# Core Records
# Account Categories
# Account Categories
Purpose and when to use this record
Group general-ledger accounts by statement type so financial reports place balances in the correct asset, liability, equity, income, or expense section.
## At a glance
- **Identify it by:** **Name**.
- **Why care:** Dates, accounts, amounts, posting state, and period locks can change financial reports. Verify them against the source document before finalizing the record.
## Before you begin
You need the Brisk permission for the action you are taking on account categories. If a Create, Edit, or Delete control is absent, do not work around it with another user’s account; ask an administrator to review your role.
Find and review account categories
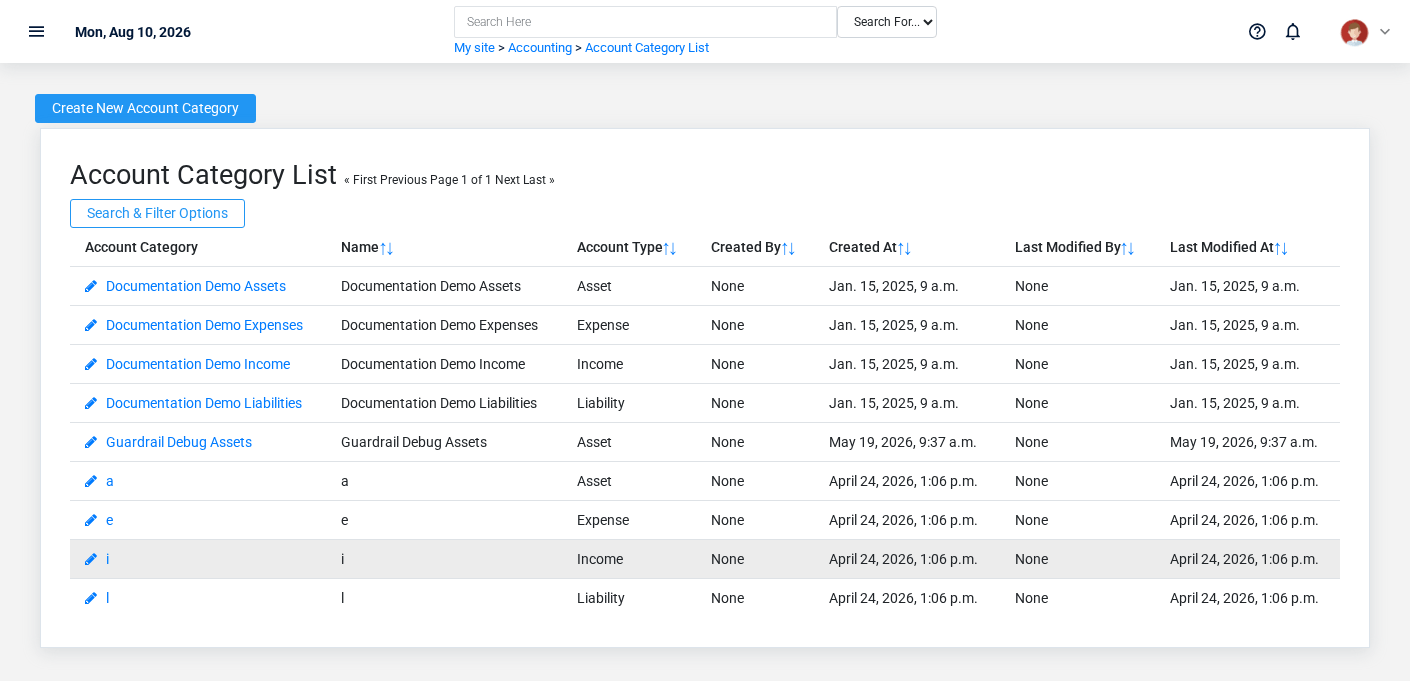
The Account Categories list screen in the Brisk documentation demo.
Use the Account Categories list to find the correct record before opening or changing it. Compare **Name**. Compare the full identifier rather than relying on a similar name.
- The initial order emphasizes **Name**. Select a column heading when you need a different comparison.
Open the account category whose **Name** match the task. If it is missing, clear the list filters and recheck **Account Type** rather than creating a replacement immediately.
Create an account category
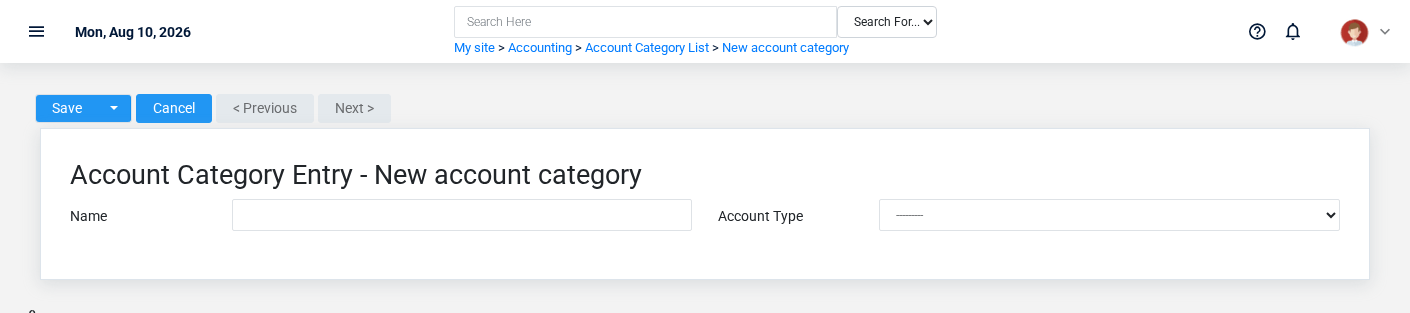
The Account Categories create screen in the Brisk documentation demo.
Create an account category only when the existing choices do not represent the policy or classification you need. Near-duplicate setup values split reporting and make later selection harder.
1. Select the business context first.
2. Enter the required identifying and operational values: **Name**, and **Account Type**.
3. Review **Account Type** deliberately; these choices control availability or workflow rather than merely describing the record.
4. Save the account category, then confirm **Name** on its detail page before continuing.
After saving: Open **Accounts** and confirm the account category appears with the intended label and availability. Keep the old value for historical records when changing it would split or relabel prior reporting.
Delete an account category
Delete this account category only if it is an unused duplicate or setup mistake. Once other records refer to it, preserve that history and make the value inactive when the screen provides that option.
Before confirming, check for related **Accounts**. Brisk may refuse deletion when another record depends on this one; resolve the duplicate or use the supported correction workflow instead of breaking the trail.
On the confirmation page, verify **Name**. After confirmation, return to the Account Categories list and make sure only the intended account category was removed.
Review account category details
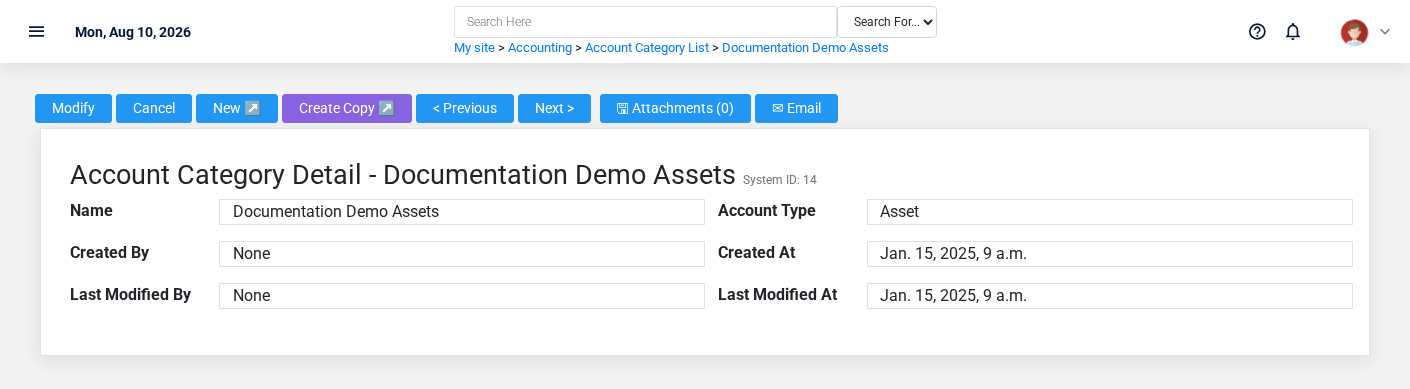
The Account Categories detail screen in the Brisk documentation demo.
Use the detail page as the shared record of what this account category currently means. Verify **Account Type** before relying on it for a decision.
Compare the account category with its source document or approved setup request before deciding that it needs correction.
Next check: Open **Accounts** and confirm the account category appears with the intended label and availability. Keep the old value for historical records when changing it would split or relabel prior reporting.
Edit an existing account category
Edit this account category when the underlying policy or classification changed. First determine whether historical transactions should retain the old value; if so, deactivate the old choice and create a new one.
1. Open the detail page. Compare **Name** with the supporting document or approved request.
2. Recheck **Account Type**. These values are most likely to change account balances, financial periods, and statement results.
3. Save the change, return to the list, and confirm that the account category now appears under the expected **Account Type**.
After the change: Open **Accounts** and confirm the account category appears with the intended label and availability. Keep the old value for historical records when changing it would split or relabel prior reporting.
## Fields and business rules
Brisk stores 2 user-relevant fields for this account category, including 0 linked-record selections and 1 controlled-choice field. Create and edit screens may hide calculated or workflow-managed values from this full reference.
| Field | Required | What it controls |
|---|---:|---|
| **Name** | Yes | Human-readable name for this account category. |
| **Account Type** | Yes | The account type recorded for this account category. Available values: Asset, Liability, Equity, Income, Expense, Contra Asset, Contra Liability, Contra Equity. |
## What happens next
Open **Accounts** and confirm the account category appears with the intended label and availability. Keep the old value for historical records when changing it would split or relabel prior reporting.
## Common mistakes and troubleshooting
- **The record will not save:** Recheck **Name**, and **Account Type** and any message beside the field. A required related record may also be inactive or unavailable to your role.
- **The values look right but the result is wrong:** Compare this account category with the source document or approved setup decision, then check the downstream screen where it is used.
# Accounts
# Accounts
Purpose and when to use this record
Maintain the chart of accounts used to classify transactions, organize warehouse subaccounts, and produce financial statements.
## At a glance
- **Identify it by:** **Account Name**, and **Account Number**.
- **Check its business context:** **Category**, **Parent Account**, and **Warehouse**.
- **Why care:** Dates, accounts, amounts, posting state, and period locks can change financial reports. Verify them against the source document before finalizing the record.
- **Why care:** Availability and publication flags affect future use without erasing history. Prefer disabling an obsolete setup record when existing transactions still refer to it.
## Before you begin
You need the Brisk permission for the action you are taking on accounts. If a Create, Edit, or Delete control is absent, do not work around it with another user’s account; ask an administrator to review your role.
Have valid **Category** records ready first. Those selections determine where this account belongs and which later screens can find it.
Create an account
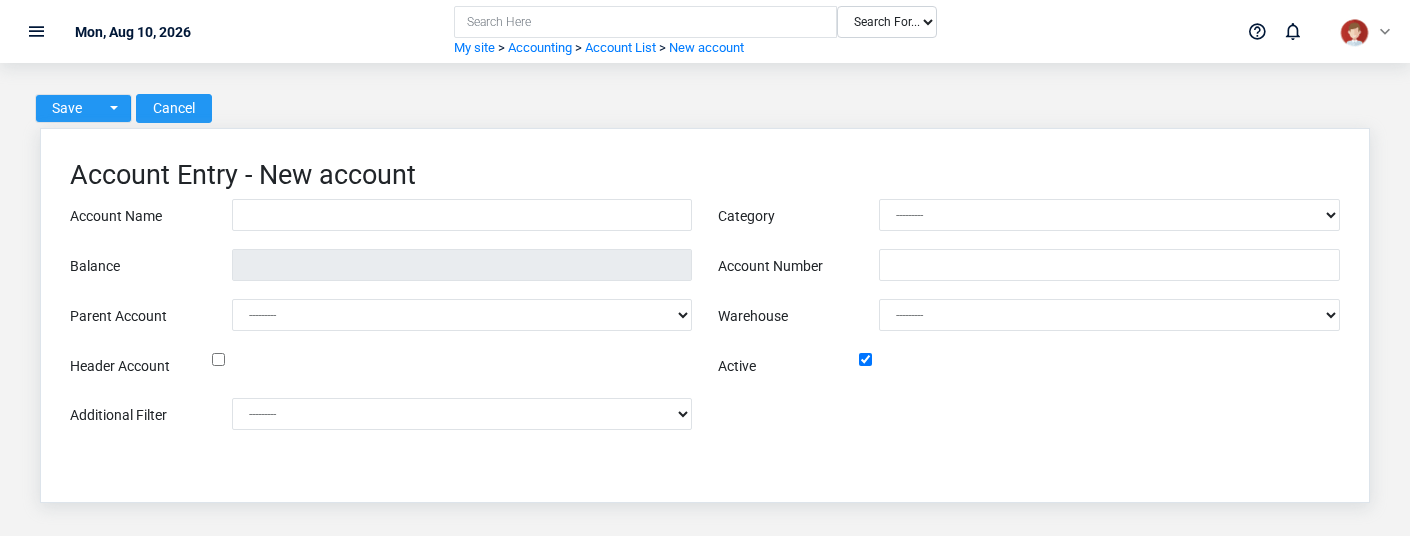
The Accounts create screen in the Brisk documentation demo.
Create an account after searching for the person, organization, item, location, or resource under alternate names and identifiers. Merge or correct an existing master record instead of creating a duplicate.
1. Select the business context first: **Category**, **Parent Account**, and **Warehouse**.
2. Enter the required identifying and operational values: **Account Name**, and **Category**.
3. Review **Header Account**, **Active**, and **Additional Filter** deliberately; these choices control availability or workflow rather than merely describing the record.
4. Save the account, then confirm **Account Name**, and **Account Number** on its detail page before continuing.
After saving: Verify this account in **1099 Account Configurations**, **Account Daily Rollups**, **Account Rollup Rebuild Jobs**, and **Accounts**, plus the remaining screen fields before staff build new activity on it; correct ownership, classification, and active state now rather than after transactions accumulate.
Delete an account
Delete this account only if it is an unused duplicate or setup mistake. Once other records refer to it, preserve that history and make the value inactive when the screen provides that option.
If the record is merely obsolete, use **Active** to remove it from future use while preserving existing references.
Before confirming, check for related **1099 Account Configurations**, **Account Daily Rollups**, **Account Rollup Rebuild Jobs**, **Accounts**, and **Bank Accounts**, plus the remaining screen fields. Brisk may refuse deletion when another record depends on this one; resolve the duplicate or use the supported correction workflow instead of breaking the trail.
On the confirmation page, verify **Account Name**, and **Account Number**. After confirmation, return to the Accounts list and make sure only the intended account was removed.
Review account details
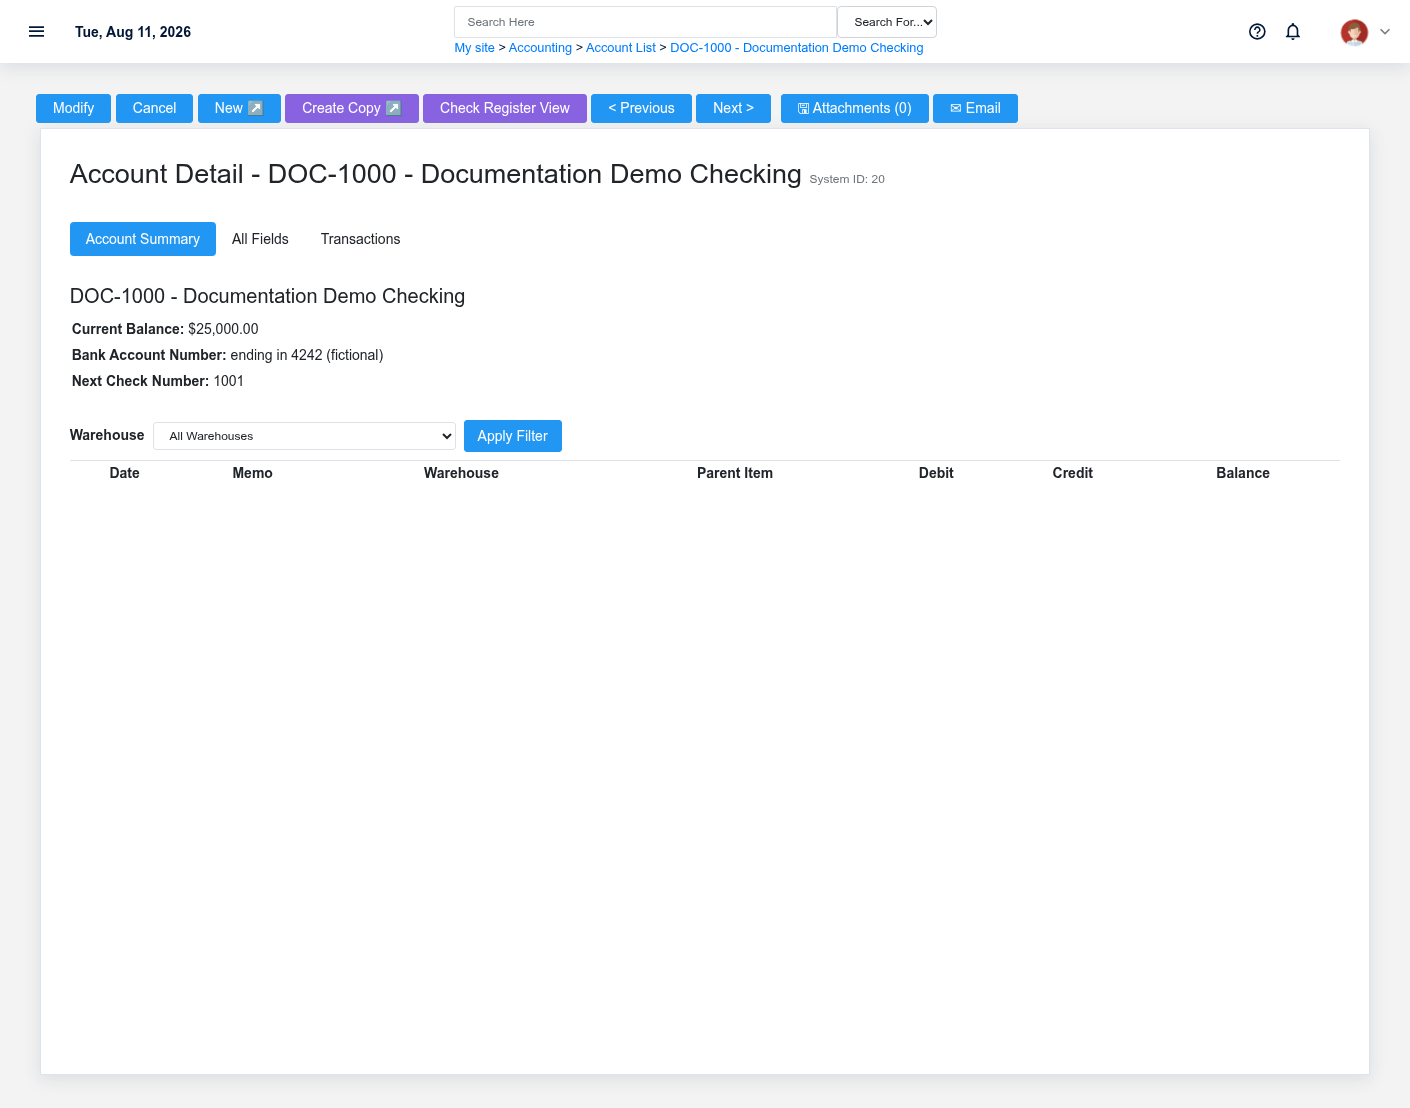
The Accounts detail screen in the Brisk documentation demo.
Use the detail page as the shared record of what this account currently means. Verify **Balance**, **Active**, and **Additional Filter** before relying on it for a decision.
Follow **Category**, **Parent Account**, and **Warehouse** to determine whether the issue is on this account or on one of those linked records.
Next check: Verify this account in **1099 Account Configurations**, **Account Daily Rollups**, **Account Rollup Rebuild Jobs**, and **Accounts**, plus the remaining screen fields before staff build new activity on it; correct ownership, classification, and active state now rather than after transactions accumulate.
Edit an existing account
Edit this account to keep the same real-world party, item, location, or resource accurate. Do not repurpose it for a different entity after activity is attached.
1. Open the detail page. Compare **Category**, **Parent Account**, and **Warehouse** with the supporting document or approved request.
2. Recheck **Balance**, **Parent Account**, **Warehouse**, **Header Account**, **Active**, and **Additional Filter**. These values are most likely to change account balances, financial periods, and statement results.
3. Save the change, return to the list, and confirm that the account now appears under the expected **Active**, and **Additional Filter**.
After the change: Verify this account in **1099 Account Configurations**, **Account Daily Rollups**, **Account Rollup Rebuild Jobs**, and **Accounts**, plus the remaining screen fields before staff build new activity on it; correct ownership, classification, and active state now rather than after transactions accumulate.
Find and review accounts
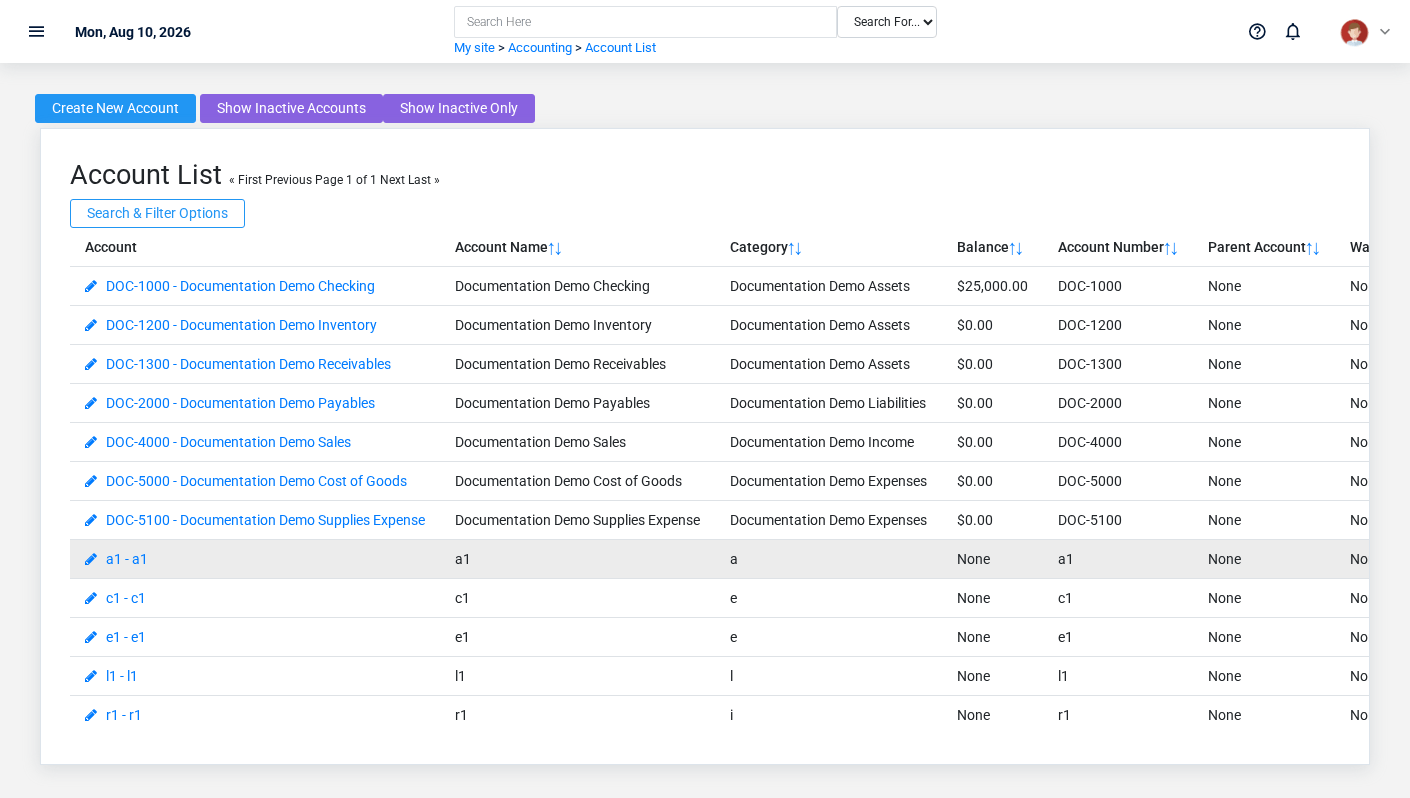
The Accounts list screen in the Brisk documentation demo.
Use the Accounts list to find the correct record before opening or changing it. Compare **Account Name**, and **Account Number**. Records with similar names or numbers can still belong to different **Category**, **Parent Account**, and **Warehouse**.
Open the account whose **Account Name**, and **Account Number** match the task. If it is missing, clear the list filters and recheck **Active**, and **Additional Filter** rather than creating a replacement immediately.
## Fields and business rules
Brisk stores 9 user-relevant fields for this account, including 3 linked-record selections and 1 controlled-choice field. Create and edit screens may hide calculated or workflow-managed values from this full reference.
| Field | Required | What it controls |
|---|---:|---|
| **Account Name** | Yes | Human-readable name for this account. |
| **Category** | Yes | The category associated with this account. |
| **Balance** | No | The balance value recorded for this account. |
| **Account Number** | No | Short code used to identify this account. |
| **Parent Account** | No | Parent GL account that this warehouse sub account rolls into. |
| **Warehouse** | No | Warehouse represented by this GL sub account. |
| **Header Account** | No | If an account is defined as a Header Account, it will report the total balances of all accounts assigned to it. |
| **Active** | No | Uncheck this field to mark an account as inactive. Inactive accounts will not be presented for selection in various menus in the Brisk system. |
| **Additional Filter** | No | For reporting purposes, add a tag to this account to help it flow into the correct section on financial reports. Available values: Fixed Asset, Current Asset, Other Asset, Liabilities and Equity, Employee Expense, Ordinary Expense, Cost of Goods Sold, Other Expense, Ordinary Income, Other Income. |
## What happens next
Verify this account in **1099 Account Configurations**, **Account Daily Rollups**, **Account Rollup Rebuild Jobs**, and **Accounts**, plus the remaining screen fields before staff build new activity on it; correct ownership, classification, and active state now rather than after transactions accumulate.
## Common mistakes and troubleshooting
- **The record will not save:** Recheck **Account Name**, and **Category** and any message beside the field. A required related record may also be inactive or unavailable to your role.
- **The record saved but is not available where expected:** Recheck **Active**, and **Additional Filter**, then clear the filters on the destination list. A saved record can still be inactive, unpublished, locked, unapproved, or in the wrong workflow state.
- **The values look right but the result is wrong:** Open **Category**, **Parent Account**, and **Warehouse** from the detail page. Correct the specific relationship that is wrong instead of forcing a total or status to compensate for it.
# Bank Information
# Bank Information
Purpose and when to use this record
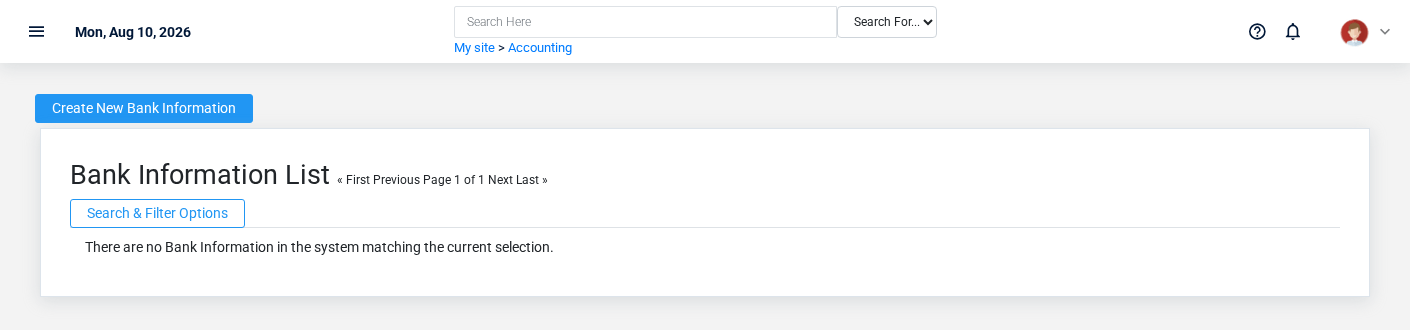
The Bank Information overview screen in the Brisk documentation demo.
Record the check, ACH, transfer, or withdrawal details used to clear and balance a bank-side transaction.
## At a glance
- **Identify it by:** **Transaction Date**, and **Check Number**.
- **Check its business context:** **Bank Information**, and **Expense Account**.
- **Why care:** Dates, accounts, amounts, posting state, and period locks can change financial reports. Verify them against the source document before finalizing the record.
- **Why care:** Treat posted, processed, paid, reversed, and edit-locked states as controls—not ordinary descriptive fields. Confirm the source transaction before changing any state that the screen permits you to change.
## Before you begin
You need the Brisk permission for the action you are taking on bank information. If a Create, Edit, or Delete control is absent, do not work around it with another user’s account; ask an administrator to review your role.
Have valid **Bank Information** records ready first. Those selections determine where this Bank Information belongs and which later screens can find it.
Review Bank Information details
Use the detail page as the shared record of what this Bank Information currently means. Verify **Transaction Date**, **Posted**, and **Dispersal Method** before relying on it for a decision.
Follow **Bank Information**, and **Expense Account** to determine whether the issue is on this Bank Information or on one of those linked records.
Next check: Use **Bank Information**, and **Expense Account** to interpret this Bank Information. If it records a failure or exception, correct the source process and create a new successful event rather than rewriting the audit trail.
## Fields and business rules
Brisk stores 7 user-relevant fields for this Bank Information, including 2 linked-record selections and 1 controlled-choice field. Create and edit screens may hide calculated or workflow-managed values from this full reference.
| Field | Required | What it controls |
|---|---:|---|
| **Bank Information** | Yes | Connects to the GL transaction that needs to be balanced. |
| **Transaction Date** | Yes | Record the date that this transaction took place. |
| **Posted** | No | Records whether or not this transaction has cleared the bank. |
| **Expense Account** | No | If this is balanced by a single transaction, select a balancing account to use. |
| **Check Number** | No | Record the check number, ACH number, or other identifying number here. |
| **Payee** | No | Records the payee or "Pay to the order of" field on a check. |
| **Dispersal Method** | No | Records how this withdrawal was made. If Print Check is selected, this check will be printed or added to the print queue. Available values: Print Check, Handwritten Check, ACH/Bank Transfer, Debit Card, Withdrawal/ATM, Bank Deposit, Mobile Deposit, Other. |
## What happens next
Use **Bank Information**, and **Expense Account** to interpret this Bank Information. If it records a failure or exception, correct the source process and create a new successful event rather than rewriting the audit trail.
## Common mistakes and troubleshooting
- **The record will not save:** Recheck **Bank Information**, and **Transaction Date** and any message beside the field. A required related record may also be inactive or unavailable to your role.
- **The record saved but is not available where expected:** Recheck **Posted**, and **Dispersal Method**, then clear the filters on the destination list. A saved record can still be inactive, unpublished, locked, unapproved, or in the wrong workflow state.
- **The values look right but the result is wrong:** Open **Bank Information**, and **Expense Account** from the detail page. Correct the specific relationship that is wrong instead of forcing a total or status to compensate for it.
# Credit Card Accounts
# Credit Card Accounts
Purpose and when to use this record
Connect a business credit card to its payable account, issuing institution, and vendor used for statement charges and finance costs.
## At a glance
- **Identify it by:** **Account Number**.
- **Check its business context:** **Account**, and **Vendor**.
- **Why care:** Dates, accounts, amounts, posting state, and period locks can change financial reports. Verify them against the source document before finalizing the record.
## Before you begin
You need the Brisk permission for the action you are taking on credit card accounts. If a Create, Edit, or Delete control is absent, do not work around it with another user’s account; ask an administrator to review your role.
Have valid **Account** records ready first. Those selections determine where this credit card account belongs and which later screens can find it.
Create a credit card account
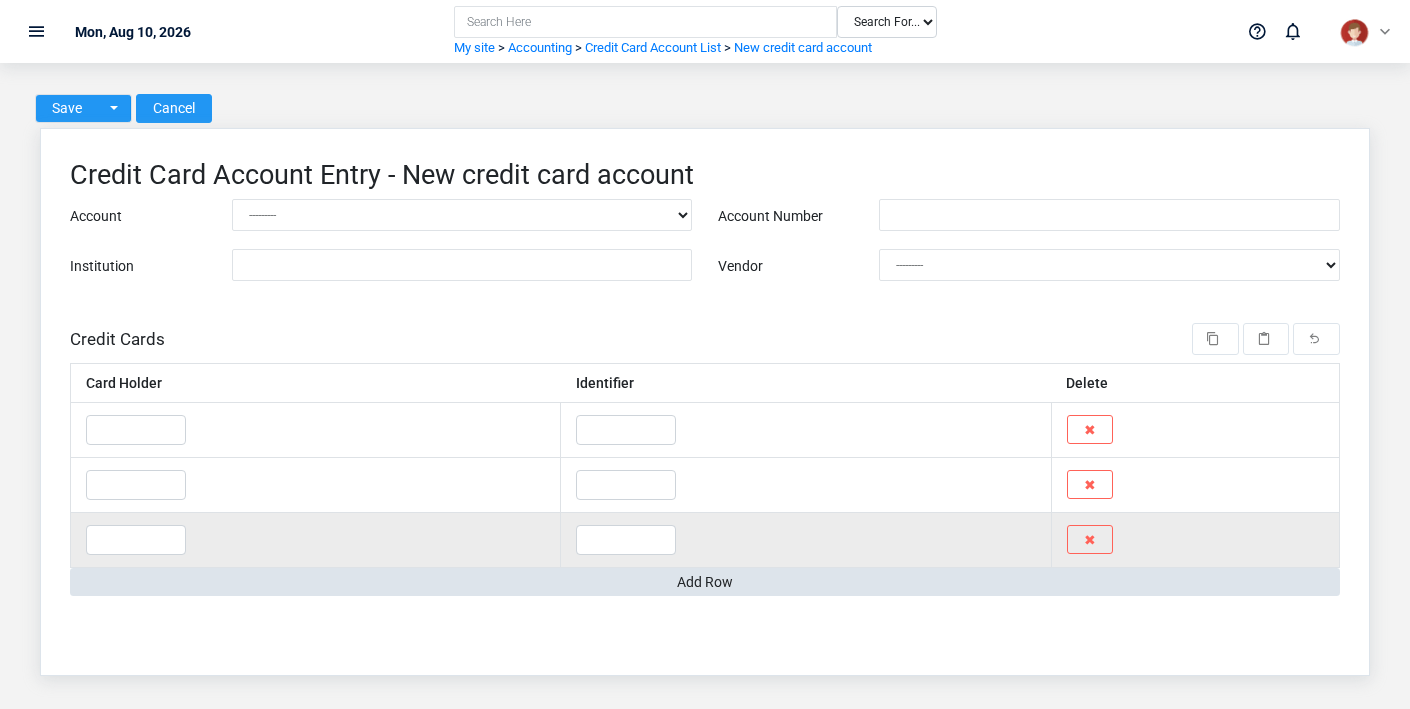
The Credit Card Accounts create screen in the Brisk documentation demo.
Create a credit card account only when the existing choices do not represent the policy or classification you need. Near-duplicate setup values split reporting and make later selection harder.
1. Select the business context first: **Account**, and **Vendor**.
2. Enter the required identifying and operational values: **Account**.
3. Review **Account Number**, and **Institution** against the source document or approved setup decision.
4. Save the credit card account, then confirm **Account Number** on its detail page before continuing.
After saving: Open **Credit Card Charges**, and **Credit Cards** and confirm the credit card account appears with the intended label and availability. Keep the old value for historical records when changing it would split or relabel prior reporting.
Delete a credit card account
Delete this credit card account only if it is an unused duplicate or setup mistake. Once other records refer to it, preserve that history and make the value inactive when the screen provides that option.
Before confirming, check for related **Credit Card Charges**, and **Credit Cards**. Brisk may refuse deletion when another record depends on this one; resolve the duplicate or use the supported correction workflow instead of breaking the trail.
On the confirmation page, verify **Account Number**. After confirmation, return to the Credit Card Accounts list and make sure only the intended credit card account was removed.
Review credit card account details
Use the detail page as the shared record of what this credit card account currently means. Verify **Account**, **Account Number**, **Institution**, and **Vendor** before relying on it for a decision.
Follow **Account**, and **Vendor** to determine whether the issue is on this credit card account or on one of those linked records.
Next check: Open **Credit Card Charges**, and **Credit Cards** and confirm the credit card account appears with the intended label and availability. Keep the old value for historical records when changing it would split or relabel prior reporting.
Edit an existing credit card account
Edit this credit card account when the underlying policy or classification changed. First determine whether historical transactions should retain the old value; if so, deactivate the old choice and create a new one.
1. Open the detail page. Compare **Account**, and **Vendor** with the supporting document or approved request.
2. Recheck **Account**, **Account Number**, and **Vendor**. These values are most likely to change account balances, financial periods, and statement results.
3. Save the change, return to the list, and confirm that the credit card account now appears under the expected **Account Number**.
After the change: Open **Credit Card Charges**, and **Credit Cards** and confirm the credit card account appears with the intended label and availability. Keep the old value for historical records when changing it would split or relabel prior reporting.
Find and review credit card accounts
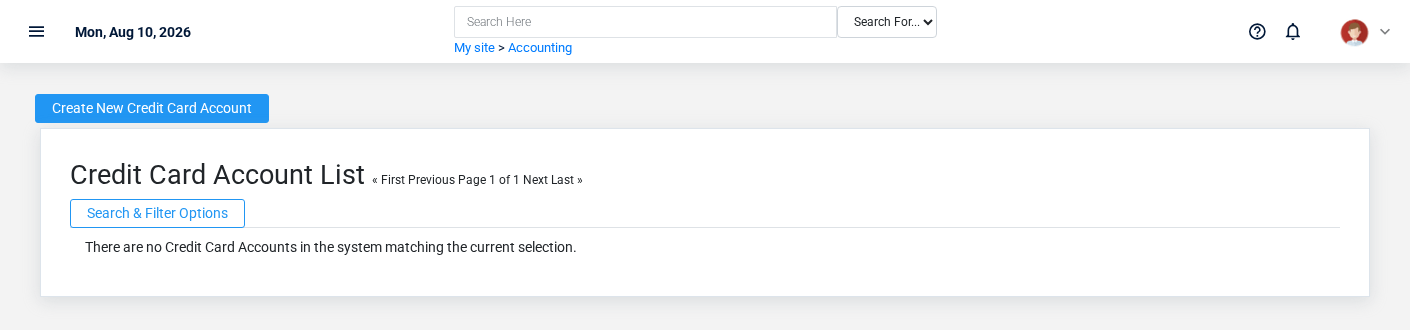
The Credit Card Accounts list screen in the Brisk documentation demo.
Use the Credit Card Accounts list to find the correct record before opening or changing it. Compare **Account Number**. Records with similar names or numbers can still belong to different **Account**, and **Vendor**.
Open the credit card account whose **Account Number** match the task. If it is missing, clear the list filters and recheck the identifying information shown on the screen rather than creating a replacement immediately.
## Fields and business rules
Brisk stores 4 user-relevant fields for this credit card account, including 2 linked-record selections and 0 controlled-choice fields. Create and edit screens may hide calculated or workflow-managed values from this full reference.
| Field | Required | What it controls |
|---|---:|---|
| **Account** | Yes | Select the payable account that represents this credit card. |
| **Account Number** | No | The account number recorded for this credit card account. |
| **Institution** | No | The institution value recorded for this credit card account. |
| **Vendor** | No | Sets the vendor associated with this credit card; handles accounting transactions for finance charges and other fees. |
## What happens next
Open **Credit Card Charges**, and **Credit Cards** and confirm the credit card account appears with the intended label and availability. Keep the old value for historical records when changing it would split or relabel prior reporting.
## Common mistakes and troubleshooting
- **The record will not save:** Recheck **Account** and any message beside the field. A required related record may also be inactive or unavailable to your role.
- **The values look right but the result is wrong:** Open **Account**, and **Vendor** from the detail page. Correct the specific relationship that is wrong instead of forcing a total or status to compensate for it.
# Credit Card Charges
# Credit Card Charges
Purpose and when to use this record
Record a card purchase or credit, its vendor, statement-clearing state, amount, and transaction date.
## At a glance
- **Identify it by:** **Reference #**, and **Charge Date**.
- **Check its business context:** **Vendor**, and **Card Account**.
- **Why care:** Dates, accounts, amounts, posting state, and period locks can change financial reports. Verify them against the source document before finalizing the record.
- **Why care:** Treat posted, processed, paid, reversed, and edit-locked states as controls—not ordinary descriptive fields. Confirm the source transaction before changing any state that the screen permits you to change.
## Before you begin
You need the Brisk permission for the action you are taking on credit card charges. If a Create, Edit, or Delete control is absent, do not work around it with another user’s account; ask an administrator to review your role.
Have valid **Vendor**, and **Card Account** records ready first. Those selections determine where this Credit Card Charge belongs and which later screens can find it.
Create a Credit Card Charge
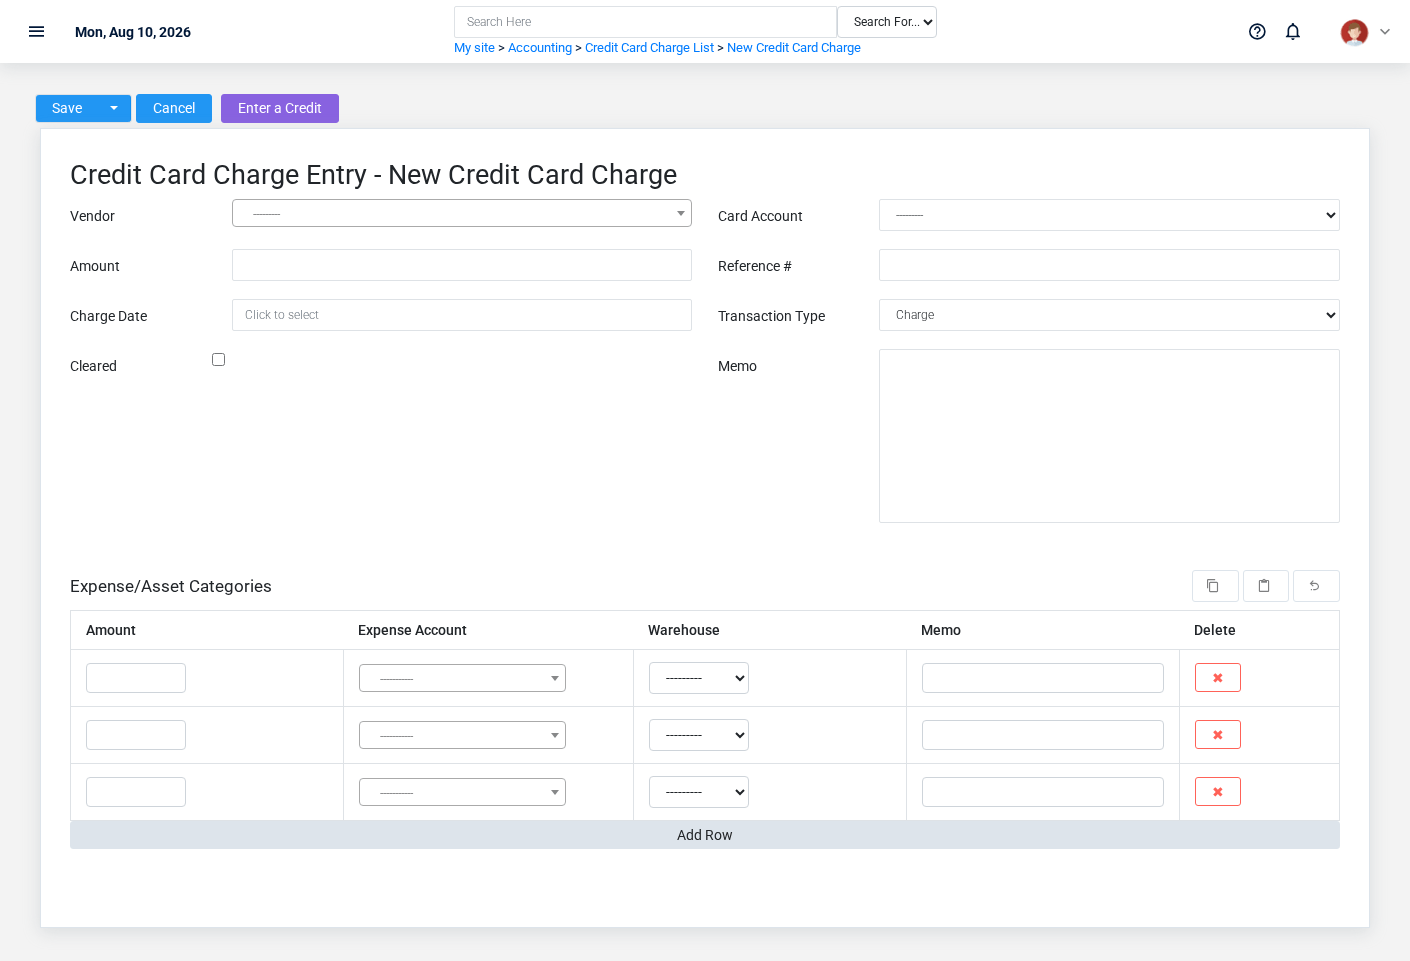
The Credit Card Charges create screen in the Brisk documentation demo.
Create a Credit Card Charge only when the existing choices do not represent the policy or classification you need. Near-duplicate setup values split reporting and make later selection harder.
1. Select the business context first: **Vendor**, and **Card Account**.
2. Enter the required identifying and operational values: **Vendor**, **Card Account**, and **Amount**.
3. Review **Transaction Type**, **Cleared**, and **Edit Locked** deliberately; these choices control availability or workflow rather than merely describing the record.
4. Save the Credit Card Charge, then confirm **Reference #**, and **Charge Date** on its detail page before continuing.
After saving: Open **Credit Card Reconciliation Information**, **Expense/Asset Categories**, and **Transactions** and confirm the Credit Card Charge appears with the intended label and availability. Keep the old value for historical records when changing it would split or relabel prior reporting.
Delete a Credit Card Charge
Delete this Credit Card Charge only if it is an unused duplicate or setup mistake. Once other records refer to it, preserve that history and make the value inactive when the screen provides that option.
Before confirming, check for related **Credit Card Reconciliation Information**, **Expense/Asset Categories**, and **Transactions**. Brisk may refuse deletion when another record depends on this one; resolve the duplicate or use the supported correction workflow instead of breaking the trail.
On the confirmation page, verify **Reference #**, and **Charge Date**. After confirmation, return to the Credit Card Charges list and make sure only the intended Credit Card Charge was removed.
Review Credit Card Charge details
Use the detail page as the shared record of what this Credit Card Charge currently means. Verify **Amount**, **Charge Date**, **Transaction Type**, **Cleared**, and **Edit Locked** before relying on it for a decision.
Follow **Vendor**, and **Card Account** to determine whether the issue is on this Credit Card Charge or on one of those linked records.
Next check: Open **Credit Card Reconciliation Information**, **Expense/Asset Categories**, and **Transactions** and confirm the Credit Card Charge appears with the intended label and availability. Keep the old value for historical records when changing it would split or relabel prior reporting.
Edit an existing Credit Card Charge
Edit this Credit Card Charge when the underlying policy or classification changed. First determine whether historical transactions should retain the old value; if so, deactivate the old choice and create a new one.
1. Open the detail page. Compare **Vendor**, and **Card Account** with the supporting document or approved request.
2. Recheck **Vendor**, **Card Account**, **Amount**, **Charge Date**, **Transaction Type**, and **Cleared**, plus the remaining screen fields. These values are most likely to change account balances, financial periods, and statement results.
3. Save the change, return to the list, and confirm that the Credit Card Charge now appears under the expected **Transaction Type**, **Cleared**, and **Edit Locked**.
After the change: Open **Credit Card Reconciliation Information**, **Expense/Asset Categories**, and **Transactions** and confirm the Credit Card Charge appears with the intended label and availability. Keep the old value for historical records when changing it would split or relabel prior reporting.
Find and review credit card charges
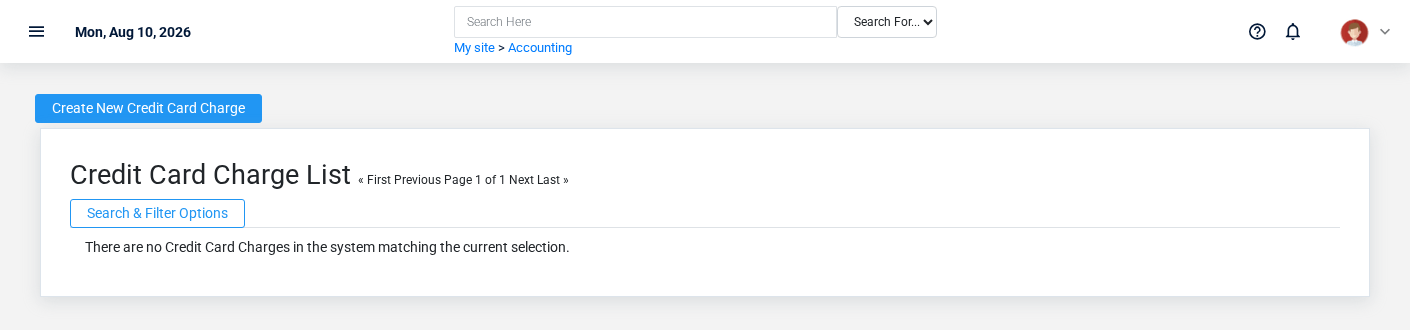
The Credit Card Charges list screen in the Brisk documentation demo.
Use the Credit Card Charges list to find the correct record before opening or changing it. Compare **Reference #**, and **Charge Date**. Records with similar names or numbers can still belong to different **Vendor**, and **Card Account**.
- Keyword search checks **Memo**.
- Narrow the list with **Vendor** filters.
Open the Credit Card Charge whose **Reference #**, and **Charge Date** match the task. If it is missing, clear the list filters and recheck **Vendor**, **Transaction Type**, **Cleared**, and **Edit Locked** rather than creating a replacement immediately.
## Fields and business rules
Brisk stores 9 user-relevant fields for this Credit Card Charge, including 2 linked-record selections and 1 controlled-choice field. Create and edit screens may hide calculated or workflow-managed values from this full reference.
| Field | Required | What it controls |
|---|---:|---|
| **Vendor** | Yes | Please select the vendor for this credit card charge. |
| **Card Account** | Yes | The card account associated with this credit card charge. |
| **Amount** | Yes | The amount value recorded for this credit card charge. |
| **Reference #** | No | The reference number for this transaction. |
| **Charge Date** | No | Date that the card was charged. |
| **Transaction Type** | No | Determines whether this credit card transaction is a charge or a credit. Available values: Charge, Credit. |
| **Cleared** | No | Records whether or not this transaction has cleared on a credit card statement. |
| **Memo** | No | The memo recorded for this credit card charge. |
| **Edit Locked** | No | Whether the edit locked option applies to this credit card charge. |
## What happens next
Open **Credit Card Reconciliation Information**, **Expense/Asset Categories**, and **Transactions** and confirm the Credit Card Charge appears with the intended label and availability. Keep the old value for historical records when changing it would split or relabel prior reporting.
## Common mistakes and troubleshooting
- **The record will not save:** Recheck **Vendor**, **Card Account**, and **Amount** and any message beside the field. A required related record may also be inactive or unavailable to your role.
- **The record saved but is not available where expected:** Recheck **Transaction Type**, **Cleared**, and **Edit Locked**, then clear the filters on the destination list. A saved record can still be inactive, unpublished, locked, unapproved, or in the wrong workflow state.
- **The values look right but the result is wrong:** Open **Vendor**, and **Card Account** from the detail page. Correct the specific relationship that is wrong instead of forcing a total or status to compensate for it.
# Customer Credits
# Customer Credits
Purpose and when to use this record
The Customer Credits overview screen in the Brisk documentation demo.
Record money or credit owed back to a customer and preserve its connection to the originating sale or tender.
## At a glance
- **Identify it by:** **Date Created**, and **Check Number**.
- **Check its business context:** **Customer**, **Related Sale**, and **Relatedcredit**.
- **Why care:** Dates, accounts, amounts, posting state, and period locks can change financial reports. Verify them against the source document before finalizing the record.
- **Why care:** Treat posted, processed, paid, reversed, and edit-locked states as controls—not ordinary descriptive fields. Confirm the source transaction before changing any state that the screen permits you to change.
## Before you begin
You need the Brisk permission for the action you are taking on customer credits. If a Create, Edit, or Delete control is absent, do not work around it with another user’s account; ask an administrator to review your role.
Have valid **Customer** records ready first. Those selections determine where this Customer Credit belongs and which later screens can find it.
Create a Customer Credit
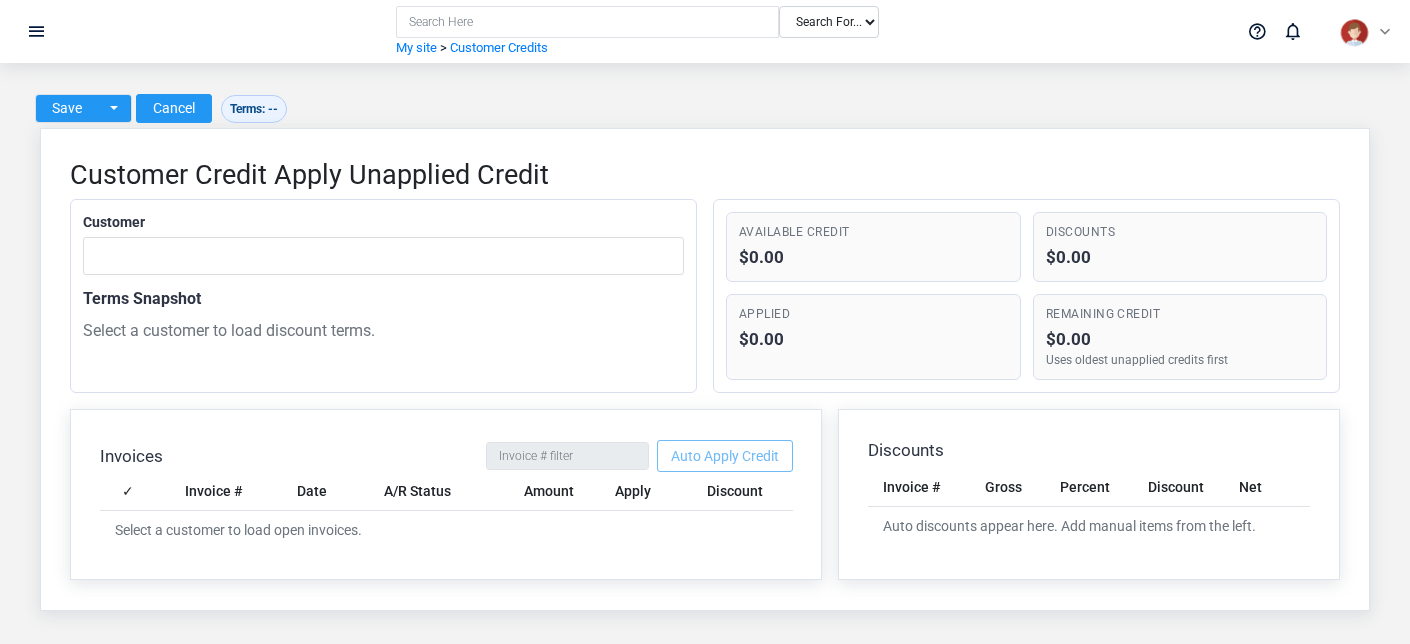
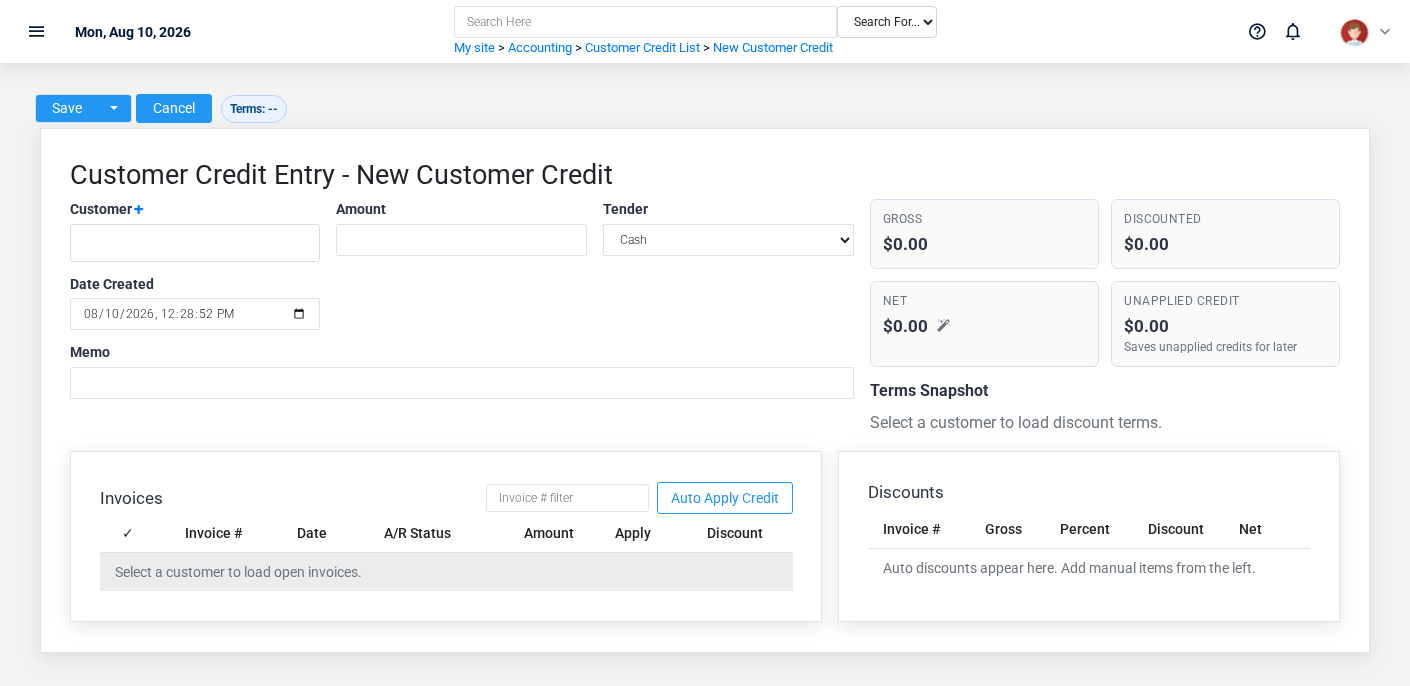
The Customer Credits create screen in the Brisk documentation demo.
Create a Customer Credit only after confirming that the source document or operational event has not already been entered.
1. Select the business context first: **Customer**, **Related Sale**, and **Relatedcredit**.
2. Enter the required identifying and operational values: **Customer**, **Amount**, and **Tender**.
3. Review **Tender**, **Card Type**, **Posted**, and **Edit Locked** deliberately; these choices control availability or workflow rather than merely describing the record.
4. Save the Customer Credit, then confirm **Date Created**, and **Check Number** on its detail page before continuing.
After saving: Apply the credit during the customer’s next settlement or refund workflow, and verify the related sale and tender trail before closing the issue.
Delete a Customer Credit
Delete this Customer Credit only when it was entered by mistake and no downstream history depends on it. Use a reversal, void, credit, counter-adjustment, or status correction for a real event that later changed.
Before confirming, check for related **Customer Credits**, **Customer Debits**, **Deposits**, **Emv Refunds**, and **Emv Transactions**, plus the remaining screen fields. Brisk may refuse deletion when another record depends on this one; resolve the duplicate or use the supported correction workflow instead of breaking the trail.
On the confirmation page, verify **Date Created**, and **Check Number**. After confirmation, return to the Customer Credits list and make sure only the intended Customer Credit was removed.
Review Customer Credit details
Use the detail page as the shared record of what this Customer Credit currently means. Verify **Date Created**, **Amount**, **Tender**, **Card Type**, **Posted**, and **Edit Locked** before relying on it for a decision.
Follow **Customer**, **Related Sale**, and **Relatedcredit** to determine whether the issue is on this Customer Credit or on one of those linked records.
Next check: Apply the credit during the customer’s next settlement or refund workflow, and verify the related sale and tender trail before closing the issue.
Edit an existing Customer Credit
Edit this Customer Credit to correct or complete the same source document or operational event; use the supported reversal or follow-up workflow when the business event itself changed.
1. Open the detail page. Compare **Customer**, **Related Sale**, and **Relatedcredit** with the supporting document or approved request.
2. Recheck **Date Created**, **Customer**, **Amount**, **Tender**, **Card Type**, and **Edit Locked**. These values are most likely to change account balances, financial periods, and statement results.
3. Save the change, return to the list, and confirm that the Customer Credit now appears under the expected **Tender**, **Card Type**, **Posted**, and **Edit Locked**.
After the change: Apply the credit during the customer’s next settlement or refund workflow, and verify the related sale and tender trail before closing the issue.
Find and review customer credits
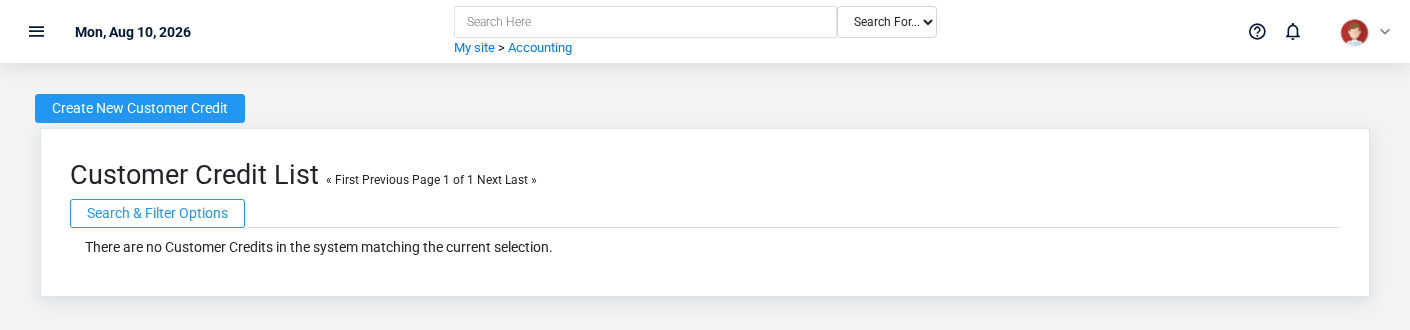
The Customer Credits list screen in the Brisk documentation demo.
Use the Customer Credits list to find the correct record before opening or changing it. Compare **Date Created**, and **Check Number**. Records with similar names or numbers can still belong to different **Customer**, **Related Sale**, and **Relatedcredit**.
- Keyword search checks **Memo**, **Check Number**, and **Card Type**.
- Narrow the list with **Customer** filters.
- The date filter uses **Date Created**; choose a range that matches the business event you are reconciling.
Open the Customer Credit whose **Date Created**, and **Check Number** match the task. If it is missing, clear the list filters and recheck **Customer**, **Date Created**, **Tender**, **Card Type**, **Posted**, and **Edit Locked** rather than creating a replacement immediately.
## Fields and business rules
Brisk stores 12 user-relevant fields for this Customer Credit, including 3 linked-record selections and 2 controlled-choice fields. Create and edit screens may hide calculated or workflow-managed values from this full reference.
| Field | Required | What it controls |
|---|---:|---|
| **Date Created** | No | Date and time recorded for date created on this customer credit. |
| **Customer** | Yes | Links this Customer Credit to the selected Customer; verify the relationship before saving. |
| **Amount** | Yes | The amount value recorded for this customer credit. |
| **Tender** | Yes | If receiving a payment, select the payment method used by the customer. If crediting an account to reverse a finance charge, select "Interest Reversal". If writing off a bad debt, select "Write-Off". Available values: Cash, Check, ACH, Debit Card, Credit Card, Refund, User Defined, Discount. |
| **Check Number** | No | The check number recorded for this customer credit. |
| **Card Type** | No | The card type recorded for this customer credit. Available values: Visa, Master Card, Discover, American Express. |
| **Memo** | No | The memo recorded for this customer credit. |
| **Related Sale** | No | The related sale associated with this customer credit. |
| **Relatedcredit** | No | The related credit associated with this customer credit. |
| **Posted** | No | Whether the posted option applies to this customer credit. |
| **Edit Locked** | No | Whether the edit locked option applies to this customer credit. |
| **Pos Client Request Id** | No | Idempotency key supplied by the Point of Sale client for online and offline account payment submissions. |
## What happens next
Apply the credit during the customer’s next settlement or refund workflow, and verify the related sale and tender trail before closing the issue.
## Common mistakes and troubleshooting
- **The record will not save:** Recheck **Customer**, **Amount**, and **Tender** and any message beside the field. A required related record may also be inactive or unavailable to your role.
- **The record saved but is not available where expected:** Recheck **Tender**, **Card Type**, **Posted**, and **Edit Locked**, then clear the filters on the destination list. A saved record can still be inactive, unpublished, locked, unapproved, or in the wrong workflow state.
- **The values look right but the result is wrong:** Open **Customer**, **Related Sale**, and **Relatedcredit** from the detail page. Correct the specific relationship that is wrong instead of forcing a total or status to compensate for it.
# Debit Cards
# Debit Cards
Purpose and when to use this record
Identify the debit cards and bank-payment methods available when recording withdrawals from a bank account.
## At a glance
- **Identify it by:** **Bank Account**, **Card Holder**, **Identifier**, and **System Generated**.
- **Check its business context:** **Bank Account**.
- **Why care:** Dates, accounts, amounts, posting state, and period locks can change financial reports. Verify them against the source document before finalizing the record.
## Before you begin
You need the Brisk permission for the action you are taking on debit cards. If a Create, Edit, or Delete control is absent, do not work around it with another user’s account; ask an administrator to review your role.
Have valid **Bank Account** records ready first. Those selections determine where this debit card belongs and which later screens can find it.
Create a debit card
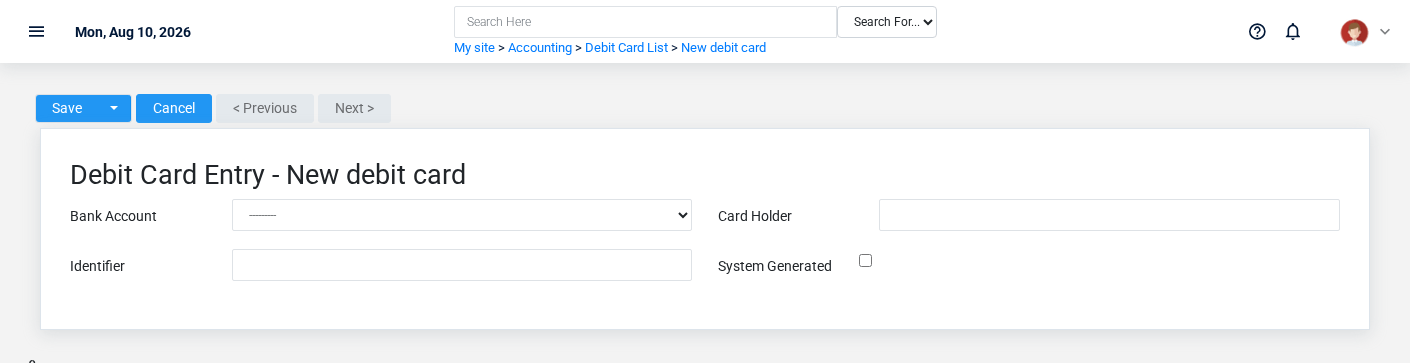
The Debit Cards create screen in the Brisk documentation demo.
Create a debit card only when the existing choices do not represent the policy or classification you need. Near-duplicate setup values split reporting and make later selection harder.
1. Select the business context first: **Bank Account**.
2. Enter the required identifying and operational values: **Bank Account**, **Card Holder**, and **Identifier**.
3. Review **System Generated** deliberately; these choices control availability or workflow rather than merely describing the record.
4. Save the debit card, then confirm **Bank Account**, **Card Holder**, **Identifier**, and **System Generated** on its detail page before continuing.
After saving: Open **Payment Cards** and confirm the debit card appears with the intended label and availability. Keep the old value for historical records when changing it would split or relabel prior reporting.
Delete a debit card
Delete this debit card only if it is an unused duplicate or setup mistake. Once other records refer to it, preserve that history and make the value inactive when the screen provides that option.
Before confirming, check for related **Payment Cards**. Brisk may refuse deletion when another record depends on this one; resolve the duplicate or use the supported correction workflow instead of breaking the trail.
On the confirmation page, verify **Bank Account**, **Card Holder**, **Identifier**, and **System Generated**. After confirmation, return to the Debit Cards list and make sure only the intended debit card was removed.
Review debit card details
Use the detail page as the shared record of what this debit card currently means. Verify **Bank Account**, **Card Holder**, **Identifier**, and **System Generated** before relying on it for a decision.
Follow **Bank Account** to determine whether the issue is on this debit card or on one of those linked records.
Next check: Open **Payment Cards** and confirm the debit card appears with the intended label and availability. Keep the old value for historical records when changing it would split or relabel prior reporting.
Edit an existing debit card
Edit this debit card when the underlying policy or classification changed. First determine whether historical transactions should retain the old value; if so, deactivate the old choice and create a new one.
1. Open the detail page. Compare **Bank Account** with the supporting document or approved request.
2. Recheck **Bank Account**. These values are most likely to change account balances, financial periods, and statement results.
3. Save the change, return to the list, and confirm that the debit card now appears under the expected the identifying information shown on the screen.
After the change: Open **Payment Cards** and confirm the debit card appears with the intended label and availability. Keep the old value for historical records when changing it would split or relabel prior reporting.
Find and review debit cards
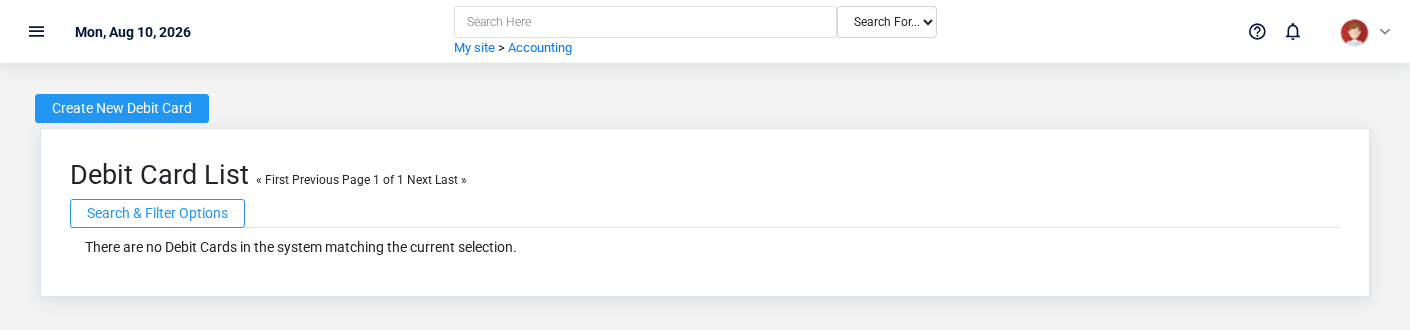
The Debit Cards list screen in the Brisk documentation demo.
Use the Debit Cards list to find the correct record before opening or changing it. Compare **Bank Account**, **Card Holder**, **Identifier**, and **System Generated**. Records with similar names or numbers can still belong to different **Bank Account**.
Open the debit card whose **Bank Account**, **Card Holder**, **Identifier**, and **System Generated** match the task. If it is missing, clear the list filters and recheck the identifying information shown on the screen rather than creating a replacement immediately.
## Fields and business rules
Brisk stores 4 user-relevant fields for this debit card, including 1 linked-record selection and 0 controlled-choice fields. Create and edit screens may hide calculated or workflow-managed values from this full reference.
| Field | Required | What it controls |
|---|---:|---|
| **Bank Account** | Yes | Connects this debit card to the bank account it draws from. |
| **Card Holder** | Yes | Enter the name of the card holder on this account. |
| **Identifier** | Yes | Enter some identifying information for this card, such as its last 4 digits or a shorthand nickname. |
| **System Generated** | No | Represents payment by bank without debit card for use by checkbook system. |
## What happens next
Open **Payment Cards** and confirm the debit card appears with the intended label and availability. Keep the old value for historical records when changing it would split or relabel prior reporting.
## Common mistakes and troubleshooting
- **The record will not save:** Recheck **Bank Account**, **Card Holder**, and **Identifier** and any message beside the field. A required related record may also be inactive or unavailable to your role.
- **The values look right but the result is wrong:** Open **Bank Account** from the detail page. Correct the specific relationship that is wrong instead of forcing a total or status to compensate for it.
# Deposits
# Deposits
Purpose and when to use this record
Move undeposited funds into a bank account and create the balancing detail for the warehouse and work period involved.
## At a glance
- **Identify it by:** **Deposit Date**.
- **Check its business context:** **Bank Account**, **Source Account**, **Warehouse**, and **Work Period**.
- **Why care:** Dates, accounts, amounts, posting state, and period locks can change financial reports. Verify them against the source document before finalizing the record.
## Before you begin
You need the Brisk permission for the action you are taking on deposits. If a Create, Edit, or Delete control is absent, do not work around it with another user’s account; ask an administrator to review your role.
Have valid **Bank Account** records ready first. Those selections determine where this Deposit belongs and which later screens can find it.
Create a Deposit
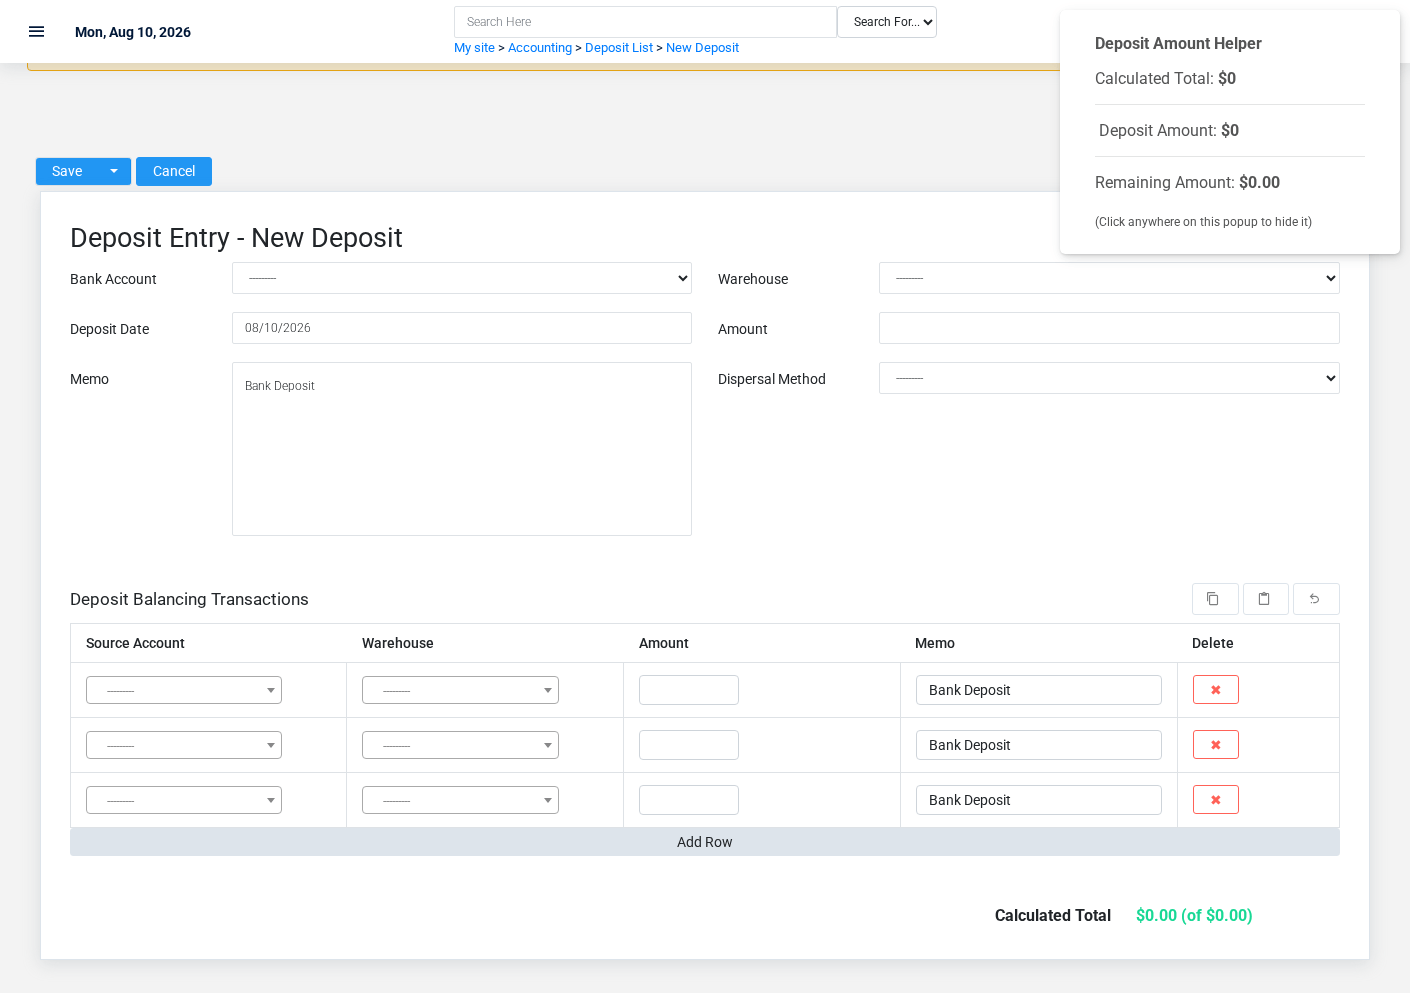
The Deposits create screen in the Brisk documentation demo.
Create a Deposit only after confirming that the source document or operational event has not already been entered.
1. Select the business context first: **Bank Account**, **Source Account**, **Warehouse**, and **Work Period**.
2. Enter the required identifying and operational values: **Bank Account**, and **Amount**.
3. Review **Dispersal Method**, and **Enable Splits** deliberately; these choices control availability or workflow rather than merely describing the record.
4. Save the Deposit, then confirm **Deposit Date** on its detail page before continuing.
After saving: Compare the saved deposit with the bank deposit record, then include it in the next reconciliation for the selected bank account.
Delete a Deposit
Delete this Deposit only when it was entered by mistake and no downstream history depends on it. Use a reversal, void, credit, counter-adjustment, or status correction for a real event that later changed.
Before confirming, check for related **Bank Information**, **Deposit Balancing Transactions**, **Sheriff Bank Deposits**, and **Transactions**. Brisk may refuse deletion when another record depends on this one; resolve the duplicate or use the supported correction workflow instead of breaking the trail.
On the confirmation page, verify **Deposit Date**. After confirmation, return to the Deposits list and make sure only the intended Deposit was removed.
Review Deposit details
Use the detail page as the shared record of what this Deposit currently means. Verify **Amount**, **Deposit Date**, and **Dispersal Method** before relying on it for a decision.
Follow **Bank Account**, **Source Account**, **Warehouse**, and **Work Period** to determine whether the issue is on this Deposit or on one of those linked records.
Next check: Compare the saved deposit with the bank deposit record, then include it in the next reconciliation for the selected bank account.
Edit an existing Deposit
Edit this Deposit to correct or complete the same source document or operational event; use the supported reversal or follow-up workflow when the business event itself changed.
1. Open the detail page. Compare **Bank Account**, **Source Account**, **Warehouse**, and **Work Period** with the supporting document or approved request.
2. Recheck **Bank Account**, **Source Account**, **Warehouse**, **Amount**, **Deposit Date**, and **Dispersal Method**. These values are most likely to change account balances, financial periods, and statement results.
3. Save the change, return to the list, and confirm that the Deposit now appears under the expected **Dispersal Method**.
After the change: Compare the saved deposit with the bank deposit record, then include it in the next reconciliation for the selected bank account.
Find and review deposits
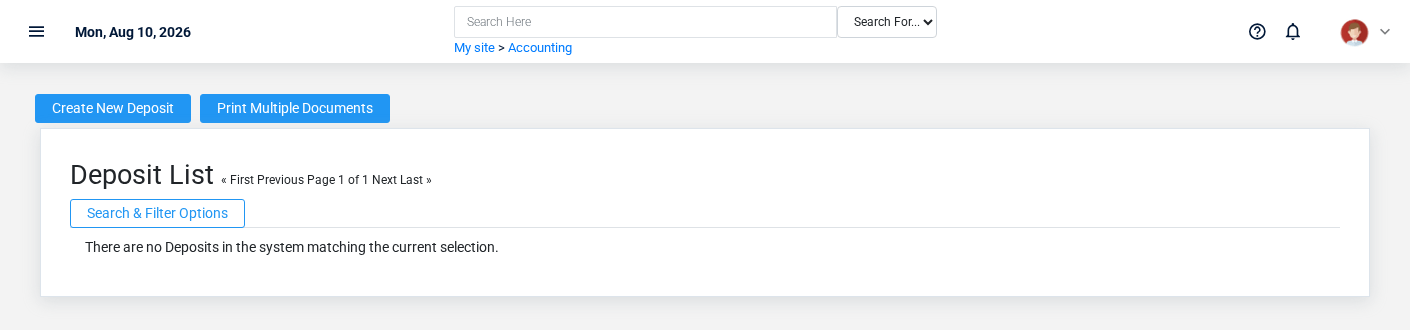
The Deposits list screen in the Brisk documentation demo.
Use the Deposits list to find the correct record before opening or changing it. Compare **Deposit Date**. Records with similar names or numbers can still belong to different **Bank Account**, **Source Account**, **Warehouse**, and **Work Period**.
Open the Deposit whose **Deposit Date** match the task. If it is missing, clear the list filters and recheck **Dispersal Method** rather than creating a replacement immediately.
## Fields and business rules
Brisk stores 9 user-relevant fields for this Deposit, including 4 linked-record selections and 1 controlled-choice field. Create and edit screens may hide calculated or workflow-managed values from this full reference.
| Field | Required | What it controls |
|---|---:|---|
| **Bank Account** | Yes | Select the bank account to which this deposit will be made. |
| **Source Account** | No | Select the source of undeposited funds. |
| **Warehouse** | No | Associates this deposit with a system warehouse. |
| **Amount** | Yes | The amount value recorded for this deposit. |
| **Deposit Date** | No | Date recorded for deposit date on this deposit. |
| **Memo** | No | The memo recorded for this deposit. |
| **Dispersal Method** | No | Records how this deposit was made. Available values: ACH/Bank Transfer, Bank Deposit, Mobile Deposit, ATM Deposit, Other. |
| **Work Period** | No | Optionally link this deposit to a work period. |
| **Enable Splits** | No | Enable split balancing transactions for this deposit. Enabled by default, but disabled in specific circumstances. |
## What happens next
Compare the saved deposit with the bank deposit record, then include it in the next reconciliation for the selected bank account.
## Common mistakes and troubleshooting
- **The record will not save:** Recheck **Bank Account**, and **Amount** and any message beside the field. A required related record may also be inactive or unavailable to your role.
- **The values look right but the result is wrong:** Open **Bank Account**, **Source Account**, **Warehouse**, and **Work Period** from the detail page. Correct the specific relationship that is wrong instead of forcing a total or status to compensate for it.
# Expense Categories
# Expense Categories
Purpose and when to use this record
Maintain the categories used to group small business expenses for entry and later analysis.
## At a glance
- **Identify it by:** **Name**.
- **Why care:** Dates, accounts, amounts, posting state, and period locks can change financial reports. Verify them against the source document before finalizing the record.
## Before you begin
You need the Brisk permission for the action you are taking on expense categories. If a Create, Edit, or Delete control is absent, do not work around it with another user’s account; ask an administrator to review your role.
Find and review expense categories
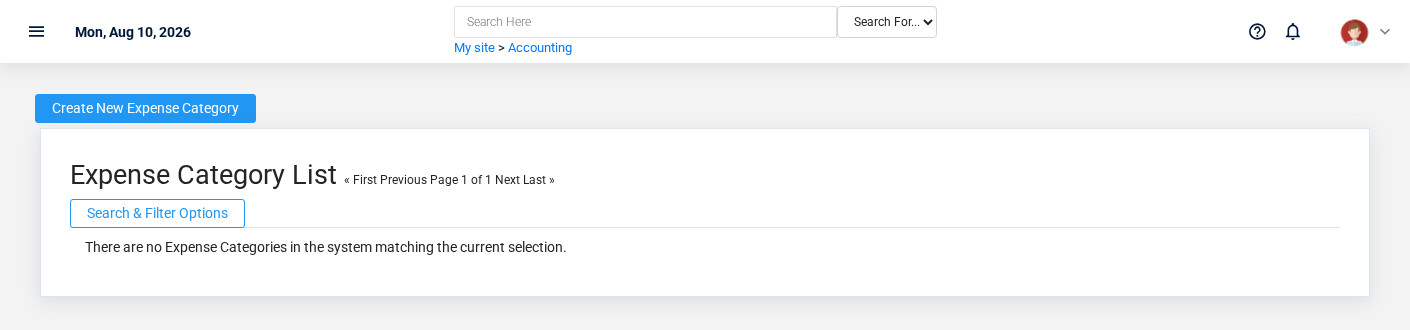
The Expense Categories list screen in the Brisk documentation demo.
Use the Expense Categories list to find the correct record before opening or changing it. Compare **Name**. Compare the full identifier rather than relying on a similar name.
- The initial order emphasizes **Name**. Select a column heading when you need a different comparison.
Open the Expense Category whose **Name** match the task. If it is missing, clear the list filters and recheck the identifying information shown on the screen rather than creating a replacement immediately.
Create an Expense Category
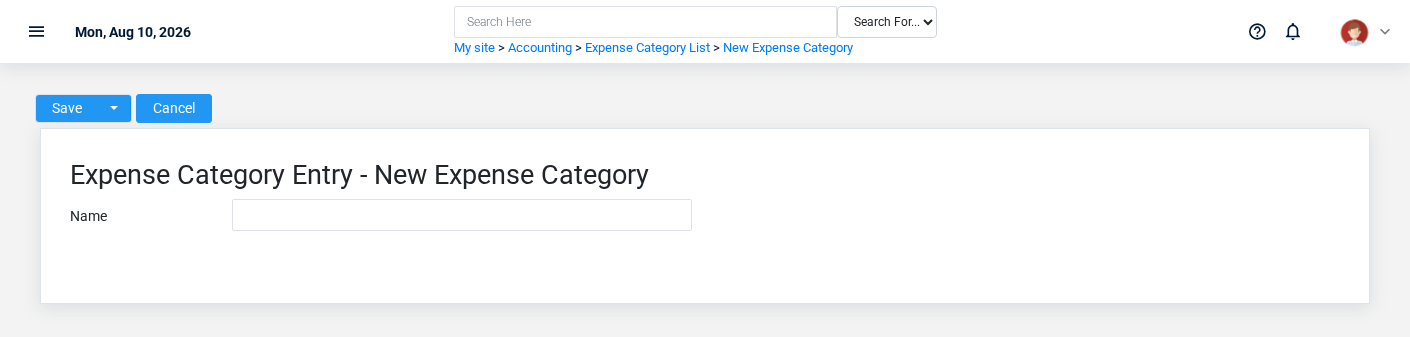
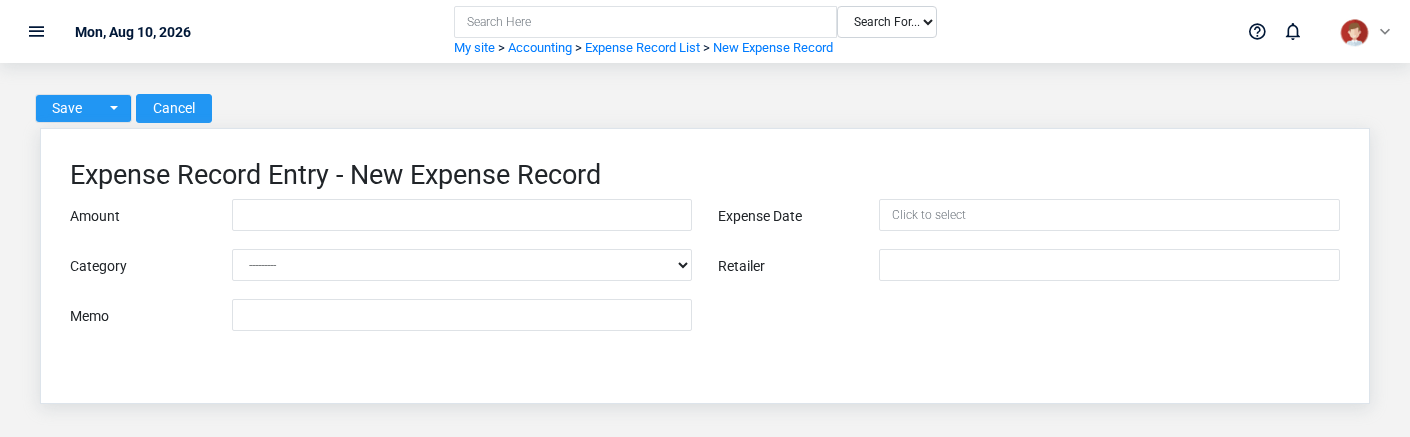
The Expense Categories create screen in the Brisk documentation demo.
Create an Expense Category only when the existing choices do not represent the policy or classification you need. Near-duplicate setup values split reporting and make later selection harder.
1. Select the business context first.
2. Enter the required identifying and operational values: **Name**.
3. Review the identifying information shown on the screen against the source document or approved setup decision.
4. Save the Expense Category, then confirm **Name** on its detail page before continuing.
After saving: Open **Expense Records** and confirm the Expense Category appears with the intended label and availability. Keep the old value for historical records when changing it would split or relabel prior reporting.
Delete an Expense Category
Delete this Expense Category only if it is an unused duplicate or setup mistake. Once other records refer to it, preserve that history and make the value inactive when the screen provides that option.
Before confirming, check for related **Expense Records**. Brisk may refuse deletion when another record depends on this one; resolve the duplicate or use the supported correction workflow instead of breaking the trail.
On the confirmation page, verify **Name**. After confirmation, return to the Expense Categories list and make sure only the intended Expense Category was removed.
Review Expense Category details
Use the detail page as the shared record of what this Expense Category currently means. Verify **Name** before relying on it for a decision.
Compare the Expense Category with its source document or approved setup request before deciding that it needs correction.
Next check: Open **Expense Records** and confirm the Expense Category appears with the intended label and availability. Keep the old value for historical records when changing it would split or relabel prior reporting.
Edit an existing Expense Category
Edit this Expense Category when the underlying policy or classification changed. First determine whether historical transactions should retain the old value; if so, deactivate the old choice and create a new one.
1. Open the detail page. Compare **Name** with the supporting document or approved request.
2. Recheck the identifying information shown on the screen. These values are most likely to change account balances, financial periods, and statement results.
3. Save the change, return to the list, and confirm that the Expense Category now appears under the expected **Name**.
After the change: Open **Expense Records** and confirm the Expense Category appears with the intended label and availability. Keep the old value for historical records when changing it would split or relabel prior reporting.
## Fields and business rules
Brisk stores 1 user-relevant fields for this Expense Category, including 0 linked-record selections and 0 controlled-choice fields. Create and edit screens may hide calculated or workflow-managed values from this full reference.
| Field | Required | What it controls |
|---|---:|---|
| **Name** | Yes | Define the category name. |
## What happens next
Open **Expense Records** and confirm the Expense Category appears with the intended label and availability. Keep the old value for historical records when changing it would split or relabel prior reporting.
## Common mistakes and troubleshooting
- **The record will not save:** Recheck **Name** and any message beside the field. A required related record may also be inactive or unavailable to your role.
- **The values look right but the result is wrong:** Compare this Expense Category with the source document or approved setup decision, then check the downstream screen where it is used.
# Expense Records
# Expense Records
Purpose and when to use this record
Record a dated business expense with its amount, retailer, category, and supporting memo.
## At a glance
- **Identify it by:** **Expense Date**.
- **Check its business context:** **Category**.
- **Why care:** Dates, accounts, amounts, posting state, and period locks can change financial reports. Verify them against the source document before finalizing the record.
## Before you begin
You need the Brisk permission for the action you are taking on expense records. If a Create, Edit, or Delete control is absent, do not work around it with another user’s account; ask an administrator to review your role.
Have valid **Category** records ready first. Those selections determine where this Expense Record belongs and which later screens can find it.
Create an Expense Record
The Expense Records create screen in the Brisk documentation demo.
Create an Expense Record only after confirming that the source document or operational event has not already been entered.
1. Select the business context first: **Category**.
2. Enter the required identifying and operational values: **Amount**, **Expense Date**, and **Category**.
3. Review **Retailer**, and **Memo** against the source document or approved setup decision.
4. Save the Expense Record, then confirm **Expense Date** on its detail page before continuing.
After saving: Use **Category** to interpret this Expense Record. If it records a failure or exception, correct the source process and create a new successful event rather than rewriting the audit trail.
Delete an Expense Record
Delete this Expense Record only when it was entered by mistake and no downstream history depends on it. Use a reversal, void, credit, counter-adjustment, or status correction for a real event that later changed.
On the confirmation page, verify **Expense Date**. After confirmation, return to the Expense Records list and make sure only the intended Expense Record was removed.
Review Expense Record details
Use the detail page as the shared record of what this Expense Record currently means. Verify **Amount**, and **Expense Date** before relying on it for a decision.
Follow **Category** to determine whether the issue is on this Expense Record or on one of those linked records.
Next check: Use **Category** to interpret this Expense Record. If it records a failure or exception, correct the source process and create a new successful event rather than rewriting the audit trail.
Edit an existing Expense Record
Edit this Expense Record to correct or complete the same source document or operational event; use the supported reversal or follow-up workflow when the business event itself changed.
1. Open the detail page. Compare **Category** with the supporting document or approved request.
2. Recheck **Amount**, and **Expense Date**. These values are most likely to change account balances, financial periods, and statement results.
3. Save the change, return to the list, and confirm that the Expense Record now appears under the expected **Expense Date**.
After the change: Use **Category** to interpret this Expense Record. If it records a failure or exception, correct the source process and create a new successful event rather than rewriting the audit trail.
Find and review expense records
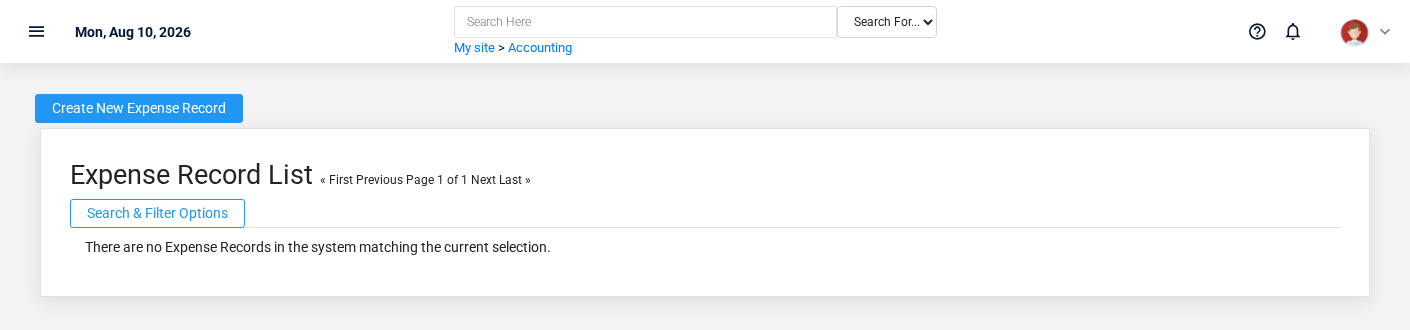
The Expense Records list screen in the Brisk documentation demo.
Use the Expense Records list to find the correct record before opening or changing it. Compare **Expense Date**. Records with similar names or numbers can still belong to different **Category**.
Open the Expense Record whose **Expense Date** match the task. If it is missing, clear the list filters and recheck the identifying information shown on the screen rather than creating a replacement immediately.
## Fields and business rules
Brisk stores 5 user-relevant fields for this Expense Record, including 1 linked-record selection and 0 controlled-choice fields. Create and edit screens may hide calculated or workflow-managed values from this full reference.
| Field | Required | What it controls |
|---|---:|---|
| **Amount** | Yes | The amount value recorded for this expense record. |
| **Expense Date** | Yes | Date recorded for expense date on this expense record. |
| **Category** | Yes | The category associated with this expense record. |
| **Retailer** | No | Record the business where this purchase was made. |
| **Memo** | No | Record notes about this expense record. |
## What happens next
Use **Category** to interpret this Expense Record. If it records a failure or exception, correct the source process and create a new successful event rather than rewriting the audit trail.
## Common mistakes and troubleshooting
- **The record will not save:** Recheck **Amount**, **Expense Date**, and **Category** and any message beside the field. A required related record may also be inactive or unavailable to your role.
- **The values look right but the result is wrong:** Open **Category** from the detail page. Correct the specific relationship that is wrong instead of forcing a total or status to compensate for it.
# Finance Charge Groups
# Finance Charge Groups
Purpose and when to use this record
Review the customer groupings used when finance charges are calculated and applied to receivables.
## At a glance
- **Identify it by:** the identifying information shown on the screen.
- **Why care:** Dates, accounts, amounts, posting state, and period locks can change financial reports. Verify them against the source document before finalizing the record.
## Before you begin
You need the Brisk permission for the action you are taking on finance charge groups. If a Create, Edit, or Delete control is absent, do not work around it with another user’s account; ask an administrator to review your role.
Review Finance Charge Group details
Use the detail page as the shared record of what this Finance Charge Group currently means. Verify the identifying information shown on the screen before relying on it for a decision.
Compare the Finance Charge Group with its source document or approved setup request before deciding that it needs correction.
Next check: Verify the identifying information shown on the screen on the detail page, then continue the accounting workflow only when those values agree with the source document and actual work performed.
Edit an existing Finance Charge Group
Edit this Finance Charge Group to correct or complete the same source document or operational event; use the supported reversal or follow-up workflow when the business event itself changed.
1. Open the detail page. Compare the identifying information shown on the screen with the supporting document or approved request.
2. Recheck the identifying information shown on the screen. These values are most likely to change the downstream business result.
3. Save the change, return to the list, and confirm that the Finance Charge Group now appears under the expected the identifying information shown on the screen.
After the change: Verify the identifying information shown on the screen on the detail page, then continue the accounting workflow only when those values agree with the source document and actual work performed.
Find and review finance charge groups
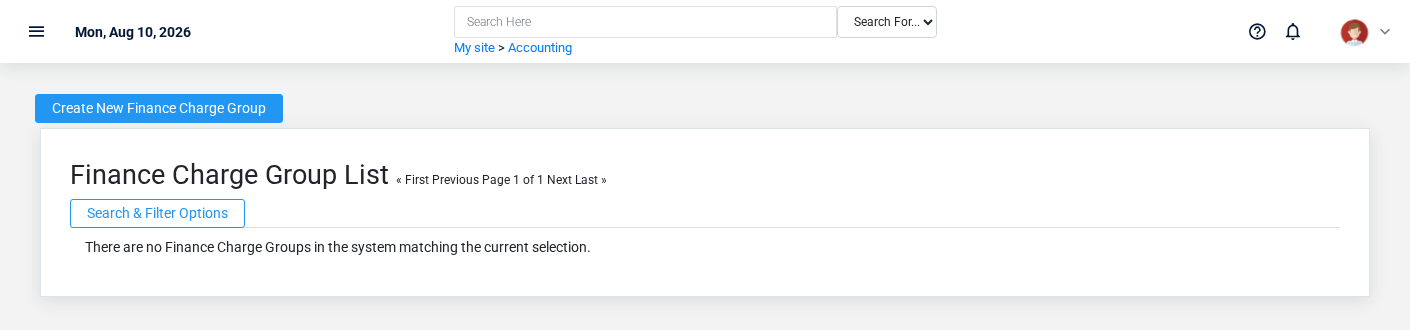
The Finance Charge Groups list screen in the Brisk documentation demo.
Use the Finance Charge Groups list to find the correct record before opening or changing it. Compare the identifying information shown on the screen. Compare the full identifier rather than relying on a similar name.
Open the Finance Charge Group whose the identifying information shown on the screen match the task. If it is missing, clear the list filters and recheck the identifying information shown on the screen rather than creating a replacement immediately.
## Fields and business rules
Brisk stores 0 user-relevant fields for this Finance Charge Group, including 0 linked-record selections and 0 controlled-choice fields. Create and edit screens may hide calculated or workflow-managed values from this full reference.
| Field | Required | What it controls |
|---|---:|---|
## What happens next
Verify the identifying information shown on the screen on the detail page, then continue the accounting workflow only when those values agree with the source document and actual work performed.
## Common mistakes and troubleshooting
- **The values look right but the result is wrong:** Compare this Finance Charge Group with the source document or approved setup decision, then check the downstream screen where it is used.
# Journal Entries
# Journal Entries
Purpose and when to use this record
Enter and review balanced general-ledger adjustments that are not produced by a normal sales, purchasing, or banking workflow.
## At a glance
- **Identify it by:** **Date Created**.
- **Why care:** Dates, accounts, amounts, posting state, and period locks can change financial reports. Verify them against the source document before finalizing the record.
- **Why care:** Treat posted, processed, paid, reversed, and edit-locked states as controls—not ordinary descriptive fields. Confirm the source transaction before changing any state that the screen permits you to change.
## Before you begin
You need the Brisk permission for the action you are taking on journal entries. If a Create, Edit, or Delete control is absent, do not work around it with another user’s account; ask an administrator to review your role.
Find and review journal entries
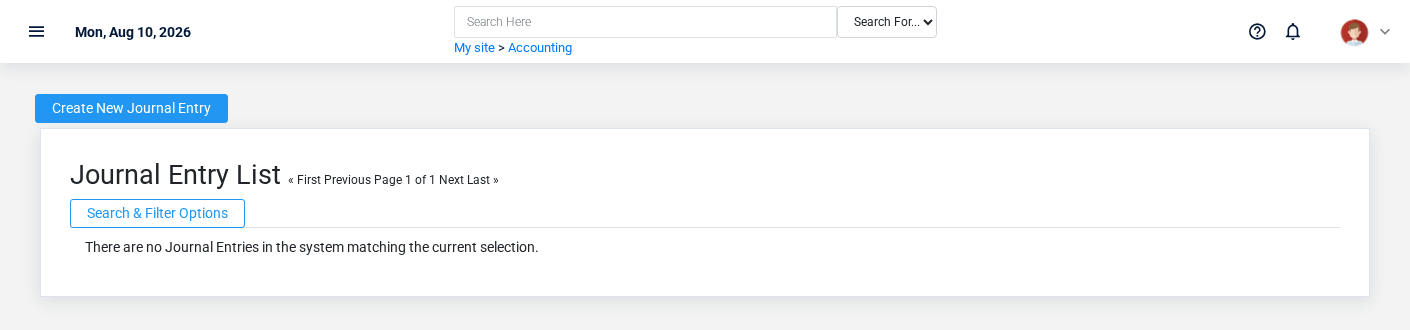
The Journal Entries list screen in the Brisk documentation demo.
Use the Journal Entries list to find the correct record before opening or changing it. Compare **Date Created**. Compare the full identifier rather than relying on a similar name.
Open the Journal Entry whose **Date Created** match the task. If it is missing, clear the list filters and recheck the identifying information shown on the screen rather than creating a replacement immediately.
Create a Journal Entry
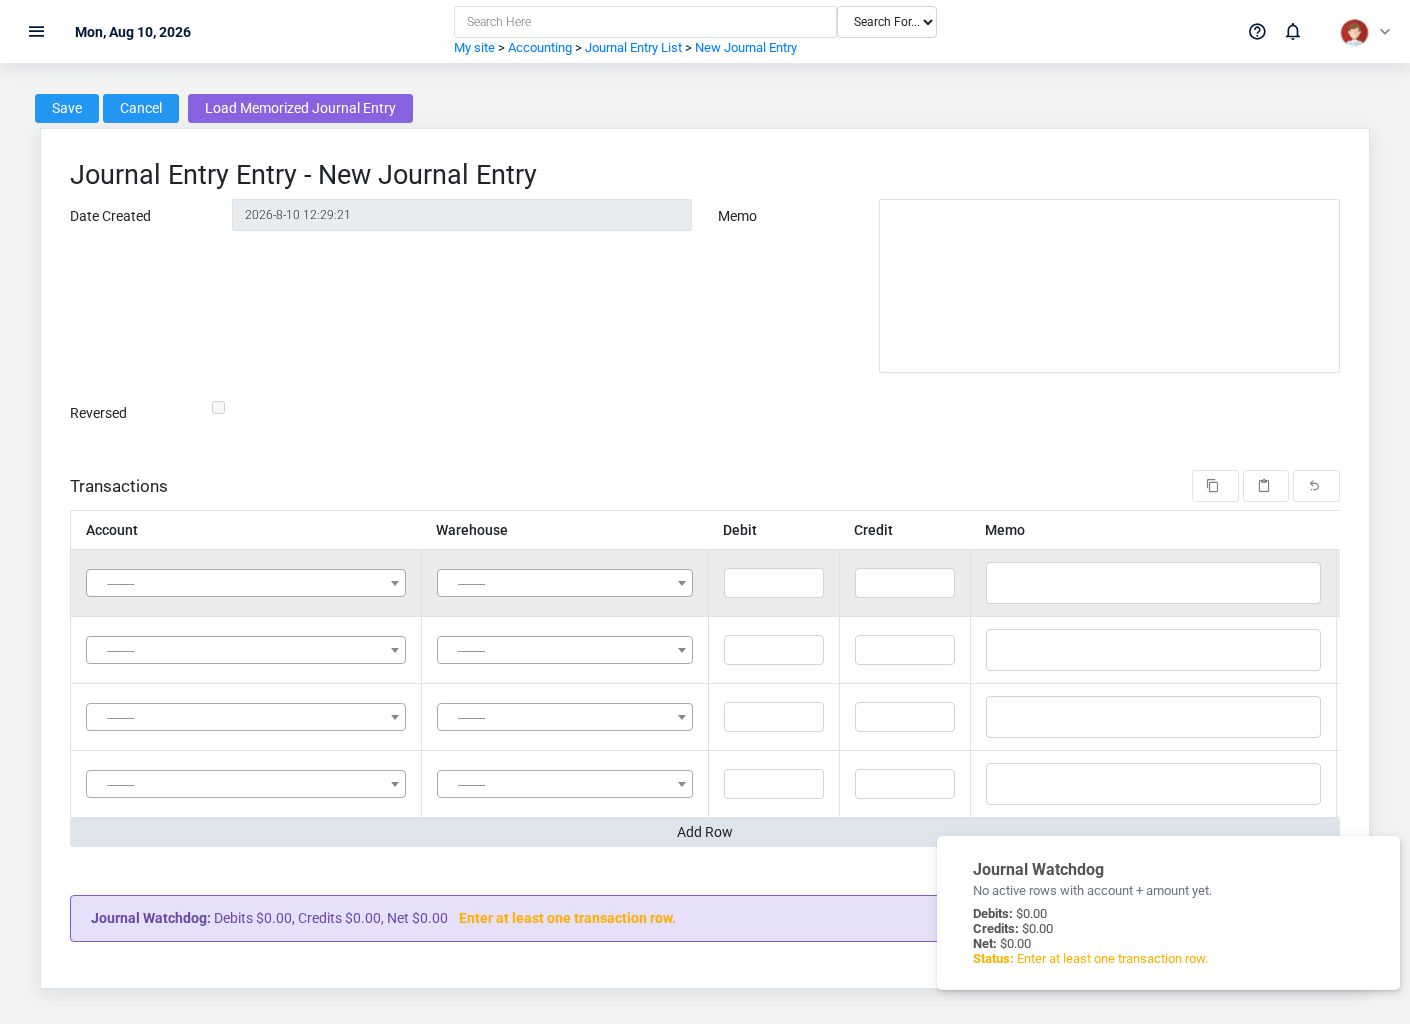
The Journal Entries create screen in the Brisk documentation demo.
Create a Journal Entry only after confirming that the source document or operational event has not already been entered.
1. Select the business context first.
2. Enter the identifying values shown on the form, especially **Date Created**, **Memo**, and **Reversed**.
3. Review **Reversed** deliberately; these choices control availability or workflow rather than merely describing the record.
4. Save the Journal Entry, then confirm **Date Created** on its detail page before continuing.
After saving: Review both sides of the entry in the general ledger and confirm that the intended reporting period and accounts changed by equal amounts.
Delete a Journal Entry
Delete this Journal Entry only when it was entered by mistake and no downstream history depends on it. Use a reversal, void, credit, counter-adjustment, or status correction for a real event that later changed.
Before confirming, check for related **Customer Balance Import Records**, **Payroll Journal Entries**, and **Transactions**. Brisk may refuse deletion when another record depends on this one; resolve the duplicate or use the supported correction workflow instead of breaking the trail.
On the confirmation page, verify **Date Created**. After confirmation, return to the Journal Entries list and make sure only the intended Journal Entry was removed.
Review Journal Entry details
Use the detail page as the shared record of what this Journal Entry currently means. Verify **Date Created** before relying on it for a decision.
Compare the Journal Entry with its source document or approved setup request before deciding that it needs correction.
Next check: Review both sides of the entry in the general ledger and confirm that the intended reporting period and accounts changed by equal amounts.
Print a Journal Entry
Before printing, verify the identifiers, dates, amounts, status, and recipient information on the Journal Entry. Printed output can outlive later corrections, so regenerate it after a material edit.
Edit an existing Journal Entry
Edit this Journal Entry to correct or complete the same source document or operational event; use the supported reversal or follow-up workflow when the business event itself changed.
1. Open the detail page. Compare **Date Created** with the supporting document or approved request.
2. Recheck **Date Created**. These values are most likely to change account balances, financial periods, and statement results.
3. Save the change, return to the list, and confirm that the Journal Entry now appears under the expected **Date Created**.
After the change: Review both sides of the entry in the general ledger and confirm that the intended reporting period and accounts changed by equal amounts.
## Fields and business rules
Brisk stores 3 user-relevant fields for this Journal Entry, including 0 linked-record selections and 0 controlled-choice fields. Create and edit screens may hide calculated or workflow-managed values from this full reference.
| Field | Required | What it controls |
|---|---:|---|
| **Date Created** | No | Date and time recorded for date created on this journal entry. |
| **Memo** | No | The memo recorded for this journal entry. |
| **Reversed** | No | Whether the reversed option applies to this journal entry. |
## What happens next
Review both sides of the entry in the general ledger and confirm that the intended reporting period and accounts changed by equal amounts.
## Common mistakes and troubleshooting
- **The values look right but the result is wrong:** Compare this Journal Entry with the source document or approved setup decision, then check the downstream screen where it is used.
# Memorized Transactions
# Memorized Transactions
Purpose and when to use this record
Save a reusable journal-entry or vendor-invoice pattern for recurring transactions while controlling date refresh and availability.
## At a glance
- **Identify it by:** **Template Name**, and **Auto-Update Date Fields**.
- **Why care:** Dates, accounts, amounts, posting state, and period locks can change financial reports. Verify them against the source document before finalizing the record.
- **Why care:** Availability and publication flags affect future use without erasing history. Prefer disabling an obsolete setup record when existing transactions still refer to it.
## Before you begin
You need the Brisk permission for the action you are taking on memorized transactions. If a Create, Edit, or Delete control is absent, do not work around it with another user’s account; ask an administrator to review your role.
Create a Memorized Transaction
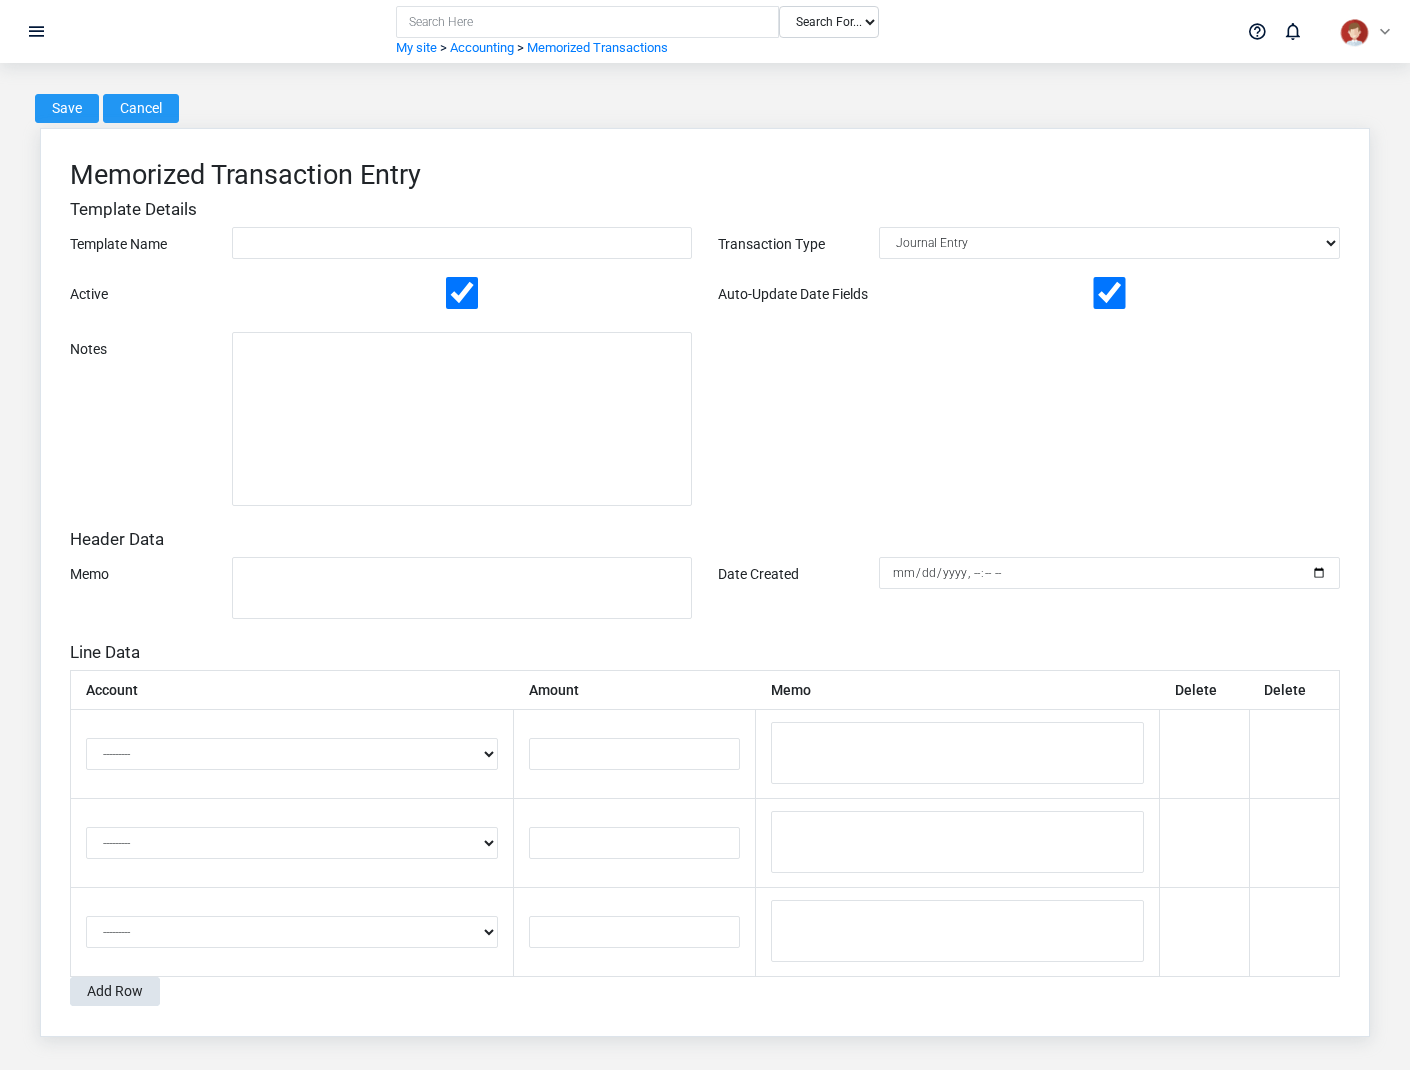
The Memorized Transactions create screen in the Brisk documentation demo.
Create a Memorized Transaction after searching for the person, organization, item, location, or resource under alternate names and identifiers. Merge or correct an existing master record instead of creating a duplicate.
1. Select the business context first.
2. Enter the required identifying and operational values: **Template Name**, and **Transaction Type**.
3. Review **Transaction Type**, **Auto-Update Date Fields**, and **Active** deliberately; these choices control availability or workflow rather than merely describing the record.
4. Save the Memorized Transaction, then confirm **Template Name**, and **Auto-Update Date Fields** on its detail page before continuing.
After saving: Verify this Memorized Transaction in the next transaction or assignment screen before staff build new activity on it; correct ownership, classification, and active state now rather than after transactions accumulate.
Delete a Memorized Transaction
Delete this Memorized Transaction only if it is an unused duplicate or setup mistake. Once other records refer to it, preserve that history and make the value inactive when the screen provides that option.
If the record is merely obsolete, use **Active** to remove it from future use while preserving existing references.
On the confirmation page, verify **Template Name**, and **Auto-Update Date Fields**. After confirmation, return to the Memorized Transactions list and make sure only the intended Memorized Transaction was removed.
Review Memorized Transaction details
Use the detail page as the shared record of what this Memorized Transaction currently means. Verify **Transaction Type**, **Auto-Update Date Fields**, and **Active** before relying on it for a decision.
Compare the Memorized Transaction with its source document or approved setup request before deciding that it needs correction.
Next check: Verify this Memorized Transaction in the next transaction or assignment screen before staff build new activity on it; correct ownership, classification, and active state now rather than after transactions accumulate.
Find and review memorized transactions
The Memorized Transactions list screen in the Brisk documentation demo.
Use the Memorized Transactions list to find the correct record before opening or changing it. Compare **Template Name**, and **Auto-Update Date Fields**. Compare the full identifier rather than relying on a similar name.
- Keyword search checks **Template Name**, and **Notes**.
Open the Memorized Transaction whose **Template Name**, and **Auto-Update Date Fields** match the task. If it is missing, clear the list filters and recheck **Transaction Type**, and **Active** rather than creating a replacement immediately.
Edit an existing Memorized Transaction
Edit this Memorized Transaction to keep the same real-world party, item, location, or resource accurate. Do not repurpose it for a different entity after activity is attached.
1. Open the detail page. Compare **Template Name**, and **Auto-Update Date Fields** with the supporting document or approved request.
2. Recheck **Transaction Type**, **Auto-Update Date Fields**, and **Active**. These values are most likely to change account balances, financial periods, and statement results.
3. Save the change, return to the list, and confirm that the Memorized Transaction now appears under the expected **Transaction Type**, and **Active**.
After the change: Verify this Memorized Transaction in the next transaction or assignment screen before staff build new activity on it; correct ownership, classification, and active state now rather than after transactions accumulate.
## Fields and business rules
Brisk stores 7 user-relevant fields for this Memorized Transaction, including 0 linked-record selections and 1 controlled-choice field. Create and edit screens may hide calculated or workflow-managed values from this full reference.
| Field | Required | What it controls |
|---|---:|---|
| **Template Name** | Yes | Human-readable name for this memorized transaction. |
| **Transaction Type** | Yes | The transaction type recorded for this memorized transaction. Available values: Journal Entry, Vendor Invoice. |
| **Header Data** | No | The header data recorded for this memorized transaction. |
| **Line Data** | No | The line data recorded for this memorized transaction. |
| **Auto-Update Date Fields** | No | If enabled, date fields are refreshed to today when this template is applied. |
| **Active** | No | Whether this memorized transaction is active and available for use. |
| **Notes** | No | Additional internal notes about this memorized transaction. |
## What happens next
Verify this Memorized Transaction in the next transaction or assignment screen before staff build new activity on it; correct ownership, classification, and active state now rather than after transactions accumulate.
## Common mistakes and troubleshooting
- **The record will not save:** Recheck **Template Name**, and **Transaction Type** and any message beside the field. A required related record may also be inactive or unavailable to your role.
- **The record saved but is not available where expected:** Recheck **Transaction Type**, and **Active**, then clear the filters on the destination list. A saved record can still be inactive, unpublished, locked, unapproved, or in the wrong workflow state.
- **The values look right but the result is wrong:** Compare this Memorized Transaction with the source document or approved setup decision, then check the downstream screen where it is used.
# Mileage Records
# Mileage Records
Purpose and when to use this record
Document business vehicle mileage for a specific date so reimbursable or deductible travel can be supported.
## At a glance
- **Identify it by:** **Expense Date**.
- **Check its business context:** **Vehicle**.
- **Why care:** Dates, accounts, amounts, posting state, and period locks can change financial reports. Verify them against the source document before finalizing the record.
## Before you begin
You need the Brisk permission for the action you are taking on mileage records. If a Create, Edit, or Delete control is absent, do not work around it with another user’s account; ask an administrator to review your role.
Have valid **Vehicle** records ready first. Those selections determine where this Mileage Record belongs and which later screens can find it.
Create a Mileage Record
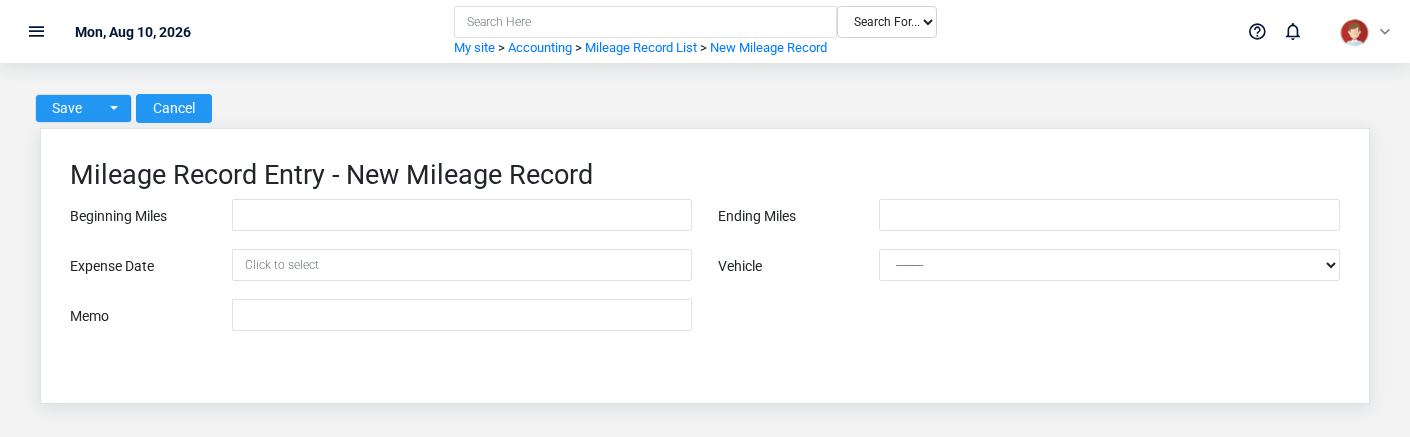
The Mileage Records create screen in the Brisk documentation demo.
Create a Mileage Record only after confirming that the source document or operational event has not already been entered.
1. Select the business context first: **Vehicle**.
2. Enter the required identifying and operational values: **Beginning Miles**, **Ending Miles**, **Expense Date**, and **Vehicle**.
3. Review **Memo** against the source document or approved setup decision.
4. Save the Mileage Record, then confirm **Expense Date** on its detail page before continuing.
After saving: Use **Vehicle** to interpret this Mileage Record. If it records a failure or exception, correct the source process and create a new successful event rather than rewriting the audit trail.
Delete a Mileage Record
Delete this Mileage Record only when it was entered by mistake and no downstream history depends on it. Use a reversal, void, credit, counter-adjustment, or status correction for a real event that later changed.
On the confirmation page, verify **Expense Date**. After confirmation, return to the Mileage Records list and make sure only the intended Mileage Record was removed.
Review Mileage Record details
Use the detail page as the shared record of what this Mileage Record currently means. Verify **Expense Date** before relying on it for a decision.
Follow **Vehicle** to determine whether the issue is on this Mileage Record or on one of those linked records.
Next check: Use **Vehicle** to interpret this Mileage Record. If it records a failure or exception, correct the source process and create a new successful event rather than rewriting the audit trail.
Edit an existing Mileage Record
Edit this Mileage Record to correct or complete the same source document or operational event; use the supported reversal or follow-up workflow when the business event itself changed.
1. Open the detail page. Compare **Vehicle** with the supporting document or approved request.
2. Recheck **Expense Date**. These values are most likely to change account balances, financial periods, and statement results.
3. Save the change, return to the list, and confirm that the Mileage Record now appears under the expected **Expense Date**.
After the change: Use **Vehicle** to interpret this Mileage Record. If it records a failure or exception, correct the source process and create a new successful event rather than rewriting the audit trail.
Find and review mileage records
The Mileage Records list screen in the Brisk documentation demo.
Use the Mileage Records list to find the correct record before opening or changing it. Compare **Expense Date**. Records with similar names or numbers can still belong to different **Vehicle**.
Open the Mileage Record whose **Expense Date** match the task. If it is missing, clear the list filters and recheck the identifying information shown on the screen rather than creating a replacement immediately.
## Fields and business rules
Brisk stores 5 user-relevant fields for this Mileage Record, including 1 linked-record selection and 0 controlled-choice fields. Create and edit screens may hide calculated or workflow-managed values from this full reference.
| Field | Required | What it controls |
|---|---:|---|
| **Beginning Miles** | Yes | The beginning miles value recorded for this mileage record. |
| **Ending Miles** | Yes | The ending miles value recorded for this mileage record. |
| **Expense Date** | Yes | Date recorded for expense date on this mileage record. |
| **Vehicle** | Yes | The vehicle associated with this mileage record. |
| **Memo** | No | Record notes about this mileage record. |
## What happens next
Use **Vehicle** to interpret this Mileage Record. If it records a failure or exception, correct the source process and create a new successful event rather than rewriting the audit trail.
## Common mistakes and troubleshooting
- **The record will not save:** Recheck **Beginning Miles**, **Ending Miles**, **Expense Date**, and **Vehicle** and any message beside the field. A required related record may also be inactive or unavailable to your role.
- **The values look right but the result is wrong:** Open **Vehicle** from the detail page. Correct the specific relationship that is wrong instead of forcing a total or status to compensate for it.
# Months
# Months
Purpose and when to use this record
Control monthly accounting periods, their parent quarter, finance-charge state, warehouse scope, and lock dates.
## At a glance
- **Identify it by:** **Parent**, **Quarter**, **Opening Date**, and **Closing Date**.
- **Check its business context:** **Parent**, **Quarter**, and **Warehouse**.
- **Why care:** Dates, accounts, amounts, posting state, and period locks can change financial reports. Verify them against the source document before finalizing the record.
- **Why care:** Treat posted, processed, paid, reversed, and edit-locked states as controls—not ordinary descriptive fields. Confirm the source transaction before changing any state that the screen permits you to change.
## Before you begin
You need the Brisk permission for the action you are taking on months. If a Create, Edit, or Delete control is absent, do not work around it with another user’s account; ask an administrator to review your role.
Have valid **Parent** records ready first. Those selections determine where this Month belongs and which later screens can find it.
Create a Month
The Months create screen in the Brisk documentation demo.
Create a Month after searching for the person, organization, item, location, or resource under alternate names and identifiers. Merge or correct an existing master record instead of creating a duplicate.
1. Select the business context first: **Parent**, **Quarter**, and **Warehouse**.
2. Enter the required identifying and operational values: **Parent**, and **Opening Date**.
3. Review **Locked**, and **Finance Charges Levied** deliberately; these choices control availability or workflow rather than merely describing the record.
4. Save the Month, then confirm **Parent**, **Quarter**, **Opening Date**, **Closing Date**, **Warehouse**, and **Locked**, plus the remaining screen fields on its detail page before continuing.
After saving: Verify this Month in **Customer Aging Snapshots**, and **Work Periods** before staff build new activity on it; correct ownership, classification, and active state now rather than after transactions accumulate.
Delete a Month
Delete this Month only if it is an unused duplicate or setup mistake. Once other records refer to it, preserve that history and make the value inactive when the screen provides that option.
Before confirming, check for related **Customer Aging Snapshots**, and **Work Periods**. Brisk may refuse deletion when another record depends on this one; resolve the duplicate or use the supported correction workflow instead of breaking the trail.
On the confirmation page, verify **Parent**, **Quarter**, **Opening Date**, and **Closing Date**. After confirmation, return to the Months list and make sure only the intended Month was removed.
Review Month details
Use the detail page as the shared record of what this Month currently means. Verify **Locked** before relying on it for a decision.
Follow **Parent**, **Quarter**, and **Warehouse** to determine whether the issue is on this Month or on one of those linked records.
Next check: Verify this Month in **Customer Aging Snapshots**, and **Work Periods** before staff build new activity on it; correct ownership, classification, and active state now rather than after transactions accumulate.
Edit an existing Month
Edit this Month to keep the same real-world party, item, location, or resource accurate. Do not repurpose it for a different entity after activity is attached.
1. Open the detail page. Compare **Parent**, **Quarter**, and **Warehouse** with the supporting document or approved request.
2. Recheck **Warehouse**, and **Locked**. These values are most likely to change account balances, financial periods, and statement results.
3. Save the change, return to the list, and confirm that the Month now appears under the expected **Locked**.
After the change: Verify this Month in **Customer Aging Snapshots**, and **Work Periods** before staff build new activity on it; correct ownership, classification, and active state now rather than after transactions accumulate.
Find and review months
The Months list screen in the Brisk documentation demo.
Use the Months list to find the correct record before opening or changing it. Compare **Parent**, **Quarter**, **Opening Date**, and **Closing Date**. Records with similar names or numbers can still belong to different **Parent**, **Quarter**, and **Warehouse**.
- The initial order emphasizes **Opening Date**. Select a column heading when you need a different comparison.
Open the Month whose **Parent**, **Quarter**, **Opening Date**, and **Closing Date** match the task. If it is missing, clear the list filters and recheck **Locked** rather than creating a replacement immediately.
## Fields and business rules
Brisk stores 8 user-relevant fields for this Month, including 3 linked-record selections and 0 controlled-choice fields. Create and edit screens may hide calculated or workflow-managed values from this full reference.
| Field | Required | What it controls |
|---|---:|---|
| **Parent** | Yes | Parent month in the hierarchy. |
| **Quarter** | No | The quarter associated with this month. |
| **Opening Date** | Yes | Date and time recorded for opening date on this month. |
| **Closing Date** | No | Date and time recorded for closing date on this month. |
| **Warehouse** | No | Optionally scope this month to a system warehouse. |
| **Locked** | No | Whether the locked option applies to this month. |
| **Finance Charges Levied** | No | Whether the finance charges levied option applies to this month. |
| **Memo** | No | The memo recorded for this month. |
## What happens next
Verify this Month in **Customer Aging Snapshots**, and **Work Periods** before staff build new activity on it; correct ownership, classification, and active state now rather than after transactions accumulate.
## Common mistakes and troubleshooting
- **The record will not save:** Recheck **Parent**, and **Opening Date** and any message beside the field. A required related record may also be inactive or unavailable to your role.
- **The record saved but is not available where expected:** Recheck **Locked**, then clear the filters on the destination list. A saved record can still be inactive, unpublished, locked, unapproved, or in the wrong workflow state.
- **The values look right but the result is wrong:** Open **Parent**, **Quarter**, and **Warehouse** from the detail page. Correct the specific relationship that is wrong instead of forcing a total or status to compensate for it.
# Payments
# Payments
Purpose and when to use this record
The Payments overview screen in the Brisk documentation demo.
Issue and review vendor payments drawn from a bank account, including check identity, payee, amount, and invoice applications.
## At a glance
- **Identify it by:** **Date Created**, **Check Date**, and **Check Number**.
- **Check its business context:** **Bank Account**, and **Vendor**.
- **Why care:** Dates, accounts, amounts, posting state, and period locks can change financial reports. Verify them against the source document before finalizing the record.
- **Why care:** Treat posted, processed, paid, reversed, and edit-locked states as controls—not ordinary descriptive fields. Confirm the source transaction before changing any state that the screen permits you to change.
## Before you begin
You need the Brisk permission for the action you are taking on payments. If a Create, Edit, or Delete control is absent, do not work around it with another user’s account; ask an administrator to review your role.
Create a Payment
The Payments create screen in the Brisk documentation demo.
Create a Payment only after confirming that the source document or operational event has not already been entered.
1. Select the business context first: **Bank Account**, and **Vendor**.
2. Enter the required identifying and operational values: **Amount**.
3. Review **Edit Locked** deliberately; these choices control availability or workflow rather than merely describing the record.
4. Save the Payment, then confirm **Date Created**, **Check Date**, and **Check Number** on its detail page before continuing.
After saving: Confirm the invoice applications and bank disbursement, then include the payment when the bank account is reconciled.
Delete a Payment
Delete this Payment only when it was entered by mistake and no downstream history depends on it. Use a reversal, void, credit, counter-adjustment, or status correction for a real event that later changed.
Before confirming, check for related **Bank Information**, **Invoices Paid**, and **Transactions**. Brisk may refuse deletion when another record depends on this one; resolve the duplicate or use the supported correction workflow instead of breaking the trail.
On the confirmation page, verify **Date Created**, **Check Date**, and **Check Number**. After confirmation, return to the Payments list and make sure only the intended Payment was removed.
Review Payment details
A fictional partial vendor payment allocated to a vendor invoice.
Use the detail page as the shared record of what this Payment currently means. Verify **Date Created**, **Amount**, **Check Date**, and **Edit Locked** before relying on it for a decision.
Follow **Bank Account**, and **Vendor** to determine whether the issue is on this Payment or on one of those linked records.
Next check: Confirm the invoice applications and bank disbursement, then include the payment when the bank account is reconciled.
Edit an existing Payment
Edit this Payment to correct or complete the same source document or operational event; use the supported reversal or follow-up workflow when the business event itself changed.
1. Open the detail page. Compare **Bank Account**, and **Vendor** with the supporting document or approved request.
2. Recheck **Date Created**, **Bank Account**, **Vendor**, **Amount**, **Check Date**, and **Edit Locked**. These values are most likely to change account balances, financial periods, and statement results.
3. Save the change, return to the list, and confirm that the Payment now appears under the expected **Edit Locked**.
After the change: Confirm the invoice applications and bank disbursement, then include the payment when the bank account is reconciled.
Find and review payments
The Payments list screen in the Brisk documentation demo.
Use the Payments list to find the correct record before opening or changing it. Compare **Date Created**, **Check Date**, and **Check Number**. Records with similar names or numbers can still belong to different **Bank Account**, and **Vendor**.
- Narrow the list with **Vendor** filters.
Open the Payment whose **Date Created**, **Check Date**, and **Check Number** match the task. If it is missing, clear the list filters and recheck **Vendor**, and **Edit Locked** rather than creating a replacement immediately.
## Fields and business rules
Brisk stores 9 user-relevant fields for this Payment, including 2 linked-record selections and 0 controlled-choice fields. Create and edit screens may hide calculated or workflow-managed values from this full reference.
| Field | Required | What it controls |
|---|---:|---|
| **Date Created** | No | Date and time recorded for date created on this payment. |
| **Bank Account** | No | The bank account associated with this payment. |
| **Vendor** | No | The vendor associated with this payment. |
| **Amount** | Yes | The amount value recorded for this payment. |
| **Check Date** | No | Date recorded for check date on this payment. |
| **Check Number** | No | The check number value recorded for this payment. |
| **Payee Override** | No | The payee override recorded for this payment. |
| **Memo** | No | The memo recorded for this payment. |
| **Edit Locked** | No | Whether the edit locked option applies to this payment. |
## What happens next
Confirm the invoice applications and bank disbursement, then include the payment when the bank account is reconciled.
## Common mistakes and troubleshooting
- **The record will not save:** Recheck **Amount** and any message beside the field. A required related record may also be inactive or unavailable to your role.
- **The record saved but is not available where expected:** Recheck **Edit Locked**, then clear the filters on the destination list. A saved record can still be inactive, unpublished, locked, unapproved, or in the wrong workflow state.
- **The values look right but the result is wrong:** Open **Bank Account**, and **Vendor** from the detail page. Correct the specific relationship that is wrong instead of forcing a total or status to compensate for it.
# Quarters
# Quarters
Purpose and when to use this record
Define quarterly accounting boundaries and lock completed quarters against ordinary transaction changes.
## At a glance
- **Identify it by:** **Parent**, **Opening Date**, **Closing Date**, and **Locked**.
- **Check its business context:** **Parent**.
- **Why care:** Dates, accounts, amounts, posting state, and period locks can change financial reports. Verify them against the source document before finalizing the record.
- **Why care:** Treat posted, processed, paid, reversed, and edit-locked states as controls—not ordinary descriptive fields. Confirm the source transaction before changing any state that the screen permits you to change.
## Before you begin
You need the Brisk permission for the action you are taking on quarters. If a Create, Edit, or Delete control is absent, do not work around it with another user’s account; ask an administrator to review your role.
Have valid **Parent** records ready first. Those selections determine where this Quarter belongs and which later screens can find it.
Create a Quarter
The Quarters create screen in the Brisk documentation demo.
Create a Quarter after searching for the person, organization, item, location, or resource under alternate names and identifiers. Merge or correct an existing master record instead of creating a duplicate.
1. Select the business context first: **Parent**.
2. Enter the required identifying and operational values: **Parent**, and **Opening Date**.
3. Review **Locked** deliberately; these choices control availability or workflow rather than merely describing the record.
4. Save the Quarter, then confirm **Parent**, **Opening Date**, **Closing Date**, **Locked**, and **Memo** on its detail page before continuing.
After saving: Verify this Quarter in **Months** before staff build new activity on it; correct ownership, classification, and active state now rather than after transactions accumulate.
Delete a Quarter
Delete this Quarter only if it is an unused duplicate or setup mistake. Once other records refer to it, preserve that history and make the value inactive when the screen provides that option.
Before confirming, check for related **Months**. Brisk may refuse deletion when another record depends on this one; resolve the duplicate or use the supported correction workflow instead of breaking the trail.
On the confirmation page, verify **Parent**, **Opening Date**, **Closing Date**, and **Locked**. After confirmation, return to the Quarters list and make sure only the intended Quarter was removed.
Review Quarter details
Use the detail page as the shared record of what this Quarter currently means. Verify **Locked** before relying on it for a decision.
Follow **Parent** to determine whether the issue is on this Quarter or on one of those linked records.
Next check: Verify this Quarter in **Months** before staff build new activity on it; correct ownership, classification, and active state now rather than after transactions accumulate.
Edit an existing Quarter
Edit this Quarter to keep the same real-world party, item, location, or resource accurate. Do not repurpose it for a different entity after activity is attached.
1. Open the detail page. Compare **Parent** with the supporting document or approved request.
2. Recheck **Locked**. These values are most likely to change account balances, financial periods, and statement results.
3. Save the change, return to the list, and confirm that the Quarter now appears under the expected **Locked**.
After the change: Verify this Quarter in **Months** before staff build new activity on it; correct ownership, classification, and active state now rather than after transactions accumulate.
Find and review quarters
The Quarters list screen in the Brisk documentation demo.
Use the Quarters list to find the correct record before opening or changing it. Compare **Parent**, **Opening Date**, **Closing Date**, and **Locked**. Records with similar names or numbers can still belong to different **Parent**.
- The initial order emphasizes **Opening Date**. Select a column heading when you need a different comparison.
Open the Quarter whose **Parent**, **Opening Date**, **Closing Date**, and **Locked** match the task. If it is missing, clear the list filters and recheck **Locked** rather than creating a replacement immediately.
## Fields and business rules
Brisk stores 5 user-relevant fields for this Quarter, including 1 linked-record selection and 0 controlled-choice fields. Create and edit screens may hide calculated or workflow-managed values from this full reference.
| Field | Required | What it controls |
|---|---:|---|
| **Parent** | Yes | Parent quarter in the hierarchy. |
| **Opening Date** | Yes | Date and time recorded for opening date on this quarter. |
| **Closing Date** | No | Date and time recorded for closing date on this quarter. |
| **Locked** | No | Whether the locked option applies to this quarter. |
| **Memo** | No | The memo recorded for this quarter. |
## What happens next
Verify this Quarter in **Months** before staff build new activity on it; correct ownership, classification, and active state now rather than after transactions accumulate.
## Common mistakes and troubleshooting
- **The record will not save:** Recheck **Parent**, and **Opening Date** and any message beside the field. A required related record may also be inactive or unavailable to your role.
- **The record saved but is not available where expected:** Recheck **Locked**, then clear the filters on the destination list. A saved record can still be inactive, unpublished, locked, unapproved, or in the wrong workflow state.
- **The values look right but the result is wrong:** Open **Parent** from the detail page. Correct the specific relationship that is wrong instead of forcing a total or status to compensate for it.
# Receivable Transactions
# Receivable Transactions
Purpose and when to use this record
The Receivable Transactions overview screen in the Brisk documentation demo.
Trace the charge, payment, credit, or adjustment that changed a customer’s accounts-receivable balance.
## At a glance
- **Identify it by:** **Due Date Override**, and **Payment Date**.
- **Check its business context:** **Transaction**, **Customer**, and **Payment Terms**.
- **Why care:** Dates, accounts, amounts, posting state, and period locks can change financial reports. Verify them against the source document before finalizing the record.
- **Why care:** Treat posted, processed, paid, reversed, and edit-locked states as controls—not ordinary descriptive fields. Confirm the source transaction before changing any state that the screen permits you to change.
## Before you begin
You need the Brisk permission for the action you are taking on receivable transactions. If a Create, Edit, or Delete control is absent, do not work around it with another user’s account; ask an administrator to review your role.
Have valid **Transaction**, and **Customer** records ready first. Those selections determine where this Receivable Transaction belongs and which later screens can find it.
## Fields and business rules
Brisk stores 6 user-relevant fields for this Receivable Transaction, including 3 linked-record selections and 0 controlled-choice fields. Create and edit screens may hide calculated or workflow-managed values from this full reference.
| Field | Required | What it controls |
|---|---:|---|
| **Transaction** | Yes | The transaction associated with this receivable transaction. |
| **Customer** | Yes | The customer associated with this receivable transaction. |
| **Payment Terms** | No | The payment terms associated with this receivable transaction. |
| **Paid** | No | Whether the paid option applies to this receivable transaction. |
| **Due Date Override** | No | This field, if not left blank, overrides the due date set by this transaction's payment terms. |
| **Payment Date** | No | Date and time recorded for payment date on this receivable transaction. |
## What happens next
Use **Transaction**, **Customer**, and **Payment Terms** to interpret this Receivable Transaction. If it records a failure or exception, correct the source process and create a new successful event rather than rewriting the audit trail.
## Common mistakes and troubleshooting
- **The record will not save:** Recheck **Transaction**, and **Customer** and any message beside the field. A required related record may also be inactive or unavailable to your role.
- **The values look right but the result is wrong:** Open **Transaction**, **Customer**, and **Payment Terms** from the detail page. Correct the specific relationship that is wrong instead of forcing a total or status to compensate for it.
# Reconciliations
# Reconciliations
Purpose and when to use this record
Reconcile a bank or card account to a statement ending balance, including service charges and earned interest.
## At a glance
- **Identify it by:** **Statement Date**, **Service Charge Date**, and **Interest Date**.
- **Check its business context:** **Account**, **Service Charge Account**, and **Interest Account**.
- **Why care:** Dates, accounts, amounts, posting state, and period locks can change financial reports. Verify them against the source document before finalizing the record.
## Before you begin
You need the Brisk permission for the action you are taking on reconciliations. If a Create, Edit, or Delete control is absent, do not work around it with another user’s account; ask an administrator to review your role.
Have valid **Account** records ready first. Those selections determine where this reconciliation belongs and which later screens can find it.
Create a reconciliation
The Reconciliations create screen in the Brisk documentation demo.
Create a reconciliation only after confirming that the source document or operational event has not already been entered.
1. Select the business context first: **Account**, **Service Charge Account**, and **Interest Account**.
2. Enter the required identifying and operational values: **Account**, and **Statement Date**.
3. Review **Ending Balance**, **Service Charge**, **Service Charge Date**, **Interest**, and **Interest Date** against the source document or approved setup decision.
4. Save the reconciliation, then confirm **Statement Date**, **Service Charge Date**, and **Interest Date** on its detail page before continuing.
After saving: Resolve any remaining difference before treating the statement as reconciled; service charges and interest should land in the selected accounts.
Edit an existing reconciliation
Edit this reconciliation to correct or complete the same source document or operational event; use the supported reversal or follow-up workflow when the business event itself changed.
1. Open the detail page. Compare **Account**, **Service Charge Account**, and **Interest Account** with the supporting document or approved request.
2. Recheck **Account**, **Statement Date**, **Ending Balance**, **Service Charge Date**, **Service Charge Account**, and **Interest Date**, plus the remaining screen fields. These values are most likely to change account balances, financial periods, and statement results.
3. Save the change, return to the list, and confirm that the reconciliation now appears under the expected **Statement Date**, **Service Charge Date**, and **Interest Date**.
After the change: Resolve any remaining difference before treating the statement as reconciled; service charges and interest should land in the selected accounts.
Find and review reconciliations
The Reconciliations list screen in the Brisk documentation demo.
Use the Reconciliations list to find the correct record before opening or changing it. Compare **Statement Date**, **Service Charge Date**, and **Interest Date**. Records with similar names or numbers can still belong to different **Account**, **Service Charge Account**, and **Interest Account**.
- Narrow the list with **Account** filters.
Open the reconciliation whose **Statement Date**, **Service Charge Date**, and **Interest Date** match the task. If it is missing, clear the list filters and recheck **Account** rather than creating a replacement immediately.
## Fields and business rules
Brisk stores 9 user-relevant fields for this reconciliation, including 3 linked-record selections and 0 controlled-choice fields. Create and edit screens may hide calculated or workflow-managed values from this full reference.
| Field | Required | What it controls |
|---|---:|---|
| **Account** | Yes | The account associated with this reconciliation. |
| **Statement Date** | Yes | Date recorded for statement date on this reconciliation. |
| **Ending Balance** | No | The ending balance value recorded for this reconciliation. |
| **Service Charge** | No | The total amount of any service charges on this statement. |
| **Service Charge Date** | No | Record the date that the service charge was levied by the bank. |
| **Service Charge Account** | No | Set the account that the balancing transaction for the service charges will post to. |
| **Interest** | No | The total amount of interest earned on this statement. |
| **Interest Date** | No | Record the date that the interest was deposited by the bank. |
| **Interest Account** | No | Set the account that the balancing transaction for the interest earned will post to. |
## What happens next
Resolve any remaining difference before treating the statement as reconciled; service charges and interest should land in the selected accounts.
## Common mistakes and troubleshooting
- **The record will not save:** Recheck **Account**, and **Statement Date** and any message beside the field. A required related record may also be inactive or unavailable to your role.
- **The values look right but the result is wrong:** Open **Account**, **Service Charge Account**, and **Interest Account** from the detail page. Correct the specific relationship that is wrong instead of forcing a total or status to compensate for it.
# Reporting Api Credentials
# Reporting Api Credentials
Purpose and when to use this record
Grant a named integration narrowly scoped, expiring access to reporting data, optionally restricted by source network.
## At a glance
- **Identify it by:** **Name**.
- **Check its business context:** **Service User**.
- **Why care:** Availability and publication flags affect future use without erasing history. Prefer disabling an obsolete setup record when existing transactions still refer to it.
- **Why care:** Grant the smallest capability and shortest practical lifetime. Treat any generated secret as confidential; copy it at creation time and never place it in notes or screenshots.
## Before you begin
You need the Brisk permission for the action you are taking on reporting api credentials. If a Create, Edit, or Delete control is absent, do not work around it with another user’s account; ask an administrator to review your role.
Create a Reporting API Credential
The Reporting Api Credentials create screen in the Brisk documentation demo.
Create a Reporting API Credential for one identifiable integration or device. Do not share one credential across unrelated systems because revocation and audit history would become ambiguous.
1. Select the business context first: **Service User**.
2. Enter the required identifying and operational values: **Name**.
3. Review **Active**, and **Allow Reporting Reads** deliberately; these choices control availability or workflow rather than merely describing the record.
4. Save the Reporting API Credential, then confirm **Name** on its detail page before continuing.
After saving: Give the generated secret only to the named integration, test reporting access from an allowed network, and record the expiration/rotation plan outside the credential itself.
Delete a Reporting API Credential
Disable or revoke this Reporting API Credential when access must stop. Delete it only after its audit value is no longer needed and the integration has been moved to a replacement credential.
If the record is merely obsolete, use **Active** to remove it from future use while preserving existing references.
On the confirmation page, verify **Name**. After confirmation, return to the Reporting API Credentials list and make sure only the intended Reporting API Credential was removed.
Review Reporting API Credential details
Use the detail page as the shared record of what this Reporting API Credential currently means. Verify **Active** before relying on it for a decision.
Follow **Service User** to determine whether the issue is on this Reporting API Credential or on one of those linked records.
Next check: Give the generated secret only to the named integration, test reporting access from an allowed network, and record the expiration/rotation plan outside the credential itself.
Edit an existing Reporting API Credential
Edit this Reporting API Credential to reduce access, rotate ownership, set an expiration, or disable the integration. Create a separate credential when the calling system changes.
1. Open the detail page. Compare **Service User** with the supporting document or approved request.
2. Recheck **Active**. These values are most likely to change account balances, financial periods, and statement results.
3. Save the change, return to the list, and confirm that the Reporting API Credential now appears under the expected **Active**.
After the change: Give the generated secret only to the named integration, test reporting access from an allowed network, and record the expiration/rotation plan outside the credential itself.
Find and review reporting api credentials
The Reporting Api Credentials list screen in the Brisk documentation demo.
Use the Reporting Api Credentials list to find the correct record before opening or changing it. Compare **Name**. Records with similar names or numbers can still belong to different **Service User**.
- Keyword search checks **Name**, and **Last Used Ip**.
- Narrow the list with **Service User** filters.
- The initial order emphasizes **Name**. Select a column heading when you need a different comparison.
Open the Reporting API Credential whose **Name** match the task. If it is missing, clear the list filters and recheck **Service User**, and **Active** rather than creating a replacement immediately.
## Fields and business rules
Brisk stores 6 user-relevant fields for this Reporting API Credential, including 1 linked-record selection and 0 controlled-choice fields. Create and edit screens may hide calculated or workflow-managed values from this full reference.
| Field | Required | What it controls |
|---|---:|---|
| **Name** | Yes | Human-readable name for this reporting API credential. |
| **Service User** | No | Optional human owner for this credential. |
| **Active** | No | Whether this reporting API credential is active. |
| **Allow Reporting Reads** | No | Whether this reporting API credential allows read reporting. |
| **Expires At** | No | Date and time recorded for expires at on this reporting API credential. |
| **Allowed Ip/Cidrs** | No | Optional newline/comma-separated list of allowed IP or CIDR ranges. |
## What happens next
Give the generated secret only to the named integration, test reporting access from an allowed network, and record the expiration/rotation plan outside the credential itself.
## Common mistakes and troubleshooting
- **The record will not save:** Recheck **Name** and any message beside the field. A required related record may also be inactive or unavailable to your role.
- **The record saved but is not available where expected:** Recheck **Active**, then clear the filters on the destination list. A saved record can still be inactive, unpublished, locked, unapproved, or in the wrong workflow state.
- **The values look right but the result is wrong:** Open **Service User** from the detail page. Correct the specific relationship that is wrong instead of forcing a total or status to compensate for it.
# Taxes
# Taxes
Purpose and when to use this record
Configure a tax rate, its liability account, and the tax-authority vendor used to track and remit collected tax.
## At a glance
- **Identify it by:** **Name**.
- **Check its business context:** **Liability Account**, and **Payee**.
- **Why care:** Dates, accounts, amounts, posting state, and period locks can change financial reports. Verify them against the source document before finalizing the record.
## Before you begin
You need the Brisk permission for the action you are taking on taxes. If a Create, Edit, or Delete control is absent, do not work around it with another user’s account; ask an administrator to review your role.
Create a tax
The Taxes create screen in the Brisk documentation demo.
Create a tax after searching for the person, organization, item, location, or resource under alternate names and identifiers. Merge or correct an existing master record instead of creating a duplicate.
1. Select the business context first: **Liability Account**, and **Payee**.
2. Enter the required identifying and operational values: **Name**, and **Percent**.
3. Review the identifying information shown on the screen against the source document or approved setup decision.
4. Save the tax, then confirm **Name** on its detail page before continuing.
After saving: Verify this tax in **Commodity Items**, **Item Rows**, **Items**, and **Order Line Items**, plus the remaining screen fields before staff build new activity on it; correct ownership, classification, and active state now rather than after transactions accumulate.
Delete a tax
Delete this tax only if it is an unused duplicate or setup mistake. Once other records refer to it, preserve that history and make the value inactive when the screen provides that option.
Before confirming, check for related **Commodity Items**, **Item Rows**, **Items**, **Order Line Items**, and **Quote Rows**, plus the remaining screen fields. Brisk may refuse deletion when another record depends on this one; resolve the duplicate or use the supported correction workflow instead of breaking the trail.
On the confirmation page, verify **Name**. After confirmation, return to the Taxes list and make sure only the intended tax was removed.
Review tax details
The Taxes detail screen in the Brisk documentation demo.
Use the detail page as the shared record of what this tax currently means. Verify **Name**, **Percent**, **Liability Account**, and **Payee** before relying on it for a decision.
Follow **Liability Account**, and **Payee** to determine whether the issue is on this tax or on one of those linked records.
Next check: Verify this tax in **Commodity Items**, **Item Rows**, **Items**, and **Order Line Items**, plus the remaining screen fields before staff build new activity on it; correct ownership, classification, and active state now rather than after transactions accumulate.
Edit an existing tax
Edit this tax to keep the same real-world party, item, location, or resource accurate. Do not repurpose it for a different entity after activity is attached.
1. Open the detail page. Compare **Liability Account**, and **Payee** with the supporting document or approved request.
2. Recheck **Liability Account**. These values are most likely to change account balances, financial periods, and statement results.
3. Save the change, return to the list, and confirm that the tax now appears under the expected **Name**.
After the change: Verify this tax in **Commodity Items**, **Item Rows**, **Items**, and **Order Line Items**, plus the remaining screen fields before staff build new activity on it; correct ownership, classification, and active state now rather than after transactions accumulate.
Find and review taxes
The Taxes list screen in the Brisk documentation demo.
Use the Taxes list to find the correct record before opening or changing it. Compare **Name**. Records with similar names or numbers can still belong to different **Liability Account**, and **Payee**.
- The initial order emphasizes **Name**. Select a column heading when you need a different comparison.
Open the tax whose **Name** match the task. If it is missing, clear the list filters and recheck the identifying information shown on the screen rather than creating a replacement immediately.
## Fields and business rules
Brisk stores 4 user-relevant fields for this tax, including 2 linked-record selections and 0 controlled-choice fields. Create and edit screens may hide calculated or workflow-managed values from this full reference.
| Field | Required | What it controls |
|---|---:|---|
| **Name** | Yes | Set an easily understandable name for this tax. |
| **Percent** | Yes | Use this field to set the tax rate. For example, if you need to collect a 6 percent sales tax, this field should be set to 6.0. |
| **Liability Account** | No | Sets the GL account that tracks sales tax transactions. |
| **Payee** | No | For taxes with rates above 0, create a vendor in the system for the tax authority. This allows Brisk to keep track of your tax liabilities. |
## What happens next
Verify this tax in **Commodity Items**, **Item Rows**, **Items**, and **Order Line Items**, plus the remaining screen fields before staff build new activity on it; correct ownership, classification, and active state now rather than after transactions accumulate.
## Common mistakes and troubleshooting
- **The record will not save:** Recheck **Name**, and **Percent** and any message beside the field. A required related record may also be inactive or unavailable to your role.
- **The values look right but the result is wrong:** Open **Liability Account**, and **Payee** from the detail page. Correct the specific relationship that is wrong instead of forcing a total or status to compensate for it.
# 1099 Account Configurations
# 1099 Account Configurations
Purpose and when to use this record
Classify general-ledger accounts into the standard, NEC, and interest 1099 reporting groups.
## At a glance
- **Identify it by:** the identifying information shown on the screen.
- **Why care:** Dates, accounts, amounts, posting state, and period locks can change financial reports. Verify them against the source document before finalizing the record.
## Before you begin
You need the Brisk permission for the action you are taking on 1099 account configurations. If a Create, Edit, or Delete control is absent, do not work around it with another user’s account; ask an administrator to review your role.
Find and review 1099 account configurations
The 1099 Account Configurations list screen in the Brisk documentation demo.
Use the 1099 Account Configurations list to find the correct record before opening or changing it. Compare the identifying information shown on the screen. Compare the full identifier rather than relying on a similar name.
Open the 1099 Account Configuration whose the identifying information shown on the screen match the task. If it is missing, clear the list filters and recheck the identifying information shown on the screen rather than creating a replacement immediately.
## Fields and business rules
Brisk stores 0 user-relevant fields for this 1099 Account Configuration, including 0 linked-record selections and 0 controlled-choice fields. Create and edit screens may hide calculated or workflow-managed values from this full reference.
| Field | Required | What it controls |
|---|---:|---|
## What happens next
Use the originating business process to interpret this 1099 Account Configuration. If it records a failure or exception, correct the source process and create a new successful event rather than rewriting the audit trail.
## Common mistakes and troubleshooting
- **The values look right but the result is wrong:** Compare this 1099 Account Configuration with the source document or approved setup decision, then check the downstream screen where it is used.
# Transactions
# Transactions
Purpose and when to use this record
Trace the individual general-ledger postings created by sales, purchases, payments, manufacturing, and journal entries.
## At a glance
- **Identify it by:** **Date Created**.
- **Check its business context:** **Account**, **Warehouse**, **Journal Entry**, **Parent Sale**, and **Parent Return**.
- **Why care:** Dates, accounts, amounts, posting state, and period locks can change financial reports. Verify them against the source document before finalizing the record.
## Before you begin
You need the Brisk permission for the action you are taking on transactions. If a Create, Edit, or Delete control is absent, do not work around it with another user’s account; ask an administrator to review your role.
Have valid **Account** records ready first. Those selections determine where this Transaction belongs and which later screens can find it.
Edit an existing Transaction
Edit this Transaction to keep the same real-world party, item, location, or resource accurate. Do not repurpose it for a different entity after activity is attached.
1. Open the detail page. Compare **Account**, **Warehouse**, **Journal Entry**, **Parent Sale**, **Parent Return**, and **Parent Purchase**, plus the remaining screen fields with the supporting document or approved request.
2. Recheck **Date Created**, **Account**, **Warehouse**, **Amount**, and **Parent Customer Credit**. These values are most likely to change account balances, financial periods, and statement results.
3. Save the change, return to the list, and confirm that the Transaction now appears under the expected **Date Created**.
After the change: Verify this Transaction in **Bank Information**, **Credit Card Transactions**, **Deposit Balancing Transactions**, and **Deposits**, plus the remaining screen fields before staff build new activity on it; correct ownership, classification, and active state now rather than after transactions accumulate.
Create a Transaction
Create a Transaction after searching for the person, organization, item, location, or resource under alternate names and identifiers. Merge or correct an existing master record instead of creating a duplicate.
1. Select the business context first: **Account**, **Warehouse**, **Journal Entry**, **Parent Sale**, **Parent Return**, and **Parent Purchase**, plus the remaining screen fields.
2. Enter the required identifying and operational values: **Account**, and **Amount**.
3. Review **Date Created**, and **Memo** against the source document or approved setup decision.
4. Save the Transaction, then confirm **Date Created** on its detail page before continuing.
After saving: Verify this Transaction in **Bank Information**, **Credit Card Transactions**, **Deposit Balancing Transactions**, and **Deposits**, plus the remaining screen fields before staff build new activity on it; correct ownership, classification, and active state now rather than after transactions accumulate.
Review Transaction details
Use the detail page as the shared record of what this Transaction currently means. Verify **Date Created**, and **Amount** before relying on it for a decision.
Follow **Account**, **Warehouse**, **Journal Entry**, **Parent Sale**, **Parent Return**, and **Parent Purchase**, plus the remaining screen fields to determine whether the issue is on this Transaction or on one of those linked records.
Next check: Verify this Transaction in **Bank Information**, **Credit Card Transactions**, **Deposit Balancing Transactions**, and **Deposits**, plus the remaining screen fields before staff build new activity on it; correct ownership, classification, and active state now rather than after transactions accumulate.
Find and review transactions
The Transactions list screen in the Brisk documentation demo.
Use the Transactions list to find the correct record before opening or changing it. Compare **Date Created**. Records with similar names or numbers can still belong to different **Account**, **Warehouse**, **Journal Entry**, **Parent Sale**, **Parent Return**, and **Parent Purchase**, plus the remaining screen fields.
- Keyword search checks **Memo**.
- Narrow the list with **Account** filters.
- The date filter uses **Date Created**; choose a range that matches the business event you are reconciling.
Open the Transaction whose **Date Created** match the task. If it is missing, clear the list filters and recheck **Account**, and **Date Created** rather than creating a replacement immediately.
## Fields and business rules
Brisk stores 24 user-relevant fields for this Transaction, including 21 linked-record selections and 0 controlled-choice fields. Create and edit screens may hide calculated or workflow-managed values from this full reference.
| Field | Required | What it controls |
|---|---:|---|
| **Date Created** | No | Date and time recorded for date created on this transaction. |
| **Account** | Yes | The account associated with this transaction. |
| **Warehouse** | No | Associates this transaction with a system warehouse. |
| **Amount** | Yes | The amount value recorded for this transaction. |
| **Memo** | No | The memo recorded for this transaction. |
| **Journal Entry** | No | The journal entry associated with this transaction. |
| **Parent Sale** | No | The parent sale associated with this transaction. |
| **Parent Return** | No | The parent return associated with this transaction. |
| **Parent Purchase** | No | The parent purchase associated with this transaction. |
| **Parent Mfg Instance** | No | The parent mfg instance associated with this transaction. |
| **Parent Journal Entry** | No | The parent journal entry associated with this transaction. |
| **Parent Inv Adjustment** | No | The parent inv adjustment associated with this transaction. |
| **Parent Payment** | No | The parent payment associated with this transaction. |
| **Parent Commission Payment** | No | The parent commission payment associated with this transaction. |
| **Parent Invoice** | No | The parent invoice associated with this transaction. |
| **Parent Customer Credit** | No | The parent customer credit associated with this transaction. |
| **Parent Inventory Receipt** | No | The parent inventory receipt associated with this transaction. |
| **Parent Credit Memo** | No | The parent credit memo associated with this transaction. |
| **Parent Payout** | No | The parent payout associated with this transaction. |
| **Parent Credit Card Charge** | No | The parent credit card charge associated with this transaction. |
| **Parent Deposit** | No | The parent deposit associated with this transaction. |
| **Parent Reconciliation** | No | The parent reconciliation associated with this transaction. |
| **Parent Sheriff Receipt** | No | The parent sheriff receipt associated with this transaction. |
| **Parent Sheriff Refund** | No | The parent sheriff refund associated with this transaction. |
## What happens next
Verify this Transaction in **Bank Information**, **Credit Card Transactions**, **Deposit Balancing Transactions**, and **Deposits**, plus the remaining screen fields before staff build new activity on it; correct ownership, classification, and active state now rather than after transactions accumulate.
## Common mistakes and troubleshooting
- **The record will not save:** Recheck **Account**, and **Amount** and any message beside the field. A required related record may also be inactive or unavailable to your role.
- **The values look right but the result is wrong:** Open **Account**, **Warehouse**, **Journal Entry**, **Parent Sale**, **Parent Return**, and **Parent Purchase**, plus the remaining screen fields from the detail page. Correct the specific relationship that is wrong instead of forcing a total or status to compensate for it.
# Vehicles
# Vehicles
Purpose and when to use this record
Maintain the business vehicles available for mileage-expense records.
## At a glance
- **Identify it by:** **Name**.
- **Why care:** Dates, accounts, amounts, posting state, and period locks can change financial reports. Verify them against the source document before finalizing the record.
## Before you begin
You need the Brisk permission for the action you are taking on vehicles. If a Create, Edit, or Delete control is absent, do not work around it with another user’s account; ask an administrator to review your role.
Create a Vehicle
The Vehicles create screen in the Brisk documentation demo.
Create a Vehicle after searching for the person, organization, item, location, or resource under alternate names and identifiers. Merge or correct an existing master record instead of creating a duplicate.
1. Select the business context first.
2. Enter the required identifying and operational values: **Name**.
3. Review the identifying information shown on the screen against the source document or approved setup decision.
4. Save the Vehicle, then confirm **Name** on its detail page before continuing.
After saving: Verify this Vehicle in **Mileage Records** before staff build new activity on it; correct ownership, classification, and active state now rather than after transactions accumulate.
Delete a Vehicle
Delete this Vehicle only if it is an unused duplicate or setup mistake. Once other records refer to it, preserve that history and make the value inactive when the screen provides that option.
Before confirming, check for related **Mileage Records**. Brisk may refuse deletion when another record depends on this one; resolve the duplicate or use the supported correction workflow instead of breaking the trail.
On the confirmation page, verify **Name**. After confirmation, return to the Vehicles list and make sure only the intended Vehicle was removed.
Review Vehicle details
Use the detail page as the shared record of what this Vehicle currently means. Verify **Name** before relying on it for a decision.
Compare the Vehicle with its source document or approved setup request before deciding that it needs correction.
Next check: Verify this Vehicle in **Mileage Records** before staff build new activity on it; correct ownership, classification, and active state now rather than after transactions accumulate.
Edit an existing Vehicle
Edit this Vehicle to keep the same real-world party, item, location, or resource accurate. Do not repurpose it for a different entity after activity is attached.
1. Open the detail page. Compare **Name** with the supporting document or approved request.
2. Recheck the identifying information shown on the screen. These values are most likely to change account balances, financial periods, and statement results.
3. Save the change, return to the list, and confirm that the Vehicle now appears under the expected **Name**.
After the change: Verify this Vehicle in **Mileage Records** before staff build new activity on it; correct ownership, classification, and active state now rather than after transactions accumulate.
Find and review vehicles
The Vehicles list screen in the Brisk documentation demo.
Use the Vehicles list to find the correct record before opening or changing it. Compare **Name**. Compare the full identifier rather than relying on a similar name.
Open the Vehicle whose **Name** match the task. If it is missing, clear the list filters and recheck the identifying information shown on the screen rather than creating a replacement immediately.
## Fields and business rules
Brisk stores 1 user-relevant fields for this Vehicle, including 0 linked-record selections and 0 controlled-choice fields. Create and edit screens may hide calculated or workflow-managed values from this full reference.
| Field | Required | What it controls |
|---|---:|---|
| **Name** | Yes | Set the name of this vehicle. |
## What happens next
Verify this Vehicle in **Mileage Records** before staff build new activity on it; correct ownership, classification, and active state now rather than after transactions accumulate.
## Common mistakes and troubleshooting
- **The record will not save:** Recheck **Name** and any message beside the field. A required related record may also be inactive or unavailable to your role.
- **The values look right but the result is wrong:** Compare this Vehicle with the source document or approved setup decision, then check the downstream screen where it is used.
# Vendor Credit Memo Applications
# Vendor Credit Memo Applications
Purpose and when to use this record
Apply part or all of a vendor credit memo to a specific vendor invoice without losing the original credit trail.
## At a glance
- **Identify it by:** **Source Credit Memo**, **Vendor Invoice**, **Applied Amount**, and **Memo**.
- **Check its business context:** **Source Credit Memo**, and **Vendor Invoice**.
- **Why care:** Dates, accounts, amounts, posting state, and period locks can change financial reports. Verify them against the source document before finalizing the record.
## Before you begin
You need the Brisk permission for the action you are taking on vendor credit memo applications. If a Create, Edit, or Delete control is absent, do not work around it with another user’s account; ask an administrator to review your role.
Have valid **Source Credit Memo**, and **Vendor Invoice** records ready first. Those selections determine where this Vendor Credit Memo Application belongs and which later screens can find it.
Delete a Vendor Credit Memo Application
Delete this Vendor Credit Memo Application only when it was entered by mistake and no downstream history depends on it. Use a reversal, void, credit, counter-adjustment, or status correction for a real event that later changed.
On the confirmation page, verify **Source Credit Memo**, **Vendor Invoice**, **Applied Amount**, and **Memo**. After confirmation, return to the Vendor Credit Memo Applications list and make sure only the intended Vendor Credit Memo Application was removed.
Review Vendor Credit Memo Application details
Use the detail page as the shared record of what this Vendor Credit Memo Application currently means. Verify **Applied Amount** before relying on it for a decision.
Follow **Source Credit Memo**, and **Vendor Invoice** to determine whether the issue is on this Vendor Credit Memo Application or on one of those linked records.
Next check: Recheck the vendor invoice balance and the remaining unapplied credit so neither amount is overstated.
Find and review vendor credit memo applications
The Vendor Credit Memo Applications list screen in the Brisk documentation demo.
Use the Vendor Credit Memo Applications list to find the correct record before opening or changing it. Compare **Source Credit Memo**, **Vendor Invoice**, **Applied Amount**, and **Memo**. Records with similar names or numbers can still belong to different **Source Credit Memo**, and **Vendor Invoice**.
- The initial order emphasizes **Created At**, and **Id**. Select a column heading when you need a different comparison.
Open the Vendor Credit Memo Application whose **Source Credit Memo**, **Vendor Invoice**, **Applied Amount**, and **Memo** match the task. If it is missing, clear the list filters and recheck the identifying information shown on the screen rather than creating a replacement immediately.
## Fields and business rules
Brisk stores 4 user-relevant fields for this Vendor Credit Memo Application, including 2 linked-record selections and 0 controlled-choice fields. Create and edit screens may hide calculated or workflow-managed values from this full reference.
| Field | Required | What it controls |
|---|---:|---|
| **Source Credit Memo** | Yes | The source credit memo associated with this vendor credit memo application. |
| **Vendor Invoice** | Yes | The vendor invoice associated with this vendor credit memo application. |
| **Applied Amount** | Yes | The applied amount value recorded for this vendor credit memo application. |
| **Memo** | No | The memo recorded for this vendor credit memo application. |
## What happens next
Recheck the vendor invoice balance and the remaining unapplied credit so neither amount is overstated.
## Common mistakes and troubleshooting
- **The record will not save:** Recheck **Source Credit Memo**, **Vendor Invoice**, and **Applied Amount** and any message beside the field. A required related record may also be inactive or unavailable to your role.
- **The values look right but the result is wrong:** Open **Source Credit Memo**, and **Vendor Invoice** from the detail page. Correct the specific relationship that is wrong instead of forcing a total or status to compensate for it.
# Vendor Invoices
# Vendor Invoices
Purpose and when to use this record
Use a vendor invoice to record an amount your business owes a vendor. The record combines the vendor's header information with one or more expense or asset lines. It also tracks payments and vendor-credit applications so Brisk can calculate the remaining unpaid amount.
At a glance
- **Vendor and invoice number** identify the source bill.
- **Invoice Date**, **Terms**, and **Due Date** control payment timing. When terms are available, Brisk calculates the due date from the invoice date plus the terms length.
- **Subtotal**, **Discount**, and **Amount** represent the gross amount, prompt-payment discount, and resulting net amount.
- **Paid**, **Posted**, and **Edit Locked** are status indicators; do not treat them as ordinary descriptive fields.
- Expense/asset lines allocate the invoice amount to accounts and, when applicable, warehouses or receiving lines.
Find and review vendor invoices
The Vendor Invoices list screen in the Brisk documentation demo.
Open **Accounting → Vendor Invoices**. The list is paginated and supports filtering by vendor and searching memo text. Use **Payables** when your task is to review unpaid balances and decide what to pay.
Create a vendor invoice
1. Select the vendor and enter the vendor's **Invoice #** exactly enough to recognize duplicates.
2. Enter **Invoice Date**. If the vendor has payment terms, Brisk uses them; otherwise select terms on the invoice. Brisk recalculates **Due Date** from that information.
3. Enter a memo that will help later review.
4. Add expense or asset lines. Choose the relevant account, amount, optional warehouse, and a useful line memo.
5. Confirm **Subtotal**, **Discount**, and net **Amount**. If the discount is zero and valid prompt-payment terms apply, Brisk can calculate the discount; the amount is then subtotal minus discount, never below zero.
6. Save and inspect the detail page before moving to payment.
If certificate-of-insurance warnings are enabled and the selected vendor's certificate has expired, Brisk displays a warning. Corn checkoff fields appear only when that feature is enabled.
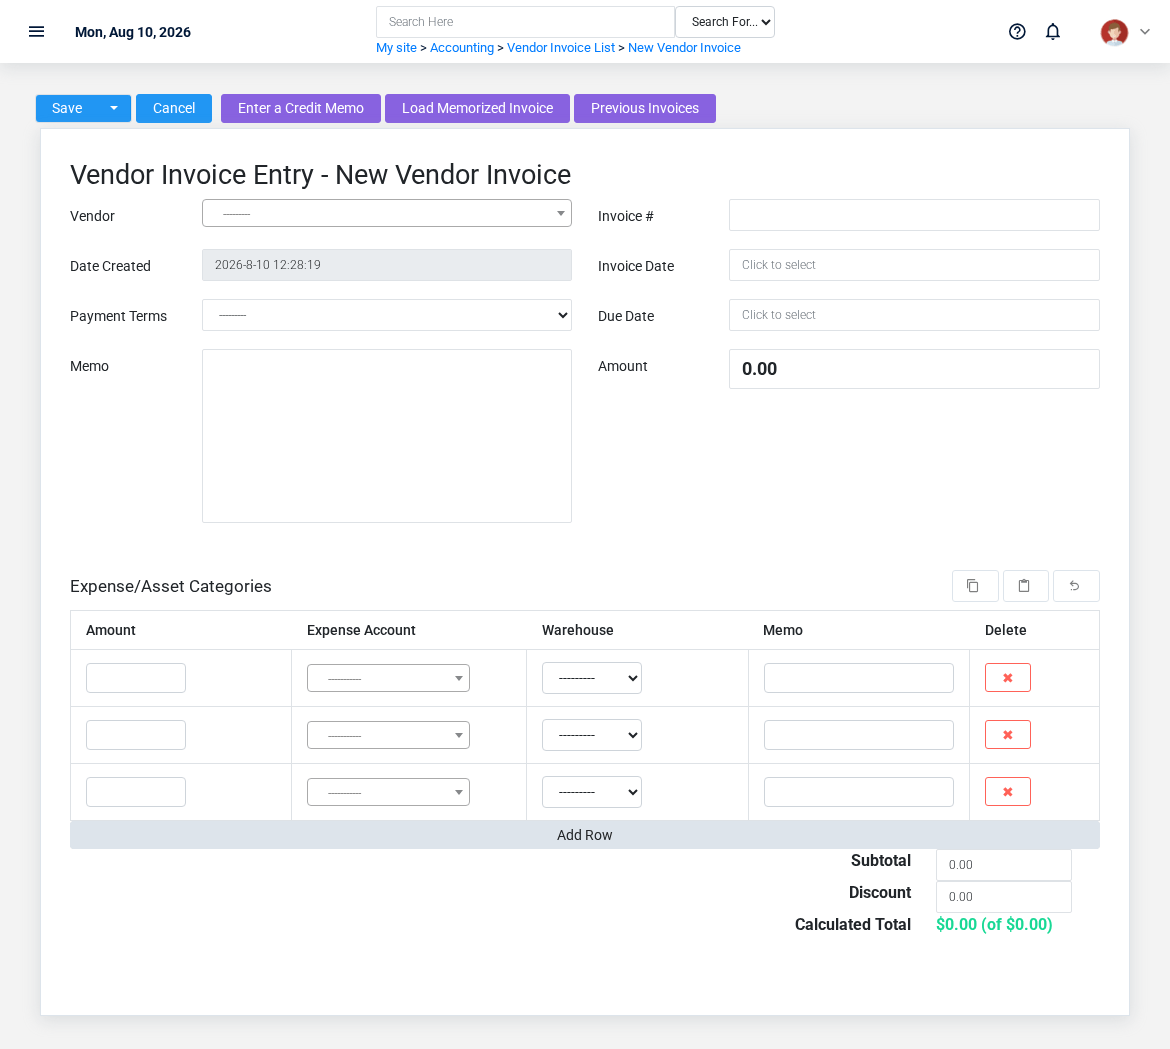
View invoice details and related records
The fictional vendor invoice before posting, with its receiving-ticket link and accounting line.
The detail page brings together invoice lines, credit applications, accounting transactions, related inventory receipts, and specialized commodity or freight information when present. Use **View Credit Applications** to inspect credits. An unpaid invoice offers **Pay Invoice** with the vendor and unpaid amount carried into payment entry; a paid invoice links to its latest non-deleted payment.
The unpaid amount is the invoice amount less both payment allocations and applied vendor credits. Verify those related records before assuming a checked **Paid** status tells the whole story.
Edit an existing invoice
Open the detail page and choose **Update**. Changing the vendor, invoice number, dates, terms, totals, discount, or allocation lines can require Brisk to reprocess related values. Recheck the due date and net amount after editing. Tonnage-report source dates are shown as disabled reference values when the invoice came from that process.
Delete an invoice
Deletion uses a confirmation screen. Because invoices can be protected by payment, receipt, credit, or accounting relationships, deletion may be blocked. Check related records and your accounting policy before attempting it; do not remove a posted record merely to correct an entry.
Pay an invoice
From an unpaid invoice, select **Pay Invoice**. Brisk carries the invoice, vendor, display name, and current unpaid amount into payment entry. Confirm the bank account, payment date, check or reference number, and allocation before saving. Continue with [Vendor Payments](https://help.brisksystems.us/link/2584#bkmrk-overview).
Common mistakes and troubleshooting
- If the due date is unexpected, verify the invoice date, selected terms, and the vendor's default terms.
- If the net amount is unexpected, compare subtotal and discount; an eligible calculated discount may have been applied.
- If an invoice cannot be deleted, inspect payments, credit applications, inventory receipts, and accounting transactions linked on its detail page.
- If corn checkoff or tonnage fields are missing, those fields are conditional and may depend on configuration or how the invoice was created.
# Work Periods
# Work Periods
Purpose and when to use this record
Bound an operating period for warehouse activity, deposit entry, and close/lock controls.
## At a glance
- **Identify it by:** **Parent**, **Opening Date**, **Closing Date**, and **Warehouse**.
- **Check its business context:** **Parent**, and **Warehouse**.
- **Why care:** Dates, accounts, amounts, posting state, and period locks can change financial reports. Verify them against the source document before finalizing the record.
- **Why care:** Treat posted, processed, paid, reversed, and edit-locked states as controls—not ordinary descriptive fields. Confirm the source transaction before changing any state that the screen permits you to change.
## Before you begin
You need the Brisk permission for the action you are taking on work periods. If a Create, Edit, or Delete control is absent, do not work around it with another user’s account; ask an administrator to review your role.
Have valid **Parent** records ready first. Those selections determine where this Work Period belongs and which later screens can find it.
Create a Work Period
The Work Periods create screen in the Brisk documentation demo.
Create a Work Period after searching for the person, organization, item, location, or resource under alternate names and identifiers. Merge or correct an existing master record instead of creating a duplicate.
1. Select the business context first: **Parent**, and **Warehouse**.
2. Enter the required identifying and operational values: **Parent**, and **Opening Date**.
3. Review **Locked**, and **Deposits Entered** deliberately; these choices control availability or workflow rather than merely describing the record.
4. Save the Work Period, then confirm **Parent**, **Opening Date**, **Closing Date**, **Warehouse**, **Locked**, and **Memo**, plus the remaining screen fields on its detail page before continuing.
After saving: Verify this Work Period in **Deposits**, and **Work Period Overages/Shortages** before staff build new activity on it; correct ownership, classification, and active state now rather than after transactions accumulate.
Delete a Work Period
Delete this Work Period only if it is an unused duplicate or setup mistake. Once other records refer to it, preserve that history and make the value inactive when the screen provides that option.
Before confirming, check for related **Deposits**, and **Work Period Overages/Shortages**. Brisk may refuse deletion when another record depends on this one; resolve the duplicate or use the supported correction workflow instead of breaking the trail.
On the confirmation page, verify **Parent**, **Opening Date**, **Closing Date**, and **Warehouse**. After confirmation, return to the Work Periods list and make sure only the intended Work Period was removed.
Review Work Period details
Use the detail page as the shared record of what this Work Period currently means. Verify **Locked** before relying on it for a decision.
Follow **Parent**, and **Warehouse** to determine whether the issue is on this Work Period or on one of those linked records.
Next check: Verify this Work Period in **Deposits**, and **Work Period Overages/Shortages** before staff build new activity on it; correct ownership, classification, and active state now rather than after transactions accumulate.
Edit an existing Work Period
Edit this Work Period to keep the same real-world party, item, location, or resource accurate. Do not repurpose it for a different entity after activity is attached.
1. Open the detail page. Compare **Parent**, and **Warehouse** with the supporting document or approved request.
2. Recheck **Warehouse**, and **Locked**. These values are most likely to change account balances, financial periods, and statement results.
3. Save the change, return to the list, and confirm that the Work Period now appears under the expected **Locked**.
After the change: Verify this Work Period in **Deposits**, and **Work Period Overages/Shortages** before staff build new activity on it; correct ownership, classification, and active state now rather than after transactions accumulate.
Find and review work periods
The Work Periods list screen in the Brisk documentation demo.
Use the Work Periods list to find the correct record before opening or changing it. Compare **Parent**, **Opening Date**, **Closing Date**, and **Warehouse**. Records with similar names or numbers can still belong to different **Parent**, and **Warehouse**.
- The initial order emphasizes **Opening Date**. Select a column heading when you need a different comparison.
Open the Work Period whose **Parent**, **Opening Date**, **Closing Date**, and **Warehouse** match the task. If it is missing, clear the list filters and recheck **Locked** rather than creating a replacement immediately.
## Fields and business rules
Brisk stores 7 user-relevant fields for this Work Period, including 2 linked-record selections and 0 controlled-choice fields. Create and edit screens may hide calculated or workflow-managed values from this full reference.
| Field | Required | What it controls |
|---|---:|---|
| **Parent** | Yes | Parent work period in the hierarchy. |
| **Opening Date** | Yes | Date and time recorded for opening date on this work period. |
| **Closing Date** | No | Date and time recorded for closing date on this work period. |
| **Warehouse** | No | Optionally scope this work period to a system warehouse. |
| **Locked** | No | Whether the locked option applies to this work period. |
| **Memo** | No | The memo recorded for this work period. |
| **Deposits Entered** | No | Indicates whether this work period has had deposits entered or not. |
## What happens next
Verify this Work Period in **Deposits**, and **Work Period Overages/Shortages** before staff build new activity on it; correct ownership, classification, and active state now rather than after transactions accumulate.
## Common mistakes and troubleshooting
- **The record will not save:** Recheck **Parent**, and **Opening Date** and any message beside the field. A required related record may also be inactive or unavailable to your role.
- **The record saved but is not available where expected:** Recheck **Locked**, then clear the filters on the destination list. A saved record can still be inactive, unpublished, locked, unapproved, or in the wrong workflow state.
- **The values look right but the result is wrong:** Open **Parent**, and **Warehouse** from the detail page. Correct the specific relationship that is wrong instead of forcing a total or status to compensate for it.
# Years
# Years
Purpose and when to use this record
Define the organization’s accounting-year boundaries and lock a completed year against ordinary edits.
## At a glance
- **Identify it by:** **Opening Date**, **Closing Date**, **Locked**, and **Memo**.
- **Why care:** Dates, accounts, amounts, posting state, and period locks can change financial reports. Verify them against the source document before finalizing the record.
- **Why care:** Treat posted, processed, paid, reversed, and edit-locked states as controls—not ordinary descriptive fields. Confirm the source transaction before changing any state that the screen permits you to change.
## Before you begin
You need the Brisk permission for the action you are taking on years. If a Create, Edit, or Delete control is absent, do not work around it with another user’s account; ask an administrator to review your role.
Create a Year
The Years create screen in the Brisk documentation demo.
Create a Year after searching for the person, organization, item, location, or resource under alternate names and identifiers. Merge or correct an existing master record instead of creating a duplicate.
1. Select the business context first.
2. Enter the required identifying and operational values: **Opening Date**.
3. Review **Locked** deliberately; these choices control availability or workflow rather than merely describing the record.
4. Save the Year, then confirm **Opening Date**, **Closing Date**, **Locked**, and **Memo** on its detail page before continuing.
After saving: Verify this Year in **Months**, and **Quarters** before staff build new activity on it; correct ownership, classification, and active state now rather than after transactions accumulate.
Delete a Year
Delete this Year only if it is an unused duplicate or setup mistake. Once other records refer to it, preserve that history and make the value inactive when the screen provides that option.
Before confirming, check for related **Months**, and **Quarters**. Brisk may refuse deletion when another record depends on this one; resolve the duplicate or use the supported correction workflow instead of breaking the trail.
On the confirmation page, verify **Opening Date**, **Closing Date**, **Locked**, and **Memo**. After confirmation, return to the Years list and make sure only the intended Year was removed.
Review Year details
Use the detail page as the shared record of what this Year currently means. Verify **Locked** before relying on it for a decision.
Compare the Year with its source document or approved setup request before deciding that it needs correction.
Next check: Verify this Year in **Months**, and **Quarters** before staff build new activity on it; correct ownership, classification, and active state now rather than after transactions accumulate.
Edit an existing Year
Edit this Year to keep the same real-world party, item, location, or resource accurate. Do not repurpose it for a different entity after activity is attached.
1. Open the detail page. Compare the identifying information shown on the screen with the supporting document or approved request.
2. Recheck **Locked**. These values are most likely to change account balances, financial periods, and statement results.
3. Save the change, return to the list, and confirm that the Year now appears under the expected **Locked**.
After the change: Verify this Year in **Months**, and **Quarters** before staff build new activity on it; correct ownership, classification, and active state now rather than after transactions accumulate.
Find and review years
The Years list screen in the Brisk documentation demo.
Use the Years list to find the correct record before opening or changing it. Compare **Opening Date**, **Closing Date**, **Locked**, and **Memo**. Compare the full identifier rather than relying on a similar name.
- The initial order emphasizes **Opening Date**. Select a column heading when you need a different comparison.
Open the Year whose **Opening Date**, **Closing Date**, **Locked**, and **Memo** match the task. If it is missing, clear the list filters and recheck **Locked** rather than creating a replacement immediately.
## Fields and business rules
Brisk stores 4 user-relevant fields for this Year, including 0 linked-record selections and 0 controlled-choice fields. Create and edit screens may hide calculated or workflow-managed values from this full reference.
| Field | Required | What it controls |
|---|---:|---|
| **Opening Date** | Yes | Date and time recorded for opening date on this year. |
| **Closing Date** | No | Date and time recorded for closing date on this year. |
| **Locked** | No | Whether the locked option applies to this year. |
| **Memo** | No | The memo recorded for this year. |
## What happens next
Verify this Year in **Months**, and **Quarters** before staff build new activity on it; correct ownership, classification, and active state now rather than after transactions accumulate.
## Common mistakes and troubleshooting
- **The record will not save:** Recheck **Opening Date** and any message beside the field. A required related record may also be inactive or unavailable to your role.
- **The record saved but is not available where expected:** Recheck **Locked**, then clear the filters on the destination list. A saved record can still be inactive, unpublished, locked, unapproved, or in the wrong workflow state.
- **The values look right but the result is wrong:** Compare this Year with the source document or approved setup decision, then check the downstream screen where it is used.