# Core Records
# Automatic Purchase Records
# Automatic Purchase Records
Purpose and when to use this record
Review a system-generated replenishment proposal and the purchase orders it created from reorder demand.
## At a glance
- **Identify it by:** the identifying information shown on the screen.
- **Why care:** Warehouse, item, unit, quantity, and cost must describe the same physical movement. A wrong warehouse or unit can make availability and valuation misleading.
## Before you begin
You need the Brisk permission for the action you are taking on automatic purchase records. If a Create, Edit, or Delete control is absent, do not work around it with another user’s account; ask an administrator to review your role.
Delete an Automatic Purchase Record
Delete this Automatic Purchase Record only when it was entered by mistake and no downstream history depends on it. Use a reversal, void, credit, counter-adjustment, or status correction for a real event that later changed.
Before confirming, check for related **Purchase Orders**. Brisk may refuse deletion when another record depends on this one; resolve the duplicate or use the supported correction workflow instead of breaking the trail.
On the confirmation page, verify the identifying information shown on the screen. After confirmation, return to the Automatic Purchase Records list and make sure only the intended Automatic Purchase Record was removed.
Review Automatic Purchase Record details
Use the detail page as the shared record of what this Automatic Purchase Record currently means. Verify the identifying information shown on the screen before relying on it for a decision.
Compare the Automatic Purchase Record with its source document or approved setup request before deciding that it needs correction.
Next check: Open the linked purchase orders and confirm vendors, warehouses, quantities, and costs before sending commitments to suppliers.
Find and review automatic purchase records
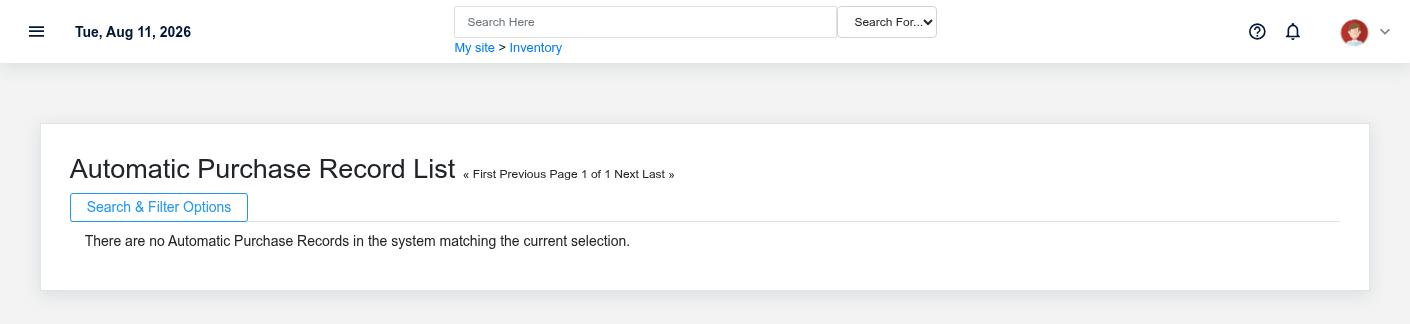
The Automatic Purchase Records list screen in the Brisk documentation demo.
Use the Automatic Purchase Records list to find the correct record before opening or changing it. Compare the identifying information shown on the screen. Compare the full identifier rather than relying on a similar name.
Open the Automatic Purchase Record whose the identifying information shown on the screen match the task. If it is missing, clear the list filters and recheck the identifying information shown on the screen rather than creating a replacement immediately.
## Fields and business rules
Brisk stores 0 user-relevant fields for this Automatic Purchase Record, including 0 linked-record selections and 0 controlled-choice fields. Create and edit screens may hide calculated or workflow-managed values from this full reference.
| Field | Required | What it controls |
|---|---:|---|
## What happens next
Open the linked purchase orders and confirm vendors, warehouses, quantities, and costs before sending commitments to suppliers.
## Common mistakes and troubleshooting
- **The values look right but the result is wrong:** Compare this Automatic Purchase Record with the source document or approved setup decision, then check the downstream screen where it is used.
# Foodservice Option Groups
# Foodservice Option Groups
Purpose and when to use this record
Define an ordered group of foodservice choices, such as sizes or add-ons, and whether cashiers can use it.
## At a glance
- **Identify it by:** **Group Name**.
- **Why care:** Warehouse, item, unit, quantity, and cost must describe the same physical movement. A wrong warehouse or unit can make availability and valuation misleading.
- **Why care:** Availability and publication flags affect future use without erasing history. Prefer disabling an obsolete setup record when existing transactions still refer to it.
## Before you begin
You need the Brisk permission for the action you are taking on foodservice option groups. If a Create, Edit, or Delete control is absent, do not work around it with another user’s account; ask an administrator to review your role.
Create a Foodservice Option Group
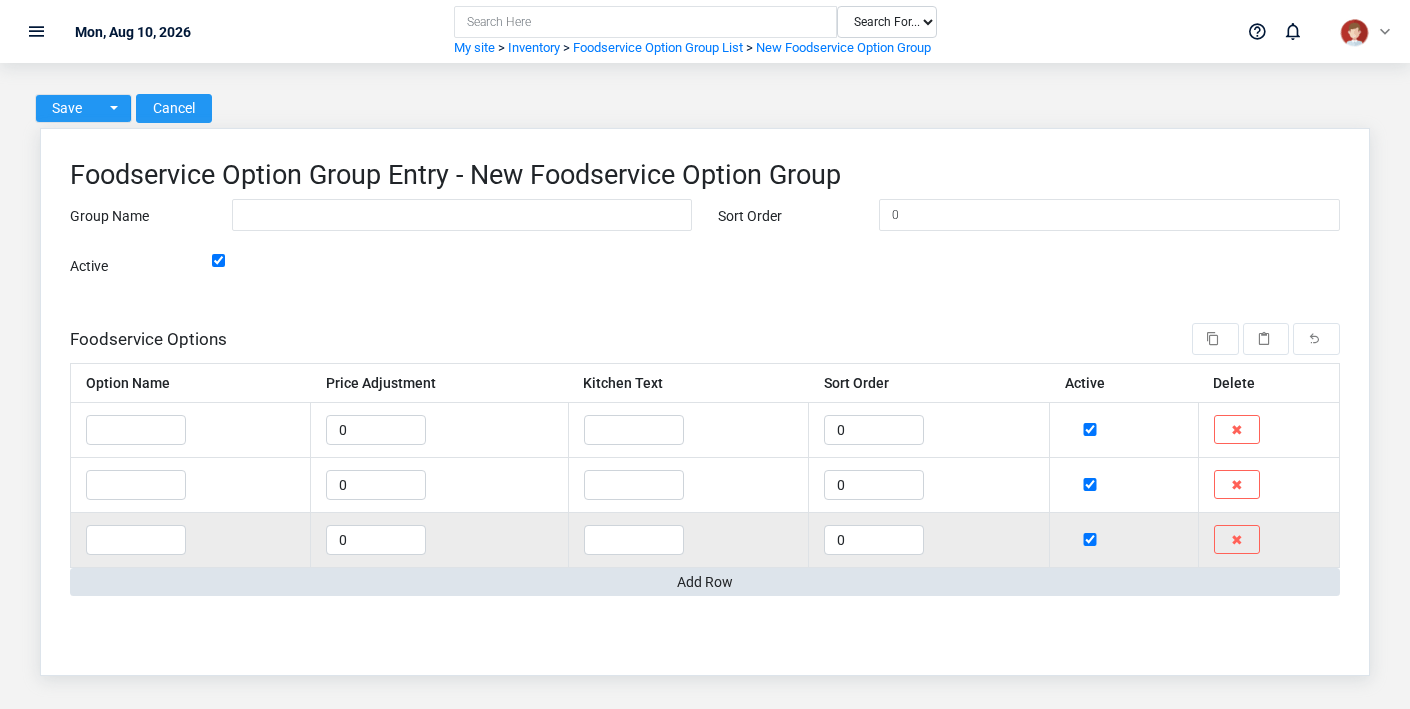
The Foodservice Option Groups create screen in the Brisk documentation demo.
Create a Foodservice Option Group only when the existing choices do not represent the policy or classification you need. Near-duplicate setup values split reporting and make later selection harder.
1. Select the business context first.
2. Enter the required identifying and operational values: **Group Name**.
3. Review **Active** deliberately; these choices control availability or workflow rather than merely describing the record.
4. Save the Foodservice Option Group, then confirm **Group Name** on its detail page before continuing.
After saving: Open **Foodservice Options**, and **Items** and confirm the Foodservice Option Group appears with the intended label and availability. Keep the old value for historical records when changing it would split or relabel prior reporting.
Delete a Foodservice Option Group
Delete this Foodservice Option Group only if it is an unused duplicate or setup mistake. Once other records refer to it, preserve that history and make the value inactive when the screen provides that option.
If the record is merely obsolete, use **Active** to remove it from future use while preserving existing references.
Before confirming, check for related **Foodservice Options**, and **Items**. Brisk may refuse deletion when another record depends on this one; resolve the duplicate or use the supported correction workflow instead of breaking the trail.
On the confirmation page, verify **Group Name**. After confirmation, return to the Foodservice Option Groups list and make sure only the intended Foodservice Option Group was removed.
Review Foodservice Option Group details
Use the detail page as the shared record of what this Foodservice Option Group currently means. Verify **Active** before relying on it for a decision.
Compare the Foodservice Option Group with its source document or approved setup request before deciding that it needs correction.
Next check: Open **Foodservice Options**, and **Items** and confirm the Foodservice Option Group appears with the intended label and availability. Keep the old value for historical records when changing it would split or relabel prior reporting.
Edit an existing Foodservice Option Group
Edit this Foodservice Option Group when the underlying policy or classification changed. First determine whether historical transactions should retain the old value; if so, deactivate the old choice and create a new one.
1. Open the detail page. Compare **Group Name** with the supporting document or approved request.
2. Recheck **Active**. These values are most likely to change warehouse availability, replenishment, quantities, and valuation.
3. Save the change, return to the list, and confirm that the Foodservice Option Group now appears under the expected **Active**.
After the change: Open **Foodservice Options**, and **Items** and confirm the Foodservice Option Group appears with the intended label and availability. Keep the old value for historical records when changing it would split or relabel prior reporting.
Find and review foodservice option groups
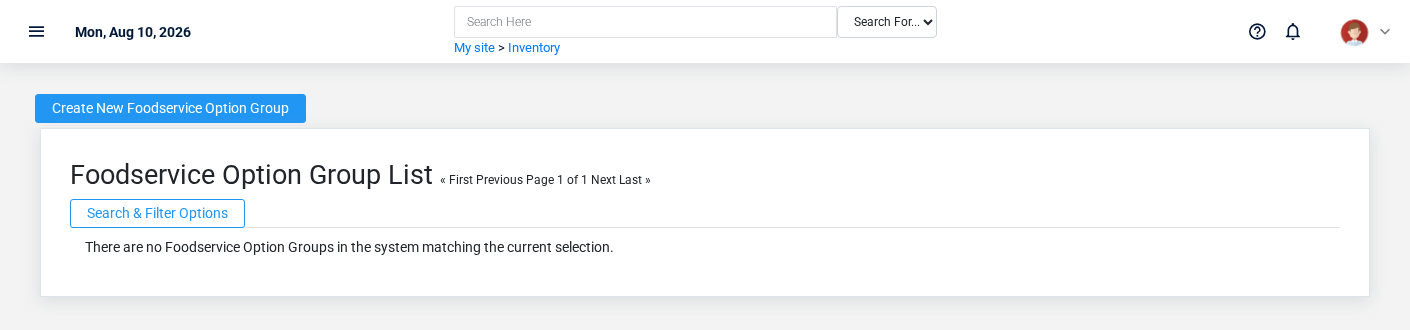
The Foodservice Option Groups list screen in the Brisk documentation demo.
Use the Foodservice Option Groups list to find the correct record before opening or changing it. Compare **Group Name**. Compare the full identifier rather than relying on a similar name.
- The initial order emphasizes **Sort Order**, and **Group Name**. Select a column heading when you need a different comparison.
Open the Foodservice Option Group whose **Group Name** match the task. If it is missing, clear the list filters and recheck **Active** rather than creating a replacement immediately.
## Fields and business rules
Brisk stores 3 user-relevant fields for this Foodservice Option Group, including 0 linked-record selections and 0 controlled-choice fields. Create and edit screens may hide calculated or workflow-managed values from this full reference.
| Field | Required | What it controls |
|---|---:|---|
| **Group Name** | Yes | Human-readable name for this foodservice option group. |
| **Sort Order** | No | The sort order value recorded for this foodservice option group. |
| **Active** | No | Whether this foodservice option group is active and available for use. |
## What happens next
Open **Foodservice Options**, and **Items** and confirm the Foodservice Option Group appears with the intended label and availability. Keep the old value for historical records when changing it would split or relabel prior reporting.
## Common mistakes and troubleshooting
- **The record will not save:** Recheck **Group Name** and any message beside the field. A required related record may also be inactive or unavailable to your role.
- **The record saved but is not available where expected:** Recheck **Active**, then clear the filters on the destination list. A saved record can still be inactive, unpublished, locked, unapproved, or in the wrong workflow state.
- **The values look right but the result is wrong:** Compare this Foodservice Option Group with the source document or approved setup decision, then check the downstream screen where it is used.
# Inventory Adjustments
# Inventory Adjustments
Purpose and when to use this record
Correct on-hand inventory for a warehouse with an auditable reason, quantities, costs, and resulting accounting impact.
## At a glance
- **Identify it by:** **Status**, and **Date Created**.
- **Check its business context:** **Warehouse**, and **Balancing Account**.
- **Why care:** Warehouse, item, unit, quantity, and cost must describe the same physical movement. A wrong warehouse or unit can make availability and valuation misleading.
- **Why care:** Treat posted, processed, paid, reversed, and edit-locked states as controls—not ordinary descriptive fields. Confirm the source transaction before changing any state that the screen permits you to change.
- **Why care:** Status communicates workflow progress to other staff. Change it only when the underlying work, approval, payment, or handoff has actually occurred.
## Before you begin
You need the Brisk permission for the action you are taking on inventory adjustments. If a Create, Edit, or Delete control is absent, do not work around it with another user’s account; ask an administrator to review your role.
Have valid **Balancing Account** records ready first. Those selections determine where this Inventory Adjustment belongs and which later screens can find it.
Create an Inventory Adjustment
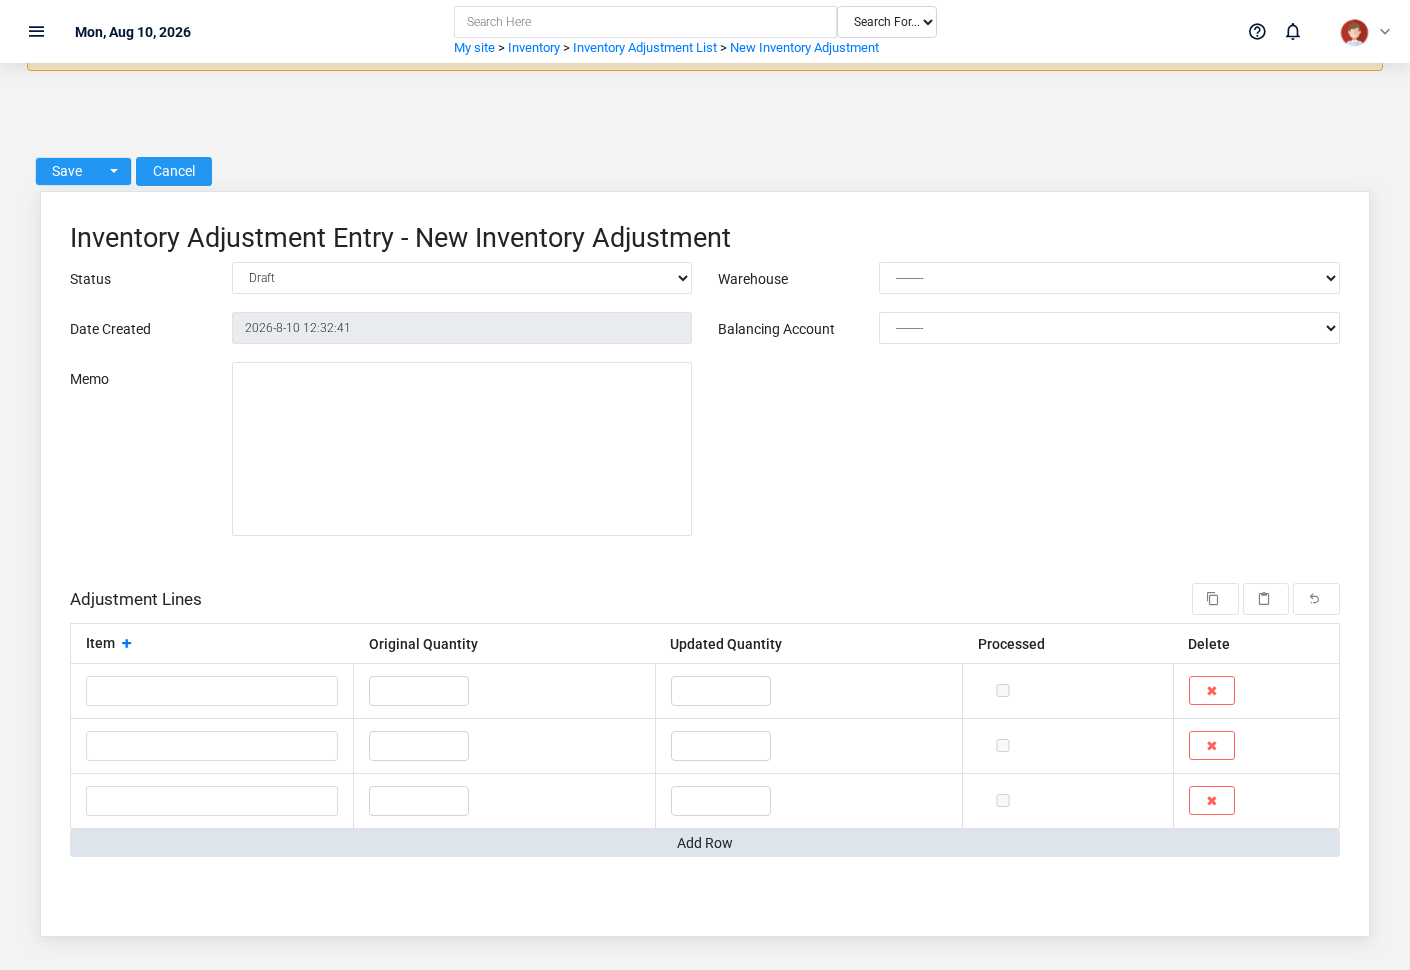
The Inventory Adjustments create screen in the Brisk documentation demo.
Create an Inventory Adjustment only after confirming that the source document or operational event has not already been entered.
1. Select the business context first: **Warehouse**, and **Balancing Account**.
2. Enter the required identifying and operational values: **Balancing Account**.
3. Review **Status**, and **Edit Locked** deliberately; these choices control availability or workflow rather than merely describing the record.
4. Save the Inventory Adjustment, then confirm **Status**, and **Date Created** on its detail page before continuing.
After saving: Review the resulting warehouse quantity and accounting entries. If the correction was wrong, make a traceable counter-adjustment rather than concealing the original event.
Delete an Inventory Adjustment
Delete this Inventory Adjustment only when it was entered by mistake and no downstream history depends on it. Use a reversal, void, credit, counter-adjustment, or status correction for a real event that later changed.
Before confirming, check for related **Adjustment Lines**, **Inventory Records**, **Inventory Transfers**, and **Transactions**. Brisk may refuse deletion when another record depends on this one; resolve the duplicate or use the supported correction workflow instead of breaking the trail.
On the confirmation page, verify **Status**, and **Date Created**. After confirmation, return to the Inventory Adjustments list and make sure only the intended Inventory Adjustment was removed.
Review Inventory Adjustment details
Use the detail page as the shared record of what this Inventory Adjustment currently means. Verify **Status**, **Date Created**, and **Edit Locked** before relying on it for a decision.
Follow **Warehouse**, and **Balancing Account** to determine whether the issue is on this Inventory Adjustment or on one of those linked records.
Next check: Review the resulting warehouse quantity and accounting entries. If the correction was wrong, make a traceable counter-adjustment rather than concealing the original event.
Edit an existing Inventory Adjustment
Edit this Inventory Adjustment to correct or complete the same source document or operational event; use the supported reversal or follow-up workflow when the business event itself changed.
1. Open the detail page. Compare **Warehouse**, and **Balancing Account** with the supporting document or approved request.
2. Recheck **Status**, **Warehouse**, **Date Created**, **Balancing Account**, and **Edit Locked**. These values are most likely to change warehouse availability, replenishment, quantities, and valuation.
3. Save the change, return to the list, and confirm that the Inventory Adjustment now appears under the expected **Status**, and **Edit Locked**.
After the change: Review the resulting warehouse quantity and accounting entries. If the correction was wrong, make a traceable counter-adjustment rather than concealing the original event.
Find and review inventory adjustments
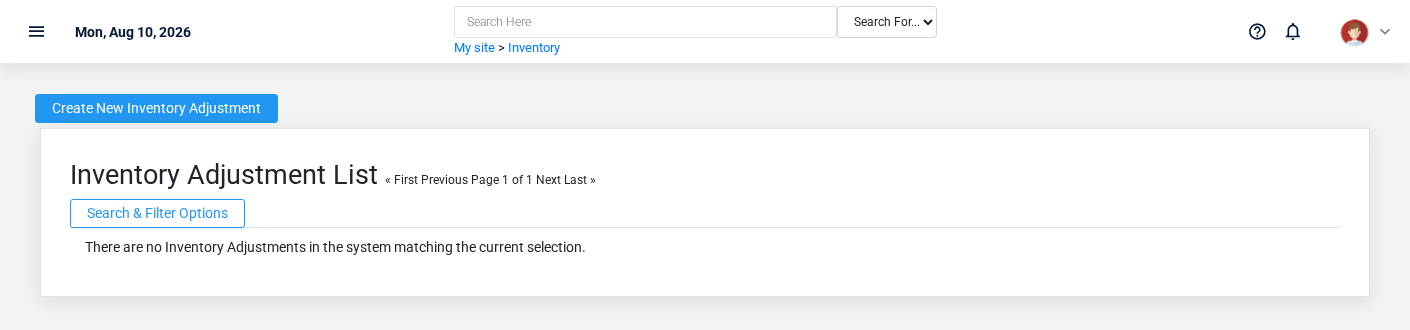
The Inventory Adjustments list screen in the Brisk documentation demo.
Use the Inventory Adjustments list to find the correct record before opening or changing it. Compare **Status**, and **Date Created**. Records with similar names or numbers can still belong to different **Warehouse**, and **Balancing Account**.
- The initial order emphasizes **Id**. Select a column heading when you need a different comparison.
Open the Inventory Adjustment whose **Status**, and **Date Created** match the task. If it is missing, clear the list filters and recheck **Status**, and **Edit Locked** rather than creating a replacement immediately.
## Fields and business rules
Brisk stores 6 user-relevant fields for this Inventory Adjustment, including 2 linked-record selections and 1 controlled-choice field. Create and edit screens may hide calculated or workflow-managed values from this full reference.
| Field | Required | What it controls |
|---|---:|---|
| **Status** | No | This is a system field that helps identify whether or not this document has affected the inventory and general ledger. Available values: Draft, Complete. |
| **Warehouse** | No | The inventory warehouse that this adjustment will affect. To adjust inventory in separate warehouses, separate inventory adjustments are required. |
| **Date Created** | No | Date and time recorded for date created on this inventory adjustment. |
| **Balancing Account** | Yes | The balancing account associated with this inventory adjustment. |
| **Memo** | No | The memo recorded for this inventory adjustment. |
| **Edit Locked** | No | Whether the edit locked option applies to this inventory adjustment. |
## What happens next
Review the resulting warehouse quantity and accounting entries. If the correction was wrong, make a traceable counter-adjustment rather than concealing the original event.
## Common mistakes and troubleshooting
- **The record will not save:** Recheck **Balancing Account** and any message beside the field. A required related record may also be inactive or unavailable to your role.
- **The record saved but is not available where expected:** Recheck **Status**, and **Edit Locked**, then clear the filters on the destination list. A saved record can still be inactive, unpublished, locked, unapproved, or in the wrong workflow state.
- **The values look right but the result is wrong:** Open **Warehouse**, and **Balancing Account** from the detail page. Correct the specific relationship that is wrong instead of forcing a total or status to compensate for it.
# Items In Inventory
# Items In Inventory
Purpose and when to use this record
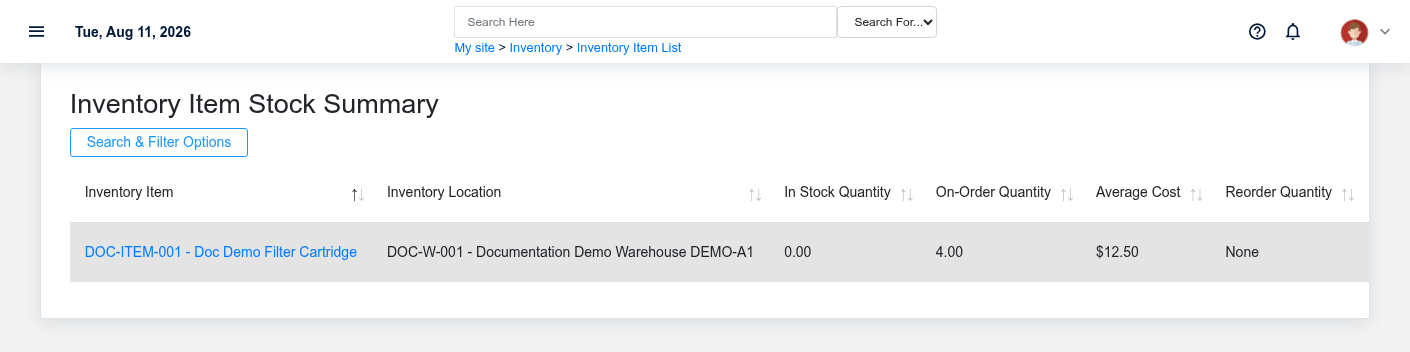
The Items In Inventory overview screen in the Brisk documentation demo.The Items In Inventory overview screen in the Brisk documentation demo.
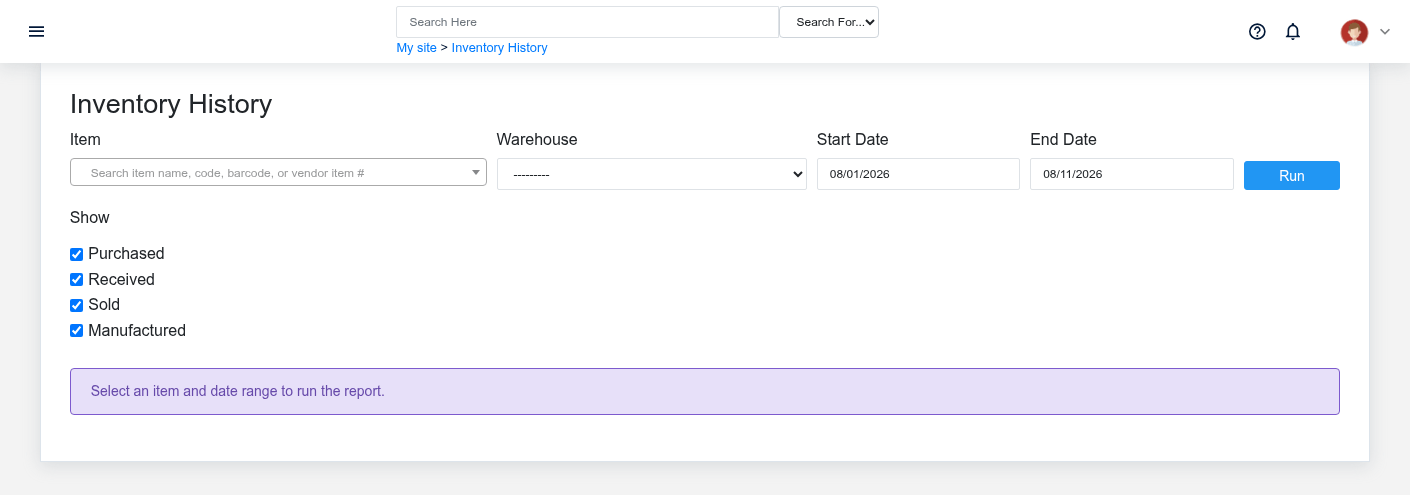
Review an item’s on-hand and available quantities across warehouses rather than changing the shared item definition.
## At a glance
- **Identify it by:** **Item**, **Warehouse**, **Average Cost**, and **Quantity**.
- **Check its business context:** **Item**, and **Warehouse**.
- **Why care:** Warehouse, item, unit, quantity, and cost must describe the same physical movement. A wrong warehouse or unit can make availability and valuation misleading.
## Before you begin
You need the Brisk permission for the action you are taking on items in inventory. If a Create, Edit, or Delete control is absent, do not work around it with another user’s account; ask an administrator to review your role.
Find and review items in inventory
The Items In Inventory list screen in the Brisk documentation demo.
Use the Items In Inventory list to find the correct record before opening or changing it. Compare **Item**, **Warehouse**, **Average Cost**, and **Quantity**. Records with similar names or numbers can still belong to different **Item**, and **Warehouse**.
- Narrow the list with **Warehouse** filters.
Open the Inventory Item whose **Item**, **Warehouse**, **Average Cost**, and **Quantity** match the task. If it is missing, clear the list filters and recheck **Warehouse** rather than creating a replacement immediately.
Review Inventory Item details
Use the detail page as the shared record of what this Inventory Item currently means. Verify **Item**, **Warehouse**, **Average Cost**, and **Quantity** before relying on it for a decision.
Follow **Item**, and **Warehouse** to determine whether the issue is on this Inventory Item or on one of those linked records.
Next check: Use **Item**, and **Warehouse** to interpret this Inventory Item. If it records a failure or exception, correct the source process and create a new successful event rather than rewriting the audit trail.
## Fields and business rules
Brisk stores 4 user-relevant fields for this Inventory Item, including 2 linked-record selections and 0 controlled-choice fields. Create and edit screens may hide calculated or workflow-managed values from this full reference.
| Field | Required | What it controls |
|---|---:|---|
| **Item** | No | The item associated with this inventory item. |
| **Warehouse** | No | The warehouse associated with this inventory item. |
| **Average Cost** | No | The average cost value recorded for this inventory item. |
| **Quantity** | No | The quantity value recorded for this inventory item. |
## What happens next
Use **Item**, and **Warehouse** to interpret this Inventory Item. If it records a failure or exception, correct the source process and create a new successful event rather than rewriting the audit trail.
## Common mistakes and troubleshooting
- **The values look right but the result is wrong:** Open **Item**, and **Warehouse** from the detail page. Correct the specific relationship that is wrong instead of forcing a total or status to compensate for it.
# Inventory Items Recevied
# Inventory Items Recevied
Purpose and when to use this record
Review the individual items and quantities received across inventory receipts.
## At a glance
- **Identify it by:** **Date Received**.
- **Check its business context:** **Receipt Link**, **Item**, and **Purchase Row**.
- **Why care:** Warehouse, item, unit, quantity, and cost must describe the same physical movement. A wrong warehouse or unit can make availability and valuation misleading.
- **Why care:** Treat posted, processed, paid, reversed, and edit-locked states as controls—not ordinary descriptive fields. Confirm the source transaction before changing any state that the screen permits you to change.
## Before you begin
You need the Brisk permission for the action you are taking on inventory items recevied. If a Create, Edit, or Delete control is absent, do not work around it with another user’s account; ask an administrator to review your role.
Find and review inventory items recevied
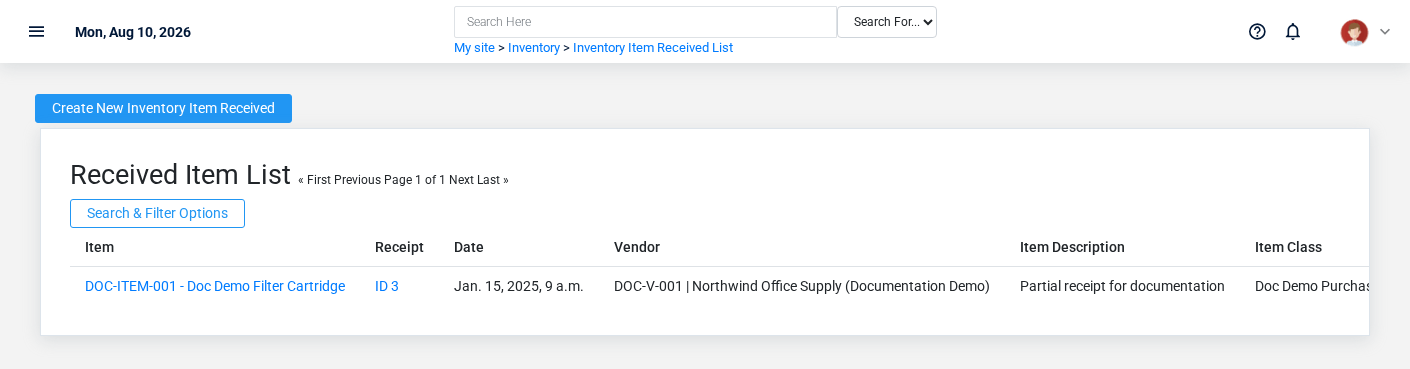
The Inventory Items Recevied list screen in the Brisk documentation demo.
Use the Inventory Items Recevied list to find the correct record before opening or changing it. Compare **Date Received**. Records with similar names or numbers can still belong to different **Receipt Link**, **Item**, and **Purchase Row**.
- Keyword search checks **Name**, **Description**, **Item Code**, and **Item Type**.
- Narrow the list with **Item Class**, **Vendor**, and **Location** filters.
- The date filter uses **Created At**; choose a range that matches the business event you are reconciling.
- The initial order emphasizes **Created At**. Select a column heading when you need a different comparison.
Open the Inventory Item Received whose **Date Received** match the task. If it is missing, clear the list filters and recheck **Item Class**, **Vendor**, **Location**, **Created At**, and **Processed** rather than creating a replacement immediately.
## Fields and business rules
Brisk stores 12 user-relevant fields for this Inventory Item Received, including 3 linked-record selections and 0 controlled-choice fields. Create and edit screens may hide calculated or workflow-managed values from this full reference.
| Field | Required | What it controls |
|---|---:|---|
| **Receipt Link** | No | Parent inventory receipt row in the hierarchy. |
| **Item** | No | Links this Inventory Item Received to the selected Item; verify the relationship before saving. |
| **Quantity Received** | Yes | The quantity received value recorded for this inventory receipt row. |
| **Cost** | Yes | The cost value recorded for this inventory receipt row. |
| **Non-Freight Cost** | No | Hidden system field storing the original unit cost before freight distribution. |
| **Freight Cost** | No | Hidden system field storing the distributed freight portion of the unit cost. |
| **Total Cost** | Yes | The total cost value recorded for this inventory receipt row. |
| **Description** | No | Description of this inventory receipt row. |
| **Memo** | No | The memo recorded for this inventory receipt row. |
| **Date Received** | No | Date and time recorded for date received on this inventory receipt row. |
| **Purchase Row** | No | Links this Inventory Item Received to the selected purchase row; verify the relationship before saving. |
| **Processed** | No | Whether the processed option applies to this inventory receipt row. |
## What happens next
Use **Receipt Link**, **Item**, and **Purchase Row** to interpret this Inventory Item Received. If it records a failure or exception, correct the source process and create a new successful event rather than rewriting the audit trail.
## Common mistakes and troubleshooting
- **The record will not save:** Recheck **Quantity Received**, **Cost**, and **Total Cost** and any message beside the field. A required related record may also be inactive or unavailable to your role.
- **The record saved but is not available where expected:** Recheck **Processed**, then clear the filters on the destination list. A saved record can still be inactive, unpublished, locked, unapproved, or in the wrong workflow state.
- **The values look right but the result is wrong:** Open **Receipt Link**, **Item**, and **Purchase Row** from the detail page. Correct the specific relationship that is wrong instead of forcing a total or status to compensate for it.
# Inventory Receipts
# Inventory Receipts
Purpose and when to use this record
Record what actually arrived against a purchase order, including partial receipts, quantities, costs, and warehouse destination.
## At a glance
- **Identify it by:** **Status**, **Date Created**, and **Vendor Invoice #**.
- **Check its business context:** **Vendor**, **Warehouse**, **Freight Vendor**, and **Purchase Order**.
- **Why care:** Warehouse, item, unit, quantity, and cost must describe the same physical movement. A wrong warehouse or unit can make availability and valuation misleading.
- **Why care:** Treat posted, processed, paid, reversed, and edit-locked states as controls—not ordinary descriptive fields. Confirm the source transaction before changing any state that the screen permits you to change.
- **Why care:** Status communicates workflow progress to other staff. Change it only when the underlying work, approval, payment, or handoff has actually occurred.
## Before you begin
You need the Brisk permission for the action you are taking on inventory receipts. If a Create, Edit, or Delete control is absent, do not work around it with another user’s account; ask an administrator to review your role.
Create an Inventory Receipt
Create an Inventory Receipt only after confirming that the source document or operational event has not already been entered.
1. Select the business context first: **Vendor**, **Warehouse**, **Freight Vendor**, and **Purchase Order**.
2. Enter the identifying values shown on the form, especially **Status**, **Vendor**, **Warehouse**, **Date Created**, **Vendor Invoice #**, and **Bill Of Lading**, plus the remaining screen fields.
3. Review **Status**, **Edit Locked**, **Final Costs**, and **Apply Terms Discount** deliberately; these choices control availability or workflow rather than merely describing the record.
4. Save the Inventory Receipt, then confirm **Status**, **Date Created**, and **Vendor Invoice #** on its detail page before continuing.
After saving: Verify on-hand inventory and the purchase order’s remaining quantity, then use the receipt when matching the vendor invoice.
Delete an Inventory Receipt
Delete this Inventory Receipt only when it was entered by mistake and no downstream history depends on it. Use a reversal, void, credit, counter-adjustment, or status correction for a real event that later changed.
Before confirming, check for related **Inventory Items Recevied**, **Inventory Records**, and **Transactions**. Brisk may refuse deletion when another record depends on this one; resolve the duplicate or use the supported correction workflow instead of breaking the trail.
On the confirmation page, verify **Status**, **Date Created**, and **Vendor Invoice #**. After confirmation, return to the Inventory Receipts list and make sure only the intended Inventory Receipt was removed.
Review Inventory Receipt details
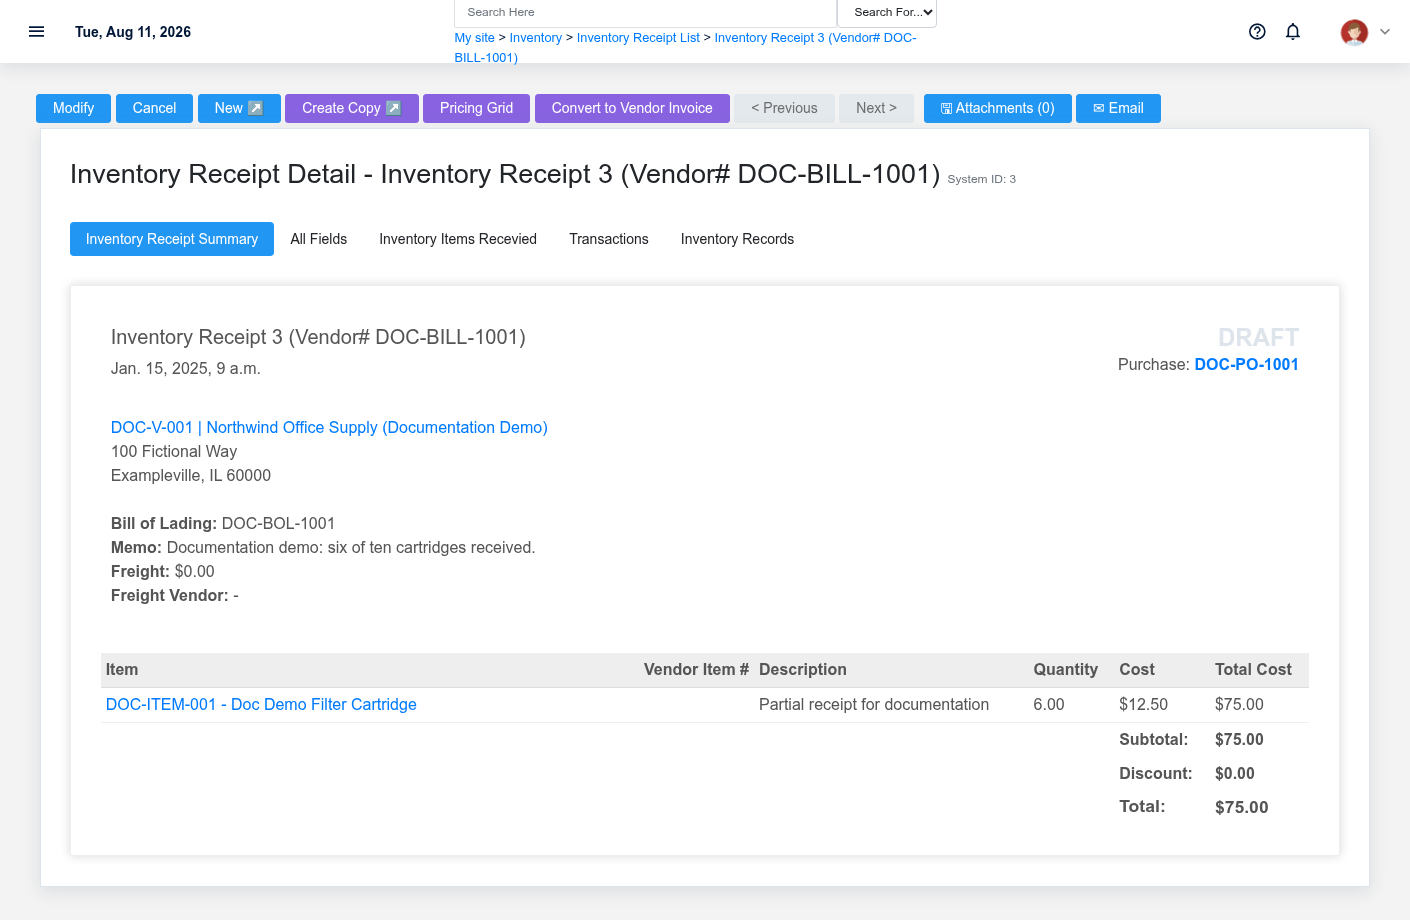
A receiving ticket linked to the fictional purchase order and vendor bill.
Use the detail page as the shared record of what this Inventory Receipt currently means. Verify **Status**, **Date Created**, **Edit Locked**, **Subtotal**, and **Total** before relying on it for a decision.
Follow **Vendor**, **Warehouse**, **Freight Vendor**, and **Purchase Order** to determine whether the issue is on this Inventory Receipt or on one of those linked records.
Next check: Verify on-hand inventory and the purchase order’s remaining quantity, then use the receipt when matching the vendor invoice.
Edit an existing Inventory Receipt
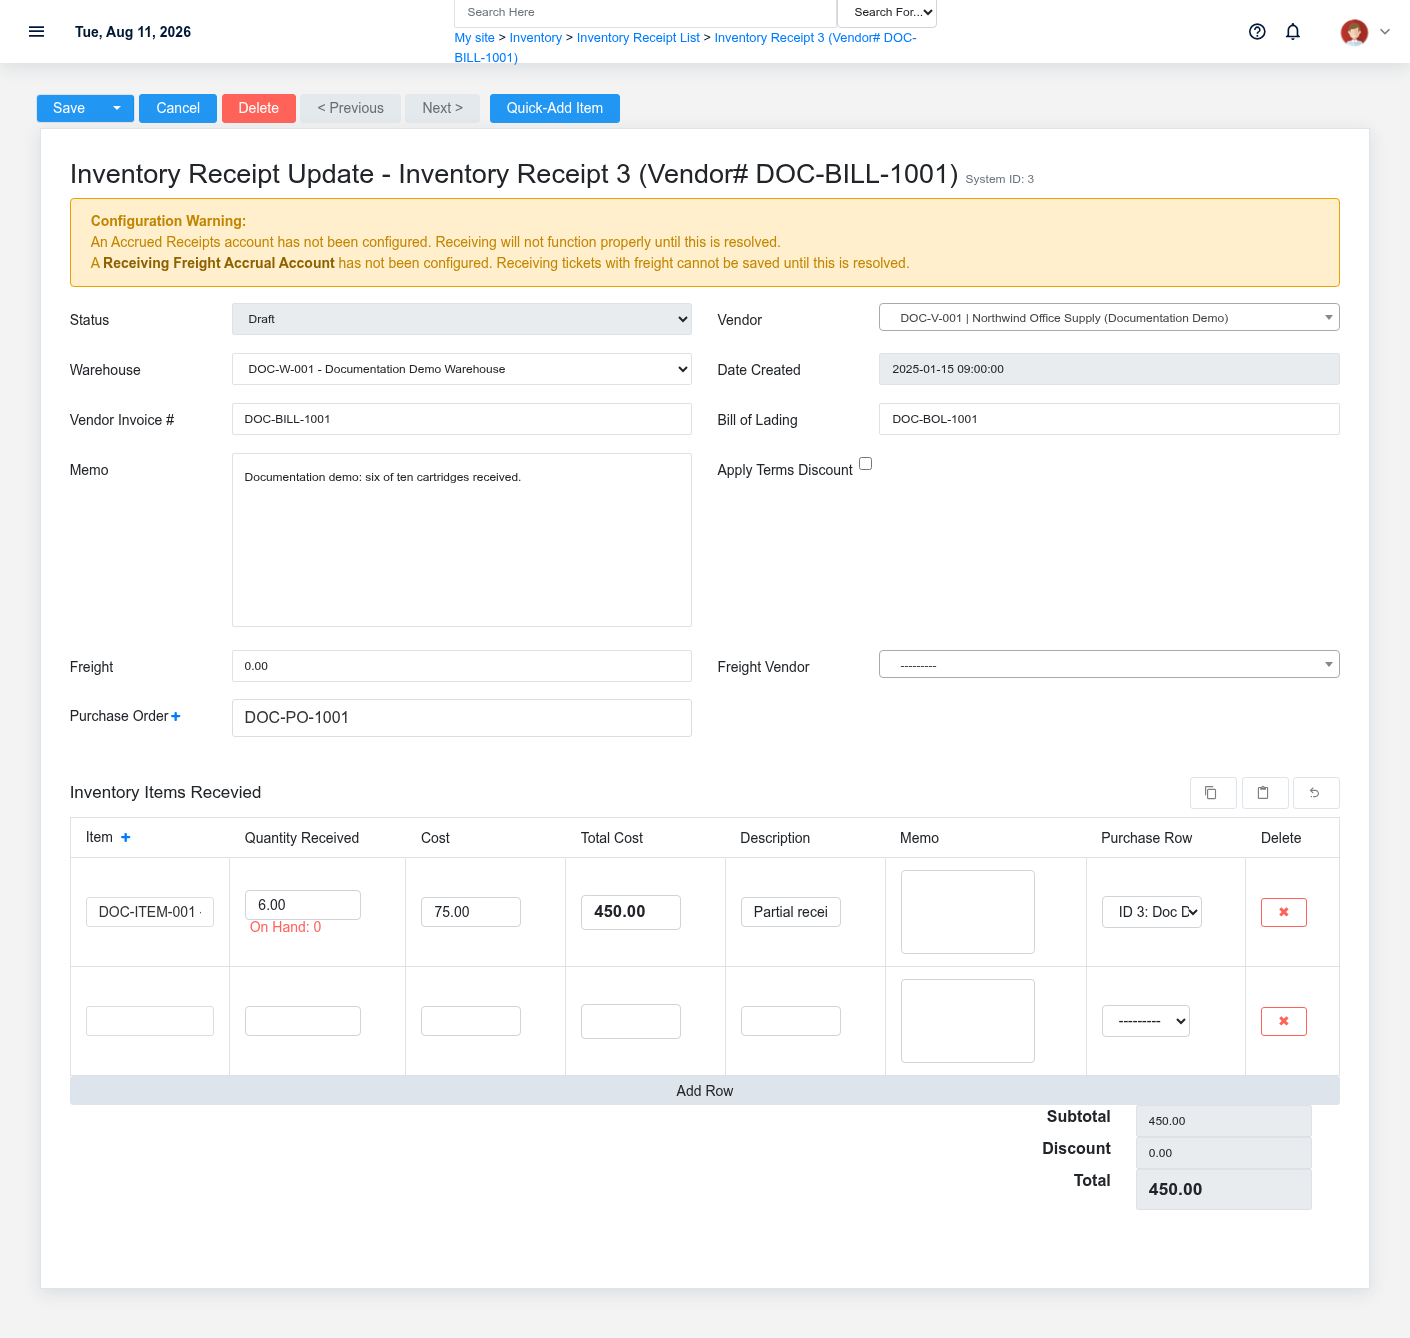
The Inventory Receipts update screen in the Brisk documentation demo.
Edit this Inventory Receipt to correct or complete the same source document or operational event; use the supported reversal or follow-up workflow when the business event itself changed.
1. Open the detail page. Compare **Vendor**, **Warehouse**, **Freight Vendor**, and **Purchase Order** with the supporting document or approved request.
2. Recheck **Status**, **Vendor**, **Warehouse**, **Date Created**, **Vendor Invoice #**, and **Edit Locked**, plus the remaining screen fields. These values are most likely to change warehouse availability, replenishment, quantities, and valuation.
3. Save the change, return to the list, and confirm that the Inventory Receipt now appears under the expected **Status**, and **Edit Locked**.
After the change: Verify on-hand inventory and the purchase order’s remaining quantity, then use the receipt when matching the vendor invoice.
Find and review inventory receipts
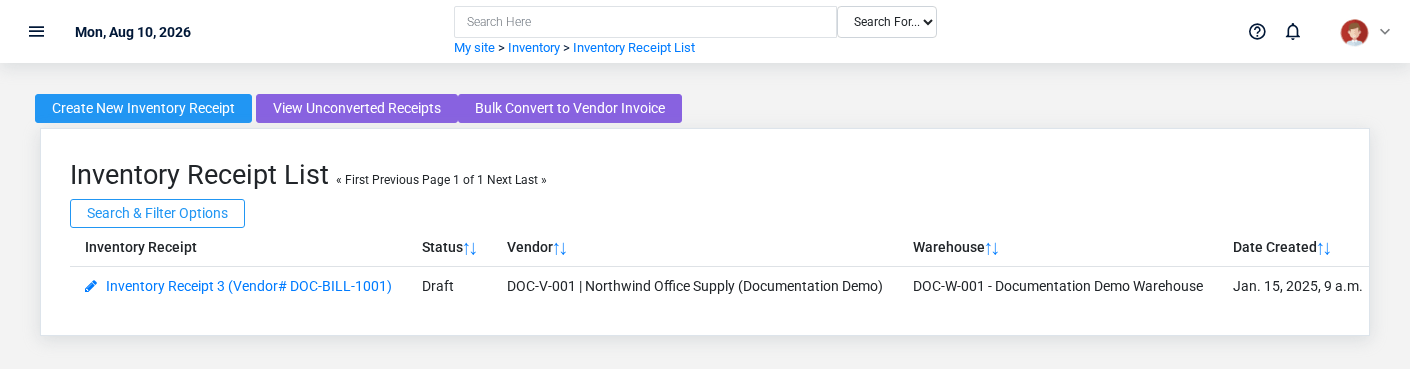
The Inventory Receipts list screen in the Brisk documentation demo.
Use the Inventory Receipts list to find the correct record before opening or changing it. Compare **Status**, **Date Created**, and **Vendor Invoice #**. Records with similar names or numbers can still belong to different **Vendor**, **Warehouse**, **Freight Vendor**, and **Purchase Order**.
- Narrow the list with **Vendor** filters.
- The initial order emphasizes **Id**. Select a column heading when you need a different comparison.
Open the Inventory Receipt whose **Status**, **Date Created**, and **Vendor Invoice #** match the task. If it is missing, clear the list filters and recheck **Vendor**, **Status**, and **Edit Locked** rather than creating a replacement immediately.
## Fields and business rules
Brisk stores 16 user-relevant fields for this Inventory Receipt, including 4 linked-record selections and 1 controlled-choice field. Create and edit screens may hide calculated or workflow-managed values from this full reference.
| Field | Required | What it controls |
|---|---:|---|
| **Status** | No | Current status of this inventory receipt. Available values: Draft, Complete. |
| **Vendor** | No | The vendor associated with this inventory receipt. |
| **Warehouse** | No | The warehouse associated with this inventory receipt. |
| **Date Created** | No | Date and time recorded for date created on this inventory receipt. |
| **Vendor Invoice #** | No | The vendor invoice # recorded for this inventory receipt. |
| **Bill Of Lading** | No | The bill of lading recorded for this inventory receipt. |
| **Memo** | No | The memo recorded for this inventory receipt. |
| **Edit Locked** | No | Whether the edit locked option applies to this inventory receipt. |
| **Final Costs** | No | Uncheck when receiving with estimated costs that will be finalized later. |
| **Apply Terms Discount** | No | When enabled, applies the vendor payment-terms discount percent to this receiving ticket. |
| **Freight** | No | The total freight cost for this receiving ticket. Freight is distributed into line-item inventory costs by weight and accrues to the receiving freight accrual account. |
| **Freight Vendor** | No | If different from the item vendor, conversion creates a separate freight vendor invoice. If the same vendor is selected, freight is added as a line on the item vendor invoice. |
| **Subtotal** | No | The gross total of all receiving ticket line items before discounts. |
| **Discount** | No | The total discount amount applied from vendor payment terms. |
| **Total** | No | The total dollar amount for this inventory receipt. |
| **Purchase Order** | No | Links this receiving ticket to a purchase order. |
## What happens next
Verify on-hand inventory and the purchase order’s remaining quantity, then use the receipt when matching the vendor invoice.
## Common mistakes and troubleshooting
- **The record saved but is not available where expected:** Recheck **Status**, and **Edit Locked**, then clear the filters on the destination list. A saved record can still be inactive, unpublished, locked, unapproved, or in the wrong workflow state.
- **The values look right but the result is wrong:** Open **Vendor**, **Warehouse**, **Freight Vendor**, and **Purchase Order** from the detail page. Correct the specific relationship that is wrong instead of forcing a total or status to compensate for it.
# Inventory Transfers
# Inventory Transfers
Purpose and when to use this record
Move stock between warehouses while preserving the source, destination, item quantities, and transfer status.
## At a glance
- **Identify it by:** **Status**, and **Date Created**.
- **Check its business context:** **From Warehouse**, **To Warehouse**, **From Adjustment**, and **To Adjustment**.
- **Why care:** Warehouse, item, unit, quantity, and cost must describe the same physical movement. A wrong warehouse or unit can make availability and valuation misleading.
- **Why care:** Treat posted, processed, paid, reversed, and edit-locked states as controls—not ordinary descriptive fields. Confirm the source transaction before changing any state that the screen permits you to change.
- **Why care:** Status communicates workflow progress to other staff. Change it only when the underlying work, approval, payment, or handoff has actually occurred.
## Before you begin
You need the Brisk permission for the action you are taking on inventory transfers. If a Create, Edit, or Delete control is absent, do not work around it with another user’s account; ask an administrator to review your role.
Have valid **From Warehouse**, and **To Warehouse** records ready first. Those selections determine where this Inventory Transfer belongs and which later screens can find it.
Create an Inventory Transfer
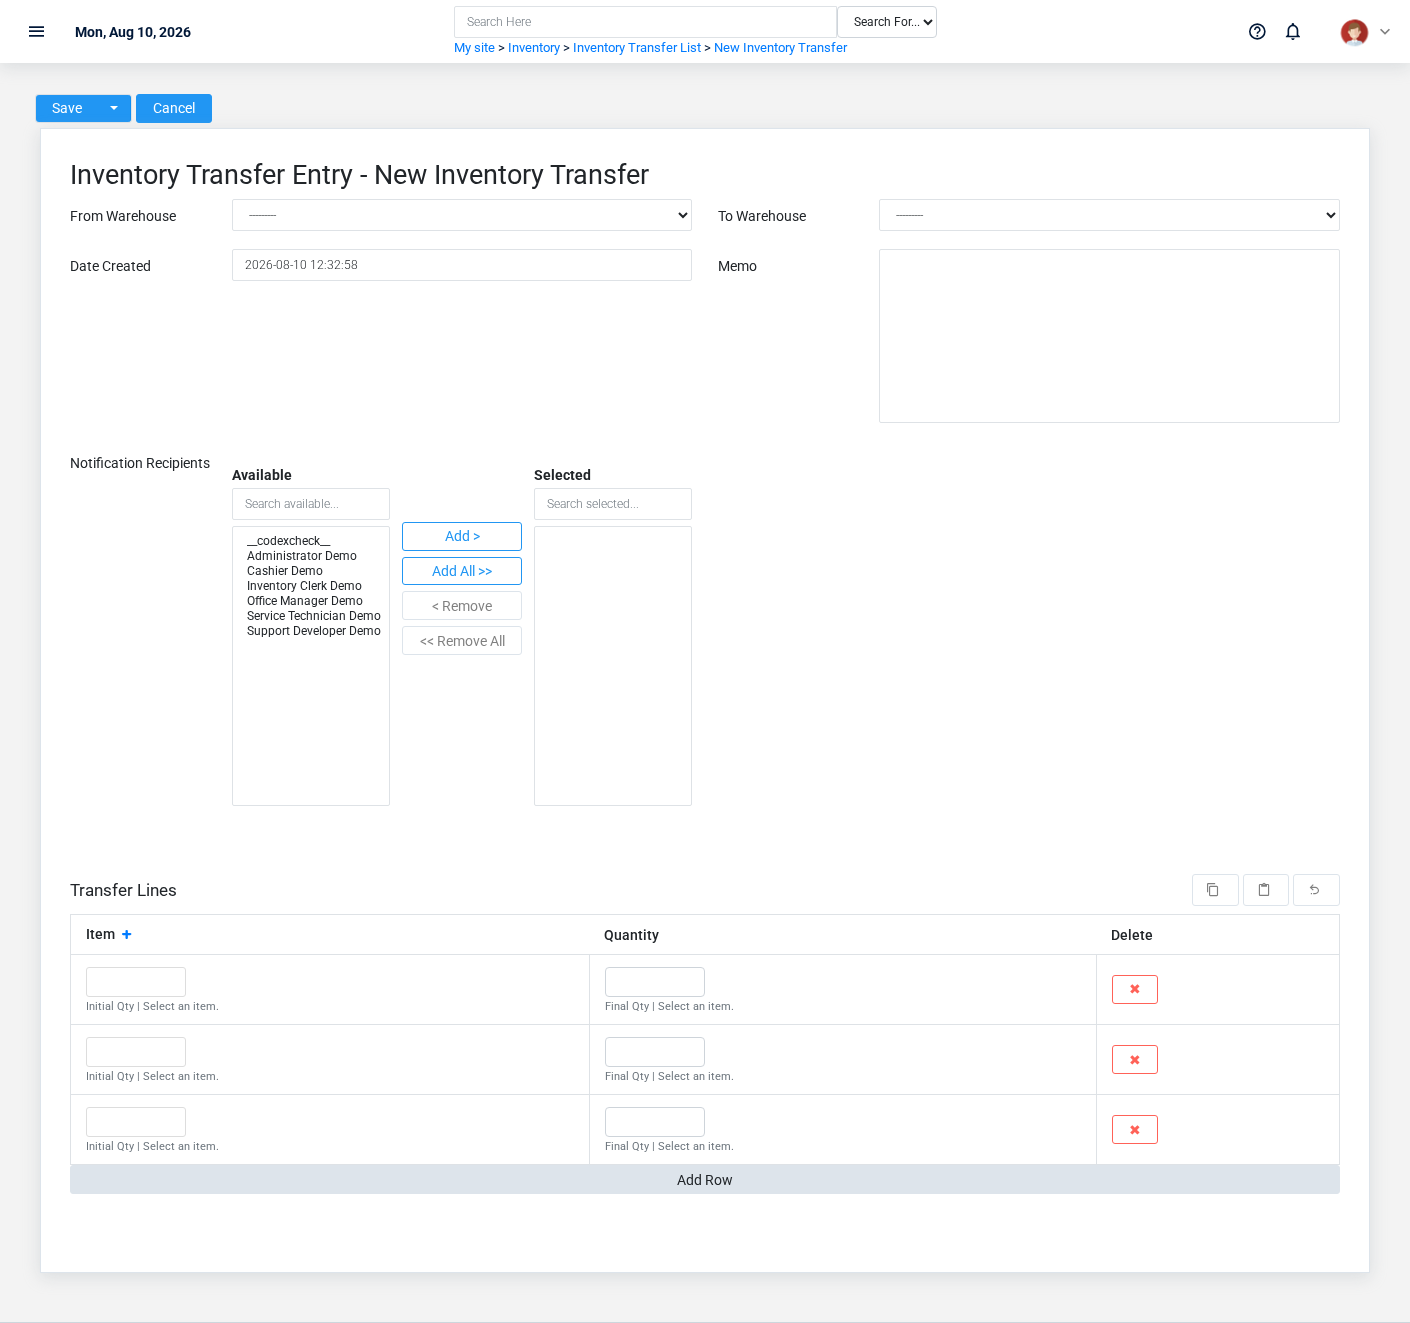
The Inventory Transfers create screen in the Brisk documentation demo.
Create an Inventory Transfer only after confirming that the source document or operational event has not already been entered.
1. Select the business context first: **From Warehouse**, **To Warehouse**, **From Adjustment**, and **To Adjustment**.
2. Enter the required identifying and operational values: **From Warehouse**, and **To Warehouse**.
3. Review **Status**, **Processed**, and **Edit Locked** deliberately; these choices control availability or workflow rather than merely describing the record.
4. Save the Inventory Transfer, then confirm **Status**, and **Date Created** on its detail page before continuing.
After saving: Confirm the source decreased and the destination increased for the same item quantities before considering the movement complete.
Review Inventory Transfer details
Use the detail page as the shared record of what this Inventory Transfer currently means. Verify **Status**, **Date Created**, **Processed**, and **Edit Locked** before relying on it for a decision.
Follow **From Warehouse**, **To Warehouse**, **From Adjustment**, and **To Adjustment** to determine whether the issue is on this Inventory Transfer or on one of those linked records.
Next check: Confirm the source decreased and the destination increased for the same item quantities before considering the movement complete.
Find and review inventory transfers
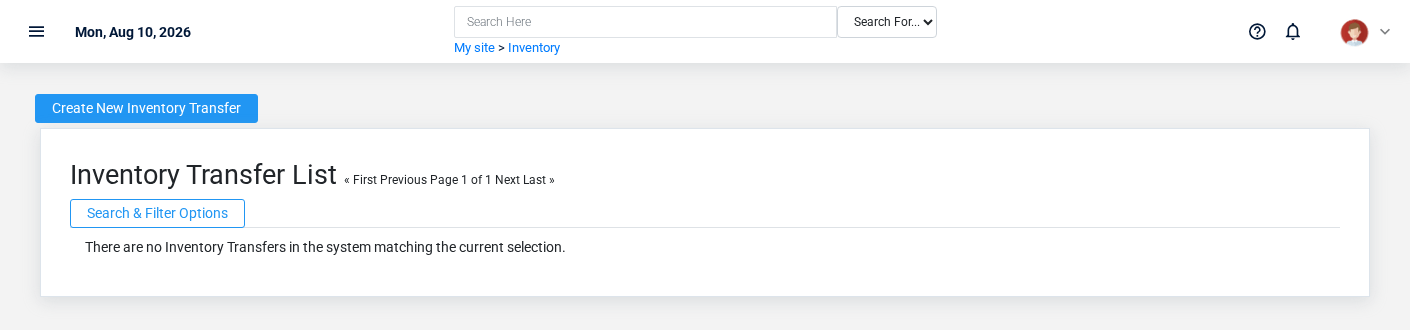
The Inventory Transfers list screen in the Brisk documentation demo.
Use the Inventory Transfers list to find the correct record before opening or changing it. Compare **Status**, and **Date Created**. Records with similar names or numbers can still belong to different **From Warehouse**, **To Warehouse**, **From Adjustment**, and **To Adjustment**.
- The initial order emphasizes **Id**. Select a column heading when you need a different comparison.
Open the Inventory Transfer whose **Status**, and **Date Created** match the task. If it is missing, clear the list filters and recheck **Status**, **Processed**, and **Edit Locked** rather than creating a replacement immediately.
## Fields and business rules
Brisk stores 9 user-relevant fields for this Inventory Transfer, including 4 linked-record selections and 1 controlled-choice field. Create and edit screens may hide calculated or workflow-managed values from this full reference.
| Field | Required | What it controls |
|---|---:|---|
| **Status** | No | Indicates whether this transfer has been processed. Available values: Draft, Complete. |
| **From Warehouse** | Yes | The from warehouse associated with this inventory transfer. |
| **To Warehouse** | Yes | The to warehouse associated with this inventory transfer. |
| **Date Created** | No | Date and time recorded for date created on this inventory transfer. |
| **Memo** | No | The memo recorded for this inventory transfer. |
| **From Adjustment** | No | The from adjustment associated with this inventory transfer. |
| **To Adjustment** | No | The to adjustment associated with this inventory transfer. |
| **Processed** | No | Whether the processed option applies to this inventory transfer. |
| **Edit Locked** | No | Whether the edit locked option applies to this inventory transfer. |
## What happens next
Confirm the source decreased and the destination increased for the same item quantities before considering the movement complete.
## Common mistakes and troubleshooting
- **The record will not save:** Recheck **From Warehouse**, and **To Warehouse** and any message beside the field. A required related record may also be inactive or unavailable to your role.
- **The record saved but is not available where expected:** Recheck **Status**, **Processed**, and **Edit Locked**, then clear the filters on the destination list. A saved record can still be inactive, unpublished, locked, unapproved, or in the wrong workflow state.
- **The values look right but the result is wrong:** Open **From Warehouse**, **To Warehouse**, **From Adjustment**, and **To Adjustment** from the detail page. Correct the specific relationship that is wrong instead of forcing a total or status to compensate for it.
# Item Classes
# Item Classes
Purpose and when to use this record
Group items for consistent reporting, defaults, pricing, and operational handling.
## At a glance
- **Identify it by:** **Name**, and **Code**.
- **Check its business context:** **Asset Account**, **Expense Account**, **Cogs Account**, and **Revenue Account**.
- **Why care:** Warehouse, item, unit, quantity, and cost must describe the same physical movement. A wrong warehouse or unit can make availability and valuation misleading.
## Before you begin
You need the Brisk permission for the action you are taking on item classes. If a Create, Edit, or Delete control is absent, do not work around it with another user’s account; ask an administrator to review your role.
Create an Item Class
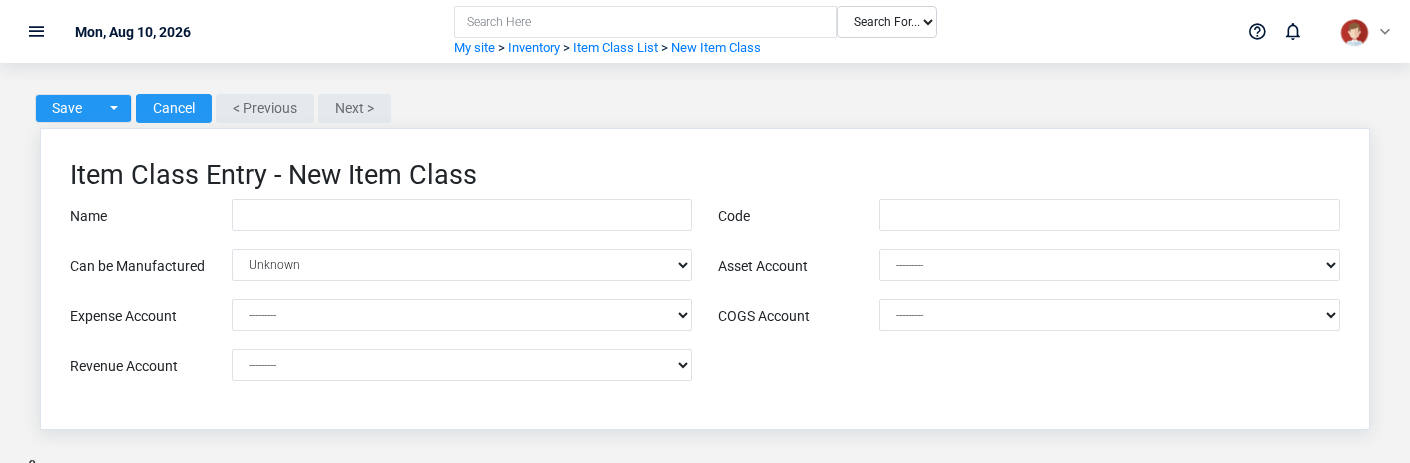
The Item Classes create screen in the Brisk documentation demo.
Create an Item Class only when the existing choices do not represent the policy or classification you need. Near-duplicate setup values split reporting and make later selection harder.
1. Select the business context first: **Asset Account**, **Expense Account**, **Cogs Account**, and **Revenue Account**.
2. Enter the required identifying and operational values: **Name**.
3. Review **Can Be Manufactured** deliberately; these choices control availability or workflow rather than merely describing the record.
4. Save the Item Class, then confirm **Name**, and **Code** on its detail page before continuing.
After saving: Open **Items**, and **Tax Rules** and confirm the Item Class appears with the intended label and availability. Keep the old value for historical records when changing it would split or relabel prior reporting.
Delete an Item Class
Delete this Item Class only if it is an unused duplicate or setup mistake. Once other records refer to it, preserve that history and make the value inactive when the screen provides that option.
Before confirming, check for related **Items**, and **Tax Rules**. Brisk may refuse deletion when another record depends on this one; resolve the duplicate or use the supported correction workflow instead of breaking the trail.
On the confirmation page, verify **Name**, and **Code**. After confirmation, return to the Item Classes list and make sure only the intended Item Class was removed.
Review Item Class details
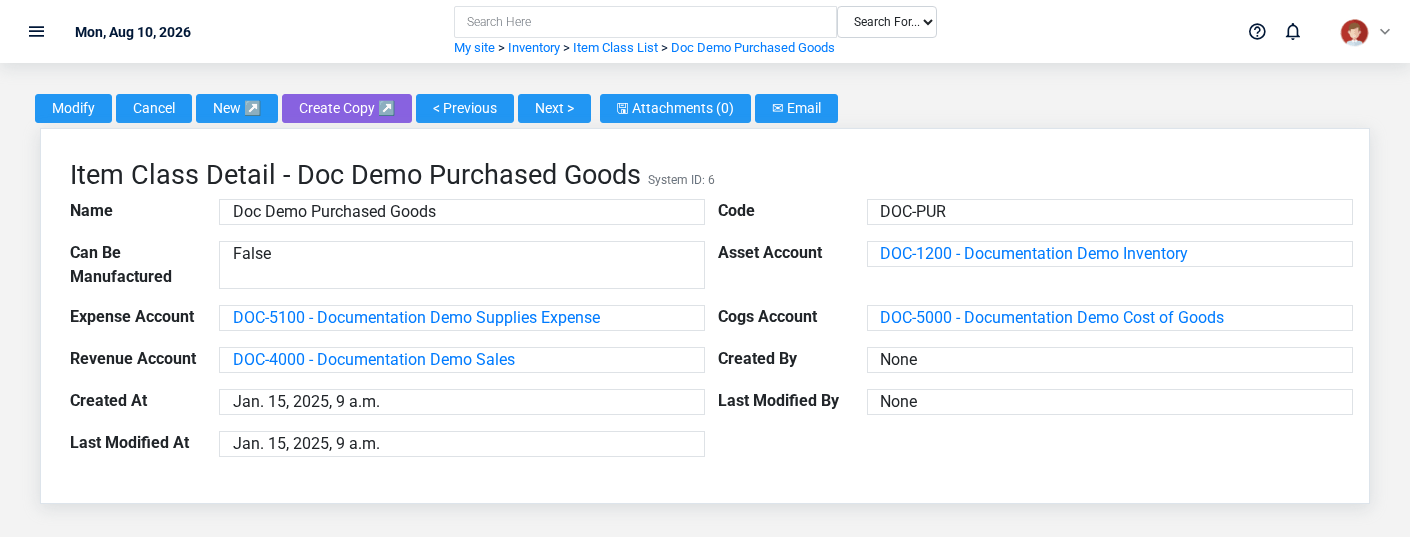
The Item Classes detail screen in the Brisk documentation demo.
Use the detail page as the shared record of what this Item Class currently means. Verify **Name**, **Code**, **Can Be Manufactured**, and **Asset Account** before relying on it for a decision.
Follow **Asset Account**, **Expense Account**, **Cogs Account**, and **Revenue Account** to determine whether the issue is on this Item Class or on one of those linked records.
Next check: Open **Items**, and **Tax Rules** and confirm the Item Class appears with the intended label and availability. Keep the old value for historical records when changing it would split or relabel prior reporting.
Edit an existing Item Class
Edit this Item Class when the underlying policy or classification changed. First determine whether historical transactions should retain the old value; if so, deactivate the old choice and create a new one.
1. Open the detail page. Compare **Asset Account**, **Expense Account**, **Cogs Account**, and **Revenue Account** with the supporting document or approved request.
2. Recheck **Asset Account**, **Expense Account**, **Cogs Account**, and **Revenue Account**. These values are most likely to change warehouse availability, replenishment, quantities, and valuation.
3. Save the change, return to the list, and confirm that the Item Class now appears under the expected **Name**, and **Code**.
After the change: Open **Items**, and **Tax Rules** and confirm the Item Class appears with the intended label and availability. Keep the old value for historical records when changing it would split or relabel prior reporting.
Find and review item classes
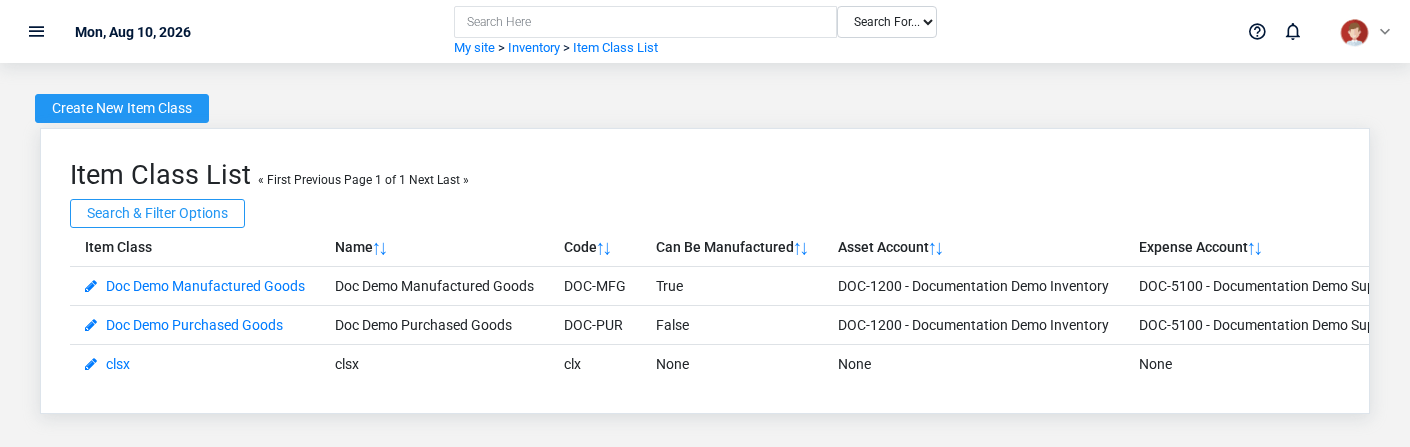
The Item Classes list screen in the Brisk documentation demo.
Use the Item Classes list to find the correct record before opening or changing it. Compare **Name**, and **Code**. Records with similar names or numbers can still belong to different **Asset Account**, **Expense Account**, **Cogs Account**, and **Revenue Account**.
- The initial order emphasizes **Name**. Select a column heading when you need a different comparison.
Open the Item Class whose **Name**, and **Code** match the task. If it is missing, clear the list filters and recheck the identifying information shown on the screen rather than creating a replacement immediately.
## Fields and business rules
Brisk stores 7 user-relevant fields for this Item Class, including 4 linked-record selections and 0 controlled-choice fields. Create and edit screens may hide calculated or workflow-managed values from this full reference.
| Field | Required | What it controls |
|---|---:|---|
| **Name** | Yes | Human-readable name for this item class. |
| **Code** | No | Short code used to identify this item class. |
| **Can Be Manufactured** | No | Whether the can be manufactured option applies to this item class. |
| **Asset Account** | No | Maps the inventory asset account for items of this class (if configured). |
| **Expense Account** | No | Maps the expense account for items of this class (if configured). |
| **Cogs Account** | No | Maps the cost of goods sold account for items of this class (if configured). |
| **Revenue Account** | No | Maps the revenue account for items of this class (if configured). |
## What happens next
Open **Items**, and **Tax Rules** and confirm the Item Class appears with the intended label and availability. Keep the old value for historical records when changing it would split or relabel prior reporting.
## Common mistakes and troubleshooting
- **The record will not save:** Recheck **Name** and any message beside the field. A required related record may also be inactive or unavailable to your role.
- **The values look right but the result is wrong:** Open **Asset Account**, **Expense Account**, **Cogs Account**, and **Revenue Account** from the detail page. Correct the specific relationship that is wrong instead of forcing a total or status to compensate for it.
# Items
# Items
Purpose and when to use this record
The Items overview screen in the Brisk documentation demo.The Items overview screen in the Brisk documentation demo.
Maintain the shared product or service definition used by purchasing, inventory, pricing, sales, and manufacturing.
## At a glance
- **Identify it by:** **Name**, **Item Code**, **Barcode**, and **Point Of Sale Label**.
- **Check its business context:** **Item Class**, **Vendor**, **Location**, **Purchase Uom**, and **Sales Uom**.
- **Why care:** Warehouse, item, unit, quantity, and cost must describe the same physical movement. A wrong warehouse or unit can make availability and valuation misleading.
## Before you begin
You need the Brisk permission for the action you are taking on items. If a Create, Edit, or Delete control is absent, do not work around it with another user’s account; ask an administrator to review your role.
Have valid **Asset Account**, **Expense Account**, **Cogs Account**, **Revenue Account**, and **Default Tax** records ready first. Those selections determine where this Item belongs and which later screens can find it.
Find and review items
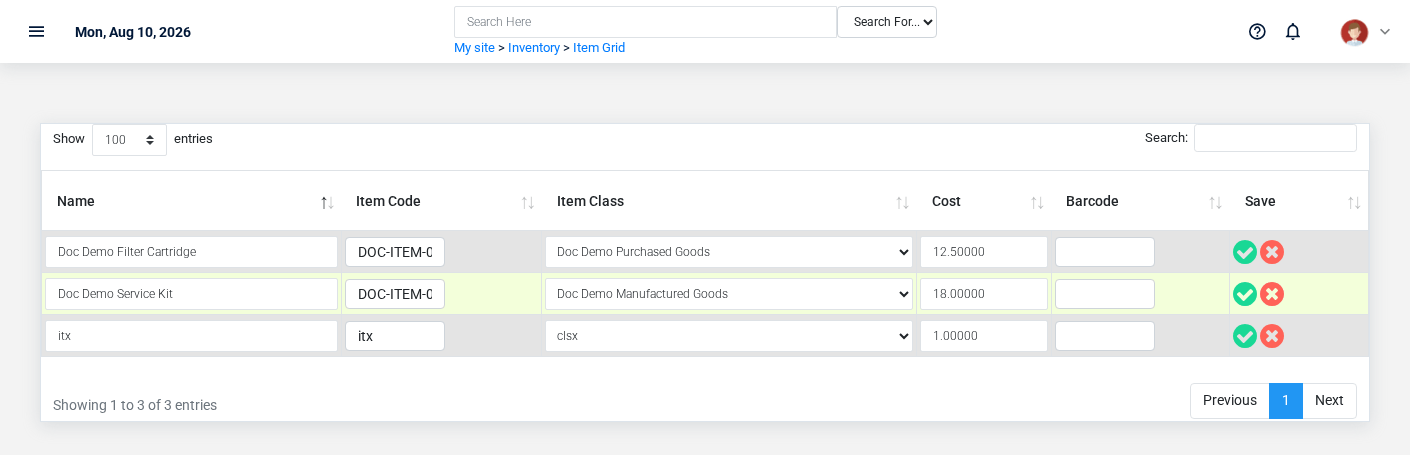
The Items list screen in the Brisk documentation demo.
Use the Items list to find the correct record before opening or changing it. Compare **Name**, **Item Code**, and **Barcode**. Records with similar names or numbers can still belong to different **Item Class**, **Vendor**, **Location**, **Purchase Uom**, **Sales Uom**, and **Stock Uom**, plus the remaining screen fields.
- Keyword search checks **Name**, **Description**, **Item Code**, **Vendor Item #**, and **Item Type**.
- Narrow the list with **Item Class**, **Vendor**, and **Location** filters.
- The initial order emphasizes **Name**. Select a column heading when you need a different comparison.
Open the Item whose **Name**, **Item Code**, and **Barcode** match the task. If it is missing, clear the list filters and recheck **Item Class**, **Vendor**, **Location**, **Item Type**, **Commission Type**, and **Pricing Locked** rather than creating a replacement immediately.
Create an Item
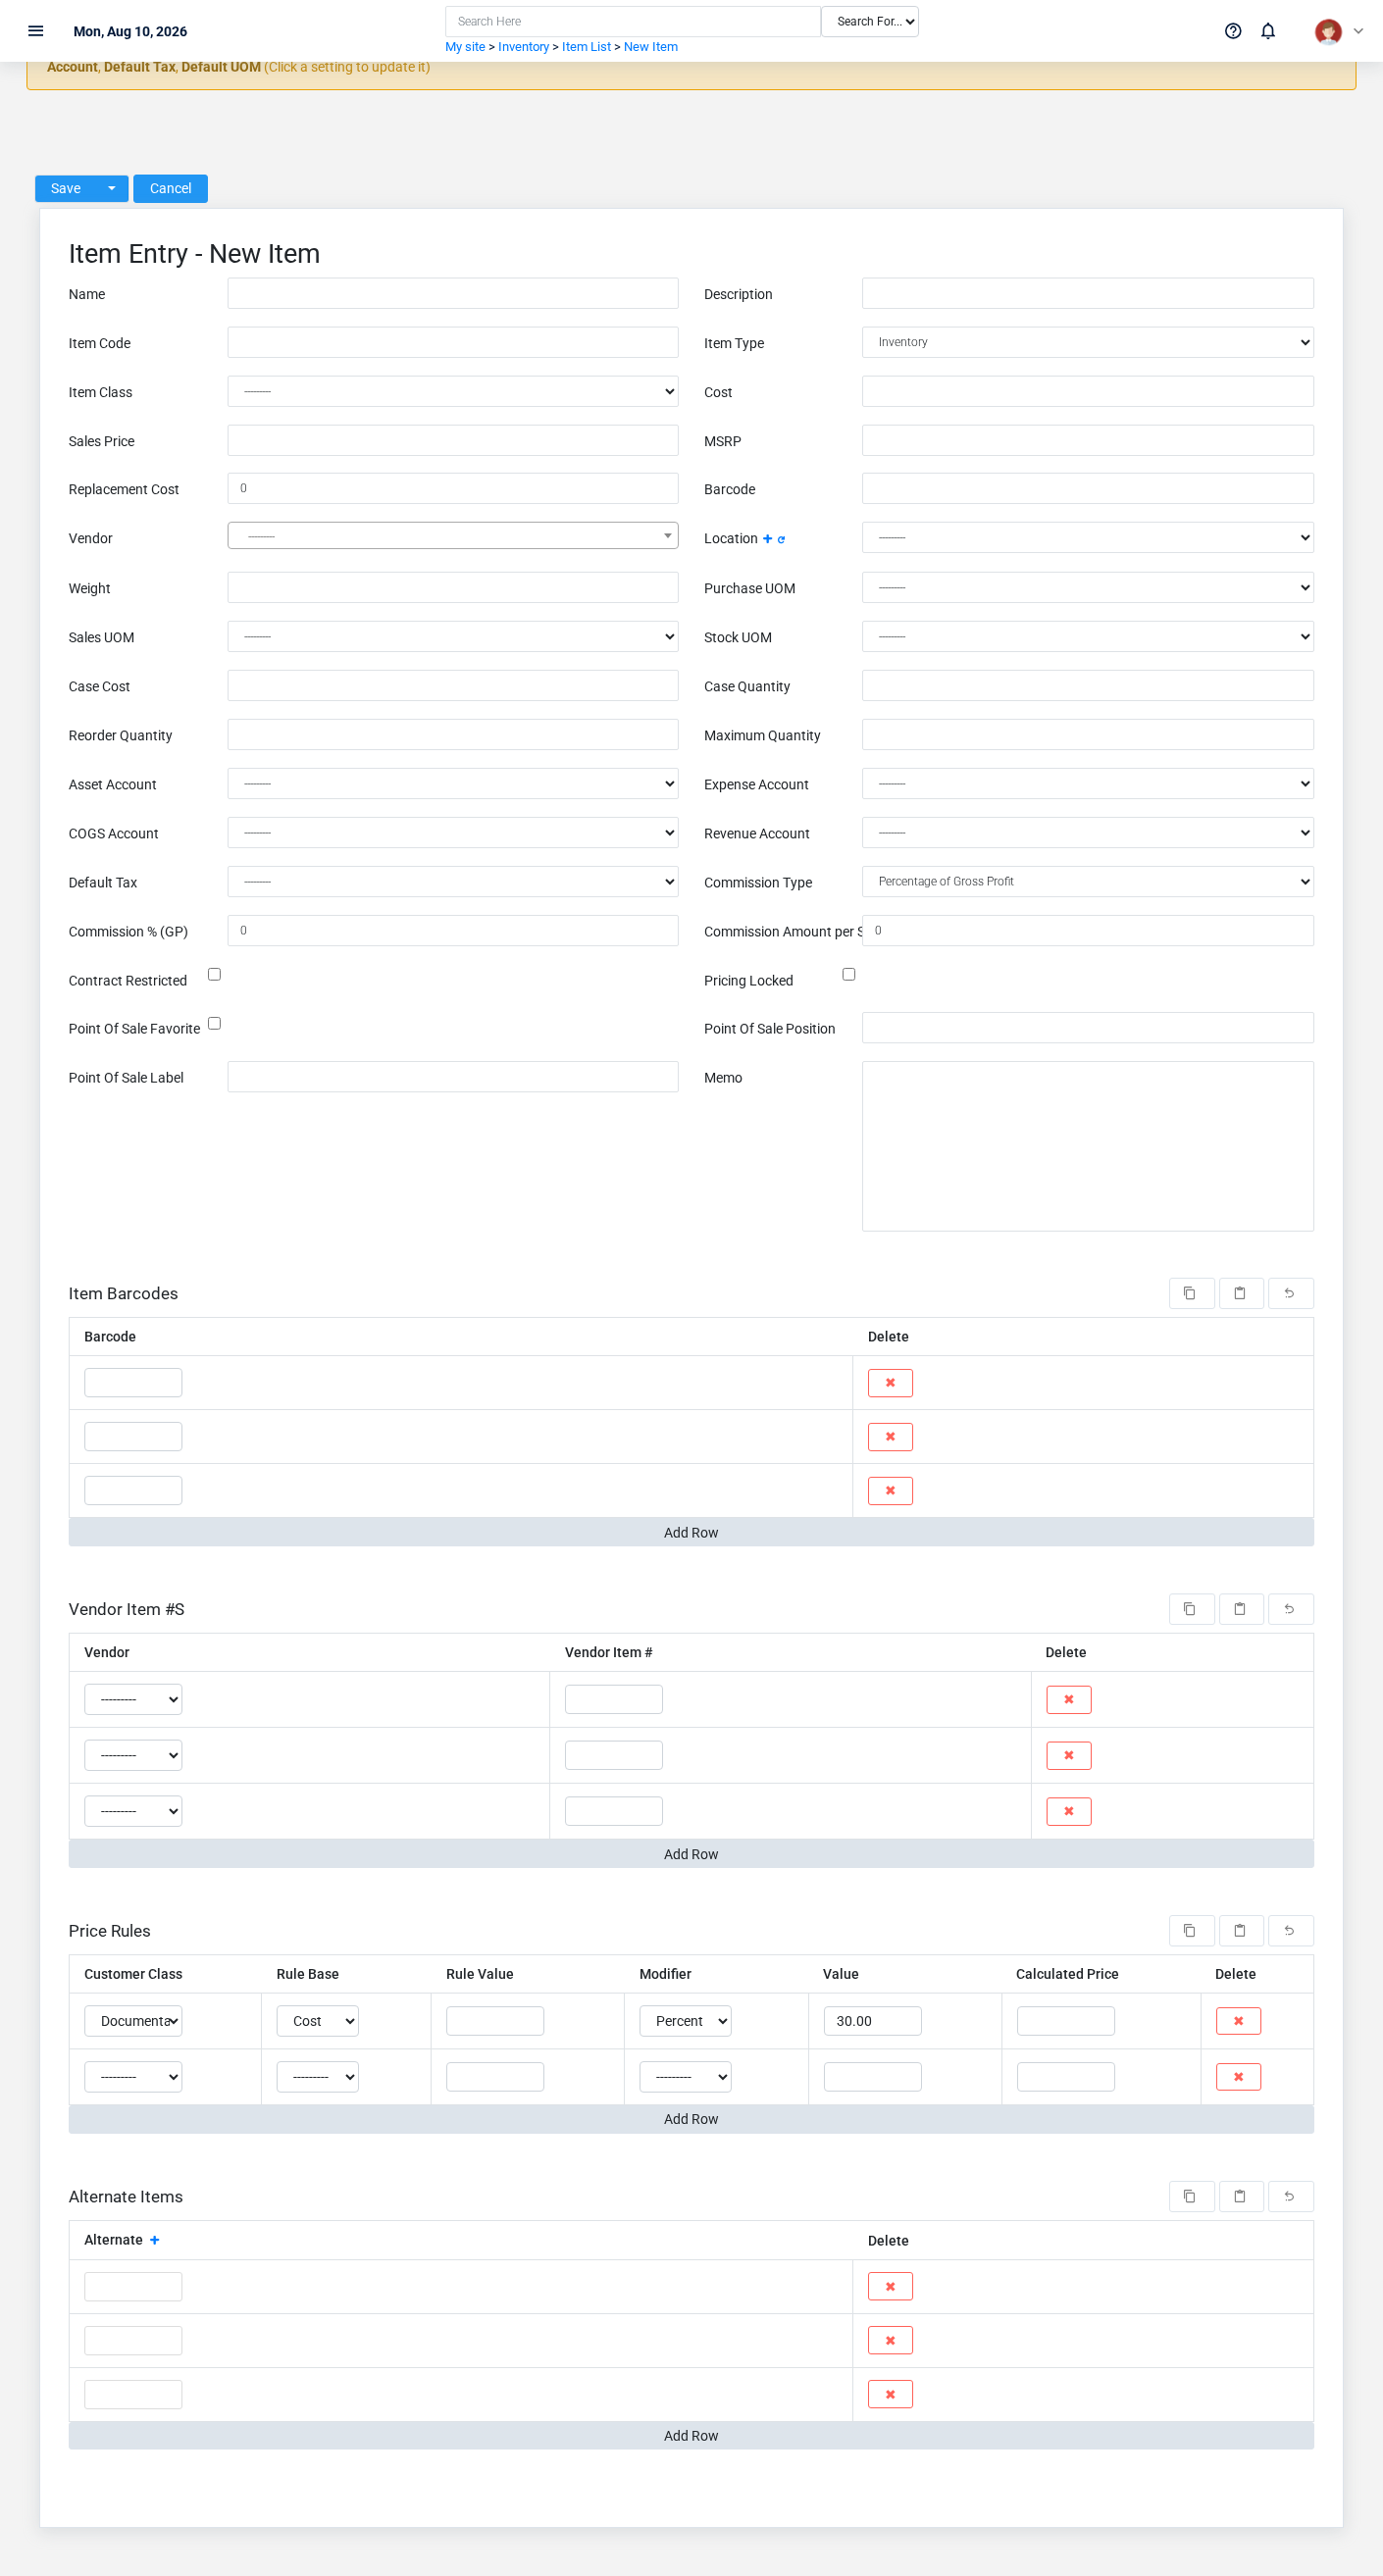
The Items create screen in the Brisk documentation demo.
Create an Item after searching for the person, organization, item, location, or resource under alternate names and identifiers. Merge or correct an existing master record instead of creating a duplicate.
1. Select the business context first: **Item Class**, **Vendor**, **Location**, **Purchase Uom**, **Sales Uom**, and **Stock Uom**, plus the remaining screen fields.
2. Enter the required identifying and operational values: **Name**, **Cost**, **Sales Price**, **Asset Account**, **Expense Account**, and **Cogs Account**, plus the remaining screen fields.
3. Review **Item Type**, **Commission Type**, **Contract Restricted**, **Pricing Locked**, **Point Of Sale Favorite**, and **Auto-Prompt Foodservice Options**, plus the remaining screen fields deliberately; these choices control availability or workflow rather than merely describing the record.
4. Save the Item, then confirm **Name**, **Item Code**, **Barcode**, and **Point Of Sale Label** on its detail page before continuing.
After saving: Verify this Item in **Adjustment Lines**, **Alternate Items**, **Ingredient Information**, and **Inventory Items Credited**, plus the remaining screen fields before staff build new activity on it; correct ownership, classification, and active state now rather than after transactions accumulate.
Delete an Item
Delete this Item only if it is an unused duplicate or setup mistake. Once other records refer to it, preserve that history and make the value inactive when the screen provides that option.
Before confirming, check for related **Adjustment Lines**, **Alternate Items**, **Ingredient Information**, **Inventory Items Credited**, and **Inventory Items Recevied**, plus the remaining screen fields. Brisk may refuse deletion when another record depends on this one; resolve the duplicate or use the supported correction workflow instead of breaking the trail.
On the confirmation page, verify **Name**, **Item Code**, **Barcode**, and **Point Of Sale Label**. After confirmation, return to the Items list and make sure only the intended Item was removed.
Review Item details
Use the detail page as the shared record of what this Item currently means. Verify **Item Type**, **Commission Type**, **Commission Amount Per Sales Uom**, and **Pricing Locked** before relying on it for a decision.
Follow **Item Class**, **Vendor**, **Location**, **Purchase Uom**, **Sales Uom**, and **Stock Uom**, plus the remaining screen fields to determine whether the issue is on this Item or on one of those linked records.
Next check: Verify this Item in **Adjustment Lines**, **Alternate Items**, **Ingredient Information**, and **Inventory Items Credited**, plus the remaining screen fields before staff build new activity on it; correct ownership, classification, and active state now rather than after transactions accumulate.
Edit an existing Item
Edit this Item to keep the same real-world party, item, location, or resource accurate. Do not repurpose it for a different entity after activity is attached.
1. Open the detail page. Compare **Item Class**, **Vendor**, **Location**, **Purchase Uom**, **Sales Uom**, and **Stock Uom**, plus the remaining screen fields with the supporting document or approved request.
2. Recheck **Item Type**, **Cost**, **Sales Price**, **Replacement Cost**, **Vendor**, and **Case Cost**, plus the remaining screen fields. These values are most likely to change warehouse availability, replenishment, quantities, and valuation.
3. Save the change, return to the list, and confirm that the Item now appears under the expected **Item Type**, **Commission Type**, and **Pricing Locked**.
After the change: Verify this Item in **Adjustment Lines**, **Alternate Items**, **Ingredient Information**, and **Inventory Items Credited**, plus the remaining screen fields before staff build new activity on it; correct ownership, classification, and active state now rather than after transactions accumulate.
## Fields and business rules
Brisk stores 36 user-relevant fields for this Item, including 11 linked-record selections and 2 controlled-choice fields. Create and edit screens may hide calculated or workflow-managed values from this full reference.
| Field | Required | What it controls |
|---|---:|---|
| **Name** | Yes | Human-readable name for this item. |
| **Description** | No | Description of this item. |
| **Item Code** | No | Short code used to identify this item. |
| **Item Type** | No | The item type recorded for this item. Available values: Inventory, Non-Inventory, Special Order, Service, Manufactured. |
| **Item Class** | No | The item class associated with this item. |
| **Cost** | Yes | Represents the current average cost for this product in inventory. For FIFO and LIFO settings, individual transactions will use the actual cost of the inventory that is being used. Under the Average value system, this field will update automatically upon receiving. In Manual and Market settings, this field will never update automatically and will always be used for financial calculations. |
| **Sales Price** | Yes | Under default settings, this is the sales price for the item. If price scheduling is enabled, this field represents the highest active, schedueld price. |
| **Msrp** | No | The msrp value recorded for this item. |
| **Replacement Cost** | No | Used by the manufacturing system, if populated this field will override the calculated system cost for this ingredient Price/Cost updates of manufactured items. |
| **Barcode** | No | The barcode recorded for this item. |
| **Vendor** | No | The vendor associated with this item. |
| **Location** | No | The location associated with this item. |
| **Weight** | No | Weight in pounds. For accurate shipping weights to calculate, the sales Unit of Measure needs to have a correct ratio for pounds. For example, "Each" should be set to 1.0, "Ton" should be set to 2000. |
| **Purchase Uom** | No | Unit of measure used when purchasing the item from a vendor. |
| **Sales Uom** | No | Unit of measure used when selling the item to a customer. |
| **Stock Uom** | No | Unit of measure used internally for stock management. |
| **Case Cost** | No | Records the case cost of this item, in combination with case quantity, this field can be used to calculate individual item quantity. |
| **Case Quantity** | No | Records the case quantity of this item, in combination with case cost. If Case Pricing is enabled, setting to this field to a value other than 0 will cause this item to behave as a bundle of items that will be unpacked into inventory by the receiving ticket. Inventory level tracking will also use case pricing. |
| **Reorder Quantity** | No | Set this value to the lowest number of items that should be in stock before reordering. |
| **Maximum Quantity** | No | Set this value to the highest number of items that should be in stock before taking action. |
| **Asset Account** | Yes | The asset account associated with this item. |
| **Expense Account** | Yes | The expense account associated with this item. |
| **Cogs Account** | Yes | The cogs account associated with this item. |
| **Revenue Account** | Yes | The revenue account associated with this item. |
| **Default Tax** | Yes | The default tax associated with this item. |
| **Commission Type** | No | Controls how salesperson commission is calculated for this item. Available values: Percentage of Gross Profit, Dollar Amount per Sales UOM. |
| **Commission % (Gp)** | No | Defines commission percentage paid to salesperson on gross profit of item sales. |
| **Commission Amount Per Sales Uom** | No | Defines fixed dollar commission paid per item sales unit of measure. |
| **Contract Restricted** | No | If this field is enabled, this item will not be sellable unless the customer has an active contract for it. |
| **Pricing Locked** | No | If this field is enabled, this item will appear as price-locked on price scheduling screens. |
| **Point Of Sale Favorite** | No | If this field is enabled, this item will have a button on the front page of the point-of-sale system. |
| **Point Of Sale Position** | No | Optionally determines the order of this button on the point-of-sale favorites tab. |
| **Point Of Sale Label** | No | If this field has a value, this will be the label for the item button on the point of sale screen, which can be helpful for differentiating between items or saving space by abbreviating long item names. |
| **Auto-Prompt Foodservice Options** | No | When enabled in foodservice POS mode, the item opens its kitchen options popup immediately after it is added. |
| **Tonnage Taxable** | No | Enable for items that should be included in tonnage tax reporting when the seller is responsible for the tonnage tax. |
| **Memo** | No | The memo recorded for this item. |
## What happens next
Verify this Item in **Adjustment Lines**, **Alternate Items**, **Ingredient Information**, and **Inventory Items Credited**, plus the remaining screen fields before staff build new activity on it; correct ownership, classification, and active state now rather than after transactions accumulate.
## Common mistakes and troubleshooting
- **The record will not save:** Recheck **Name**, **Cost**, **Sales Price**, **Asset Account**, **Expense Account**, and **Cogs Account**, plus the remaining screen fields and any message beside the field. A required related record may also be inactive or unavailable to your role.
- **The values look right but the result is wrong:** Open **Item Class**, **Vendor**, **Location**, **Purchase Uom**, **Sales Uom**, and **Stock Uom**, plus the remaining screen fields from the detail page. Correct the specific relationship that is wrong instead of forcing a total or status to compensate for it.
# Locations
# Locations
Purpose and when to use this record
Maintain physical bin, aisle, yard, or shelf identifiers used to locate inventory within operations.
## At a glance
- **Identify it by:** **Name**.
- **Check its business context:** **Warehouse**.
- **Why care:** Warehouse, item, unit, quantity, and cost must describe the same physical movement. A wrong warehouse or unit can make availability and valuation misleading.
## Before you begin
You need the Brisk permission for the action you are taking on locations. If a Create, Edit, or Delete control is absent, do not work around it with another user’s account; ask an administrator to review your role.
Create a location
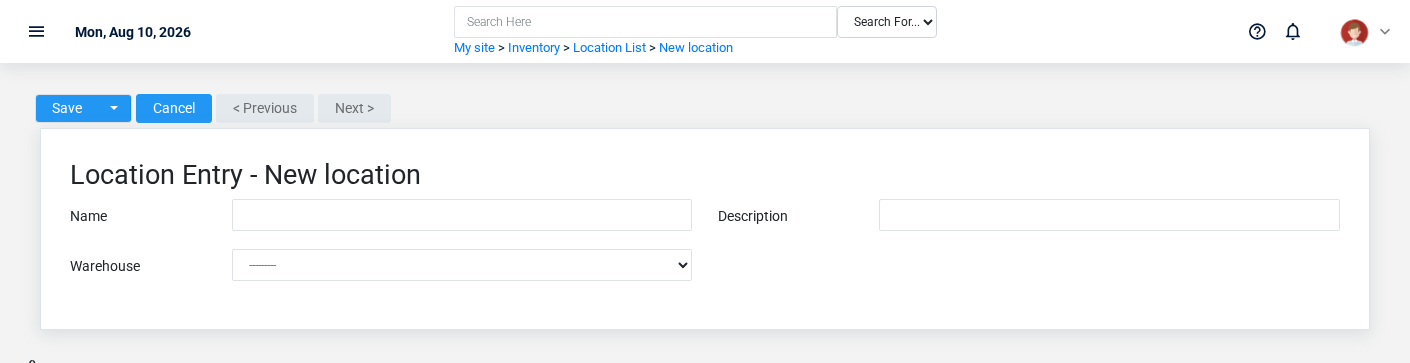
The Locations create screen in the Brisk documentation demo.
Create a location after searching for the person, organization, item, location, or resource under alternate names and identifiers. Merge or correct an existing master record instead of creating a duplicate.
1. Select the business context first: **Warehouse**.
2. Enter the required identifying and operational values: **Name**.
3. Review **Description** against the source document or approved setup decision.
4. Save the location, then confirm **Name** on its detail page before continuing.
After saving: Verify this location in **Items** before staff build new activity on it; correct ownership, classification, and active state now rather than after transactions accumulate.
Delete a location
Delete this location only if it is an unused duplicate or setup mistake. Once other records refer to it, preserve that history and make the value inactive when the screen provides that option.
Before confirming, check for related **Items**. Brisk may refuse deletion when another record depends on this one; resolve the duplicate or use the supported correction workflow instead of breaking the trail.
On the confirmation page, verify **Name**. After confirmation, return to the Locations list and make sure only the intended location was removed.
Review location details
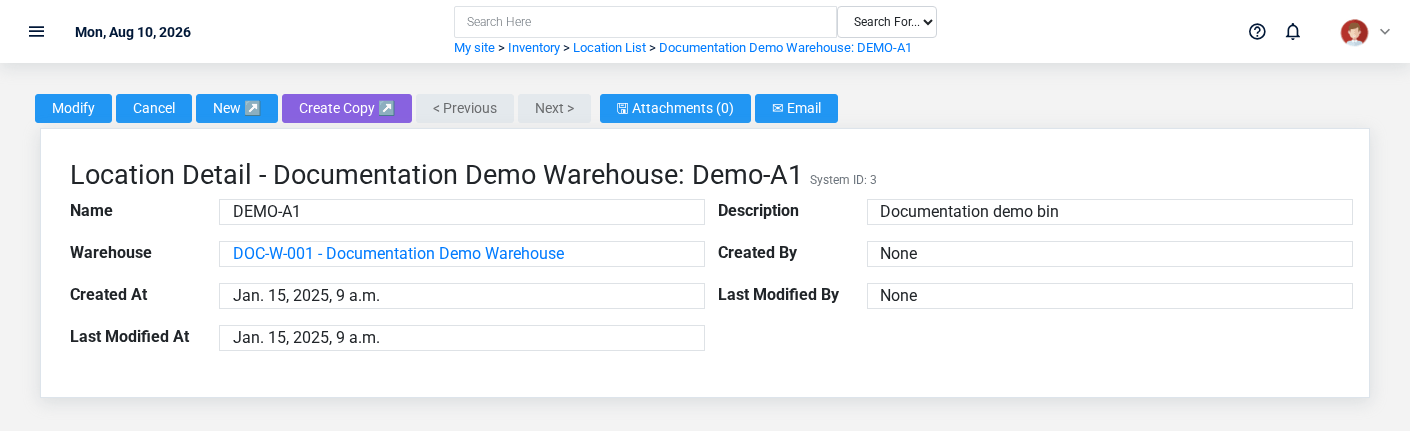
The Locations detail screen in the Brisk documentation demo.
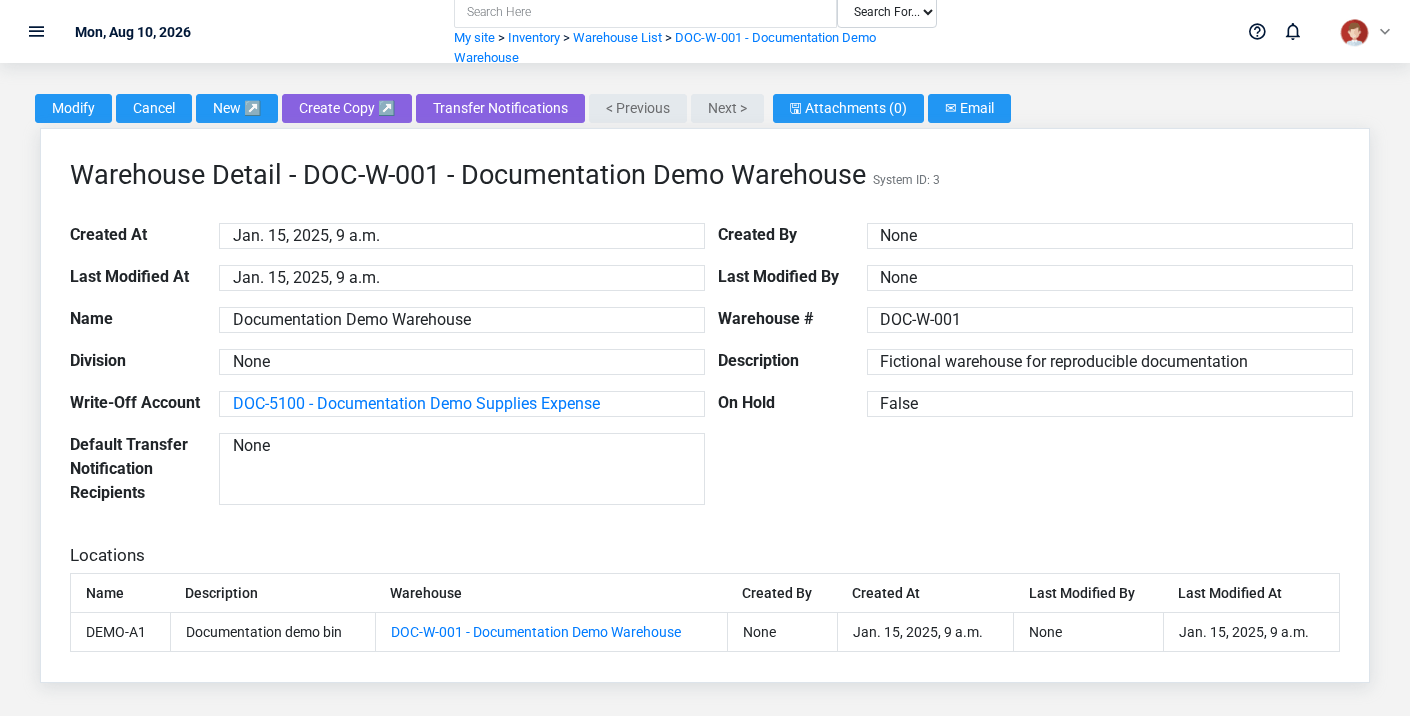
Use the detail page as the shared record of what this location currently means. Verify **Name**, **Description**, and **Warehouse** before relying on it for a decision.
Follow **Warehouse** to determine whether the issue is on this location or on one of those linked records.
Next check: Verify this location in **Items** before staff build new activity on it; correct ownership, classification, and active state now rather than after transactions accumulate.
Edit an existing location
Edit this location to keep the same real-world party, item, location, or resource accurate. Do not repurpose it for a different entity after activity is attached.
1. Open the detail page. Compare **Warehouse** with the supporting document or approved request.
2. Recheck **Warehouse**. These values are most likely to change warehouse availability, replenishment, quantities, and valuation.
3. Save the change, return to the list, and confirm that the location now appears under the expected **Name**.
After the change: Verify this location in **Items** before staff build new activity on it; correct ownership, classification, and active state now rather than after transactions accumulate.
Find and review locations
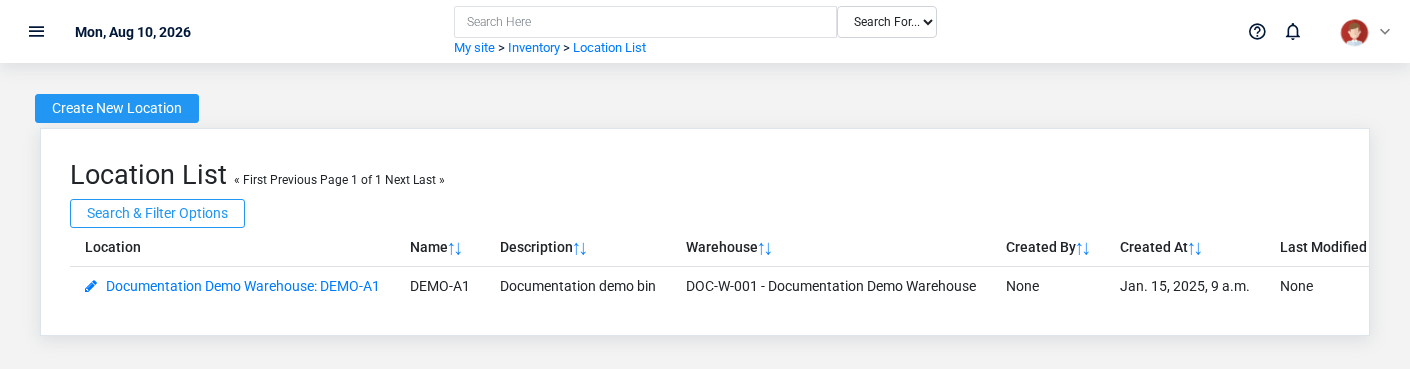
The Locations list screen in the Brisk documentation demo.
Use the Locations list to find the correct record before opening or changing it. Compare **Name**. Records with similar names or numbers can still belong to different **Warehouse**.
- The initial order emphasizes **Name**. Select a column heading when you need a different comparison.
Open the location whose **Name** match the task. If it is missing, clear the list filters and recheck the identifying information shown on the screen rather than creating a replacement immediately.
## Fields and business rules
Brisk stores 3 user-relevant fields for this location, including 1 linked-record selection and 0 controlled-choice fields. Create and edit screens may hide calculated or workflow-managed values from this full reference.
| Field | Required | What it controls |
|---|---:|---|
| **Name** | Yes | Human-readable name for this location. |
| **Description** | No | Description of this location. |
| **Warehouse** | No | The warehouse associated with this location. |
## What happens next
Verify this location in **Items** before staff build new activity on it; correct ownership, classification, and active state now rather than after transactions accumulate.
## Common mistakes and troubleshooting
- **The record will not save:** Recheck **Name** and any message beside the field. A required related record may also be inactive or unavailable to your role.
- **The values look right but the result is wrong:** Open **Warehouse** from the detail page. Correct the specific relationship that is wrong instead of forcing a total or status to compensate for it.
# Price Rules
# Price Rules
Purpose and when to use this record
The Price Rules overview screen in the Brisk documentation demo.
Review the conditional pricing rules that select a price from customer, quantity, schedule, item, and date context.
## At a glance
- **Identify it by:** **Customer Class**, **Item**, **Rule Base**, and **Rule Value**.
- **Check its business context:** **Customer Class**, and **Item**.
- **Why care:** Warehouse, item, unit, quantity, and cost must describe the same physical movement. A wrong warehouse or unit can make availability and valuation misleading.
## Before you begin
You need the Brisk permission for the action you are taking on price rules. If a Create, Edit, or Delete control is absent, do not work around it with another user’s account; ask an administrator to review your role.
Have valid **Customer Class** records ready first. Those selections determine where this price rule belongs and which later screens can find it.
Review price rule details
Use the detail page as the shared record of what this price rule currently means. Verify **Rule Base**, and **Modifier** before relying on it for a decision.
Follow **Customer Class**, and **Item** to determine whether the issue is on this price rule or on one of those linked records.
Next check: Use **Customer Class**, and **Item** to interpret this price rule. If it records a failure or exception, correct the source process and create a new successful event rather than rewriting the audit trail.
## Fields and business rules
Brisk stores 8 user-relevant fields for this price rule, including 2 linked-record selections and 2 controlled-choice fields. Create and edit screens may hide calculated or workflow-managed values from this full reference.
| Field | Required | What it controls |
|---|---:|---|
| **Customer Class** | Yes | The customer class associated with this price rule. |
| **Item** | No | Links this price rule to the selected Item; verify the relationship before saving. |
| **Rule Base** | Yes | Use this field to determine whether to mark up from cost or mark down from MSRP. Available values: Cost, MSRP. |
| **Rule Value** | No | Use this field to enter an arbitrary value for Cost or MSRP to calculate a price. If used as a cost, this field will intelligently try to suggest existing costs but the value here does not tamper with the costing system -- for all intents and purposes this value is used for planning pricing. |
| **Modifier** | Yes | This field determines whether the Value field will behave as a percentage of the base or if it will be straight additional margin. Available values: Percent, Margin. |
| **Value** | Yes | The value value recorded for this price rule. |
| **Calculated Price** | No | The calculated price value recorded for this price rule. |
| **Info** | No | Automatic pricing systems in Brisk will annotate their calculations here. |
## What happens next
Use **Customer Class**, and **Item** to interpret this price rule. If it records a failure or exception, correct the source process and create a new successful event rather than rewriting the audit trail.
## Common mistakes and troubleshooting
- **The record will not save:** Recheck **Customer Class**, **Rule Base**, **Modifier**, and **Value** and any message beside the field. A required related record may also be inactive or unavailable to your role.
- **The values look right but the result is wrong:** Open **Customer Class**, and **Item** from the detail page. Correct the specific relationship that is wrong instead of forcing a total or status to compensate for it.
# Price Schedules
# Price Schedules
Purpose and when to use this record
Define a named set of item prices that can be assigned to customers or business situations.
## At a glance
- **Identify it by:** **Beginning Date**, **Ending Date**, and **Label**.
- **Check its business context:** **Warehouse**, and **Previous**.
- **Why care:** Warehouse, item, unit, quantity, and cost must describe the same physical movement. A wrong warehouse or unit can make availability and valuation misleading.
- **Why care:** Availability and publication flags affect future use without erasing history. Prefer disabling an obsolete setup record when existing transactions still refer to it.
## Before you begin
You need the Brisk permission for the action you are taking on price schedules. If a Create, Edit, or Delete control is absent, do not work around it with another user’s account; ask an administrator to review your role.
Have valid **Warehouse** records ready first. Those selections determine where this Price Schedule belongs and which later screens can find it.
Create a Price Schedule
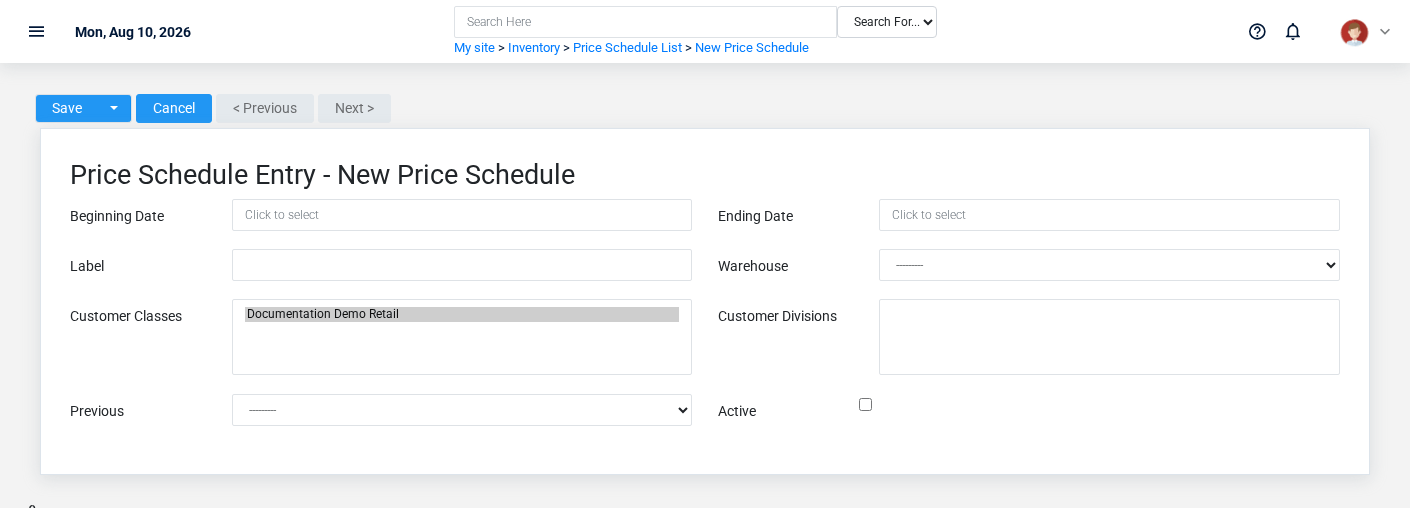
The Price Schedules create screen in the Brisk documentation demo.
Create a Price Schedule only when the existing choices do not represent the policy or classification you need. Near-duplicate setup values split reporting and make later selection harder.
1. Select the business context first: **Warehouse**, and **Previous**.
2. Enter the required identifying and operational values: **Beginning Date**, **Ending Date**, and **Warehouse**.
3. Review **Active** deliberately; these choices control availability or workflow rather than merely describing the record.
4. Save the Price Schedule, then confirm **Beginning Date**, **Ending Date**, and **Label** on its detail page before continuing.
After saving: Open **Price Schedule Items**, and **Price Schedules** and confirm the Price Schedule appears with the intended label and availability. Keep the old value for historical records when changing it would split or relabel prior reporting.
Delete a Price Schedule
Delete this Price Schedule only if it is an unused duplicate or setup mistake. Once other records refer to it, preserve that history and make the value inactive when the screen provides that option.
If the record is merely obsolete, use **Active** to remove it from future use while preserving existing references.
Before confirming, check for related **Price Schedule Items**, and **Price Schedules**. Brisk may refuse deletion when another record depends on this one; resolve the duplicate or use the supported correction workflow instead of breaking the trail.
On the confirmation page, verify **Beginning Date**, **Ending Date**, and **Label**. After confirmation, return to the Price Schedules list and make sure only the intended Price Schedule was removed.
Review Price Schedule details
Use the detail page as the shared record of what this Price Schedule currently means. Verify **Beginning Date**, **Ending Date**, and **Active** before relying on it for a decision.
Follow **Warehouse**, and **Previous** to determine whether the issue is on this Price Schedule or on one of those linked records.
Next check: Open **Price Schedule Items**, and **Price Schedules** and confirm the Price Schedule appears with the intended label and availability. Keep the old value for historical records when changing it would split or relabel prior reporting.
Edit an existing Price Schedule
Edit this Price Schedule when the underlying policy or classification changed. First determine whether historical transactions should retain the old value; if so, deactivate the old choice and create a new one.
1. Open the detail page. Compare **Warehouse**, and **Previous** with the supporting document or approved request.
2. Recheck **Beginning Date**, **Ending Date**, **Warehouse**, and **Active**. These values are most likely to change warehouse availability, replenishment, quantities, and valuation.
3. Save the change, return to the list, and confirm that the Price Schedule now appears under the expected **Active**.
After the change: Open **Price Schedule Items**, and **Price Schedules** and confirm the Price Schedule appears with the intended label and availability. Keep the old value for historical records when changing it would split or relabel prior reporting.
Find and review price schedules
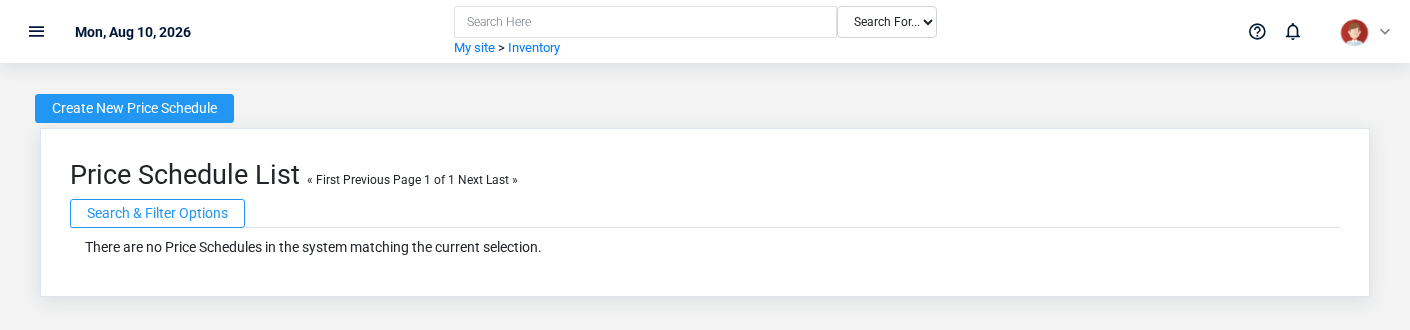
The Price Schedules list screen in the Brisk documentation demo.
Use the Price Schedules list to find the correct record before opening or changing it. Compare **Beginning Date**, and **Ending Date**. Records with similar names or numbers can still belong to different **Warehouse**, and **Previous**.
Open the Price Schedule whose **Beginning Date**, and **Ending Date** match the task. If it is missing, clear the list filters and recheck **Active** rather than creating a replacement immediately.
## Fields and business rules
Brisk stores 6 user-relevant fields for this Price Schedule, including 2 linked-record selections and 0 controlled-choice fields. Create and edit screens may hide calculated or workflow-managed values from this full reference.
| Field | Required | What it controls |
|---|---:|---|
| **Beginning Date** | Yes | Records the date that this price schedule begins taking effect. |
| **Ending Date** | Yes | Records the date that this price schedule stops taking effect. |
| **Label** | No | Give this price schedule a specific name. If left blank, it will be labelled by its beginning date. |
| **Warehouse** | Yes | Sets the warehouse that this price schedule applies to. |
| **Previous** | No | Links to the price schedule that this one was copied from. |
| **Active** | No | If a given price schedule is marked as active for a warehouse, it will take effect. Only one price schedule may be active per warehouse. |
## What happens next
Open **Price Schedule Items**, and **Price Schedules** and confirm the Price Schedule appears with the intended label and availability. Keep the old value for historical records when changing it would split or relabel prior reporting.
## Common mistakes and troubleshooting
- **The record will not save:** Recheck **Beginning Date**, **Ending Date**, and **Warehouse** and any message beside the field. A required related record may also be inactive or unavailable to your role.
- **The record saved but is not available where expected:** Recheck **Active**, then clear the filters on the destination list. A saved record can still be inactive, unpublished, locked, unapproved, or in the wrong workflow state.
- **The values look right but the result is wrong:** Open **Warehouse**, and **Previous** from the detail page. Correct the specific relationship that is wrong instead of forcing a total or status to compensate for it.
# Purchase Orders
# Purchase Orders
Purpose and when to use this record
Create and manage purchase orders from vendor commitment through partial or complete receiving.
## At a glance
- **Identify it by:** **Purchase #**, **Status**, **Date Created**, and **Ship Date**.
- **Check its business context:** **Vendor**, **Warehouse**, **Freight Vendor**, and **Parent**.
- **Why care:** Warehouse, item, unit, quantity, and cost must describe the same physical movement. A wrong warehouse or unit can make availability and valuation misleading.
- **Why care:** Status communicates workflow progress to other staff. Change it only when the underlying work, approval, payment, or handoff has actually occurred.
## Before you begin
You need the Brisk permission for the action you are taking on purchase orders. If a Create, Edit, or Delete control is absent, do not work around it with another user’s account; ask an administrator to review your role.
Create a Purchase
Create a Purchase only after confirming that the source document or operational event has not already been entered.
1. Select the business context first: **Vendor**, **Warehouse**, **Freight Vendor**, and **Parent**.
2. Enter the identifying values shown on the form, especially **Purchase #**, **Status**, **Vendor**, **Warehouse**, **Date Created**, and **Ship Date**, plus the remaining screen fields.
3. Review **Status**, and **Submitted To Vendor** deliberately; these choices control availability or workflow rather than merely describing the record.
4. Save the Purchase, then confirm **Purchase #**, **Status**, **Date Created**, and **Ship Date** on its detail page before continuing.
After saving: Send the approved order to the vendor, then receive actual deliveries against it; partial receipts should leave the unreceived balance open.
Delete a Purchase
Delete this Purchase only when it was entered by mistake and no downstream history depends on it. Use a reversal, void, credit, counter-adjustment, or status correction for a real event that later changed.
Before confirming, check for related **Inventory Receipts**, **Inventory Records**, **Purchase Rows**, and **Transactions**. Brisk may refuse deletion when another record depends on this one; resolve the duplicate or use the supported correction workflow instead of breaking the trail.
On the confirmation page, verify **Purchase #**, **Status**, **Date Created**, and **Ship Date**. After confirmation, return to the Purchase Orders list and make sure only the intended Purchase was removed.
Review Purchase details
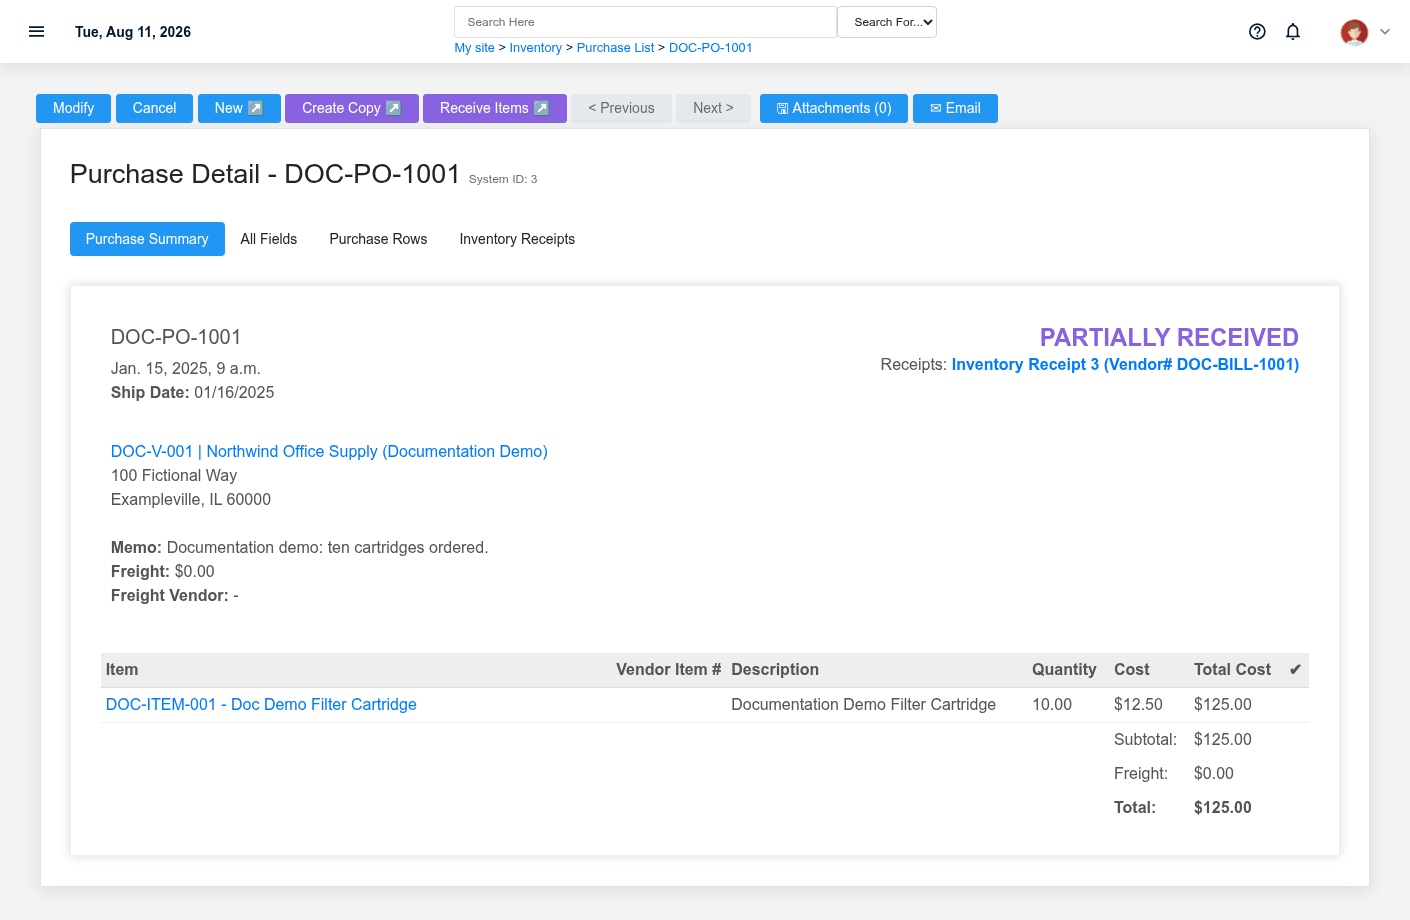
A fictional purchase order after six of ten items have been received.
Use the detail page as the shared record of what this Purchase currently means. Verify **Status**, **Date Created**, **Ship Date**, **Subtotal**, and **Total** before relying on it for a decision.
Follow **Vendor**, **Warehouse**, **Freight Vendor**, and **Parent** to determine whether the issue is on this Purchase or on one of those linked records.
Next check: Send the approved order to the vendor, then receive actual deliveries against it; partial receipts should leave the unreceived balance open.
Edit an existing Purchase
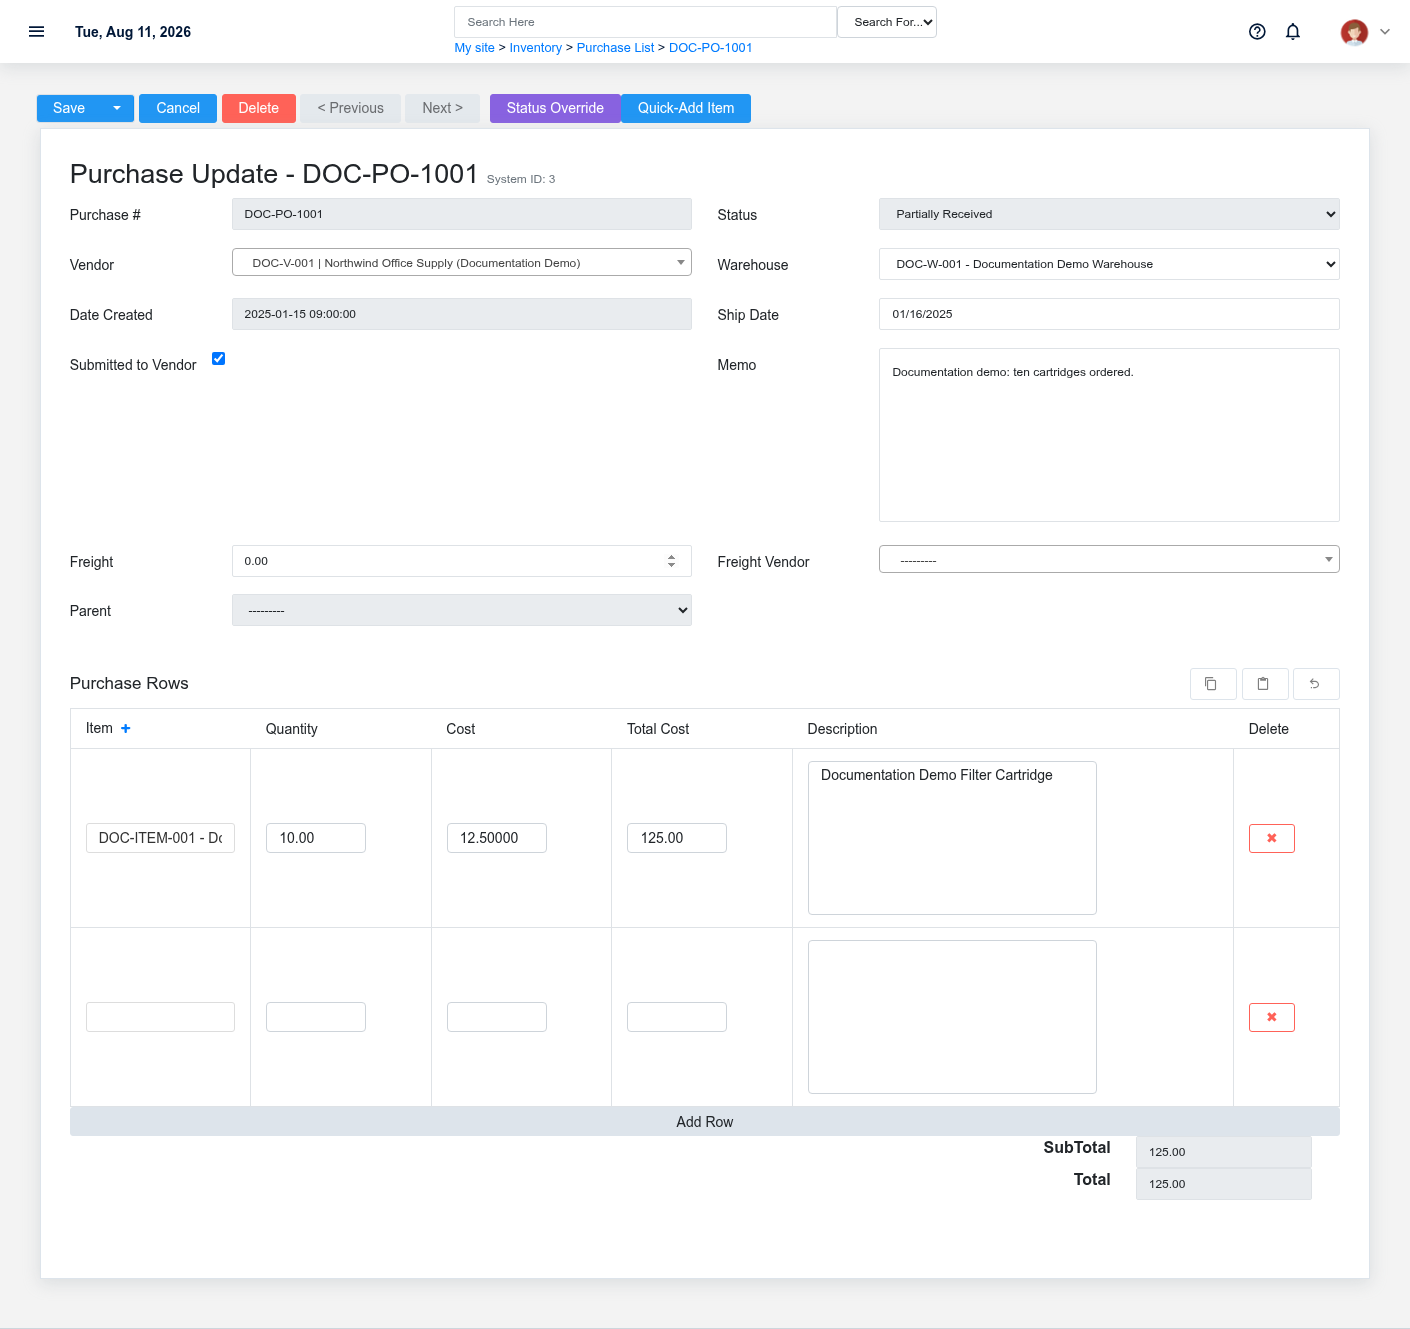
The Purchase Orders update screen in the Brisk documentation demo.
Edit this Purchase to correct or complete the same source document or operational event; use the supported reversal or follow-up workflow when the business event itself changed.
1. Open the detail page. Compare **Vendor**, **Warehouse**, **Freight Vendor**, and **Parent** with the supporting document or approved request.
2. Recheck **Status**, **Vendor**, **Warehouse**, **Date Created**, **Ship Date**, and **Subtotal**, plus the remaining screen fields. These values are most likely to change warehouse availability, replenishment, quantities, and valuation.
3. Save the change, return to the list, and confirm that the Purchase now appears under the expected **Status**.
After the change: Send the approved order to the vendor, then receive actual deliveries against it; partial receipts should leave the unreceived balance open.
Find and review purchase orders
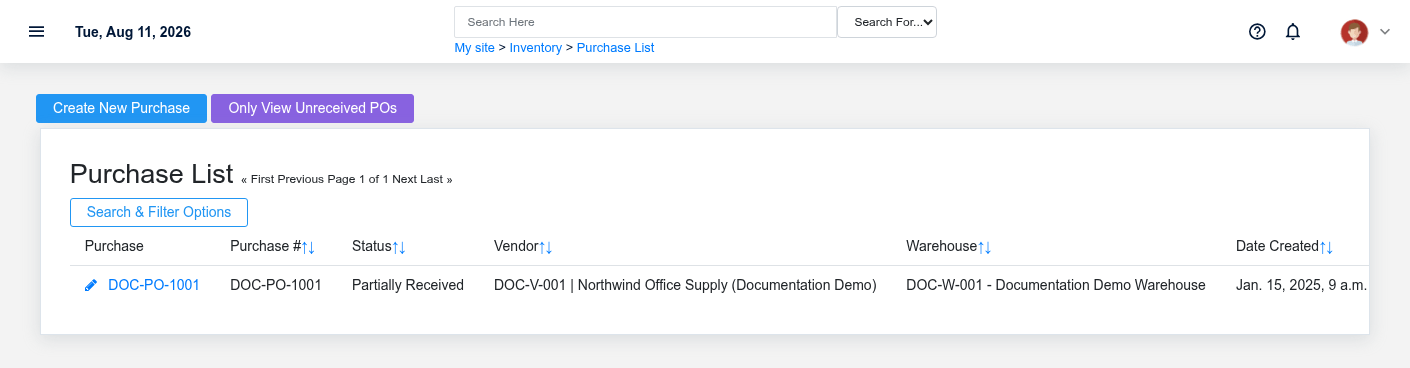
The Purchase Orders list screen in the Brisk documentation demo.
Use the Purchase Orders list to find the correct record before opening or changing it. Compare **Purchase #**, **Status**, **Date Created**, and **Ship Date**. Records with similar names or numbers can still belong to different **Vendor**, **Warehouse**, **Freight Vendor**, and **Parent**.
- Keyword search checks **Memo**, and **Status**.
- Narrow the list with **Vendor**, and **Warehouse** filters.
- The date filter uses **Ship Date**; choose a range that matches the business event you are reconciling.
- The initial order emphasizes **Purchase #**. Select a column heading when you need a different comparison.
Open the Purchase whose **Purchase #**, **Status**, **Date Created**, and **Ship Date** match the task. If it is missing, clear the list filters and recheck **Vendor**, **Warehouse**, **Ship Date**, and **Status** rather than creating a replacement immediately.
## Fields and business rules
Brisk stores 13 user-relevant fields for this Purchase, including 4 linked-record selections and 1 controlled-choice field. Create and edit screens may hide calculated or workflow-managed values from this full reference.
| Field | Required | What it controls |
|---|---:|---|
| **Purchase #** | No | The purchase # recorded for this purchase. |
| **Status** | No | Current status of this purchase. Available values: Draft, Submitted, Partially Received, Received, Overridden. |
| **Vendor** | No | The vendor associated with this purchase. |
| **Warehouse** | No | The warehouse associated with this purchase. |
| **Date Created** | No | Date and time recorded for date created on this purchase. |
| **Ship Date** | No | The date that this purchase order is scheduled to ship from the vendor. |
| **Submitted To Vendor** | No | Whether the submitted to vendor option applies to this purchase. |
| **Memo** | No | The memo recorded for this purchase. |
| **Subtotal** | No | The sub total value recorded for this purchase. |
| **Freight** | No | The total freight cost for this purchase order. This value is copied to receiving tickets created from the purchase order. |
| **Freight Vendor** | No | Sets the freight vendor associated with this purchase order; assumed to be FOB if left blank. |
| **Total** | No | The total value recorded for this purchase. |
| **Parent** | No | Parent purchase in the hierarchy. |
## What happens next
Send the approved order to the vendor, then receive actual deliveries against it; partial receipts should leave the unreceived balance open.
## Common mistakes and troubleshooting
- **The record saved but is not available where expected:** Recheck **Status**, then clear the filters on the destination list. A saved record can still be inactive, unpublished, locked, unapproved, or in the wrong workflow state.
- **The values look right but the result is wrong:** Open **Vendor**, **Warehouse**, **Freight Vendor**, and **Parent** from the detail page. Correct the specific relationship that is wrong instead of forcing a total or status to compensate for it.
# Units Of Measure
# Units Of Measure
Purpose and when to use this record
The Units Of Measure overview screen in the Brisk documentation demo.
Define the units in which items are bought, stocked, produced, and sold, including their role in quantity conversion.
## At a glance
- **Identify it by:** **Name**.
- **Why care:** Warehouse, item, unit, quantity, and cost must describe the same physical movement. A wrong warehouse or unit can make availability and valuation misleading.
## Before you begin
You need the Brisk permission for the action you are taking on units of measure. If a Create, Edit, or Delete control is absent, do not work around it with another user’s account; ask an administrator to review your role.
Create an Unit of Measure
The Units Of Measure create screen in the Brisk documentation demo.
Create an Unit of Measure after searching for the person, organization, item, location, or resource under alternate names and identifiers. Merge or correct an existing master record instead of creating a duplicate.
1. Select the business context first.
2. Enter the required identifying and operational values: **Name**.
3. Review **Weight** against the source document or approved setup decision.
4. Save the Unit of Measure, then confirm **Name** on its detail page before continuing.
After saving: Verify this Unit of Measure in **Commodity Items**, **Discount Schedules**, **Item Assemblies**, and **Item Assembly Lines**, plus the remaining screen fields before staff build new activity on it; correct ownership, classification, and active state now rather than after transactions accumulate.
Delete an Unit of Measure
Delete this Unit of Measure only if it is an unused duplicate or setup mistake. Once other records refer to it, preserve that history and make the value inactive when the screen provides that option.
Before confirming, check for related **Commodity Items**, **Discount Schedules**, **Item Assemblies**, **Item Assembly Lines**, and **Item Rows**, plus the remaining screen fields. Brisk may refuse deletion when another record depends on this one; resolve the duplicate or use the supported correction workflow instead of breaking the trail.
On the confirmation page, verify **Name**. After confirmation, return to the Units of Measure list and make sure only the intended Unit of Measure was removed.
Review Unit of Measure details
The Units Of Measure detail screen in the Brisk documentation demo.
Use the detail page as the shared record of what this Unit of Measure currently means. Verify **Name**, and **Weight** before relying on it for a decision.
Compare the Unit of Measure with its source document or approved setup request before deciding that it needs correction.
Next check: Verify this Unit of Measure in **Commodity Items**, **Discount Schedules**, **Item Assemblies**, and **Item Assembly Lines**, plus the remaining screen fields before staff build new activity on it; correct ownership, classification, and active state now rather than after transactions accumulate.
Edit an existing Unit of Measure
Edit this Unit of Measure to keep the same real-world party, item, location, or resource accurate. Do not repurpose it for a different entity after activity is attached.
1. Open the detail page. Compare **Name** with the supporting document or approved request.
2. Recheck the identifying information shown on the screen. These values are most likely to change warehouse availability, replenishment, quantities, and valuation.
3. Save the change, return to the list, and confirm that the Unit of Measure now appears under the expected **Name**.
After the change: Verify this Unit of Measure in **Commodity Items**, **Discount Schedules**, **Item Assemblies**, and **Item Assembly Lines**, plus the remaining screen fields before staff build new activity on it; correct ownership, classification, and active state now rather than after transactions accumulate.
## Fields and business rules
Brisk stores 2 user-relevant fields for this Unit of Measure, including 0 linked-record selections and 0 controlled-choice fields. Create and edit screens may hide calculated or workflow-managed values from this full reference.
| Field | Required | What it controls |
|---|---:|---|
| **Name** | Yes | Human-readable name for this unit of measure. |
| **Weight** | No | Can be used to automatically set item weights for shipping purposes. |
## What happens next
Verify this Unit of Measure in **Commodity Items**, **Discount Schedules**, **Item Assemblies**, and **Item Assembly Lines**, plus the remaining screen fields before staff build new activity on it; correct ownership, classification, and active state now rather than after transactions accumulate.
## Common mistakes and troubleshooting
- **The record will not save:** Recheck **Name** and any message beside the field. A required related record may also be inactive or unavailable to your role.
- **The values look right but the result is wrong:** Compare this Unit of Measure with the source document or approved setup decision, then check the downstream screen where it is used.
# Vendor Credit Memos
# Vendor Credit Memos
Purpose and when to use this record
Record a vendor-issued credit for returned goods, pricing corrections, or other reductions to payables.
## At a glance
- **Identify it by:** **Status**, **Credit Memo / Invoice #**, and **Date Created**.
- **Check its business context:** **Vendor**, and **Warehouse**.
- **Why care:** Warehouse, item, unit, quantity, and cost must describe the same physical movement. A wrong warehouse or unit can make availability and valuation misleading.
- **Why care:** Treat posted, processed, paid, reversed, and edit-locked states as controls—not ordinary descriptive fields. Confirm the source transaction before changing any state that the screen permits you to change.
- **Why care:** Status communicates workflow progress to other staff. Change it only when the underlying work, approval, payment, or handoff has actually occurred.
## Before you begin
You need the Brisk permission for the action you are taking on vendor credit memos. If a Create, Edit, or Delete control is absent, do not work around it with another user’s account; ask an administrator to review your role.
Create a Vendor Credit Memo
Create a Vendor Credit Memo only after confirming that the source document or operational event has not already been entered.
1. Select the business context first: **Vendor**, and **Warehouse**.
2. Enter the required identifying and operational values: **Inventory Returned**.
3. Review **Status**, **Inventory Returned**, **Edit Locked**, and **Processed** deliberately; these choices control availability or workflow rather than merely describing the record.
4. Save the Vendor Credit Memo, then confirm **Status**, **Credit Memo / Invoice #**, and **Date Created** on its detail page before continuing.
After saving: Apply the credit to the appropriate vendor invoice or payable balance and retain the connection to the returned or corrected purchase.
Delete a Vendor Credit Memo
Delete this Vendor Credit Memo only when it was entered by mistake and no downstream history depends on it. Use a reversal, void, credit, counter-adjustment, or status correction for a real event that later changed.
Before confirming, check for related **Expense Rows**, **Inventory Items Credited**, **Inventory Records**, **Transactions**, and **Vendor Credit Memo Applications**, plus the remaining screen fields. Brisk may refuse deletion when another record depends on this one; resolve the duplicate or use the supported correction workflow instead of breaking the trail.
On the confirmation page, verify **Status**, **Credit Memo / Invoice #**, and **Date Created**. After confirmation, return to the Vendor Credit Memos list and make sure only the intended Vendor Credit Memo was removed.
Review Vendor Credit Memo details
Use the detail page as the shared record of what this Vendor Credit Memo currently means. Verify **Status**, **Date Created**, **Edit Locked**, **Subtotal**, **Total**, and **Processed** before relying on it for a decision.
Follow **Vendor**, and **Warehouse** to determine whether the issue is on this Vendor Credit Memo or on one of those linked records.
Next check: Apply the credit to the appropriate vendor invoice or payable balance and retain the connection to the returned or corrected purchase.
Edit an existing Vendor Credit Memo
Edit this Vendor Credit Memo to correct or complete the same source document or operational event; use the supported reversal or follow-up workflow when the business event itself changed.
1. Open the detail page. Compare **Vendor**, and **Warehouse** with the supporting document or approved request.
2. Recheck **Status**, **Vendor**, **Warehouse**, **Date Created**, **Edit Locked**, and **Subtotal**, plus the remaining screen fields. These values are most likely to change warehouse availability, replenishment, quantities, and valuation.
3. Save the change, return to the list, and confirm that the Vendor Credit Memo now appears under the expected **Status**, **Edit Locked**, and **Processed**.
After the change: Apply the credit to the appropriate vendor invoice or payable balance and retain the connection to the returned or corrected purchase.
Find and review vendor credit memos
The Vendor Credit Memos list screen in the Brisk documentation demo.
Use the Vendor Credit Memos list to find the correct record before opening or changing it. Compare **Status**, **Credit Memo / Invoice #**, and **Date Created**. Records with similar names or numbers can still belong to different **Vendor**, and **Warehouse**.
- The initial order emphasizes **Id**. Select a column heading when you need a different comparison.
Open the Vendor Credit Memo whose **Status**, **Credit Memo / Invoice #**, and **Date Created** match the task. If it is missing, clear the list filters and recheck **Status**, **Edit Locked**, and **Processed** rather than creating a replacement immediately.
## Fields and business rules
Brisk stores 12 user-relevant fields for this Vendor Credit Memo, including 2 linked-record selections and 1 controlled-choice field. Create and edit screens may hide calculated or workflow-managed values from this full reference.
| Field | Required | What it controls |
|---|---:|---|
| **Status** | No | Indicates whether or not this document is complete;. if required informaiion is missing, it will be in draft status. Available values: Draft, Complete. |
| **Vendor** | No | The vendor associated with this vendor credit memo. |
| **Credit Memo / Invoice #** | No | Vendor-provided credit memo or invoice reference number. |
| **Inventory Returned** | Yes | This required field is used to determine whether this credit memo involves returning inventory to the vendor. If checked, items will be pulled from inventory, if unchecked, inventory levels will remain unchanged. |
| **Warehouse** | No | Indicates which warehouse from which this credit memo will remove inventory. |
| **Date Created** | No | Date and time recorded for date created on this vendor credit memo. |
| **Memo** | No | A free-text field that can be used to record any notes or additional information. |
| **Edit Locked** | No | Whether the edit locked option applies to this vendor credit memo. |
| **Subtotal** | No | The dollar amount of inventory returned on this receipt before restocking fees and other adjustments. |
| **Adjustments** | No | The dollar amount of any restocking fees or other adjustments charged by the vendor. |
| **Total** | No | The total dollar amount for this inventory receipt. |
| **Processed** | No | A non-editable field that is used by the accounting system to indicate when accounting transactions have posted for this credit memo. |
## What happens next
Apply the credit to the appropriate vendor invoice or payable balance and retain the connection to the returned or corrected purchase.
## Common mistakes and troubleshooting
- **The record will not save:** Recheck **Inventory Returned** and any message beside the field. A required related record may also be inactive or unavailable to your role.
- **The record saved but is not available where expected:** Recheck **Status**, **Edit Locked**, and **Processed**, then clear the filters on the destination list. A saved record can still be inactive, unpublished, locked, unapproved, or in the wrong workflow state.
- **The values look right but the result is wrong:** Open **Vendor**, and **Warehouse** from the detail page. Correct the specific relationship that is wrong instead of forcing a total or status to compensate for it.
# Warehouses
# Warehouses
Purpose and when to use this record
Define the operating locations that own inventory, transactions, defaults, and warehouse-specific accounting activity.
## At a glance
- **Identify it by:** **Name**, and **Warehouse #**.
- **Check its business context:** **Division**, and **Write-Off Account**.
- **Why care:** Warehouse, item, unit, quantity, and cost must describe the same physical movement. A wrong warehouse or unit can make availability and valuation misleading.
## Before you begin
You need the Brisk permission for the action you are taking on warehouses. If a Create, Edit, or Delete control is absent, do not work around it with another user’s account; ask an administrator to review your role.
Create a warehouse
The Warehouses create screen in the Brisk documentation demo.
Create a warehouse after searching for the person, organization, item, location, or resource under alternate names and identifiers. Merge or correct an existing master record instead of creating a duplicate.
1. Select the business context first: **Division**, and **Write-Off Account**.
2. Enter the required identifying and operational values: **Name**.
3. Review **On Hold** deliberately; these choices control availability or workflow rather than merely describing the record.
4. Save the warehouse, then confirm **Name**, and **Warehouse #** on its detail page before continuing.
After saving: Verify this warehouse in **Accounts**, **Deposit Balancing Transactions**, **Deposits**, and **Expense/Asset Categories**, plus the remaining screen fields before staff build new activity on it; correct ownership, classification, and active state now rather than after transactions accumulate.
Delete a warehouse
Delete this warehouse only if it is an unused duplicate or setup mistake. Once other records refer to it, preserve that history and make the value inactive when the screen provides that option.
Before confirming, check for related **Accounts**, **Deposit Balancing Transactions**, **Deposits**, **Expense/Asset Categories**, and **Inventory Adjustments**, plus the remaining screen fields. Brisk may refuse deletion when another record depends on this one; resolve the duplicate or use the supported correction workflow instead of breaking the trail.
On the confirmation page, verify **Name**, and **Warehouse #**. After confirmation, return to the Warehouses list and make sure only the intended warehouse was removed.
Review warehouse details
The Warehouses detail screen in the Brisk documentation demo.
Use the detail page as the shared record of what this warehouse currently means. Verify **Name**, **Warehouse #**, **Division**, and **Description** before relying on it for a decision.
Follow **Division**, and **Write-Off Account** to determine whether the issue is on this warehouse or on one of those linked records.
Next check: Verify this warehouse in **Accounts**, **Deposit Balancing Transactions**, **Deposits**, and **Expense/Asset Categories**, plus the remaining screen fields before staff build new activity on it; correct ownership, classification, and active state now rather than after transactions accumulate.
Find and review warehouses
The Warehouses list screen in the Brisk documentation demo.
Use the Warehouses list to find the correct record before opening or changing it. Compare **Name**, and **Warehouse #**. Records with similar names or numbers can still belong to different **Division**, and **Write-Off Account**.
- The initial order emphasizes **Name**. Select a column heading when you need a different comparison.
Open the warehouse whose **Name**, and **Warehouse #** match the task. If it is missing, clear the list filters and recheck the identifying information shown on the screen rather than creating a replacement immediately.
Edit an existing warehouse
Edit this warehouse to keep the same real-world party, item, location, or resource accurate. Do not repurpose it for a different entity after activity is attached.
1. Open the detail page. Compare **Division**, and **Write-Off Account** with the supporting document or approved request.
2. Recheck **Warehouse #**. These values are most likely to change warehouse availability, replenishment, quantities, and valuation.
3. Save the change, return to the list, and confirm that the warehouse now appears under the expected **Name**, and **Warehouse #**.
After the change: Verify this warehouse in **Accounts**, **Deposit Balancing Transactions**, **Deposits**, and **Expense/Asset Categories**, plus the remaining screen fields before staff build new activity on it; correct ownership, classification, and active state now rather than after transactions accumulate.
## Fields and business rules
Brisk stores 6 user-relevant fields for this warehouse, including 2 linked-record selections and 0 controlled-choice fields. Create and edit screens may hide calculated or workflow-managed values from this full reference.
| Field | Required | What it controls |
|---|---:|---|
| **Name** | Yes | Human-readable name for this warehouse. |
| **Warehouse #** | No | A warehouse's numeric designation. |
| **Division** | No | The division associated with this warehouse. |
| **Description** | No | Description of this warehouse. |
| **Write-Off Account** | No | The write-off account associated with this warehouse. |
| **On Hold** | No | If enabled, items stored in this warehouse will be considered "On Hold" and will not be considered toward the reorder quantity. |
## What happens next
Verify this warehouse in **Accounts**, **Deposit Balancing Transactions**, **Deposits**, and **Expense/Asset Categories**, plus the remaining screen fields before staff build new activity on it; correct ownership, classification, and active state now rather than after transactions accumulate.
## Common mistakes and troubleshooting
- **The record will not save:** Recheck **Name** and any message beside the field. A required related record may also be inactive or unavailable to your role.
- **The values look right but the result is wrong:** Open **Division**, and **Write-Off Account** from the detail page. Correct the specific relationship that is wrong instead of forcing a total or status to compensate for it.