# Law Enforcement
Brisk managed documentation
# Core Records
# Agencies
# Agencies
Purpose and when to use this record
Maintain the law-enforcement and partner agencies referenced by cases, officers, evidence, transport, and dispatch work.
## At a glance
- **Identify it by:** **Name**.
- **Why care:** Use the agency’s approved terminology and access policy. Preserve dates, responsible personnel, case links, and audit history because these records may support official reporting or custody review.
## Before you begin
You need the Brisk permission for the action you are taking on agencies. If a Create, Edit, or Delete control is absent, do not work around it with another user’s account; ask an administrator to review your role.
Find and review agencies
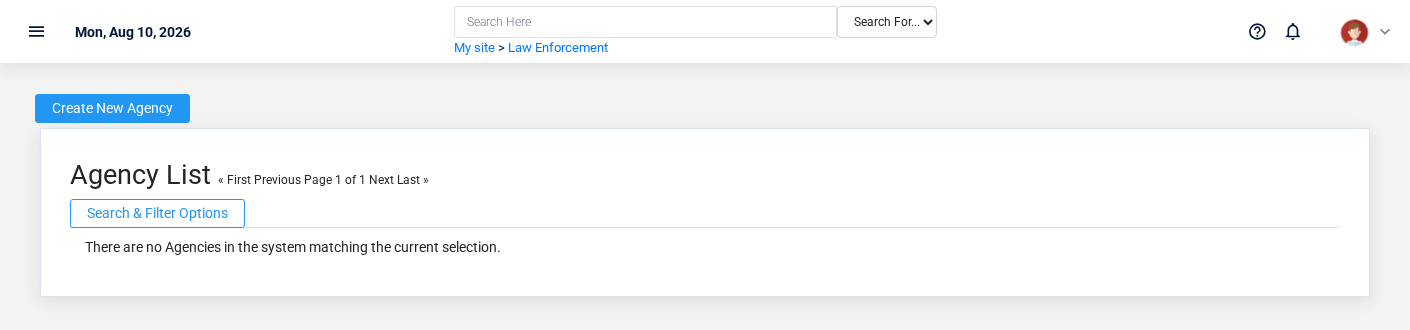
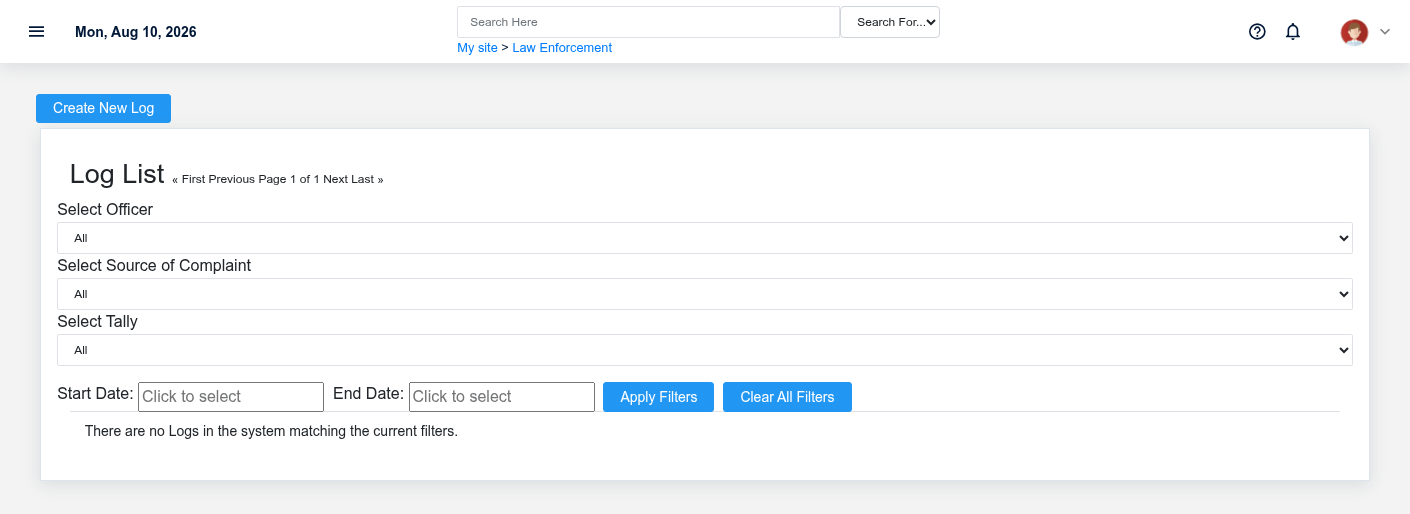
The Agencies list screen in the Brisk documentation demo.
Use the Agencies list to find the correct record before opening or changing it. Compare **Name**. Compare the full identifier rather than relying on a similar name.
Open the Agency whose **Name** match the task. If it is missing, clear the list filters and recheck **Agency Type** rather than creating a replacement immediately.
Create an Agency
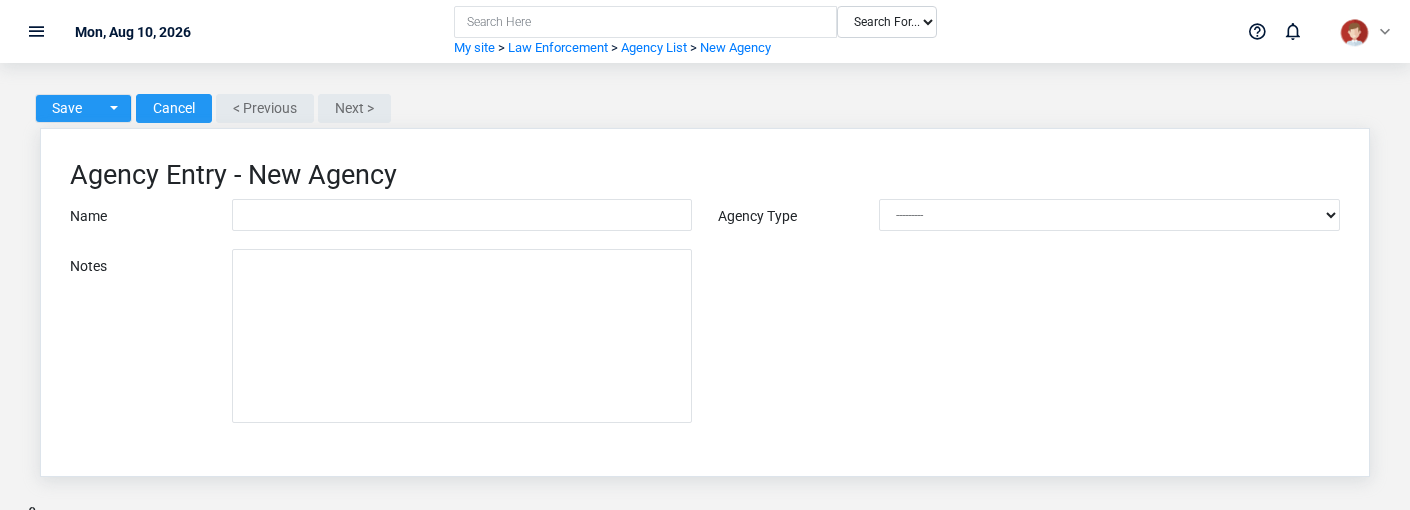
The Agencies create screen in the Brisk documentation demo.
Create an Agency only after confirming that the source document or operational event has not already been entered.
1. Select the business context first.
2. Enter the required identifying and operational values: **Name**, and **Agency Type**.
3. Review **Agency Type** deliberately; these choices control availability or workflow rather than merely describing the record.
4. Save the Agency, then confirm **Name** on its detail page before continuing.
After saving: Verify **Agency Type** on the detail page, then continue the law enforcement workflow only when those values agree with the source document and actual work performed.
Delete an Agency
Delete this Agency only when it was entered by mistake and no downstream history depends on it. Use a reversal, void, credit, counter-adjustment, or status correction for a real event that later changed.
Before confirming, check for related **Dispatch Entries**, and **Officers**. Brisk may refuse deletion when another record depends on this one; resolve the duplicate or use the supported correction workflow instead of breaking the trail.
On the confirmation page, verify **Name**. After confirmation, return to the Agencies list and make sure only the intended Agency was removed.
Review Agency details
Use the detail page as the shared record of what this Agency currently means. Verify **Agency Type** before relying on it for a decision.
Compare the Agency with its source document or approved setup request before deciding that it needs correction.
Next check: Verify **Agency Type** on the detail page, then continue the law enforcement workflow only when those values agree with the source document and actual work performed.
Edit an existing Agency
Edit this Agency to correct or complete the same source document or operational event; use the supported reversal or follow-up workflow when the business event itself changed.
1. Open the detail page. Compare **Name** with the supporting document or approved request.
2. Recheck **Agency Type**. These values are most likely to change case history, custody, dispatch, official reporting, or audit review.
3. Save the change, return to the list, and confirm that the Agency now appears under the expected **Agency Type**.
After the change: Verify **Agency Type** on the detail page, then continue the law enforcement workflow only when those values agree with the source document and actual work performed.
## Fields and business rules
Brisk stores 3 user-relevant fields for this Agency, including 0 linked-record selections and 1 controlled-choice field. Create and edit screens may hide calculated or workflow-managed values from this full reference.
| Field | Required | What it controls |
|---|---:|---|
| **Name** | Yes | Use this field to give the category a name (e.g. Felony, Misdemeanor, Federal, etc.). |
| **Agency Type** | Yes | Enter what type of agency. Available values: EMS, Fire, Law Enforcement, Other. |
| **Notes** | No | Use this field to record any notes about the agency. |
## What happens next
Verify **Agency Type** on the detail page, then continue the law enforcement workflow only when those values agree with the source document and actual work performed.
## Common mistakes and troubleshooting
- **The record will not save:** Recheck **Name**, and **Agency Type** and any message beside the field. A required related record may also be inactive or unavailable to your role.
- **The values look right but the result is wrong:** Compare this Agency with the source document or approved setup decision, then check the downstream screen where it is used.
# Case Info Definitions
# Case Info Definitions
Purpose and when to use this record
Define an additional case-information question or value that staff can record consistently across cases.
## At a glance
- **Identify it by:** **Name**.
- **Why care:** Use the agency’s approved terminology and access policy. Preserve dates, responsible personnel, case links, and audit history because these records may support official reporting or custody review.
## Before you begin
You need the Brisk permission for the action you are taking on case info definitions. If a Create, Edit, or Delete control is absent, do not work around it with another user’s account; ask an administrator to review your role.
Create a Case Info Definition
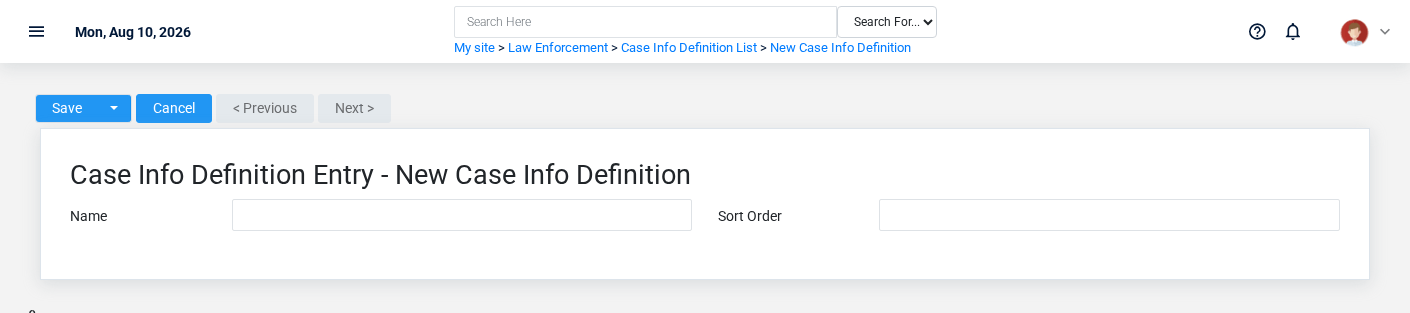
The Case Info Definitions create screen in the Brisk documentation demo.
Create a Case Info Definition only when the existing choices do not represent the policy or classification you need. Near-duplicate setup values split reporting and make later selection harder.
1. Select the business context first.
2. Enter the required identifying and operational values: **Name**.
3. Review **Sort Order** against the source document or approved setup decision.
4. Save the Case Info Definition, then confirm **Name** on its detail page before continuing.
After saving: Open **Case Info** and confirm the Case Info Definition appears with the intended label and availability. Keep the old value for historical records when changing it would split or relabel prior reporting.
Delete a Case Info Definition
Delete this Case Info Definition only if it is an unused duplicate or setup mistake. Once other records refer to it, preserve that history and make the value inactive when the screen provides that option.
Before confirming, check for related **Case Info**. Brisk may refuse deletion when another record depends on this one; resolve the duplicate or use the supported correction workflow instead of breaking the trail.
On the confirmation page, verify **Name**. After confirmation, return to the Case Info Definitions list and make sure only the intended Case Info Definition was removed.
Review Case Info Definition details
Use the detail page as the shared record of what this Case Info Definition currently means. Verify **Name**, and **Sort Order** before relying on it for a decision.
Compare the Case Info Definition with its source document or approved setup request before deciding that it needs correction.
Next check: Open **Case Info** and confirm the Case Info Definition appears with the intended label and availability. Keep the old value for historical records when changing it would split or relabel prior reporting.
Edit an existing Case Info Definition
Edit this Case Info Definition when the underlying policy or classification changed. First determine whether historical transactions should retain the old value; if so, deactivate the old choice and create a new one.
1. Open the detail page. Compare **Name** with the supporting document or approved request.
2. Recheck the identifying information shown on the screen. These values are most likely to change case history, custody, dispatch, official reporting, or audit review.
3. Save the change, return to the list, and confirm that the Case Info Definition now appears under the expected **Name**.
After the change: Open **Case Info** and confirm the Case Info Definition appears with the intended label and availability. Keep the old value for historical records when changing it would split or relabel prior reporting.
Find and review case info definitions
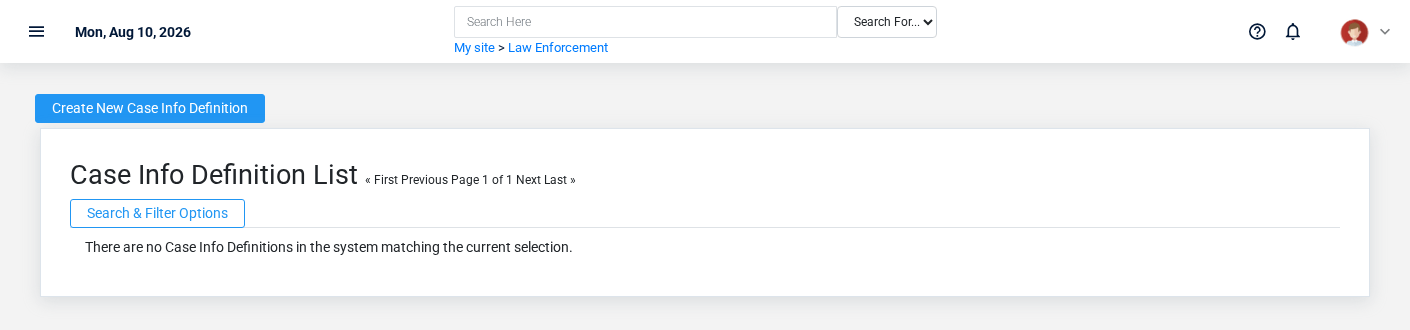
The Case Info Definitions list screen in the Brisk documentation demo.
Use the Case Info Definitions list to find the correct record before opening or changing it. Compare **Name**. Compare the full identifier rather than relying on a similar name.
Open the Case Info Definition whose **Name** match the task. If it is missing, clear the list filters and recheck the identifying information shown on the screen rather than creating a replacement immediately.
## Fields and business rules
Brisk stores 2 user-relevant fields for this Case Info Definition, including 0 linked-record selections and 0 controlled-choice fields. Create and edit screens may hide calculated or workflow-managed values from this full reference.
| Field | Required | What it controls |
|---|---:|---|
| **Name** | Yes | Sets the name of the field on. |
| **Sort Order** | No | Sets the order that this tally appears within its category. |
## What happens next
Open **Case Info** and confirm the Case Info Definition appears with the intended label and availability. Keep the old value for historical records when changing it would split or relabel prior reporting.
## Common mistakes and troubleshooting
- **The record will not save:** Recheck **Name** and any message beside the field. A required related record may also be inactive or unavailable to your role.
- **The values look right but the result is wrong:** Compare this Case Info Definition with the source document or approved setup decision, then check the downstream screen where it is used.
# Case Jurisdictions
# Case Jurisdictions
Purpose and when to use this record
Maintain the jurisdictions available for assigning responsibility and reporting cases.
## At a glance
- **Identify it by:** **Name**.
- **Why care:** Use the agency’s approved terminology and access policy. Preserve dates, responsible personnel, case links, and audit history because these records may support official reporting or custody review.
- **Why care:** Availability and publication flags affect future use without erasing history. Prefer disabling an obsolete setup record when existing transactions still refer to it.
## Before you begin
You need the Brisk permission for the action you are taking on case jurisdictions. If a Create, Edit, or Delete control is absent, do not work around it with another user’s account; ask an administrator to review your role.
Create a Case Jurisdiction
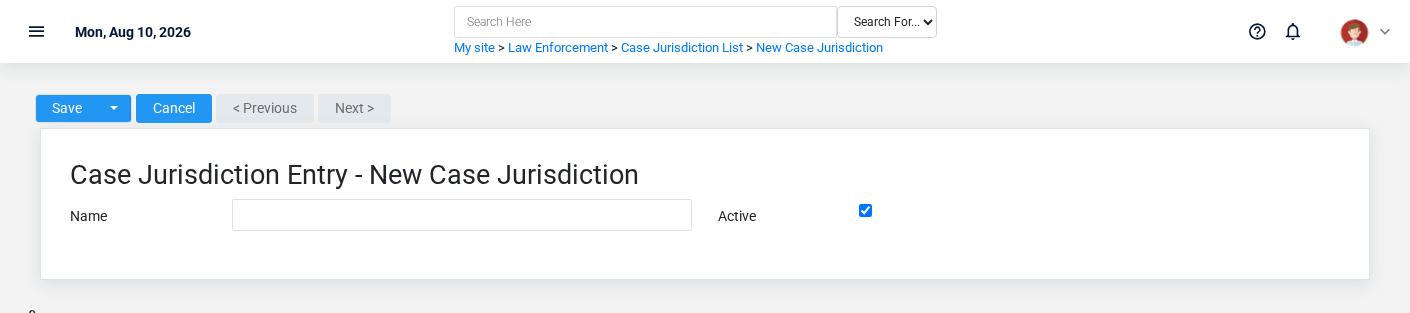
The Case Jurisdictions create screen in the Brisk documentation demo.
Create a Case Jurisdiction only after confirming that the source document or operational event has not already been entered.
1. Select the business context first.
2. Enter the required identifying and operational values: **Name**.
3. Review **Active** deliberately; these choices control availability or workflow rather than merely describing the record.
4. Save the Case Jurisdiction, then confirm **Name** on its detail page before continuing.
After saving: Verify **Active** on the detail page, then continue the law enforcement workflow only when those values agree with the source document and actual work performed.
Delete a Case Jurisdiction
Delete this Case Jurisdiction only when it was entered by mistake and no downstream history depends on it. Use a reversal, void, credit, counter-adjustment, or status correction for a real event that later changed.
If the record is merely obsolete, use **Active** to remove it from future use while preserving existing references.
Before confirming, check for related **Arrests**, and **Cases**. Brisk may refuse deletion when another record depends on this one; resolve the duplicate or use the supported correction workflow instead of breaking the trail.
On the confirmation page, verify **Name**. After confirmation, return to the Case Jurisdictions list and make sure only the intended Case Jurisdiction was removed.
Review Case Jurisdiction details
Use the detail page as the shared record of what this Case Jurisdiction currently means. Verify **Active** before relying on it for a decision.
Compare the Case Jurisdiction with its source document or approved setup request before deciding that it needs correction.
Next check: Verify **Active** on the detail page, then continue the law enforcement workflow only when those values agree with the source document and actual work performed.
Edit an existing Case Jurisdiction
Edit this Case Jurisdiction to correct or complete the same source document or operational event; use the supported reversal or follow-up workflow when the business event itself changed.
1. Open the detail page. Compare **Name** with the supporting document or approved request.
2. Recheck **Active**. These values are most likely to change case history, custody, dispatch, official reporting, or audit review.
3. Save the change, return to the list, and confirm that the Case Jurisdiction now appears under the expected **Active**.
After the change: Verify **Active** on the detail page, then continue the law enforcement workflow only when those values agree with the source document and actual work performed.
Find and review case jurisdictions
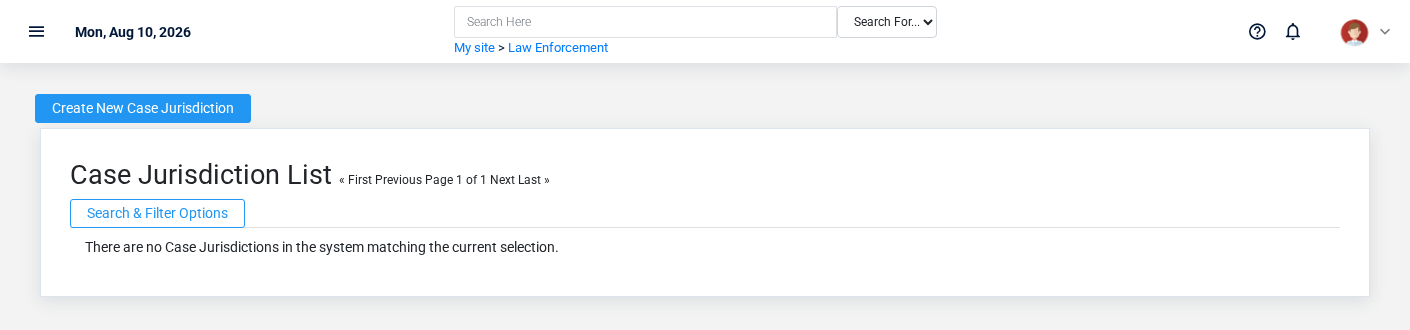
The Case Jurisdictions list screen in the Brisk documentation demo.
Use the Case Jurisdictions list to find the correct record before opening or changing it. Compare **Name**. Compare the full identifier rather than relying on a similar name.
Open the Case Jurisdiction whose **Name** match the task. If it is missing, clear the list filters and recheck **Active** rather than creating a replacement immediately.
## Fields and business rules
Brisk stores 2 user-relevant fields for this Case Jurisdiction, including 0 linked-record selections and 0 controlled-choice fields. Create and edit screens may hide calculated or workflow-managed values from this full reference.
| Field | Required | What it controls |
|---|---:|---|
| **Name** | Yes | Sets the name of this jurisdiction. |
| **Active** | No | If this field is unchecked, this jurisdiction will no longer appear in reports. |
## What happens next
Verify **Active** on the detail page, then continue the law enforcement workflow only when those values agree with the source document and actual work performed.
## Common mistakes and troubleshooting
- **The record will not save:** Recheck **Name** and any message beside the field. A required related record may also be inactive or unavailable to your role.
- **The record saved but is not available where expected:** Recheck **Active**, then clear the filters on the destination list. A saved record can still be inactive, unpublished, locked, unapproved, or in the wrong workflow state.
- **The values look right but the result is wrong:** Compare this Case Jurisdiction with the source document or approved setup decision, then check the downstream screen where it is used.
# Case Statuses
# Case Statuses
Purpose and when to use this record
Maintain the controlled case statuses used to communicate investigative or administrative progress.
## At a glance
- **Identify it by:** **Name**.
- **Why care:** Use the agency’s approved terminology and access policy. Preserve dates, responsible personnel, case links, and audit history because these records may support official reporting or custody review.
## Before you begin
You need the Brisk permission for the action you are taking on case statuses. If a Create, Edit, or Delete control is absent, do not work around it with another user’s account; ask an administrator to review your role.
Create a Case Status
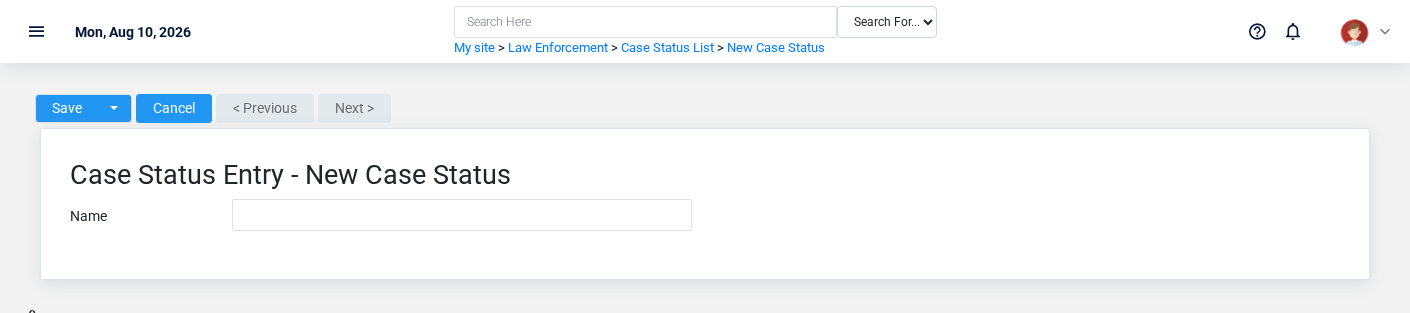
The Case Statuses create screen in the Brisk documentation demo.
Create a Case Status only when the existing choices do not represent the policy or classification you need. Near-duplicate setup values split reporting and make later selection harder.
1. Select the business context first.
2. Enter the required identifying and operational values: **Name**.
3. Review the identifying information shown on the screen against the source document or approved setup decision.
4. Save the Case Status, then confirm **Name** on its detail page before continuing.
After saving: Open **Cases** and confirm the Case Status appears with the intended label and availability. Keep the old value for historical records when changing it would split or relabel prior reporting.
Delete a Case Status
Delete this Case Status only if it is an unused duplicate or setup mistake. Once other records refer to it, preserve that history and make the value inactive when the screen provides that option.
Before confirming, check for related **Cases**. Brisk may refuse deletion when another record depends on this one; resolve the duplicate or use the supported correction workflow instead of breaking the trail.
On the confirmation page, verify **Name**. After confirmation, return to the Case Statuses list and make sure only the intended Case Status was removed.
Review Case Status details
Use the detail page as the shared record of what this Case Status currently means. Verify **Name** before relying on it for a decision.
Compare the Case Status with its source document or approved setup request before deciding that it needs correction.
Next check: Open **Cases** and confirm the Case Status appears with the intended label and availability. Keep the old value for historical records when changing it would split or relabel prior reporting.
Edit an existing Case Status
Edit this Case Status when the underlying policy or classification changed. First determine whether historical transactions should retain the old value; if so, deactivate the old choice and create a new one.
1. Open the detail page. Compare **Name** with the supporting document or approved request.
2. Recheck the identifying information shown on the screen. These values are most likely to change case history, custody, dispatch, official reporting, or audit review.
3. Save the change, return to the list, and confirm that the Case Status now appears under the expected **Name**.
After the change: Open **Cases** and confirm the Case Status appears with the intended label and availability. Keep the old value for historical records when changing it would split or relabel prior reporting.
Find and review case statuses
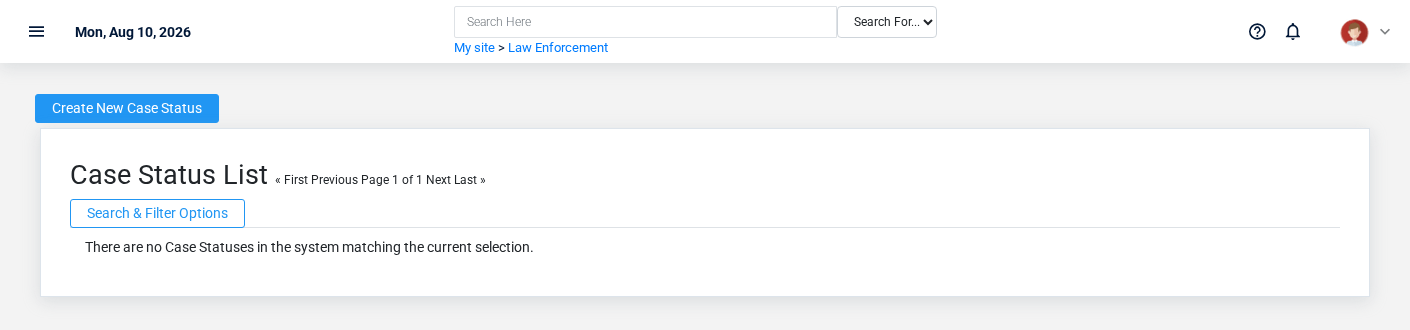
The Case Statuses list screen in the Brisk documentation demo.
Use the Case Statuses list to find the correct record before opening or changing it. Compare **Name**. Compare the full identifier rather than relying on a similar name.
Open the Case Status whose **Name** match the task. If it is missing, clear the list filters and recheck the identifying information shown on the screen rather than creating a replacement immediately.
## Fields and business rules
Brisk stores 1 user-relevant fields for this Case Status, including 0 linked-record selections and 0 controlled-choice fields. Create and edit screens may hide calculated or workflow-managed values from this full reference.
| Field | Required | What it controls |
|---|---:|---|
| **Name** | Yes | Sets the name of this status. |
## What happens next
Open **Cases** and confirm the Case Status appears with the intended label and availability. Keep the old value for historical records when changing it would split or relabel prior reporting.
## Common mistakes and troubleshooting
- **The record will not save:** Recheck **Name** and any message beside the field. A required related record may also be inactive or unavailable to your role.
- **The values look right but the result is wrong:** Compare this Case Status with the source document or approved setup decision, then check the downstream screen where it is used.
# Case Tally Categories
# Case Tally Categories
Purpose and when to use this record
Group case-specific tally definitions into understandable reporting sections.
## At a glance
- **Identify it by:** **Name**.
- **Why care:** Use the agency’s approved terminology and access policy. Preserve dates, responsible personnel, case links, and audit history because these records may support official reporting or custody review.
## Before you begin
You need the Brisk permission for the action you are taking on case tally categories. If a Create, Edit, or Delete control is absent, do not work around it with another user’s account; ask an administrator to review your role.
Find and review case tally categories
The Case Tally Categories list screen in the Brisk documentation demo.
Use the Case Tally Categories list to find the correct record before opening or changing it. Compare **Name**. Compare the full identifier rather than relying on a similar name.
Open the Case Tally Category whose **Name** match the task. If it is missing, clear the list filters and recheck the identifying information shown on the screen rather than creating a replacement immediately.
Create a Case Tally Category
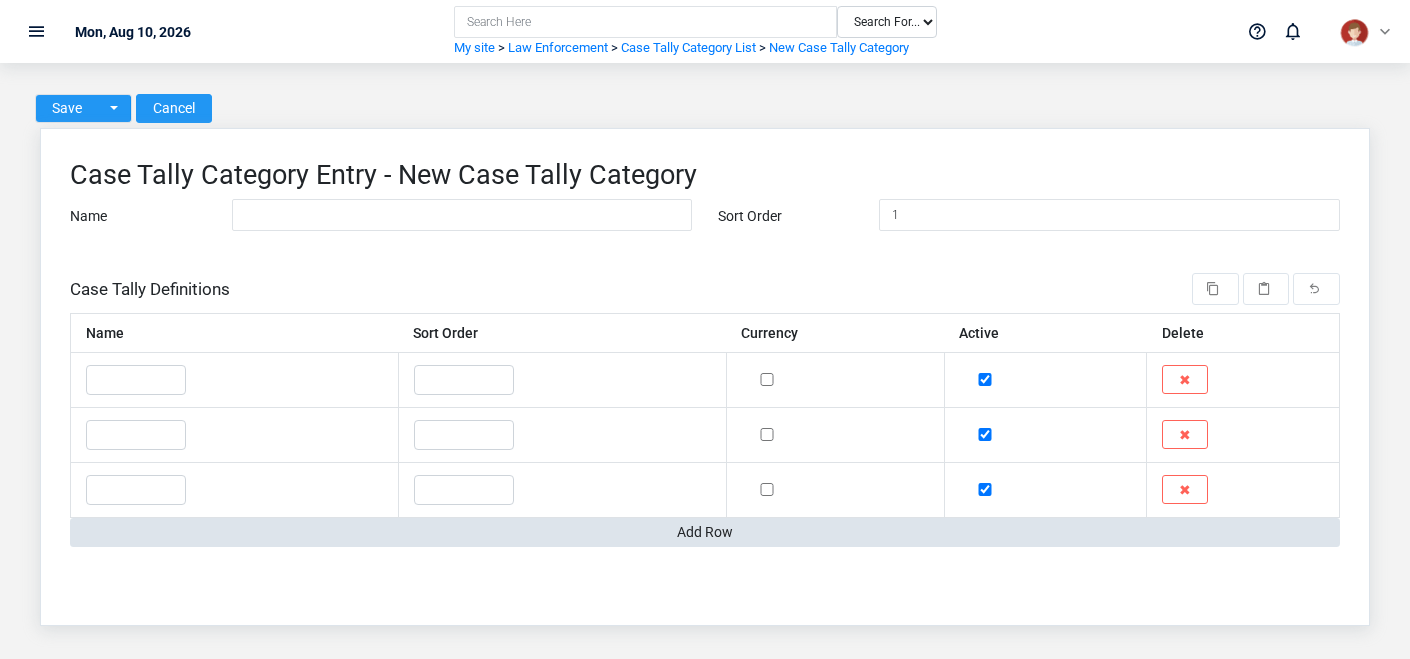
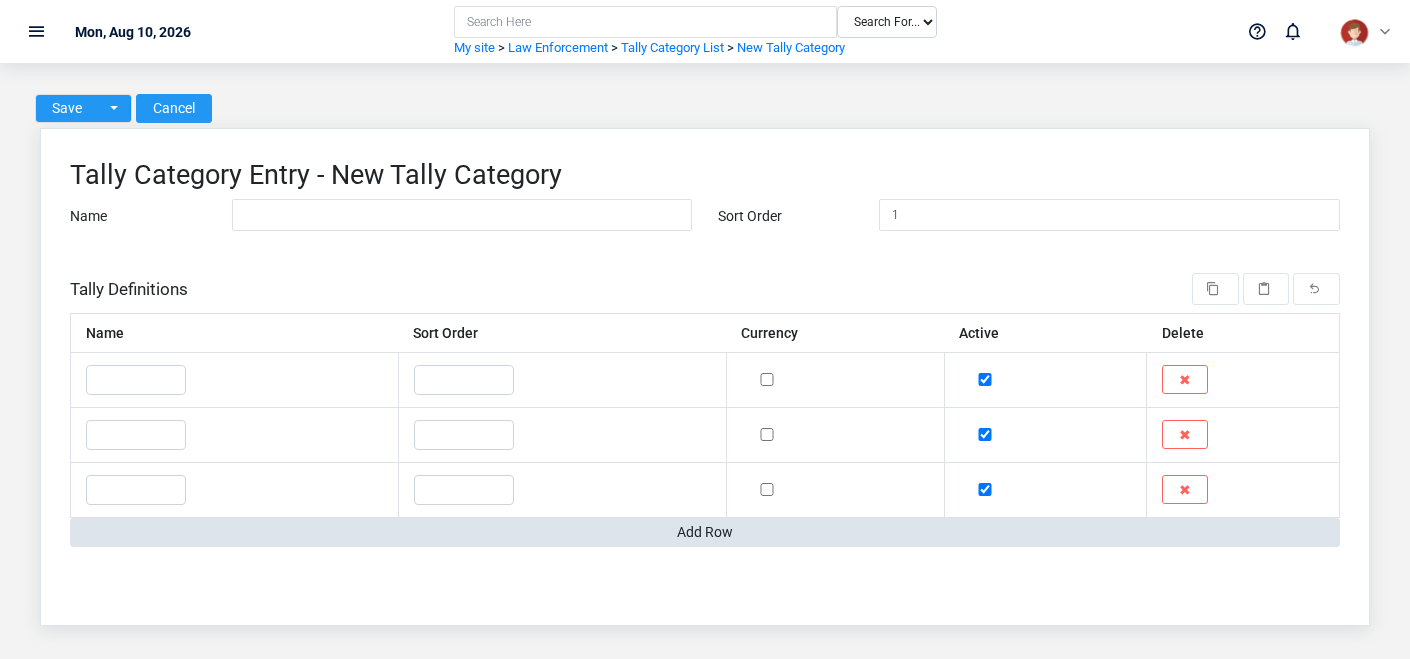
The Case Tally Categories create screen in the Brisk documentation demo.
Create a Case Tally Category only when the existing choices do not represent the policy or classification you need. Near-duplicate setup values split reporting and make later selection harder.
1. Select the business context first.
2. Enter the required identifying and operational values: **Name**.
3. Review **Sort Order** against the source document or approved setup decision.
4. Save the Case Tally Category, then confirm **Name** on its detail page before continuing.
After saving: Open **Case Tally Definitions** and confirm the Case Tally Category appears with the intended label and availability. Keep the old value for historical records when changing it would split or relabel prior reporting.
Delete a Case Tally Category
Delete this Case Tally Category only if it is an unused duplicate or setup mistake. Once other records refer to it, preserve that history and make the value inactive when the screen provides that option.
Before confirming, check for related **Case Tally Definitions**. Brisk may refuse deletion when another record depends on this one; resolve the duplicate or use the supported correction workflow instead of breaking the trail.
On the confirmation page, verify **Name**. After confirmation, return to the Case Tally Categories list and make sure only the intended Case Tally Category was removed.
Review Case Tally Category details
Use the detail page as the shared record of what this Case Tally Category currently means. Verify **Name**, and **Sort Order** before relying on it for a decision.
Compare the Case Tally Category with its source document or approved setup request before deciding that it needs correction.
Next check: Open **Case Tally Definitions** and confirm the Case Tally Category appears with the intended label and availability. Keep the old value for historical records when changing it would split or relabel prior reporting.
Edit an existing Case Tally Category
Edit this Case Tally Category when the underlying policy or classification changed. First determine whether historical transactions should retain the old value; if so, deactivate the old choice and create a new one.
1. Open the detail page. Compare **Name** with the supporting document or approved request.
2. Recheck the identifying information shown on the screen. These values are most likely to change case history, custody, dispatch, official reporting, or audit review.
3. Save the change, return to the list, and confirm that the Case Tally Category now appears under the expected **Name**.
After the change: Open **Case Tally Definitions** and confirm the Case Tally Category appears with the intended label and availability. Keep the old value for historical records when changing it would split or relabel prior reporting.
## Fields and business rules
Brisk stores 2 user-relevant fields for this Case Tally Category, including 0 linked-record selections and 0 controlled-choice fields. Create and edit screens may hide calculated or workflow-managed values from this full reference.
| Field | Required | What it controls |
|---|---:|---|
| **Name** | Yes | Sets the name of the category. |
| **Sort Order** | No | Sets the order that this category appears on cases and reports. |
## What happens next
Open **Case Tally Definitions** and confirm the Case Tally Category appears with the intended label and availability. Keep the old value for historical records when changing it would split or relabel prior reporting.
## Common mistakes and troubleshooting
- **The record will not save:** Recheck **Name** and any message beside the field. A required related record may also be inactive or unavailable to your role.
- **The values look right but the result is wrong:** Compare this Case Tally Category with the source document or approved setup decision, then check the downstream screen where it is used.
# Case Tally Definitions
# Case Tally Definitions
Purpose and when to use this record
Define a countable case outcome or activity and the category under which it is reported.
## At a glance
- **Identify it by:** **Name**.
- **Check its business context:** **Category**.
- **Why care:** Use the agency’s approved terminology and access policy. Preserve dates, responsible personnel, case links, and audit history because these records may support official reporting or custody review.
- **Why care:** Availability and publication flags affect future use without erasing history. Prefer disabling an obsolete setup record when existing transactions still refer to it.
## Before you begin
You need the Brisk permission for the action you are taking on case tally definitions. If a Create, Edit, or Delete control is absent, do not work around it with another user’s account; ask an administrator to review your role.
Have valid **Category** records ready first. Those selections determine where this Case Tally Definition belongs and which later screens can find it.
Create a Case Tally Definition
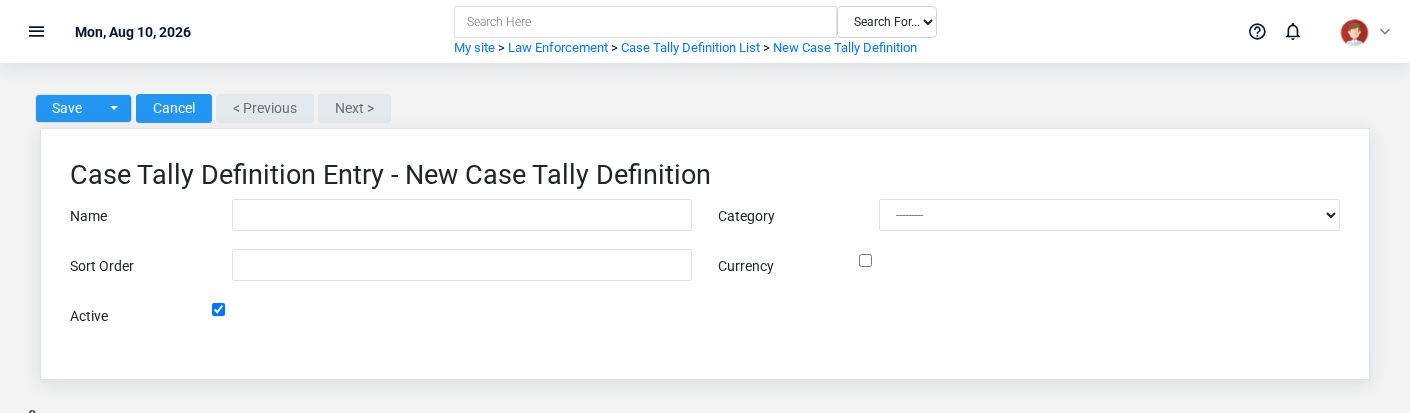
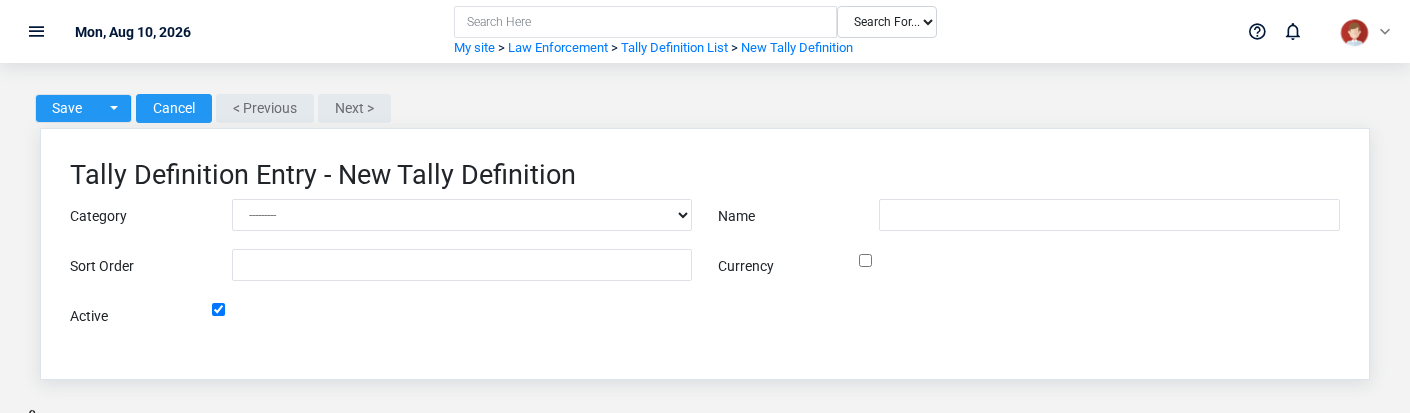
The Case Tally Definitions create screen in the Brisk documentation demo.
Create a Case Tally Definition only when the existing choices do not represent the policy or classification you need. Near-duplicate setup values split reporting and make later selection harder.
1. Select the business context first: **Category**.
2. Enter the required identifying and operational values: **Name**, and **Category**.
3. Review **Currency**, and **Active** deliberately; these choices control availability or workflow rather than merely describing the record.
4. Save the Case Tally Definition, then confirm **Name** on its detail page before continuing.
After saving: Open **Case Tallies** and confirm the Case Tally Definition appears with the intended label and availability. Keep the old value for historical records when changing it would split or relabel prior reporting.
Delete a Case Tally Definition
Delete this Case Tally Definition only if it is an unused duplicate or setup mistake. Once other records refer to it, preserve that history and make the value inactive when the screen provides that option.
If the record is merely obsolete, use **Active** to remove it from future use while preserving existing references.
Before confirming, check for related **Case Tallies**. Brisk may refuse deletion when another record depends on this one; resolve the duplicate or use the supported correction workflow instead of breaking the trail.
On the confirmation page, verify **Name**. After confirmation, return to the Case Tally Definitions list and make sure only the intended Case Tally Definition was removed.
Review Case Tally Definition details
Use the detail page as the shared record of what this Case Tally Definition currently means. Verify **Active** before relying on it for a decision.
Follow **Category** to determine whether the issue is on this Case Tally Definition or on one of those linked records.
Next check: Open **Case Tallies** and confirm the Case Tally Definition appears with the intended label and availability. Keep the old value for historical records when changing it would split or relabel prior reporting.
Edit an existing Case Tally Definition
Edit this Case Tally Definition when the underlying policy or classification changed. First determine whether historical transactions should retain the old value; if so, deactivate the old choice and create a new one.
1. Open the detail page. Compare **Category** with the supporting document or approved request.
2. Recheck **Active**. These values are most likely to change case history, custody, dispatch, official reporting, or audit review.
3. Save the change, return to the list, and confirm that the Case Tally Definition now appears under the expected **Active**.
After the change: Open **Case Tallies** and confirm the Case Tally Definition appears with the intended label and availability. Keep the old value for historical records when changing it would split or relabel prior reporting.
Find and review case tally definitions
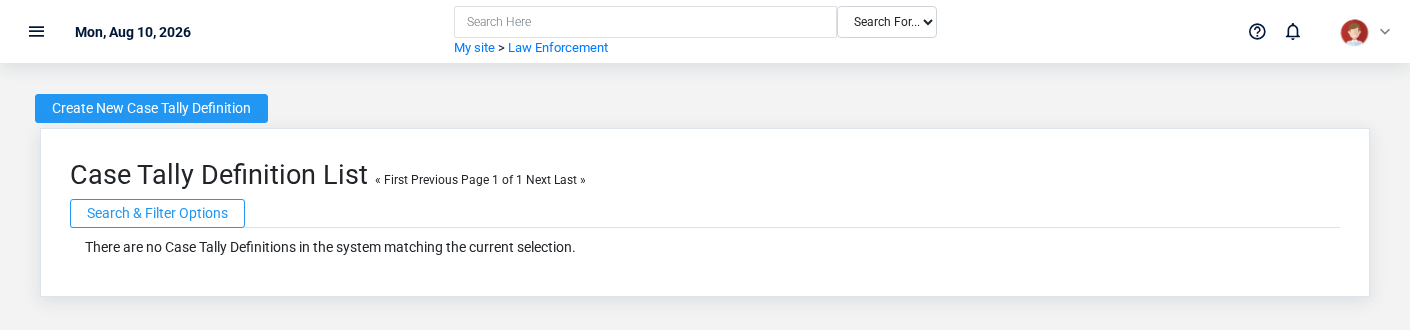
The Case Tally Definitions list screen in the Brisk documentation demo.
Use the Case Tally Definitions list to find the correct record before opening or changing it. Compare **Name**. Records with similar names or numbers can still belong to different **Category**.
Open the Case Tally Definition whose **Name** match the task. If it is missing, clear the list filters and recheck **Active** rather than creating a replacement immediately.
## Fields and business rules
Brisk stores 5 user-relevant fields for this Case Tally Definition, including 1 linked-record selection and 0 controlled-choice fields. Create and edit screens may hide calculated or workflow-managed values from this full reference.
| Field | Required | What it controls |
|---|---:|---|
| **Name** | Yes | Sets the name of this tally. |
| **Category** | Yes | The category associated with this case tally definition. |
| **Sort Order** | No | Sets the order that this tally appears within its category. |
| **Currency** | No | If enabled, this tally will be a dollar amount on reports. |
| **Active** | No | If this field is unchecked, this definition will no longer appear in reports. |
## What happens next
Open **Case Tallies** and confirm the Case Tally Definition appears with the intended label and availability. Keep the old value for historical records when changing it would split or relabel prior reporting.
## Common mistakes and troubleshooting
- **The record will not save:** Recheck **Name**, and **Category** and any message beside the field. A required related record may also be inactive or unavailable to your role.
- **The record saved but is not available where expected:** Recheck **Active**, then clear the filters on the destination list. A saved record can still be inactive, unpublished, locked, unapproved, or in the wrong workflow state.
- **The values look right but the result is wrong:** Open **Category** from the detail page. Correct the specific relationship that is wrong instead of forcing a total or status to compensate for it.
# Case Types
# Case Types
Purpose and when to use this record
Maintain the controlled incident or case classifications used for intake and reporting.
## At a glance
- **Identify it by:** **Name**.
- **Why care:** Use the agency’s approved terminology and access policy. Preserve dates, responsible personnel, case links, and audit history because these records may support official reporting or custody review.
## Before you begin
You need the Brisk permission for the action you are taking on case types. If a Create, Edit, or Delete control is absent, do not work around it with another user’s account; ask an administrator to review your role.
Create a Case Type
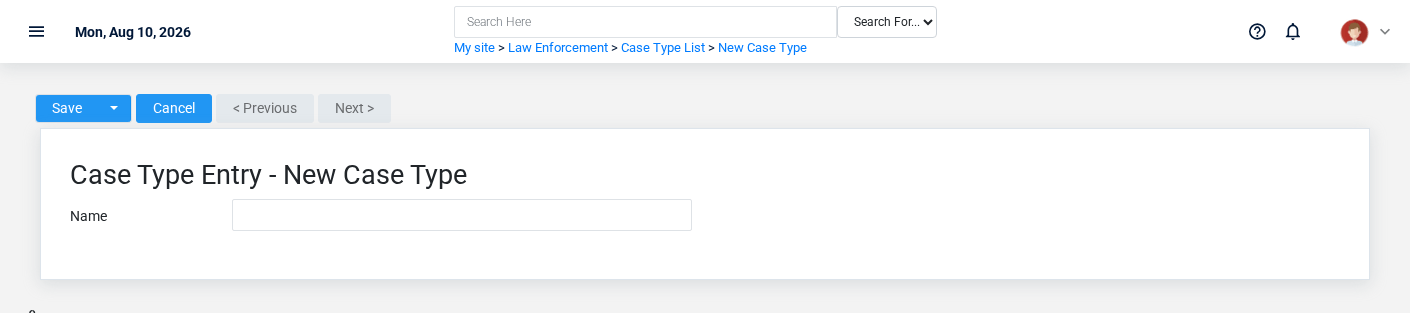
The Case Types create screen in the Brisk documentation demo.
Create a Case Type only when the existing choices do not represent the policy or classification you need. Near-duplicate setup values split reporting and make later selection harder.
1. Select the business context first.
2. Enter the required identifying and operational values: **Name**.
3. Review the identifying information shown on the screen against the source document or approved setup decision.
4. Save the Case Type, then confirm **Name** on its detail page before continuing.
After saving: Open **Cases** and confirm the Case Type appears with the intended label and availability. Keep the old value for historical records when changing it would split or relabel prior reporting.
Delete a Case Type
Delete this Case Type only if it is an unused duplicate or setup mistake. Once other records refer to it, preserve that history and make the value inactive when the screen provides that option.
Before confirming, check for related **Cases**. Brisk may refuse deletion when another record depends on this one; resolve the duplicate or use the supported correction workflow instead of breaking the trail.
On the confirmation page, verify **Name**. After confirmation, return to the Case Types list and make sure only the intended Case Type was removed.
Review Case Type details
Use the detail page as the shared record of what this Case Type currently means. Verify **Name** before relying on it for a decision.
Compare the Case Type with its source document or approved setup request before deciding that it needs correction.
Next check: Open **Cases** and confirm the Case Type appears with the intended label and availability. Keep the old value for historical records when changing it would split or relabel prior reporting.
Edit an existing Case Type
Edit this Case Type when the underlying policy or classification changed. First determine whether historical transactions should retain the old value; if so, deactivate the old choice and create a new one.
1. Open the detail page. Compare **Name** with the supporting document or approved request.
2. Recheck the identifying information shown on the screen. These values are most likely to change case history, custody, dispatch, official reporting, or audit review.
3. Save the change, return to the list, and confirm that the Case Type now appears under the expected **Name**.
After the change: Open **Cases** and confirm the Case Type appears with the intended label and availability. Keep the old value for historical records when changing it would split or relabel prior reporting.
Find and review case types
The Case Types list screen in the Brisk documentation demo.
Use the Case Types list to find the correct record before opening or changing it. Compare **Name**. Compare the full identifier rather than relying on a similar name.
Open the Case Type whose **Name** match the task. If it is missing, clear the list filters and recheck the identifying information shown on the screen rather than creating a replacement immediately.
## Fields and business rules
Brisk stores 1 user-relevant fields for this Case Type, including 0 linked-record selections and 0 controlled-choice fields. Create and edit screens may hide calculated or workflow-managed values from this full reference.
| Field | Required | What it controls |
|---|---:|---|
| **Name** | Yes | Sets the name of this case type. |
## What happens next
Open **Cases** and confirm the Case Type appears with the intended label and availability. Keep the old value for historical records when changing it would split or relabel prior reporting.
## Common mistakes and troubleshooting
- **The record will not save:** Recheck **Name** and any message beside the field. A required related record may also be inactive or unavailable to your role.
- **The values look right but the result is wrong:** Compare this Case Type with the source document or approved setup decision, then check the downstream screen where it is used.
# Cases
# Cases
Purpose and when to use this record
Maintain the central incident or investigation record that ties together jurisdiction, status, people, evidence, tallies, and activity.
## At a glance
- **Identify it by:** **Case Number**, **Request Date**, **Incident Date**, and **Status**.
- **Check its business context:** **Officer**, **Type**, **Jurisdiction**, **Seizure**, and **Status**.
- **Why care:** Use the agency’s approved terminology and access policy. Preserve dates, responsible personnel, case links, and audit history because these records may support official reporting or custody review.
- **Why care:** Status communicates workflow progress to other staff. Change it only when the underlying work, approval, payment, or handoff has actually occurred.
## Before you begin
You need the Brisk permission for the action you are taking on cases. If a Create, Edit, or Delete control is absent, do not work around it with another user’s account; ask an administrator to review your role.
Have valid **Officer**, **Type**, **Jurisdiction**, **Seizure**, and **Status** records ready first. Those selections determine where this Case belongs and which later screens can find it.
Create a Case
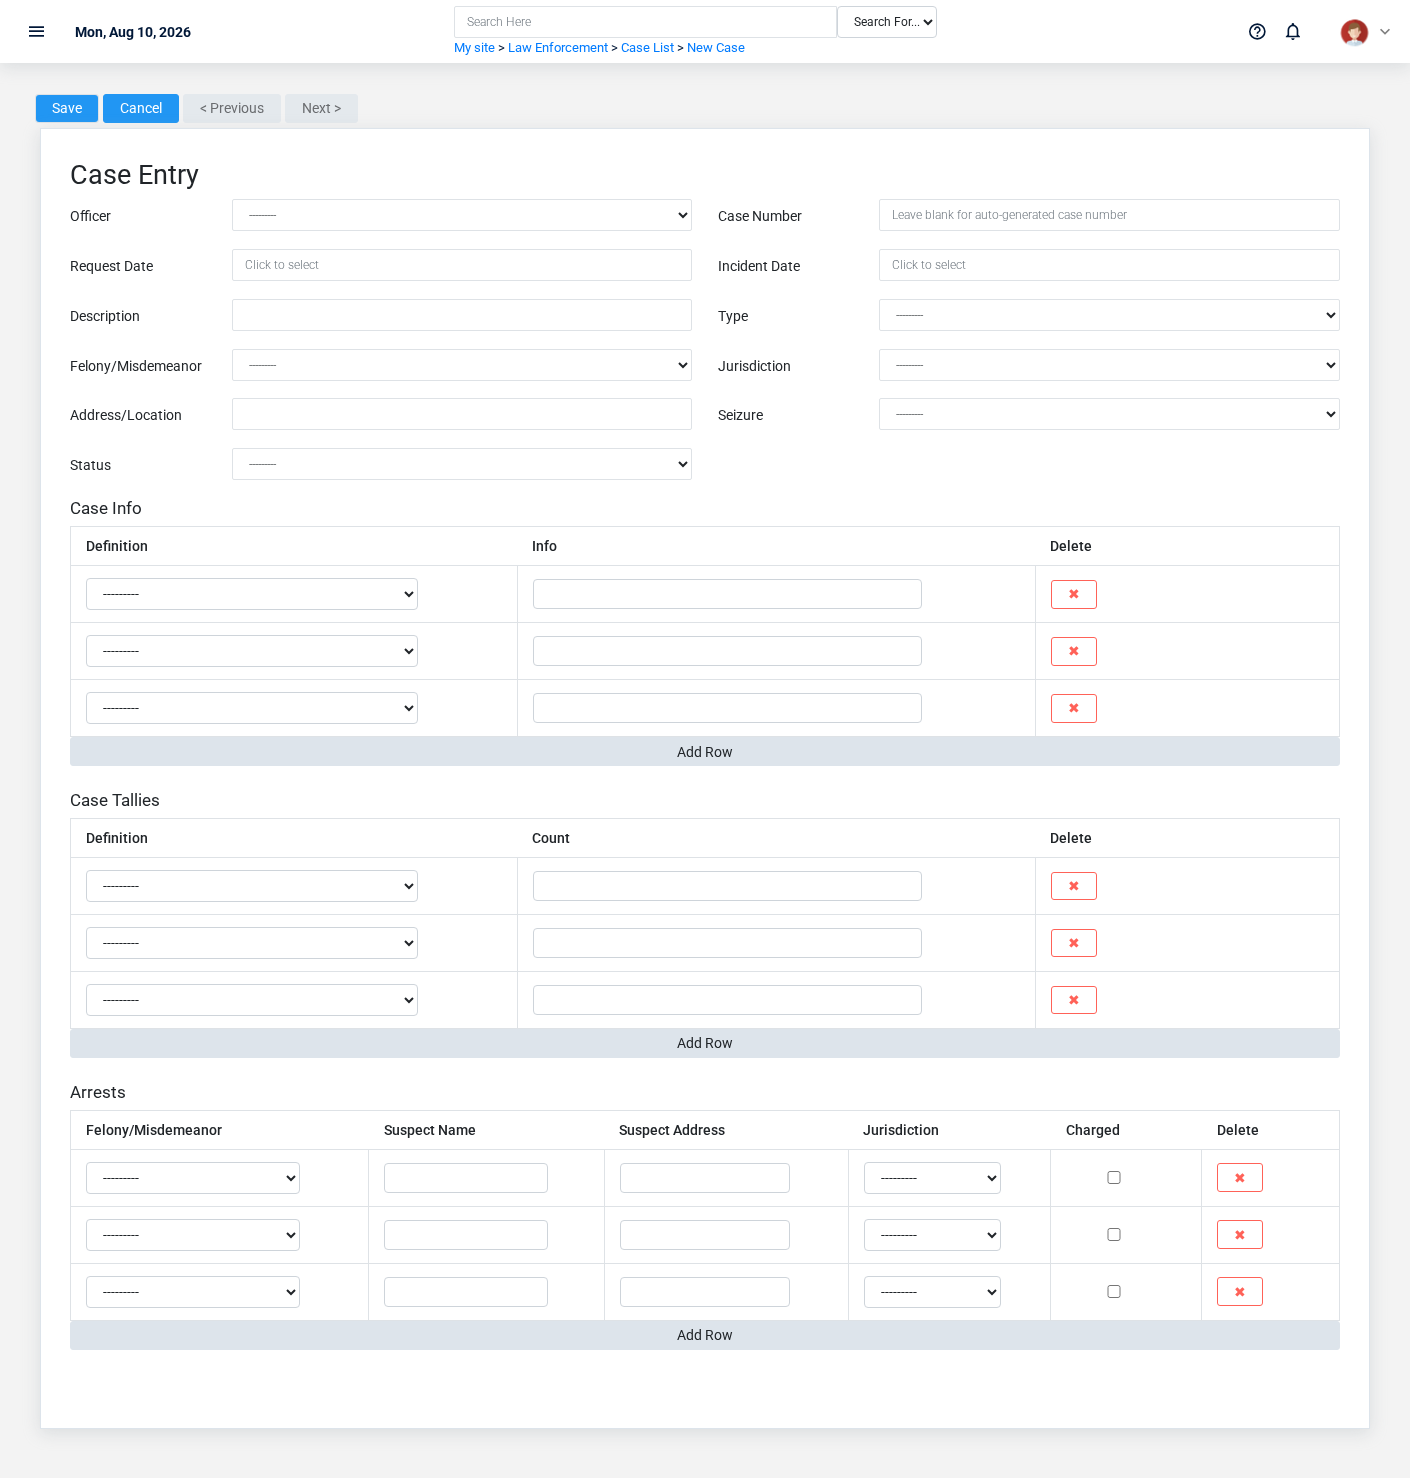
The Cases create screen in the Brisk documentation demo.
Create a Case only after confirming that the source document or operational event has not already been entered.
1. Select the business context first: **Officer**, **Type**, **Jurisdiction**, **Seizure**, and **Status**.
2. Enter the required identifying and operational values: **Officer**, **Request Date**, **Incident Date**, **Type**, **Felony/Misdemeanor**, and **Jurisdiction**, plus the remaining screen fields.
3. Review **Felony/Misdemeanor** deliberately; these choices control availability or workflow rather than merely describing the record.
4. Save the Case, then confirm **Case Number**, **Request Date**, **Incident Date**, and **Status** on its detail page before continuing.
After saving: Verify **Felony/Misdemeanor**, **Status**, **Officer**, **Type**, **Jurisdiction**, and **Seizure** on the detail page, then continue the law enforcement workflow only when those values agree with the source document and actual work performed.
Delete a Case
Delete this Case only when it was entered by mistake and no downstream history depends on it. Use a reversal, void, credit, counter-adjustment, or status correction for a real event that later changed.
Before confirming, check for related **Arrests**, **Case Info**, **Case Tallies**, and **Evidence Items**. Brisk may refuse deletion when another record depends on this one; resolve the duplicate or use the supported correction workflow instead of breaking the trail.
On the confirmation page, verify **Case Number**, **Request Date**, **Incident Date**, and **Status**. After confirmation, return to the Cases list and make sure only the intended Case was removed.
Review Case details
Use the detail page as the shared record of what this Case currently means. Verify **Request Date**, **Incident Date**, **Felony/Misdemeanor**, and **Status** before relying on it for a decision.
Follow **Officer**, **Type**, **Jurisdiction**, **Seizure**, and **Status** to determine whether the issue is on this Case or on one of those linked records.
Next check: Verify **Felony/Misdemeanor**, **Status**, **Officer**, **Type**, **Jurisdiction**, and **Seizure** on the detail page, then continue the law enforcement workflow only when those values agree with the source document and actual work performed.
Edit an existing Case
Edit this Case to correct or complete the same source document or operational event; use the supported reversal or follow-up workflow when the business event itself changed.
1. Open the detail page. Compare **Officer**, **Type**, **Jurisdiction**, **Seizure**, and **Status** with the supporting document or approved request.
2. Recheck **Request Date**, **Incident Date**, **Felony/Misdemeanor**, and **Status**. These values are most likely to change case history, custody, dispatch, official reporting, or audit review.
3. Save the change, return to the list, and confirm that the Case now appears under the expected **Felony/Misdemeanor**, and **Status**.
After the change: Verify **Felony/Misdemeanor**, **Status**, **Officer**, **Type**, **Jurisdiction**, and **Seizure** on the detail page, then continue the law enforcement workflow only when those values agree with the source document and actual work performed.
Find and review cases
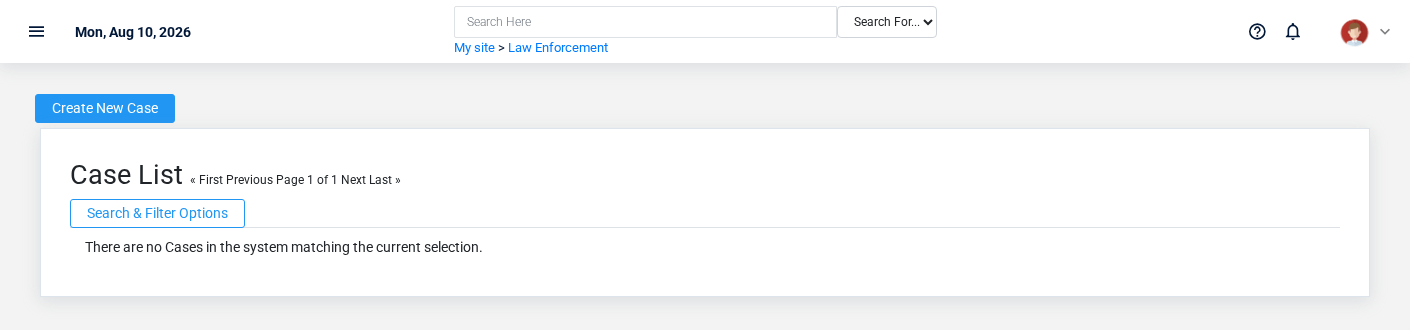
The Cases list screen in the Brisk documentation demo.
Use the Cases list to find the correct record before opening or changing it. Compare **Case Number**, **Request Date**, **Incident Date**, and **Status**. Records with similar names or numbers can still belong to different **Officer**, **Type**, **Jurisdiction**, **Seizure**, and **Status**.
Open the Case whose **Case Number**, **Request Date**, **Incident Date**, and **Status** match the task. If it is missing, clear the list filters and recheck **Felony/Misdemeanor**, and **Status** rather than creating a replacement immediately.
## Fields and business rules
Brisk stores 11 user-relevant fields for this Case, including 5 linked-record selections and 1 controlled-choice field. Create and edit screens may hide calculated or workflow-managed values from this full reference.
| Field | Required | What it controls |
|---|---:|---|
| **Officer** | Yes | Sets the officer for this case. |
| **Case Number** | No | Sets the case number. |
| **Request Date** | Yes | The date that paperwork began for this case. |
| **Incident Date** | Yes | The date for which events in this case occurred. |
| **Description** | No | Record the title or description for this case. |
| **Type** | Yes | Sets the type for this case. |
| **Felony/Misdemeanor** | Yes | Enter what type of crime. Available values: Felony, Misdemeanor, Violation, Traffic. |
| **Jurisdiction** | Yes | Select the jurisdiction for this incident. |
| **Address/Location** | Yes | Set address or location of the incident. |
| **Seizure** | Yes | Select a forfeiture condition for this case. |
| **Status** | Yes | Select the status for this incident. |
## What happens next
Verify **Felony/Misdemeanor**, **Status**, **Officer**, **Type**, **Jurisdiction**, and **Seizure** on the detail page, then continue the law enforcement workflow only when those values agree with the source document and actual work performed.
## Common mistakes and troubleshooting
- **The record will not save:** Recheck **Officer**, **Request Date**, **Incident Date**, **Type**, **Felony/Misdemeanor**, and **Jurisdiction**, plus the remaining screen fields and any message beside the field. A required related record may also be inactive or unavailable to your role.
- **The record saved but is not available where expected:** Recheck **Felony/Misdemeanor**, and **Status**, then clear the filters on the destination list. A saved record can still be inactive, unpublished, locked, unapproved, or in the wrong workflow state.
- **The values look right but the result is wrong:** Open **Officer**, **Type**, **Jurisdiction**, **Seizure**, and **Status** from the detail page. Correct the specific relationship that is wrong instead of forcing a total or status to compensate for it.
# Complaint Sources
# Complaint Sources
Purpose and when to use this record
Maintain the standardized ways complaints or referrals enter the agency for consistent case reporting.
## At a glance
- **Identify it by:** **Name**.
- **Check its business context:** **Classification**.
- **Why care:** Use the agency’s approved terminology and access policy. Preserve dates, responsible personnel, case links, and audit history because these records may support official reporting or custody review.
## Before you begin
You need the Brisk permission for the action you are taking on complaint sources. If a Create, Edit, or Delete control is absent, do not work around it with another user’s account; ask an administrator to review your role.
Create a Complaint Source
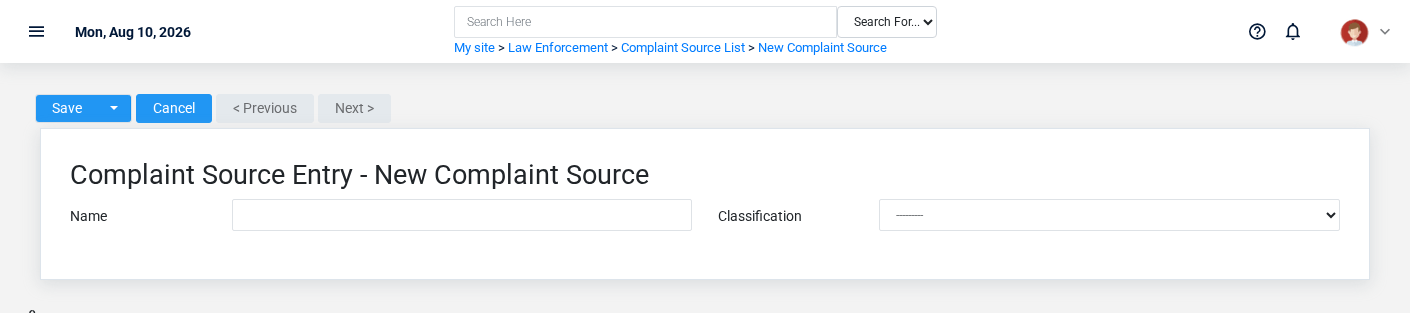
The Complaint Sources create screen in the Brisk documentation demo.
Create a Complaint Source only after confirming that the source document or operational event has not already been entered.
1. Select the business context first: **Classification**.
2. Enter the required identifying and operational values: **Name**.
3. Review the identifying information shown on the screen against the source document or approved setup decision.
4. Save the Complaint Source, then confirm **Name** on its detail page before continuing.
After saving: Verify **Classification** on the detail page, then continue the law enforcement workflow only when those values agree with the source document and actual work performed.
Delete a Complaint Source
Delete this Complaint Source only when it was entered by mistake and no downstream history depends on it. Use a reversal, void, credit, counter-adjustment, or status correction for a real event that later changed.
Before confirming, check for related **Activities**. Brisk may refuse deletion when another record depends on this one; resolve the duplicate or use the supported correction workflow instead of breaking the trail.
On the confirmation page, verify **Name**. After confirmation, return to the Complaint Sources list and make sure only the intended Complaint Source was removed.
Review Complaint Source details
Use the detail page as the shared record of what this Complaint Source currently means. Verify **Name**, and **Classification** before relying on it for a decision.
Follow **Classification** to determine whether the issue is on this Complaint Source or on one of those linked records.
Next check: Verify **Classification** on the detail page, then continue the law enforcement workflow only when those values agree with the source document and actual work performed.
Edit an existing Complaint Source
Edit this Complaint Source to correct or complete the same source document or operational event; use the supported reversal or follow-up workflow when the business event itself changed.
1. Open the detail page. Compare **Classification** with the supporting document or approved request.
2. Recheck the identifying information shown on the screen. These values are most likely to change case history, custody, dispatch, official reporting, or audit review.
3. Save the change, return to the list, and confirm that the Complaint Source now appears under the expected **Name**.
After the change: Verify **Classification** on the detail page, then continue the law enforcement workflow only when those values agree with the source document and actual work performed.
Find and review complaint sources
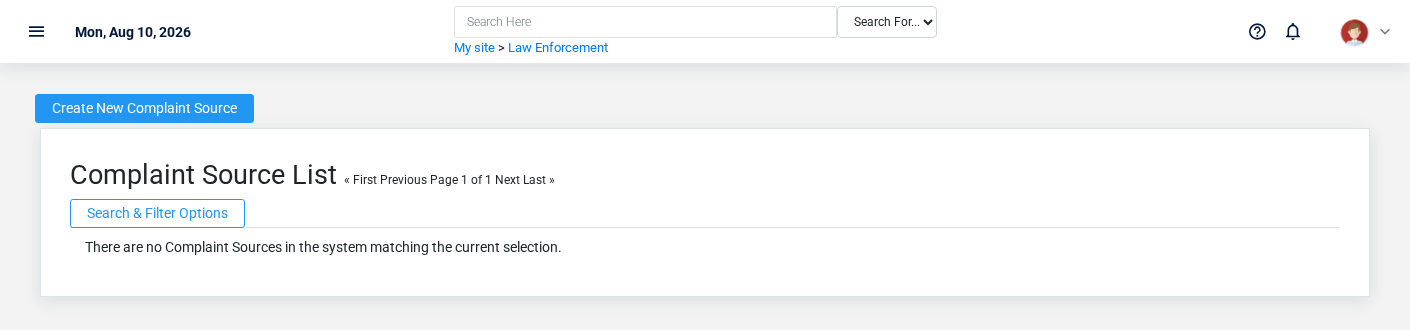
The Complaint Sources list screen in the Brisk documentation demo.
Use the Complaint Sources list to find the correct record before opening or changing it. Compare **Name**. Records with similar names or numbers can still belong to different **Classification**.
Open the Complaint Source whose **Name** match the task. If it is missing, clear the list filters and recheck the identifying information shown on the screen rather than creating a replacement immediately.
## Fields and business rules
Brisk stores 2 user-relevant fields for this Complaint Source, including 1 linked-record selection and 0 controlled-choice fields. Create and edit screens may hide calculated or workflow-managed values from this full reference.
| Field | Required | What it controls |
|---|---:|---|
| **Name** | Yes | Sets the name of this complaint source. |
| **Classification** | No | Optionally classify this complaint source for more in-depth reporting. |
## What happens next
Verify **Classification** on the detail page, then continue the law enforcement workflow only when those values agree with the source document and actual work performed.
## Common mistakes and troubleshooting
- **The record will not save:** Recheck **Name** and any message beside the field. A required related record may also be inactive or unavailable to your role.
- **The values look right but the result is wrong:** Open **Classification** from the detail page. Correct the specific relationship that is wrong instead of forcing a total or status to compensate for it.
# Dispatch Entries
# Dispatch Entries
Purpose and when to use this record
Record a dispatched call or activity with its time, unit/officer context, location, disposition, and narrative.
## At a glance
- **Identify it by:** **Label**.
- **Check its business context:** **Dispatcher**, **Agency**, and **Officer**.
- **Why care:** Use the agency’s approved terminology and access policy. Preserve dates, responsible personnel, case links, and audit history because these records may support official reporting or custody review.
## Before you begin
You need the Brisk permission for the action you are taking on dispatch entries. If a Create, Edit, or Delete control is absent, do not work around it with another user’s account; ask an administrator to review your role.
Have valid **Dispatcher**, and **Officer** records ready first. Those selections determine where this Dispatch Entry belongs and which later screens can find it.
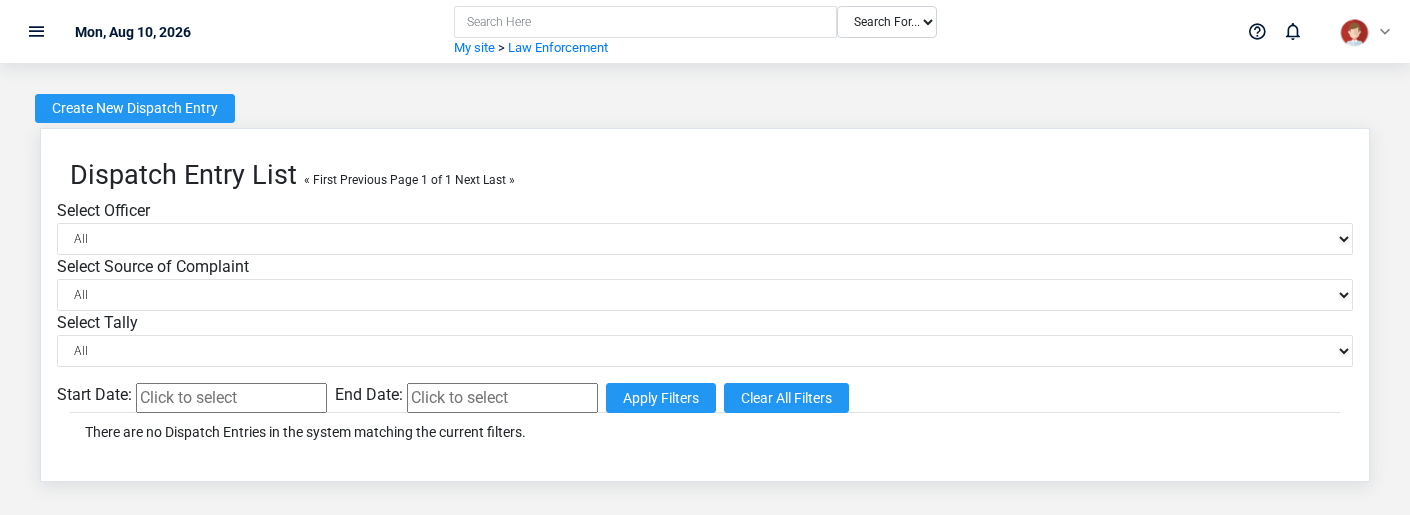
Find and review dispatch entries
The Dispatch Entries list screen in the Brisk documentation demo.
Use the Dispatch Entries list to find the correct record before opening or changing it. Compare **Dispatcher**, **Agency**, **Officer**, and **Shift Date**. Records with similar names or numbers can still belong to different **Dispatcher**, **Agency**, and **Officer**.
Open the Dispatch Entry whose **Dispatcher**, **Agency**, **Officer**, and **Shift Date** match the task. If it is missing, clear the list filters and recheck the identifying information shown on the screen rather than creating a replacement immediately.
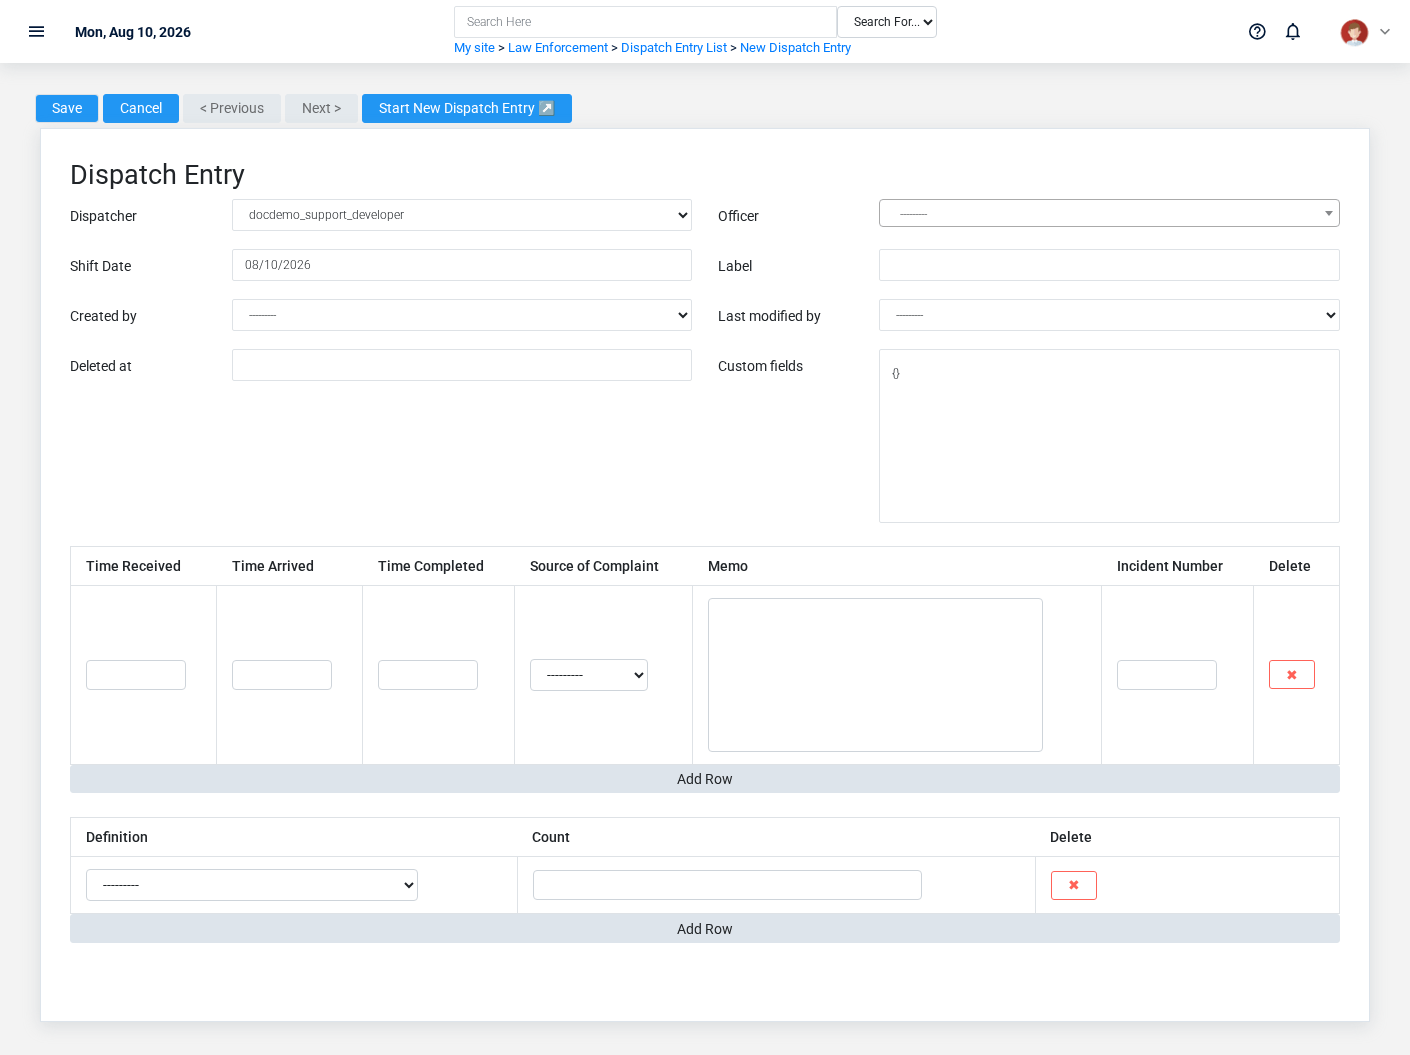
Create a Dispatch Entry
The Dispatch Entries create screen in the Brisk documentation demo.
Create a Dispatch Entry only after confirming that the source document or operational event has not already been entered.
1. Select the business context first: **Dispatcher**, **Agency**, and **Officer**.
2. Enter the required identifying and operational values: **Dispatcher**, **Officer**, and **Shift Date**.
3. Review **Label** against the source document or approved setup decision.
4. Save the Dispatch Entry, then confirm **Label** on its detail page before continuing.
After saving: Verify **Dispatcher**, **Agency**, and **Officer** on the detail page, then continue the law enforcement workflow only when those values agree with the source document and actual work performed.
Delete a Dispatch Entry
Delete this Dispatch Entry only when it was entered by mistake and no downstream history depends on it. Use a reversal, void, credit, counter-adjustment, or status correction for a real event that later changed.
Before confirming, check for related **Dispatch Activities**, and **Dispatch Tallies**. Brisk may refuse deletion when another record depends on this one; resolve the duplicate or use the supported correction workflow instead of breaking the trail.
On the confirmation page, verify **Label**. After confirmation, return to the Dispatch Entries list and make sure only the intended Dispatch Entry was removed.
Review Dispatch Entry details
Use the detail page as the shared record of what this Dispatch Entry currently means. Verify **Dispatcher**, **Agency**, **Officer**, and **Shift Date** before relying on it for a decision.
Follow **Dispatcher**, **Agency**, and **Officer** to determine whether the issue is on this Dispatch Entry or on one of those linked records.
Next check: Verify **Dispatcher**, **Agency**, and **Officer** on the detail page, then continue the law enforcement workflow only when those values agree with the source document and actual work performed.
Edit an existing Dispatch Entry
Edit this Dispatch Entry to correct or complete the same source document or operational event; use the supported reversal or follow-up workflow when the business event itself changed.
1. Open the detail page. Compare **Dispatcher**, **Agency**, and **Officer** with the supporting document or approved request.
2. Recheck the identifying information shown on the screen. These values are most likely to change case history, custody, dispatch, official reporting, or audit review.
3. Save the change, return to the list, and confirm that the Dispatch Entry now appears under the expected **Label**.
After the change: Verify **Dispatcher**, **Agency**, and **Officer** on the detail page, then continue the law enforcement workflow only when those values agree with the source document and actual work performed.
## Fields and business rules
Brisk stores 5 user-relevant fields for this Dispatch Entry, including 3 linked-record selections and 0 controlled-choice fields. Create and edit screens may hide calculated or workflow-managed values from this full reference.
| Field | Required | What it controls |
|---|---:|---|
| **Dispatcher** | Yes | Sets the dispatcher for this log entry. |
| **Agency** | No | Sets the agency for this dispatch entry. |
| **Officer** | Yes | Sets the officer for this log entry. |
| **Shift Date** | Yes | The calendar date of this shift. If shift carries into a 2nd day, please use the first/starting day. |
| **Label** | No | Optionally set a label for this dispatch entry. |
## What happens next
Verify **Dispatcher**, **Agency**, and **Officer** on the detail page, then continue the law enforcement workflow only when those values agree with the source document and actual work performed.
## Common mistakes and troubleshooting
- **The record will not save:** Recheck **Dispatcher**, **Officer**, and **Shift Date** and any message beside the field. A required related record may also be inactive or unavailable to your role.
- **The values look right but the result is wrong:** Open **Dispatcher**, **Agency**, and **Officer** from the detail page. Correct the specific relationship that is wrong instead of forcing a total or status to compensate for it.
# Evidence Chain Entries
# Evidence Chain Entries
Purpose and when to use this record
Append a custody event showing who transferred, received, stored, tested, or released an evidence item and when.
## At a glance
- **Identify it by:** **Action Date/Time**, and **Reference Number**.
- **Check its business context:** **Evidence Item**, **From Custodian**, and **To Custodian**.
- **Why care:** Use the agency’s approved terminology and access policy. Preserve dates, responsible personnel, case links, and audit history because these records may support official reporting or custody review.
## Before you begin
You need the Brisk permission for the action you are taking on evidence chain entries. If a Create, Edit, or Delete control is absent, do not work around it with another user’s account; ask an administrator to review your role.
Have valid **Evidence Item** records ready first. Those selections determine where this Evidence Chain Entry belongs and which later screens can find it.
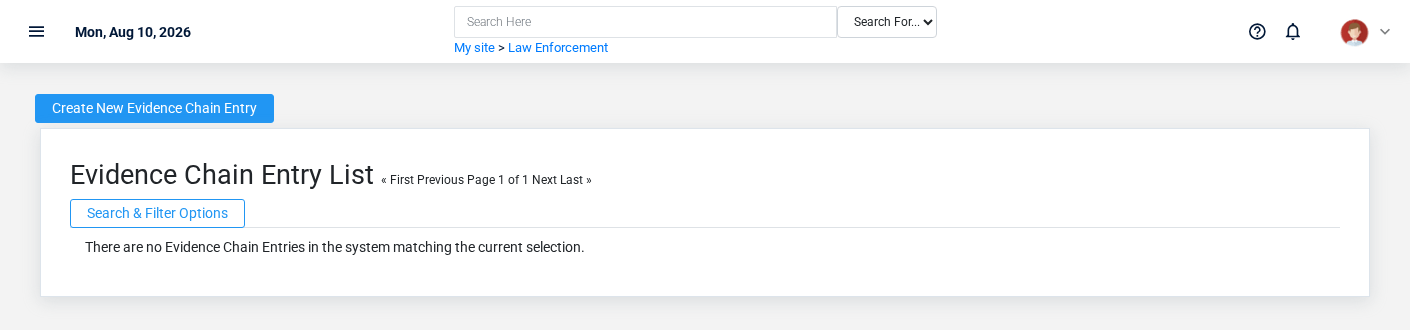
Find and review evidence chain entries
The Evidence Chain Entries list screen in the Brisk documentation demo.
Use the Evidence Chain Entries list to find the correct record before opening or changing it. Compare **Action Date/Time**, and **Reference Number**. Records with similar names or numbers can still belong to different **Evidence Item**, **From Custodian**, and **To Custodian**.
- The initial order emphasizes **Action Date/Time**, and **Id**. Select a column heading when you need a different comparison.
Open the Evidence Chain Entry whose **Action Date/Time**, and **Reference Number** match the task. If it is missing, clear the list filters and recheck **Action** rather than creating a replacement immediately.
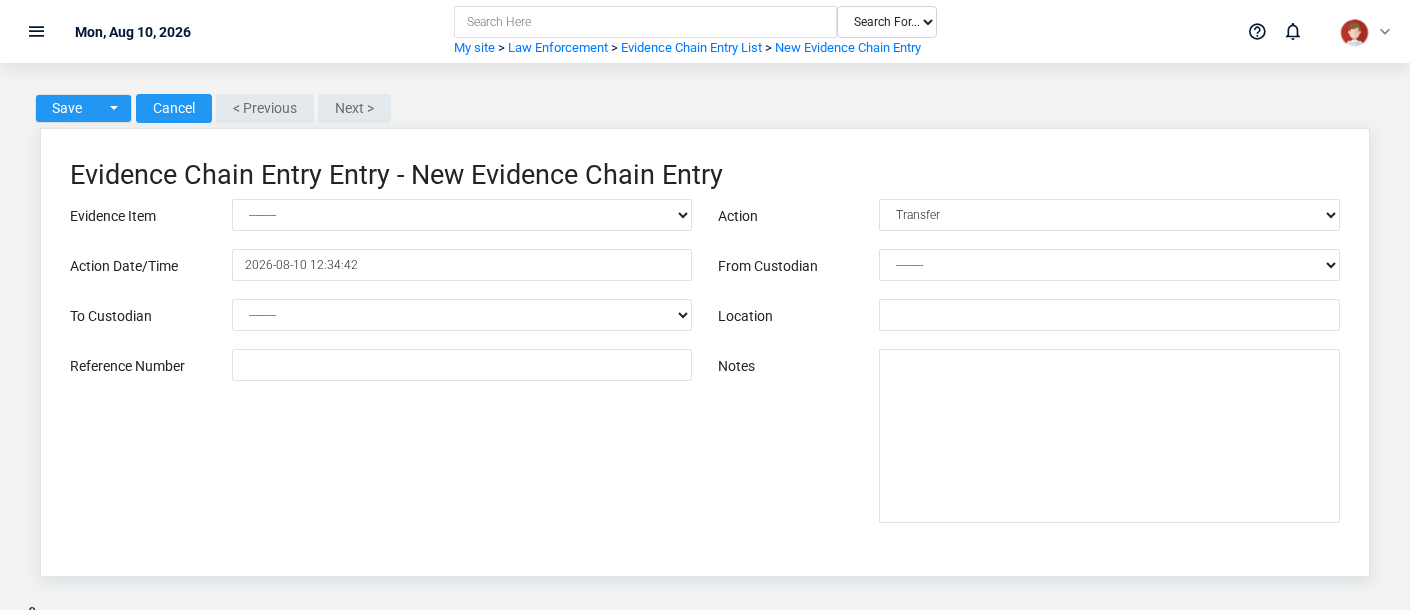
Create an Evidence Chain Entry
The Evidence Chain Entries create screen in the Brisk documentation demo.
Create an Evidence Chain Entry only after confirming that the source document or operational event has not already been entered.
1. Select the business context first: **Evidence Item**, **From Custodian**, and **To Custodian**.
2. Enter the required identifying and operational values: **Evidence Item**.
3. Review **Action** deliberately; these choices control availability or workflow rather than merely describing the record.
4. Save the Evidence Chain Entry, then confirm **Action Date/Time**, and **Reference Number** on its detail page before continuing.
After saving: Confirm the evidence item’s current custodian and location reflect this custody event; never rewrite an earlier transfer to describe a later one.
Delete an Evidence Chain Entry
Delete this Evidence Chain Entry only when it was entered by mistake and no downstream history depends on it. Use a reversal, void, credit, counter-adjustment, or status correction for a real event that later changed.
On the confirmation page, verify **Action Date/Time**, and **Reference Number**. After confirmation, return to the Evidence Chain Entries list and make sure only the intended Evidence Chain Entry was removed.
Review Evidence Chain Entry details
Use the detail page as the shared record of what this Evidence Chain Entry currently means. Verify **Action**, and **Action Date/Time** before relying on it for a decision.
Follow **Evidence Item**, **From Custodian**, and **To Custodian** to determine whether the issue is on this Evidence Chain Entry or on one of those linked records.
Next check: Confirm the evidence item’s current custodian and location reflect this custody event; never rewrite an earlier transfer to describe a later one.
Edit an existing Evidence Chain Entry
Edit this Evidence Chain Entry to correct or complete the same source document or operational event; use the supported reversal or follow-up workflow when the business event itself changed.
1. Open the detail page. Compare **Evidence Item**, **From Custodian**, and **To Custodian** with the supporting document or approved request.
2. Recheck **Action**, and **Action Date/Time**. These values are most likely to change case history, custody, dispatch, official reporting, or audit review.
3. Save the change, return to the list, and confirm that the Evidence Chain Entry now appears under the expected **Action**.
After the change: Confirm the evidence item’s current custodian and location reflect this custody event; never rewrite an earlier transfer to describe a later one.
## Fields and business rules
Brisk stores 8 user-relevant fields for this Evidence Chain Entry, including 3 linked-record selections and 1 controlled-choice field. Create and edit screens may hide calculated or workflow-managed values from this full reference.
| Field | Required | What it controls |
|---|---:|---|
| **Evidence Item** | Yes | The evidence item associated with this evidence chain entry. |
| **Action** | No | The action recorded for this evidence chain entry. Available values: Collected, Transfer, Checkout, Return, Submitted, Disposed, Released, Audit. |
| **Action Date/Time** | No | Date and time recorded for action date/time on this evidence chain entry. |
| **From Custodian** | No | The from custodian associated with this evidence chain entry. |
| **To Custodian** | No | The to custodian associated with this evidence chain entry. |
| **Location** | No | The location recorded for this evidence chain entry. |
| **Reference Number** | No | The reference number recorded for this evidence chain entry. |
| **Notes** | No | Additional internal notes about this evidence chain entry. |
## What happens next
Confirm the evidence item’s current custodian and location reflect this custody event; never rewrite an earlier transfer to describe a later one.
## Common mistakes and troubleshooting
- **The record will not save:** Recheck **Evidence Item** and any message beside the field. A required related record may also be inactive or unavailable to your role.
- **The values look right but the result is wrong:** Open **Evidence Item**, **From Custodian**, and **To Custodian** from the detail page. Correct the specific relationship that is wrong instead of forcing a total or status to compensate for it.
# Evidence Items
# Evidence Items
Purpose and when to use this record
Catalog an item of evidence under its case with identifying detail, storage location, condition, and custody state.
## At a glance
- **Identify it by:** **Collected Date**, and **Status**.
- **Check its business context:** **Case**, **Logged By**, **Evidence Type**, and **Current Custodian**.
- **Why care:** Use the agency’s approved terminology and access policy. Preserve dates, responsible personnel, case links, and audit history because these records may support official reporting or custody review.
- **Why care:** Status communicates workflow progress to other staff. Change it only when the underlying work, approval, payment, or handoff has actually occurred.
## Before you begin
You need the Brisk permission for the action you are taking on evidence items. If a Create, Edit, or Delete control is absent, do not work around it with another user’s account; ask an administrator to review your role.
Create an Evidence Item
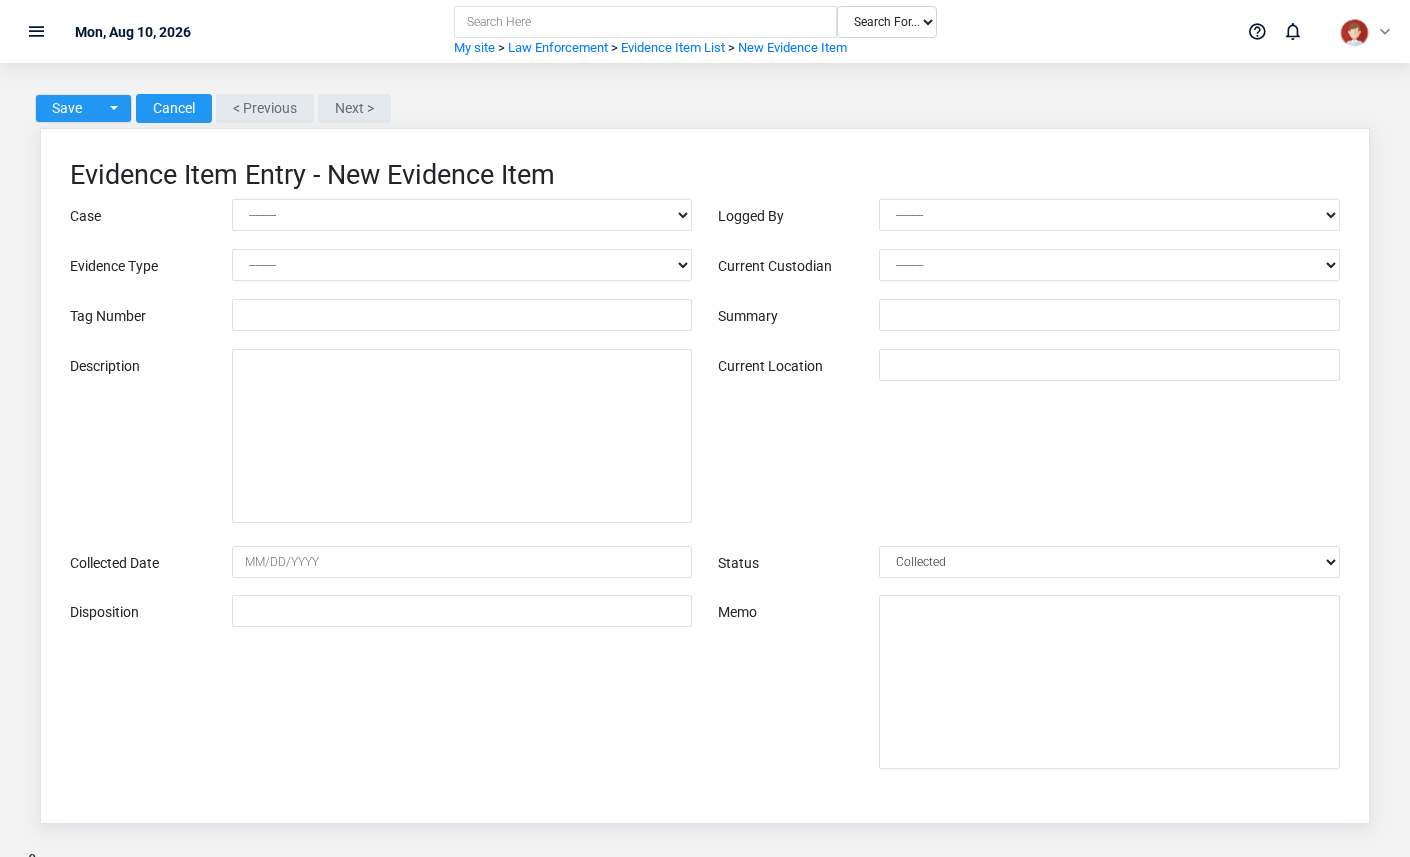
The Evidence Items create screen in the Brisk documentation demo.
Create an Evidence Item only after confirming that the source document or operational event has not already been entered.
1. Select the business context first: **Case**, **Logged By**, **Evidence Type**, and **Current Custodian**.
2. Enter the required identifying and operational values: **Tag Number**.
3. Review **Status** deliberately; these choices control availability or workflow rather than merely describing the record.
4. Save the Evidence Item, then confirm **Collected Date**, and **Status** on its detail page before continuing.
After saving: Add a chain-of-custody entry for every transfer or material handling event and verify that Current Custodian and Current Location agree with physical custody.
Delete an Evidence Item
Delete this Evidence Item only when it was entered by mistake and no downstream history depends on it. Use a reversal, void, credit, counter-adjustment, or status correction for a real event that later changed.
Before confirming, check for related **Evidence Chain Entries**. Brisk may refuse deletion when another record depends on this one; resolve the duplicate or use the supported correction workflow instead of breaking the trail.
On the confirmation page, verify **Collected Date**, and **Status**. After confirmation, return to the Evidence Items list and make sure only the intended Evidence Item was removed.
Review Evidence Item details
Use the detail page as the shared record of what this Evidence Item currently means. Verify **Collected Date**, and **Status** before relying on it for a decision.
Follow **Case**, **Logged By**, **Evidence Type**, and **Current Custodian** to determine whether the issue is on this Evidence Item or on one of those linked records.
Next check: Add a chain-of-custody entry for every transfer or material handling event and verify that Current Custodian and Current Location agree with physical custody.
Edit an existing Evidence Item
Edit this Evidence Item to correct or complete the same source document or operational event; use the supported reversal or follow-up workflow when the business event itself changed.
1. Open the detail page. Compare **Case**, **Logged By**, **Evidence Type**, and **Current Custodian** with the supporting document or approved request.
2. Recheck **Collected Date**, and **Status**. These values are most likely to change case history, custody, dispatch, official reporting, or audit review.
3. Save the change, return to the list, and confirm that the Evidence Item now appears under the expected **Status**.
After the change: Add a chain-of-custody entry for every transfer or material handling event and verify that Current Custodian and Current Location agree with physical custody.
Find and review evidence items
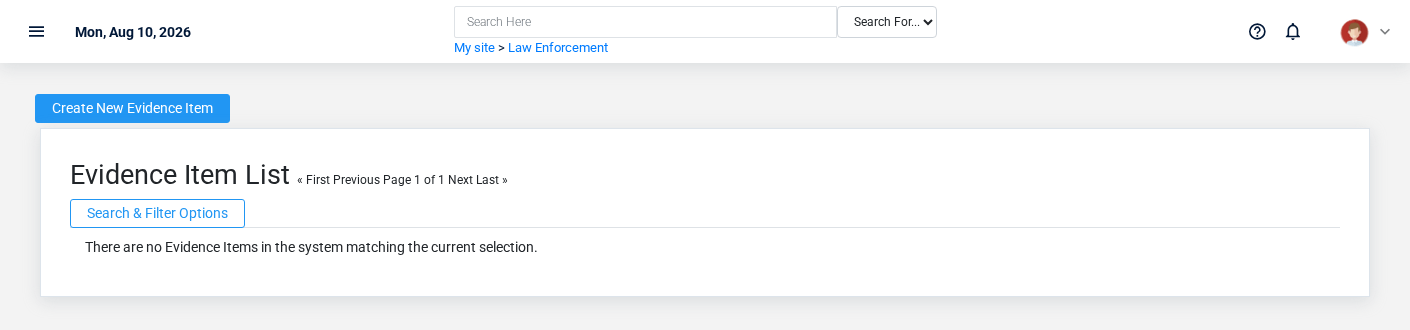
The Evidence Items list screen in the Brisk documentation demo.
Use the Evidence Items list to find the correct record before opening or changing it. Compare **Collected Date**, and **Status**. Records with similar names or numbers can still belong to different **Case**, **Logged By**, **Evidence Type**, and **Current Custodian**.
- The initial order emphasizes **Collected Date**, and **Tag Number**. Select a column heading when you need a different comparison.
Open the Evidence Item whose **Collected Date**, and **Status** match the task. If it is missing, clear the list filters and recheck **Status** rather than creating a replacement immediately.
## Fields and business rules
Brisk stores 12 user-relevant fields for this Evidence Item, including 4 linked-record selections and 1 controlled-choice field. Create and edit screens may hide calculated or workflow-managed values from this full reference.
| Field | Required | What it controls |
|---|---:|---|
| **Case** | No | The case associated with this evidence item. |
| **Logged By** | No | The logged by associated with this evidence item. |
| **Evidence Type** | No | The evidence type associated with this evidence item. |
| **Current Custodian** | No | The current custodian associated with this evidence item. |
| **Tag Number** | Yes | The tag number recorded for this evidence item. |
| **Summary** | No | The summary recorded for this evidence item. |
| **Description** | No | Description of this evidence item. |
| **Current Location** | No | The current location recorded for this evidence item. |
| **Collected Date** | No | Date recorded for collected date on this evidence item. |
| **Status** | No | Current status of this evidence item. Available values: Collected, In Storage, Checked Out, Submitted, Returned, Disposed, Released. |
| **Disposition** | No | The disposition recorded for this evidence item. |
| **Memo** | No | The memo recorded for this evidence item. |
## What happens next
Add a chain-of-custody entry for every transfer or material handling event and verify that Current Custodian and Current Location agree with physical custody.
## Common mistakes and troubleshooting
- **The record will not save:** Recheck **Tag Number** and any message beside the field. A required related record may also be inactive or unavailable to your role.
- **The record saved but is not available where expected:** Recheck **Status**, then clear the filters on the destination list. A saved record can still be inactive, unpublished, locked, unapproved, or in the wrong workflow state.
- **The values look right but the result is wrong:** Open **Case**, **Logged By**, **Evidence Type**, and **Current Custodian** from the detail page. Correct the specific relationship that is wrong instead of forcing a total or status to compensate for it.
# Evidence Types
# Evidence Types
Purpose and when to use this record
Maintain the controlled evidence classifications used for search, storage, and reporting.
## At a glance
- **Identify it by:** **Name**, and **Code**.
- **Why care:** Use the agency’s approved terminology and access policy. Preserve dates, responsible personnel, case links, and audit history because these records may support official reporting or custody review.
- **Why care:** Availability and publication flags affect future use without erasing history. Prefer disabling an obsolete setup record when existing transactions still refer to it.
## Before you begin
You need the Brisk permission for the action you are taking on evidence types. If a Create, Edit, or Delete control is absent, do not work around it with another user’s account; ask an administrator to review your role.
Create an Evidence Type
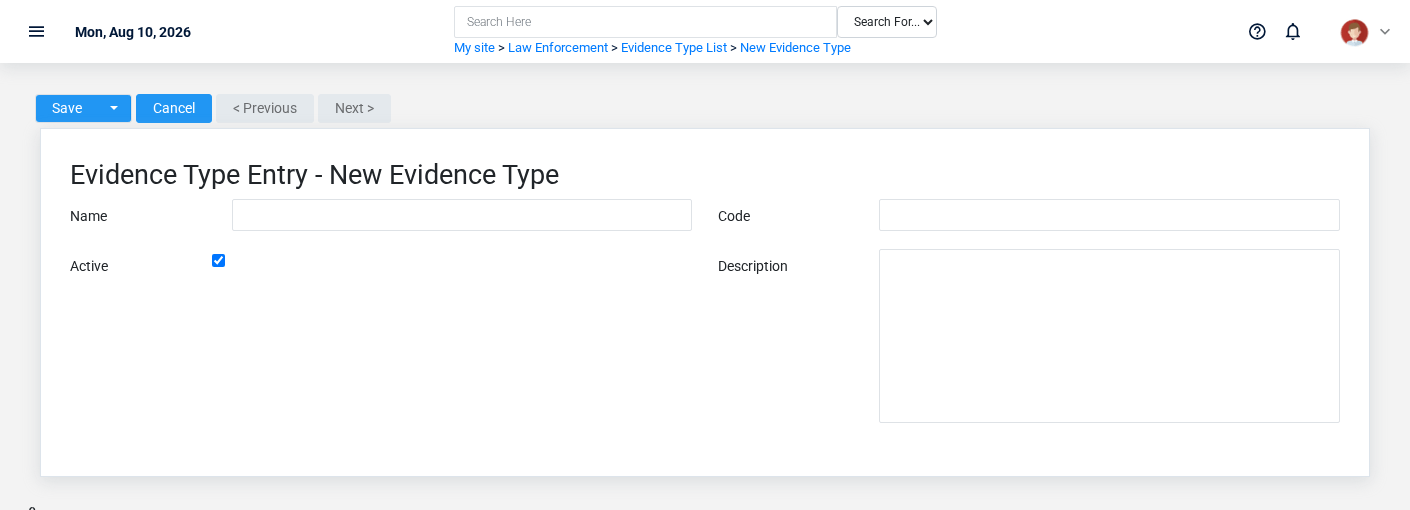
The Evidence Types create screen in the Brisk documentation demo.
Create an Evidence Type only when the existing choices do not represent the policy or classification you need. Near-duplicate setup values split reporting and make later selection harder.
1. Select the business context first.
2. Enter the required identifying and operational values: **Name**.
3. Review **Active** deliberately; these choices control availability or workflow rather than merely describing the record.
4. Save the Evidence Type, then confirm **Name**, and **Code** on its detail page before continuing.
After saving: Open **Evidence Items** and confirm the Evidence Type appears with the intended label and availability. Keep the old value for historical records when changing it would split or relabel prior reporting.
Delete an Evidence Type
Delete this Evidence Type only if it is an unused duplicate or setup mistake. Once other records refer to it, preserve that history and make the value inactive when the screen provides that option.
If the record is merely obsolete, use **Active** to remove it from future use while preserving existing references.
Before confirming, check for related **Evidence Items**. Brisk may refuse deletion when another record depends on this one; resolve the duplicate or use the supported correction workflow instead of breaking the trail.
On the confirmation page, verify **Name**, and **Code**. After confirmation, return to the Evidence Types list and make sure only the intended Evidence Type was removed.
Review Evidence Type details
Use the detail page as the shared record of what this Evidence Type currently means. Verify **Active** before relying on it for a decision.
Compare the Evidence Type with its source document or approved setup request before deciding that it needs correction.
Next check: Open **Evidence Items** and confirm the Evidence Type appears with the intended label and availability. Keep the old value for historical records when changing it would split or relabel prior reporting.
Edit an existing Evidence Type
Edit this Evidence Type when the underlying policy or classification changed. First determine whether historical transactions should retain the old value; if so, deactivate the old choice and create a new one.
1. Open the detail page. Compare **Name**, and **Code** with the supporting document or approved request.
2. Recheck **Active**. These values are most likely to change case history, custody, dispatch, official reporting, or audit review.
3. Save the change, return to the list, and confirm that the Evidence Type now appears under the expected **Active**.
After the change: Open **Evidence Items** and confirm the Evidence Type appears with the intended label and availability. Keep the old value for historical records when changing it would split or relabel prior reporting.
Find and review evidence types
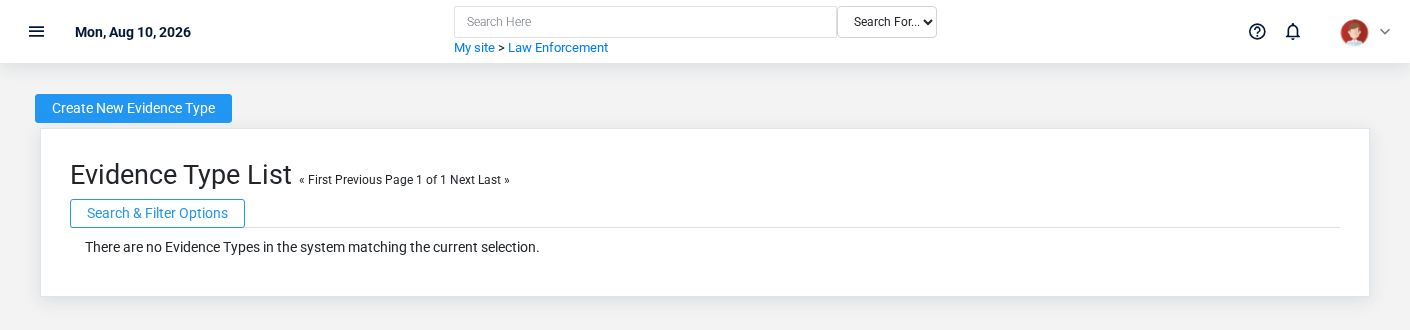
The Evidence Types list screen in the Brisk documentation demo.
Use the Evidence Types list to find the correct record before opening or changing it. Compare **Name**, and **Code**. Compare the full identifier rather than relying on a similar name.
Open the Evidence Type whose **Name**, and **Code** match the task. If it is missing, clear the list filters and recheck **Active** rather than creating a replacement immediately.
## Fields and business rules
Brisk stores 4 user-relevant fields for this Evidence Type, including 0 linked-record selections and 0 controlled-choice fields. Create and edit screens may hide calculated or workflow-managed values from this full reference.
| Field | Required | What it controls |
|---|---:|---|
| **Name** | Yes | Human-readable name for this evidence type. |
| **Code** | No | Short code used to identify this evidence type. |
| **Active** | No | Whether this evidence type is active and available for use. |
| **Description** | No | Description of this evidence type. |
## What happens next
Open **Evidence Items** and confirm the Evidence Type appears with the intended label and availability. Keep the old value for historical records when changing it would split or relabel prior reporting.
## Common mistakes and troubleshooting
- **The record will not save:** Recheck **Name** and any message beside the field. A required related record may also be inactive or unavailable to your role.
- **The record saved but is not available where expected:** Recheck **Active**, then clear the filters on the destination list. A saved record can still be inactive, unpublished, locked, unapproved, or in the wrong workflow state.
- **The values look right but the result is wrong:** Compare this Evidence Type with the source document or approved setup decision, then check the downstream screen where it is used.
# Forfeiture Options
# Forfeiture Options
Purpose and when to use this record
Maintain the permitted forfeiture outcomes or handling options available on applicable cases and property.
## At a glance
- **Identify it by:** **Name**.
- **Why care:** Use the agency’s approved terminology and access policy. Preserve dates, responsible personnel, case links, and audit history because these records may support official reporting or custody review.
## Before you begin
You need the Brisk permission for the action you are taking on forfeiture options. If a Create, Edit, or Delete control is absent, do not work around it with another user’s account; ask an administrator to review your role.
Create a Forfeiture Option
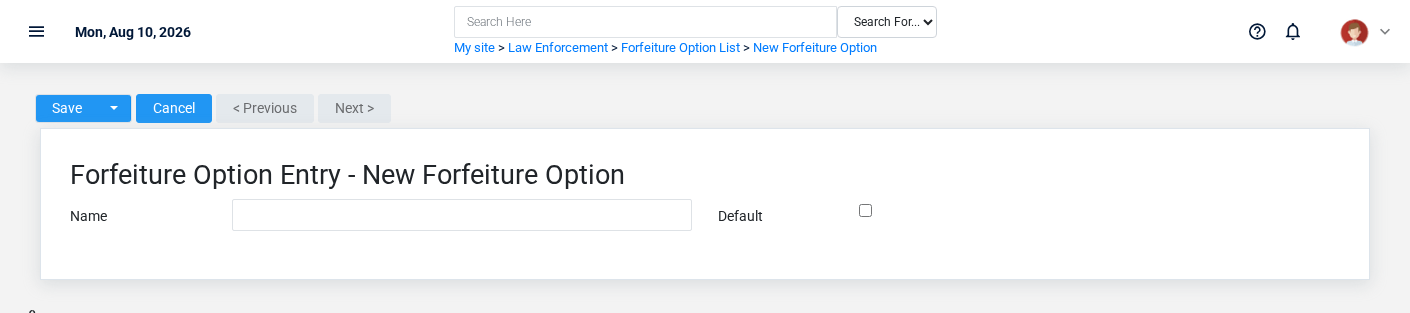
The Forfeiture Options create screen in the Brisk documentation demo.
Create a Forfeiture Option only when the existing choices do not represent the policy or classification you need. Near-duplicate setup values split reporting and make later selection harder.
1. Select the business context first.
2. Enter the required identifying and operational values: **Name**.
3. Review **Default** deliberately; these choices control availability or workflow rather than merely describing the record.
4. Save the Forfeiture Option, then confirm **Name** on its detail page before continuing.
After saving: Open **Cases** and confirm the Forfeiture Option appears with the intended label and availability. Keep the old value for historical records when changing it would split or relabel prior reporting.
Delete a Forfeiture Option
Delete this Forfeiture Option only if it is an unused duplicate or setup mistake. Once other records refer to it, preserve that history and make the value inactive when the screen provides that option.
Before confirming, check for related **Cases**. Brisk may refuse deletion when another record depends on this one; resolve the duplicate or use the supported correction workflow instead of breaking the trail.
On the confirmation page, verify **Name**. After confirmation, return to the Forfeiture Options list and make sure only the intended Forfeiture Option was removed.
Review Forfeiture Option details
Use the detail page as the shared record of what this Forfeiture Option currently means. Verify **Name**, and **Default** before relying on it for a decision.
Compare the Forfeiture Option with its source document or approved setup request before deciding that it needs correction.
Next check: Open **Cases** and confirm the Forfeiture Option appears with the intended label and availability. Keep the old value for historical records when changing it would split or relabel prior reporting.
Edit an existing Forfeiture Option
Edit this Forfeiture Option when the underlying policy or classification changed. First determine whether historical transactions should retain the old value; if so, deactivate the old choice and create a new one.
1. Open the detail page. Compare **Name** with the supporting document or approved request.
2. Recheck the identifying information shown on the screen. These values are most likely to change case history, custody, dispatch, official reporting, or audit review.
3. Save the change, return to the list, and confirm that the Forfeiture Option now appears under the expected **Name**.
After the change: Open **Cases** and confirm the Forfeiture Option appears with the intended label and availability. Keep the old value for historical records when changing it would split or relabel prior reporting.
Find and review forfeiture options
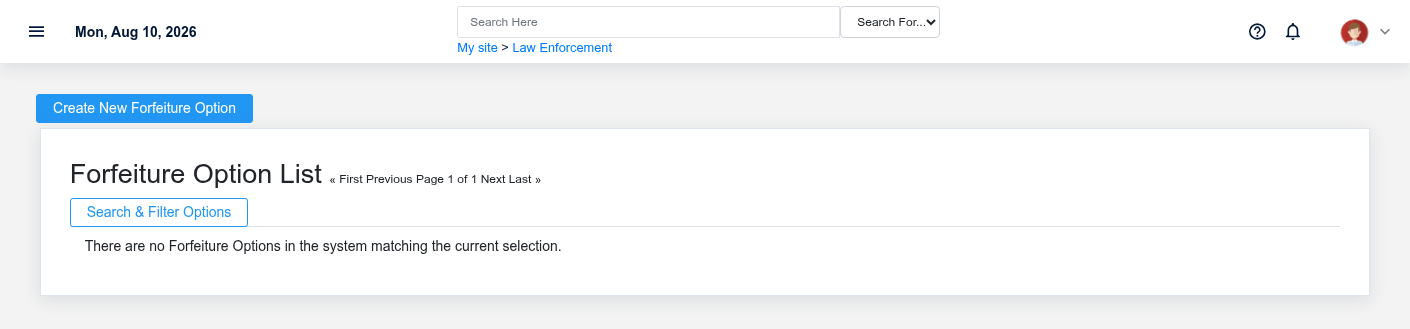
The Forfeiture Options list screen in the Brisk documentation demo.
Use the Forfeiture Options list to find the correct record before opening or changing it. Compare **Name**. Compare the full identifier rather than relying on a similar name.
Open the Forfeiture Option whose **Name** match the task. If it is missing, clear the list filters and recheck the identifying information shown on the screen rather than creating a replacement immediately.
## Fields and business rules
Brisk stores 2 user-relevant fields for this Forfeiture Option, including 0 linked-record selections and 0 controlled-choice fields. Create and edit screens may hide calculated or workflow-managed values from this full reference.
| Field | Required | What it controls |
|---|---:|---|
| **Name** | Yes | Sets the name of this option. |
| **Default** | No | If this is selected, cases will automatically select this forfeiture option. |
## What happens next
Open **Cases** and confirm the Forfeiture Option appears with the intended label and availability. Keep the old value for historical records when changing it would split or relabel prior reporting.
## Common mistakes and troubleshooting
- **The record will not save:** Recheck **Name** and any message beside the field. A required related record may also be inactive or unavailable to your role.
- **The values look right but the result is wrong:** Compare this Forfeiture Option with the source document or approved setup decision, then check the downstream screen where it is used.
# Logs
# Logs
Purpose and when to use this record
Record chronological agency activity for operational review and reporting.
## At a glance
- **Identify it by:** **Officer**, **Shift Date**, **On-Shift Time**, and **Off-Shift Time**.
- **Check its business context:** **Officer**, and **Vehicle**.
- **Why care:** Use the agency’s approved terminology and access policy. Preserve dates, responsible personnel, case links, and audit history because these records may support official reporting or custody review.
## Before you begin
You need the Brisk permission for the action you are taking on logs. If a Create, Edit, or Delete control is absent, do not work around it with another user’s account; ask an administrator to review your role.
Have valid **Officer** records ready first. Those selections determine where this Log belongs and which later screens can find it.
Create a Log
Create a Log only after confirming that the source document or operational event has not already been entered.
1. Select the business context first: **Officer**, and **Vehicle**.
2. Enter the required identifying and operational values: **Officer**, and **Shift Date**.
3. Review **On-Shift Time**, **Off-Shift Time**, **Beginning Miles**, **Ending Miles**, and **Total Miles** against the source document or approved setup decision.
4. Save the Log, then confirm **Officer**, **Shift Date**, **On-Shift Time**, **Off-Shift Time**, **Vehicle**, and **Beginning Miles**, plus the remaining screen fields on its detail page before continuing.
After saving: Use **Officer**, and **Vehicle** to interpret this Log. If it records a failure or exception, correct the source process and create a new successful event rather than rewriting the audit trail.
Delete a Log
Delete this Log only when it was entered by mistake and no downstream history depends on it. Use a reversal, void, credit, counter-adjustment, or status correction for a real event that later changed.
Before confirming, check for related **Activities**, and **Tallies**. Brisk may refuse deletion when another record depends on this one; resolve the duplicate or use the supported correction workflow instead of breaking the trail.
On the confirmation page, verify **Officer**, **Shift Date**, **On-Shift Time**, and **Off-Shift Time**. After confirmation, return to the Logs list and make sure only the intended Log was removed.
Review Log details
Use the detail page as the shared record of what this Log currently means. Verify **Total Miles** before relying on it for a decision.
Follow **Officer**, and **Vehicle** to determine whether the issue is on this Log or on one of those linked records.
Next check: Use **Officer**, and **Vehicle** to interpret this Log. If it records a failure or exception, correct the source process and create a new successful event rather than rewriting the audit trail.
Edit an existing Log
Edit this Log to correct or complete the same source document or operational event; use the supported reversal or follow-up workflow when the business event itself changed.
1. Open the detail page. Compare **Officer**, and **Vehicle** with the supporting document or approved request.
2. Recheck **Total Miles**. These values are most likely to change case history, custody, dispatch, official reporting, or audit review.
3. Save the change, return to the list, and confirm that the Log now appears under the expected the identifying information shown on the screen.
After the change: Use **Officer**, and **Vehicle** to interpret this Log. If it records a failure or exception, correct the source process and create a new successful event rather than rewriting the audit trail.
Find and review logs
The Logs list screen in the Brisk documentation demo.
Use the Logs list to find the correct record before opening or changing it. Compare **Officer**, **Shift Date**, **On-Shift Time**, and **Off-Shift Time**. Records with similar names or numbers can still belong to different **Officer**, and **Vehicle**.
Open the Log whose **Officer**, **Shift Date**, **On-Shift Time**, and **Off-Shift Time** match the task. If it is missing, clear the list filters and recheck the identifying information shown on the screen rather than creating a replacement immediately.
## Fields and business rules
Brisk stores 8 user-relevant fields for this Log, including 2 linked-record selections and 0 controlled-choice fields. Create and edit screens may hide calculated or workflow-managed values from this full reference.
| Field | Required | What it controls |
|---|---:|---|
| **Officer** | Yes | Sets the officer for this log entry. |
| **Shift Date** | Yes | The calendar date of this shift. If shift carries into a 2nd day, please use the first/starting day. |
| **On-Shift Time** | No | The on-shift time recorded for this log. |
| **Off-Shift Time** | No | The off-shift time recorded for this log. |
| **Vehicle** | No | Sets the vehicle that the officer is using this day. |
| **Beginning Miles** | No | Records the mileage of the vehicle at the beginning of the shift. |
| **Ending Miles** | No | Records the mileage of the vehicle at the end of the shift. |
| **Total Miles** | No | Records the difference between the beginning and ending mileage. |
## What happens next
Use **Officer**, and **Vehicle** to interpret this Log. If it records a failure or exception, correct the source process and create a new successful event rather than rewriting the audit trail.
## Common mistakes and troubleshooting
- **The record will not save:** Recheck **Officer**, and **Shift Date** and any message beside the field. A required related record may also be inactive or unavailable to your role.
- **The values look right but the result is wrong:** Open **Officer**, and **Vehicle** from the detail page. Correct the specific relationship that is wrong instead of forcing a total or status to compensate for it.
# Mileage Records
# Mileage Records
Purpose and when to use this record
Record vehicle mileage tied to law-enforcement activity, dates, officers, or routes.
## At a glance
- **Identify it by:** **Date**.
- **Check its business context:** **Officer**.
- **Why care:** Use the agency’s approved terminology and access policy. Preserve dates, responsible personnel, case links, and audit history because these records may support official reporting or custody review.
## Before you begin
You need the Brisk permission for the action you are taking on mileage records. If a Create, Edit, or Delete control is absent, do not work around it with another user’s account; ask an administrator to review your role.
Have valid **Officer** records ready first. Those selections determine where this Mileage Record belongs and which later screens can find it.
Create a Mileage Record
The Mileage Records create screen in the Brisk documentation demo.
Create a Mileage Record only after confirming that the source document or operational event has not already been entered.
1. Select the business context first: **Officer**.
2. Enter the required identifying and operational values: **Mileage**, **Date**, and **Officer**.
3. Review **Beginning Miles**, and **Ending Miles** against the source document or approved setup decision.
4. Save the Mileage Record, then confirm **Date** on its detail page before continuing.
After saving: Use **Officer** to interpret this Mileage Record. If it records a failure or exception, correct the source process and create a new successful event rather than rewriting the audit trail.
Delete a Mileage Record
Delete this Mileage Record only when it was entered by mistake and no downstream history depends on it. Use a reversal, void, credit, counter-adjustment, or status correction for a real event that later changed.
On the confirmation page, verify **Date**. After confirmation, return to the Mileage Records list and make sure only the intended Mileage Record was removed.
Review Mileage Record details
Use the detail page as the shared record of what this Mileage Record currently means. Verify **Date** before relying on it for a decision.
Follow **Officer** to determine whether the issue is on this Mileage Record or on one of those linked records.
Next check: Use **Officer** to interpret this Mileage Record. If it records a failure or exception, correct the source process and create a new successful event rather than rewriting the audit trail.
Edit an existing Mileage Record
Edit this Mileage Record to correct or complete the same source document or operational event; use the supported reversal or follow-up workflow when the business event itself changed.
1. Open the detail page. Compare **Officer** with the supporting document or approved request.
2. Recheck **Date**. These values are most likely to change case history, custody, dispatch, official reporting, or audit review.
3. Save the change, return to the list, and confirm that the Mileage Record now appears under the expected **Date**.
After the change: Use **Officer** to interpret this Mileage Record. If it records a failure or exception, correct the source process and create a new successful event rather than rewriting the audit trail.
Find and review mileage records
The Mileage Records list screen in the Brisk documentation demo.
Use the Mileage Records list to find the correct record before opening or changing it. Compare **Date**. Records with similar names or numbers can still belong to different **Officer**.
Open the Mileage Record whose **Date** match the task. If it is missing, clear the list filters and recheck the identifying information shown on the screen rather than creating a replacement immediately.
## Fields and business rules
Brisk stores 5 user-relevant fields for this Mileage Record, including 1 linked-record selection and 0 controlled-choice fields. Create and edit screens may hide calculated or workflow-managed values from this full reference.
| Field | Required | What it controls |
|---|---:|---|
| **Beginning Miles** | No | Records the mileage of the vehicle at the beginning of the shift. |
| **Ending Miles** | No | Records the mileage of the vehicle at the end of the shift. |
| **Mileage** | Yes | The number of miles recorded. |
| **Date** | Yes | The date that this mileage will appear on the activity report. |
| **Officer** | Yes | Sets the officer for this log entry. |
## What happens next
Use **Officer** to interpret this Mileage Record. If it records a failure or exception, correct the source process and create a new successful event rather than rewriting the audit trail.
## Common mistakes and troubleshooting
- **The record will not save:** Recheck **Mileage**, **Date**, and **Officer** and any message beside the field. A required related record may also be inactive or unavailable to your role.
- **The values look right but the result is wrong:** Open **Officer** from the detail page. Correct the specific relationship that is wrong instead of forcing a total or status to compensate for it.
# Officer Certifications
# Officer Certifications
Purpose and when to use this record
Track an officer’s certification type, effective dates, expiration, and renewal status.
## At a glance
- **Identify it by:** **Certification Name**, **Certification Number**, **Issued Date**, **Expiration Date**, and **Status**.
- **Check its business context:** **Officer**.
- **Why care:** Use the agency’s approved terminology and access policy. Preserve dates, responsible personnel, case links, and audit history because these records may support official reporting or custody review.
- **Why care:** Status communicates workflow progress to other staff. Change it only when the underlying work, approval, payment, or handoff has actually occurred.
## Before you begin
You need the Brisk permission for the action you are taking on officer certifications. If a Create, Edit, or Delete control is absent, do not work around it with another user’s account; ask an administrator to review your role.
Have valid **Officer** records ready first. Those selections determine where this Officer Certification belongs and which later screens can find it.
Create an Officer Certification
The Officer Certifications create screen in the Brisk documentation demo.
Create an Officer Certification only after confirming that the source document or operational event has not already been entered.
1. Select the business context first: **Officer**.
2. Enter the required identifying and operational values: **Officer**, and **Certification Name**.
3. Review **Status** deliberately; these choices control availability or workflow rather than merely describing the record.
4. Save the Officer Certification, then confirm **Certification Name**, **Certification Number**, **Issued Date**, **Expiration Date**, and **Status** on its detail page before continuing.
After saving: Verify **Status**, and **Officer** on the detail page, then continue the law enforcement workflow only when those values agree with the source document and actual work performed.
Delete an Officer Certification
Delete this Officer Certification only when it was entered by mistake and no downstream history depends on it. Use a reversal, void, credit, counter-adjustment, or status correction for a real event that later changed.
On the confirmation page, verify **Certification Name**, **Certification Number**, **Issued Date**, **Expiration Date**, and **Status**. After confirmation, return to the Officer Certifications list and make sure only the intended Officer Certification was removed.
Review Officer Certification details
Use the detail page as the shared record of what this Officer Certification currently means. Verify **Issued Date**, **Expiration Date**, and **Status** before relying on it for a decision.
Follow **Officer** to determine whether the issue is on this Officer Certification or on one of those linked records.
Next check: Verify **Status**, and **Officer** on the detail page, then continue the law enforcement workflow only when those values agree with the source document and actual work performed.
Edit an existing Officer Certification
Edit this Officer Certification to correct or complete the same source document or operational event; use the supported reversal or follow-up workflow when the business event itself changed.
1. Open the detail page. Compare **Officer** with the supporting document or approved request.
2. Recheck **Issued Date**, **Expiration Date**, and **Status**. These values are most likely to change case history, custody, dispatch, official reporting, or audit review.
3. Save the change, return to the list, and confirm that the Officer Certification now appears under the expected **Status**.
After the change: Verify **Status**, and **Officer** on the detail page, then continue the law enforcement workflow only when those values agree with the source document and actual work performed.
Find and review officer certifications
The Officer Certifications list screen in the Brisk documentation demo.
Use the Officer Certifications list to find the correct record before opening or changing it. Compare **Certification Name**, **Certification Number**, **Issued Date**, **Expiration Date**, and **Status**. Records with similar names or numbers can still belong to different **Officer**.
- The initial order emphasizes **Expiration Date**, **Badge/Unit Number**, and **Certification Name**. Select a column heading when you need a different comparison.
Open the Officer Certification whose **Certification Name**, **Certification Number**, **Issued Date**, **Expiration Date**, and **Status** match the task. If it is missing, clear the list filters and recheck **Status** rather than creating a replacement immediately.
## Fields and business rules
Brisk stores 9 user-relevant fields for this Officer Certification, including 1 linked-record selection and 1 controlled-choice field. Create and edit screens may hide calculated or workflow-managed values from this full reference.
| Field | Required | What it controls |
|---|---:|---|
| **Officer** | Yes | The officer associated with this officer certification. |
| **Certification Name** | Yes | The certification name recorded for this officer certification. |
| **Issuing Agency** | No | The issuing agency recorded for this officer certification. |
| **Certification Number** | No | The certification number recorded for this officer certification. |
| **Issued Date** | No | Date recorded for issued date on this officer certification. |
| **Expiration Date** | No | Date recorded for expiration date on this officer certification. |
| **Training Hours** | No | The training hours value recorded for this officer certification. |
| **Status** | No | Current status of this officer certification. Available values: Active, Expired, Pending, Revoked. |
| **Notes** | No | Additional internal notes about this officer certification. |
## What happens next
Verify **Status**, and **Officer** on the detail page, then continue the law enforcement workflow only when those values agree with the source document and actual work performed.
## Common mistakes and troubleshooting
- **The record will not save:** Recheck **Officer**, and **Certification Name** and any message beside the field. A required related record may also be inactive or unavailable to your role.
- **The record saved but is not available where expected:** Recheck **Status**, then clear the filters on the destination list. A saved record can still be inactive, unpublished, locked, unapproved, or in the wrong workflow state.
- **The values look right but the result is wrong:** Open **Officer** from the detail page. Correct the specific relationship that is wrong instead of forcing a total or status to compensate for it.
# Officers
# Officers
Purpose and when to use this record
Maintain officer identity, agency assignment, status, and details used throughout cases, dispatch, transport, and time records.
## At a glance
- **Identify it by:** **Badge/Unit Number**, **Title**, **User**, and **Admin**.
- **Check its business context:** **User**, and **Agency**.
- **Why care:** Use the agency’s approved terminology and access policy. Preserve dates, responsible personnel, case links, and audit history because these records may support official reporting or custody review.
- **Why care:** Availability and publication flags affect future use without erasing history. Prefer disabling an obsolete setup record when existing transactions still refer to it.
## Before you begin
You need the Brisk permission for the action you are taking on officers. If a Create, Edit, or Delete control is absent, do not work around it with another user’s account; ask an administrator to review your role.
Create an Officer
The Officers create screen in the Brisk documentation demo.
Create an Officer only after confirming that the source document or operational event has not already been entered.
1. Select the business context first: **User**, and **Agency**.
2. Enter the required identifying and operational values: **Badge/Unit Number**.
3. Review **Admin**, and **Active** deliberately; these choices control availability or workflow rather than merely describing the record.
4. Save the Officer, then confirm **Badge/Unit Number**, **Title**, **User**, **Admin**, **Active**, and **Agency** on its detail page before continuing.
After saving: Verify **Active**, **User**, and **Agency** on the detail page, then continue the law enforcement workflow only when those values agree with the source document and actual work performed.
Delete an Officer
Delete this Officer only when it was entered by mistake and no downstream history depends on it. Use a reversal, void, credit, counter-adjustment, or status correction for a real event that later changed.
If the record is merely obsolete, use **Active** to remove it from future use while preserving existing references.
Before confirming, check for related **Cases**, **Dispatch Entries**, **Evidence Chain Entries**, **Evidence Items**, and **Logs**, plus the remaining screen fields. Brisk may refuse deletion when another record depends on this one; resolve the duplicate or use the supported correction workflow instead of breaking the trail.
On the confirmation page, verify **Badge/Unit Number**, **Title**, **User**, and **Admin**. After confirmation, return to the Officers list and make sure only the intended Officer was removed.
Review Officer details
Use the detail page as the shared record of what this Officer currently means. Verify **Active** before relying on it for a decision.
Follow **User**, and **Agency** to determine whether the issue is on this Officer or on one of those linked records.
Next check: Verify **Active**, **User**, and **Agency** on the detail page, then continue the law enforcement workflow only when those values agree with the source document and actual work performed.
Edit an existing Officer
Edit this Officer to correct or complete the same source document or operational event; use the supported reversal or follow-up workflow when the business event itself changed.
1. Open the detail page. Compare **User**, and **Agency** with the supporting document or approved request.
2. Recheck **Active**. These values are most likely to change case history, custody, dispatch, official reporting, or audit review.
3. Save the change, return to the list, and confirm that the Officer now appears under the expected **Active**.
After the change: Verify **Active**, **User**, and **Agency** on the detail page, then continue the law enforcement workflow only when those values agree with the source document and actual work performed.
Find and review officers
The Officers list screen in the Brisk documentation demo.
Use the Officers list to find the correct record before opening or changing it. Compare **Badge/Unit Number**, **Title**, **User**, and **Admin**. Records with similar names or numbers can still belong to different **User**, and **Agency**.
Open the Officer whose **Badge/Unit Number**, **Title**, **User**, and **Admin** match the task. If it is missing, clear the list filters and recheck **Active** rather than creating a replacement immediately.
## Fields and business rules
Brisk stores 6 user-relevant fields for this Officer, including 2 linked-record selections and 0 controlled-choice fields. Create and edit screens may hide calculated or workflow-managed values from this full reference.
| Field | Required | What it controls |
|---|---:|---|
| **Badge/Unit Number** | Yes | The unit number of the responder. |
| **Title** | No | Sets the position for this officer. For example, Major or Chief. Default value is Officer. |
| **User** | No | Connects this badge number to a user that can log in. |
| **Admin** | No | If enabled, gives this officer permission to view reports and make changes to the system. |
| **Active** | No | If this field is unchecked, this officer will no longer appear in reports. |
| **Agency** | No | Sets the agency for this responder. |
## What happens next
Verify **Active**, **User**, and **Agency** on the detail page, then continue the law enforcement workflow only when those values agree with the source document and actual work performed.
## Common mistakes and troubleshooting
- **The record will not save:** Recheck **Badge/Unit Number** and any message beside the field. A required related record may also be inactive or unavailable to your role.
- **The record saved but is not available where expected:** Recheck **Active**, then clear the filters on the destination list. A saved record can still be inactive, unpublished, locked, unapproved, or in the wrong workflow state.
- **The values look right but the result is wrong:** Open **User**, and **Agency** from the detail page. Correct the specific relationship that is wrong instead of forcing a total or status to compensate for it.
# Readylog Import Stages
# Readylog Import Stages
Purpose and when to use this record
The Readylog Import Stages overview screen in the Brisk documentation demo.
Review a staged ReadyLog import row before it is accepted into Brisk’s law-enforcement records.
## At a glance
- **Identify it by:** **Status**.
- **Why care:** Use the agency’s approved terminology and access policy. Preserve dates, responsible personnel, case links, and audit history because these records may support official reporting or custody review.
- **Why care:** Status communicates workflow progress to other staff. Change it only when the underlying work, approval, payment, or handoff has actually occurred.
## Before you begin
You need the Brisk permission for the action you are taking on readylog import stages. If a Create, Edit, or Delete control is absent, do not work around it with another user’s account; ask an administrator to review your role.
## Fields and business rules
Brisk stores 6 user-relevant fields for this ReadyLog Import Stage, including 0 linked-record selections and 1 controlled-choice field. Create and edit screens may hide calculated or workflow-managed values from this full reference.
| Field | Required | What it controls |
|---|---:|---|
| **Record Type** | Yes | The record type recorded for this ready log import stage. |
| **Dedupe Key** | Yes | The dedupe key recorded for this ready log import stage. |
| **Source File** | No | The source file recorded for this ready log import stage. |
| **Payload Hash** | No | The payload hash recorded for this ready log import stage. |
| **Status** | No | Current status of this ready log import stage. Available values: Imported, Skipped, Error. |
| **Error Message** | No | The error message recorded for this ready log import stage. |
## What happens next
Use the originating business process to interpret this ReadyLog Import Stage. If it records a failure or exception, correct the source process and create a new successful event rather than rewriting the audit trail.
## Common mistakes and troubleshooting
- **The record will not save:** Recheck **Record Type**, and **Dedupe Key** and any message beside the field. A required related record may also be inactive or unavailable to your role.
- **The record saved but is not available where expected:** Recheck **Status**, then clear the filters on the destination list. A saved record can still be inactive, unpublished, locked, unapproved, or in the wrong workflow state.
- **The values look right but the result is wrong:** Compare this ReadyLog Import Stage with the source document or approved setup decision, then check the downstream screen where it is used.
# Sheriff Bank Deposits
# Sheriff Bank Deposits
Purpose and when to use this record
Group sheriff receipts into a bank deposit so collected funds can be reconciled to the bank.
## At a glance
- **Identify it by:** **Deposit Date**, **Receipt Start Date**, and **Receipt End Date**.
- **Check its business context:** **Bank Account**, **Source Account**, and **Cash Drawer**.
- **Why care:** Use the agency’s approved terminology and access policy. Preserve dates, responsible personnel, case links, and audit history because these records may support official reporting or custody review.
## Before you begin
You need the Brisk permission for the action you are taking on sheriff bank deposits. If a Create, Edit, or Delete control is absent, do not work around it with another user’s account; ask an administrator to review your role.
Have valid **Bank Account** records ready first. Those selections determine where this Sheriff Bank Deposit belongs and which later screens can find it.
Create a Sheriff Bank Deposit
The Sheriff Bank Deposits create screen in the Brisk documentation demo.
Create a Sheriff Bank Deposit only after confirming that the source document or operational event has not already been entered.
1. Select the business context first: **Bank Account**, **Source Account**, and **Cash Drawer**.
2. Enter the required identifying and operational values: **Bank Account**, and **Amount**.
3. Review **Deposit Date**, **Receipt Start Date**, **Receipt End Date**, and **Memo** against the source document or approved setup decision.
4. Save the Sheriff Bank Deposit, then confirm **Deposit Date**, **Receipt Start Date**, and **Receipt End Date** on its detail page before continuing.
After saving: Verify **Bank Account**, **Source Account**, and **Cash Drawer** on the detail page, then continue the law enforcement workflow only when those values agree with the source document and actual work performed.
Delete a Sheriff Bank Deposit
Delete this Sheriff Bank Deposit only when it was entered by mistake and no downstream history depends on it. Use a reversal, void, credit, counter-adjustment, or status correction for a real event that later changed.
On the confirmation page, verify **Deposit Date**, **Receipt Start Date**, and **Receipt End Date**. After confirmation, return to the Sheriff Bank Deposits list and make sure only the intended Sheriff Bank Deposit was removed.
Review Sheriff Bank Deposit details
Use the detail page as the shared record of what this Sheriff Bank Deposit currently means. Verify **Amount**, **Deposit Date**, **Receipt Start Date**, and **Receipt End Date** before relying on it for a decision.
Follow **Bank Account**, **Source Account**, and **Cash Drawer** to determine whether the issue is on this Sheriff Bank Deposit or on one of those linked records.
Next check: Verify **Bank Account**, **Source Account**, and **Cash Drawer** on the detail page, then continue the law enforcement workflow only when those values agree with the source document and actual work performed.
Edit an existing Sheriff Bank Deposit
Edit this Sheriff Bank Deposit to correct or complete the same source document or operational event; use the supported reversal or follow-up workflow when the business event itself changed.
1. Open the detail page. Compare **Bank Account**, **Source Account**, and **Cash Drawer** with the supporting document or approved request.
2. Recheck **Bank Account**, **Source Account**, **Amount**, **Deposit Date**, **Receipt Start Date**, and **Receipt End Date**. These values are most likely to change case history, custody, dispatch, official reporting, or audit review.
3. Save the change, return to the list, and confirm that the Sheriff Bank Deposit now appears under the expected **Deposit Date**, **Receipt Start Date**, and **Receipt End Date**.
After the change: Verify **Bank Account**, **Source Account**, and **Cash Drawer** on the detail page, then continue the law enforcement workflow only when those values agree with the source document and actual work performed.
Find and review sheriff bank deposits
The Sheriff Bank Deposits list screen in the Brisk documentation demo.
Use the Sheriff Bank Deposits list to find the correct record before opening or changing it. Compare **Deposit Date**, **Receipt Start Date**, and **Receipt End Date**. Records with similar names or numbers can still belong to different **Bank Account**, **Source Account**, and **Cash Drawer**.
- Narrow the list with **Bank Account**, and **Cash Drawer** filters.
- The date filter uses **Deposit Date**; choose a range that matches the business event you are reconciling.
Open the Sheriff Bank Deposit whose **Deposit Date**, **Receipt Start Date**, and **Receipt End Date** match the task. If it is missing, clear the list filters and recheck **Bank Account**, **Cash Drawer**, and **Deposit Date** rather than creating a replacement immediately.
## Fields and business rules
Brisk stores 8 user-relevant fields for this Sheriff Bank Deposit, including 3 linked-record selections and 0 controlled-choice fields. Create and edit screens may hide calculated or workflow-managed values from this full reference.
| Field | Required | What it controls |
|---|---:|---|
| **Bank Account** | Yes | The bank account associated with this sheriff bank deposit. |
| **Source Account** | No | The source account associated with this sheriff bank deposit. |
| **Amount** | Yes | The amount value recorded for this sheriff bank deposit. |
| **Deposit Date** | No | Date recorded for deposit date on this sheriff bank deposit. |
| **Receipt Start Date** | No | Date recorded for receipt start date on this sheriff bank deposit. |
| **Receipt End Date** | No | Date recorded for receipt end date on this sheriff bank deposit. |
| **Cash Drawer** | No | The cash drawer associated with this sheriff bank deposit. |
| **Memo** | No | The memo recorded for this sheriff bank deposit. |
## What happens next
Verify **Bank Account**, **Source Account**, and **Cash Drawer** on the detail page, then continue the law enforcement workflow only when those values agree with the source document and actual work performed.
## Common mistakes and troubleshooting
- **The record will not save:** Recheck **Bank Account**, and **Amount** and any message beside the field. A required related record may also be inactive or unavailable to your role.
- **The values look right but the result is wrong:** Open **Bank Account**, **Source Account**, and **Cash Drawer** from the detail page. Correct the specific relationship that is wrong instead of forcing a total or status to compensate for it.
# Sheriff Receipts
# Sheriff Receipts
Purpose and when to use this record
Issue and track a sheriff-office receipt, its payer/source code, amount, payment method, and deposit status.
## At a glance
- **Identify it by:** **Receipt Number**, **Received Date**, **Check Number**, **Vehicle Id Number**, and **Vin Number**.
- **Check its business context:** **Source**, **Received By**, **Office Clerk**, **Served By**, and **Utl By**.
- **Why care:** Use the agency’s approved terminology and access policy. Preserve dates, responsible personnel, case links, and audit history because these records may support official reporting or custody review.
- **Why care:** Status communicates workflow progress to other staff. Change it only when the underlying work, approval, payment, or handoff has actually occurred.
## Before you begin
You need the Brisk permission for the action you are taking on sheriff receipts. If a Create, Edit, or Delete control is absent, do not work around it with another user’s account; ask an administrator to review your role.
Create a Sheriff Receipt
The Sheriff Receipts create screen in the Brisk documentation demo.
Create a Sheriff Receipt only after confirming that the source document or operational event has not already been entered.
1. Select the business context first: **Source**, **Received By**, **Office Clerk**, **Served By**, **Utl By**, and **Service Office Clerk**, plus the remaining screen fields.
2. Enter the required identifying and operational values: **Received From**.
3. Review **Tender**, **How Received**, and **Status** deliberately; these choices control availability or workflow rather than merely describing the record.
4. Save the Sheriff Receipt, then confirm **Receipt Number**, **Received Date**, **Check Number**, **Vehicle Id Number**, and **Vin Number** on its detail page before continuing.
After saving: Verify **Tender**, **How Received**, **Status**, **Approved**, **Source**, and **Received By**, plus the remaining screen fields on the detail page, then continue the law enforcement workflow only when those values agree with the source document and actual work performed.
Delete a Sheriff Receipt
Delete this Sheriff Receipt only when it was entered by mistake and no downstream history depends on it. Use a reversal, void, credit, counter-adjustment, or status correction for a real event that later changed.
Before confirming, check for related **Sheriff Receipt Lines**, **Sheriff Receipt Refunds**, and **Transactions**. Brisk may refuse deletion when another record depends on this one; resolve the duplicate or use the supported correction workflow instead of breaking the trail.
On the confirmation page, verify **Receipt Number**, **Received Date**, **Check Number**, **Vehicle Id Number**, and **Vin Number**. After confirmation, return to the Sheriff Receipts list and make sure only the intended Sheriff Receipt was removed.
Review Sheriff Receipt details
Use the detail page as the shared record of what this Sheriff Receipt currently means. Verify **Amount**, **Tender**, **Received Date**, **How Received**, **Status**, and **Date Received**, plus the remaining screen fields before relying on it for a decision.
Follow **Source**, **Received By**, **Office Clerk**, **Served By**, **Utl By**, and **Service Office Clerk**, plus the remaining screen fields to determine whether the issue is on this Sheriff Receipt or on one of those linked records.
Next check: Verify **Tender**, **How Received**, **Status**, **Approved**, **Source**, and **Received By**, plus the remaining screen fields on the detail page, then continue the law enforcement workflow only when those values agree with the source document and actual work performed.
Edit an existing Sheriff Receipt
Edit this Sheriff Receipt to correct or complete the same source document or operational event; use the supported reversal or follow-up workflow when the business event itself changed.
1. Open the detail page. Compare **Source**, **Received By**, **Office Clerk**, **Served By**, **Utl By**, and **Service Office Clerk**, plus the remaining screen fields with the supporting document or approved request.
2. Recheck **Amount**, **Tender**, **Received Date**, **How Received**, **Status**, and **Date Received**, plus the remaining screen fields. These values are most likely to change case history, custody, dispatch, official reporting, or audit review.
3. Save the change, return to the list, and confirm that the Sheriff Receipt now appears under the expected **Tender**, **How Received**, **Status**, and **Approved**.
After the change: Verify **Tender**, **How Received**, **Status**, **Approved**, **Source**, and **Received By**, plus the remaining screen fields on the detail page, then continue the law enforcement workflow only when those values agree with the source document and actual work performed.
Find and review sheriff receipts
The Sheriff Receipts list screen in the Brisk documentation demo.
Use the Sheriff Receipts list to find the correct record before opening or changing it. Compare **Receipt Number**, **Received Date**, **Check Number**, **Vehicle Id Number**, **Vin Number**, and **Status**, plus the remaining screen fields. Records with similar names or numbers can still belong to different **Source**, **Received By**, **Office Clerk**, **Served By**, **Utl By**, and **Service Office Clerk**, plus the remaining screen fields.
- Keyword search checks **Receipt Number**, **Received From**, **For Description/Name**, **Vehicle Id Number**, **Vin Number**, and **Serve Address**, plus the remaining screen fields.
- Narrow the list with **Source**, and **Cash Drawer** filters.
- The date filter uses **Received Date**; choose a range that matches the business event you are reconciling.
Open the Sheriff Receipt whose **Receipt Number**, **Received Date**, **Check Number**, **Vehicle Id Number**, **Vin Number**, and **Status**, plus the remaining screen fields match the task. If it is missing, clear the list filters and recheck **Source**, **Cash Drawer**, **Received Date**, **Tender**, **How Received**, and **Status**, plus the remaining screen fields rather than creating a replacement immediately.
## Fields and business rules
Brisk stores 39 user-relevant fields for this Sheriff Receipt, including 7 linked-record selections and 3 controlled-choice fields. Create and edit screens may hide calculated or workflow-managed values from this full reference.
| Field | Required | What it controls |
|---|---:|---|
| **Year** | No | The year value recorded for this sheriff receipt. |
| **Receipt Number** | No | The receipt number recorded for this sheriff receipt. |
| **Received From** | Yes | The received from recorded for this sheriff receipt. |
| **For Description/Name** | No | The for description/name recorded for this sheriff receipt. |
| **Source** | No | The source associated with this sheriff receipt. |
| **Amount** | No | The amount value recorded for this sheriff receipt. |
| **Tender** | No | The tender recorded for this sheriff receipt. Available values: Cash, Check, Card, N/A. |
| **Received By** | No | The received by associated with this sheriff receipt. |
| **Received Date** | No | Date recorded for received date on this sheriff receipt. |
| **Check Number** | No | The check number recorded for this sheriff receipt. |
| **Vehicle Id Number** | No | The vehicle id number recorded for this sheriff receipt. |
| **Vin Number** | No | The vin number recorded for this sheriff receipt. |
| **How Received** | No | The how received recorded for this sheriff receipt. Available values: In Person, By Mail. |
| **Status** | No | Current status of this sheriff receipt. Available values: Draft, Pending / Not Yet Paid, Posted, Voided, Refunded. |
| **Case Number** | No | The case number recorded for this sheriff receipt. |
| **Application Number** | No | The application number recorded for this sheriff receipt. |
| **Date Received** | No | Date recorded for date received on this sheriff receipt. |
| **Date Applied** | No | Date recorded for date applied on this sheriff receipt. |
| **Date Submitted** | No | Date recorded for date submitted on this sheriff receipt. |
| **Approved** | No | Date recorded for approved on this sheriff receipt. |
| **Denied** | No | Date recorded for denied on this sheriff receipt. |
| **Plaintiff** | No | The plaintiff recorded for this sheriff receipt. |
| **Defendant** | No | The defendant recorded for this sheriff receipt. |
| **Outside County/Agent** | No | The outside county/agent recorded for this sheriff receipt. |
| **Court Date** | No | Date recorded for court date on this sheriff receipt. |
| **Court Time** | No | The court time recorded for this sheriff receipt. |
| **Office Clerk** | No | The office clerk associated with this sheriff receipt. |
| **Entry Date/Time** | No | Date and time recorded for entry date/time on this sheriff receipt. |
| **Served By** | No | The served by associated with this sheriff receipt. |
| **Served Date** | No | Date recorded for served date on this sheriff receipt. |
| **Utl By** | No | The utl by associated with this sheriff receipt. |
| **Utl Date** | No | Date recorded for utl date on this sheriff receipt. |
| **Recalled Date** | No | Date recorded for recalled date on this sheriff receipt. |
| **Service Office Clerk** | No | The service office clerk associated with this sheriff receipt. |
| **Service Entry Date/Time** | No | Date and time recorded for service entry date/time on this sheriff receipt. |
| **Serve Address** | No | The serve address recorded for this sheriff receipt. |
| **Transaction Date/Time** | No | Date and time recorded for transaction date/time on this sheriff receipt. |
| **Cash Drawer** | No | The cash drawer associated with this sheriff receipt. |
| **Additional Comments** | No | The additional comments recorded for this sheriff receipt. |
## What happens next
Verify **Tender**, **How Received**, **Status**, **Approved**, **Source**, and **Received By**, plus the remaining screen fields on the detail page, then continue the law enforcement workflow only when those values agree with the source document and actual work performed.
## Common mistakes and troubleshooting
- **The record will not save:** Recheck **Received From** and any message beside the field. A required related record may also be inactive or unavailable to your role.
- **The record saved but is not available where expected:** Recheck **Tender**, **How Received**, **Status**, and **Approved**, then clear the filters on the destination list. A saved record can still be inactive, unpublished, locked, unapproved, or in the wrong workflow state.
- **The values look right but the result is wrong:** Open **Source**, **Received By**, **Office Clerk**, **Served By**, **Utl By**, and **Service Office Clerk**, plus the remaining screen fields from the detail page. Correct the specific relationship that is wrong instead of forcing a total or status to compensate for it.
# Sheriff Source Codes
# Sheriff Source Codes
Purpose and when to use this record
Maintain standardized revenue or receipt-source codes for sheriff collections and reporting.
## At a glance
- **Identify it by:** **Source Code**, **Name**, and **Accounting Code**.
- **Check its business context:** **Balancing Account**.
- **Why care:** Use the agency’s approved terminology and access policy. Preserve dates, responsible personnel, case links, and audit history because these records may support official reporting or custody review.
- **Why care:** Availability and publication flags affect future use without erasing history. Prefer disabling an obsolete setup record when existing transactions still refer to it.
## Before you begin
You need the Brisk permission for the action you are taking on sheriff source codes. If a Create, Edit, or Delete control is absent, do not work around it with another user’s account; ask an administrator to review your role.
Create a Sheriff Source Code
The Sheriff Source Codes create screen in the Brisk documentation demo.
Create a Sheriff Source Code only when the existing choices do not represent the policy or classification you need. Near-duplicate setup values split reporting and make later selection harder.
1. Select the business context first: **Balancing Account**.
2. Enter the required identifying and operational values: **Source Code**, and **Name**.
3. Review **Active** deliberately; these choices control availability or workflow rather than merely describing the record.
4. Save the Sheriff Source Code, then confirm **Source Code**, **Name**, and **Accounting Code** on its detail page before continuing.
After saving: Open **Sheriff Receipt Lines**, and **Sheriff Receipts** and confirm the Sheriff Source Code appears with the intended label and availability. Keep the old value for historical records when changing it would split or relabel prior reporting.
Delete a Sheriff Source Code
Delete this Sheriff Source Code only if it is an unused duplicate or setup mistake. Once other records refer to it, preserve that history and make the value inactive when the screen provides that option.
If the record is merely obsolete, use **Active** to remove it from future use while preserving existing references.
Before confirming, check for related **Sheriff Receipt Lines**, and **Sheriff Receipts**. Brisk may refuse deletion when another record depends on this one; resolve the duplicate or use the supported correction workflow instead of breaking the trail.
On the confirmation page, verify **Source Code**, **Name**, and **Accounting Code**. After confirmation, return to the Sheriff Source Codes list and make sure only the intended Sheriff Source Code was removed.
Review Sheriff Source Code details
Use the detail page as the shared record of what this Sheriff Source Code currently means. Verify **Active**, and **Default Amount** before relying on it for a decision.
Follow **Balancing Account** to determine whether the issue is on this Sheriff Source Code or on one of those linked records.
Next check: Open **Sheriff Receipt Lines**, and **Sheriff Receipts** and confirm the Sheriff Source Code appears with the intended label and availability. Keep the old value for historical records when changing it would split or relabel prior reporting.
Edit an existing Sheriff Source Code
Edit this Sheriff Source Code when the underlying policy or classification changed. First determine whether historical transactions should retain the old value; if so, deactivate the old choice and create a new one.
1. Open the detail page. Compare **Balancing Account** with the supporting document or approved request.
2. Recheck **Active**, **Default Amount**, **Balancing Account**, and **Accounting Code**. These values are most likely to change case history, custody, dispatch, official reporting, or audit review.
3. Save the change, return to the list, and confirm that the Sheriff Source Code now appears under the expected **Active**.
After the change: Open **Sheriff Receipt Lines**, and **Sheriff Receipts** and confirm the Sheriff Source Code appears with the intended label and availability. Keep the old value for historical records when changing it would split or relabel prior reporting.
Find and review sheriff source codes
The Sheriff Source Codes list screen in the Brisk documentation demo.
Use the Sheriff Source Codes list to find the correct record before opening or changing it. Compare **Source Code**, **Name**, and **Accounting Code**. Records with similar names or numbers can still belong to different **Balancing Account**.
- Keyword search checks **Source Code**, **Name**, **Accounting Code**, and **Notes**.
- Narrow the list with **Balancing Account** filters.
Open the Sheriff Source Code whose **Source Code**, **Name**, and **Accounting Code** match the task. If it is missing, clear the list filters and recheck **Balancing Account**, and **Active** rather than creating a replacement immediately.
## Fields and business rules
Brisk stores 7 user-relevant fields for this Sheriff Source Code, including 1 linked-record selection and 0 controlled-choice fields. Create and edit screens may hide calculated or workflow-managed values from this full reference.
| Field | Required | What it controls |
|---|---:|---|
| **Source Code** | Yes | Short code used to identify this sheriff source code. |
| **Name** | Yes | Human-readable name for this sheriff source code. |
| **Active** | No | Whether this sheriff source code is active and available for use. |
| **Default Amount** | No | The default amount value recorded for this sheriff source code. |
| **Balancing Account** | No | G/L account credited when receipts are posted for this source code. |
| **Accounting Code** | No | The accounting code recorded for this sheriff source code. |
| **Notes** | No | Additional internal notes about this sheriff source code. |
## What happens next
Open **Sheriff Receipt Lines**, and **Sheriff Receipts** and confirm the Sheriff Source Code appears with the intended label and availability. Keep the old value for historical records when changing it would split or relabel prior reporting.
## Common mistakes and troubleshooting
- **The record will not save:** Recheck **Source Code**, and **Name** and any message beside the field. A required related record may also be inactive or unavailable to your role.
- **The record saved but is not available where expected:** Recheck **Active**, then clear the filters on the destination list. A saved record can still be inactive, unpublished, locked, unapproved, or in the wrong workflow state.
- **The values look right but the result is wrong:** Open **Balancing Account** from the detail page. Correct the specific relationship that is wrong instead of forcing a total or status to compensate for it.
# Tally Categories
# Tally Categories
Purpose and when to use this record
Group recurring agency tally definitions into stable operational and reporting sections.
## At a glance
- **Identify it by:** **Name**.
- **Why care:** Use the agency’s approved terminology and access policy. Preserve dates, responsible personnel, case links, and audit history because these records may support official reporting or custody review.
## Before you begin
You need the Brisk permission for the action you are taking on tally categories. If a Create, Edit, or Delete control is absent, do not work around it with another user’s account; ask an administrator to review your role.
Find and review tally categories
The Tally Categories list screen in the Brisk documentation demo.
Use the Tally Categories list to find the correct record before opening or changing it. Compare **Name**. Compare the full identifier rather than relying on a similar name.
Open the Tally Category whose **Name** match the task. If it is missing, clear the list filters and recheck the identifying information shown on the screen rather than creating a replacement immediately.
Create a Tally Category
The Tally Categories create screen in the Brisk documentation demo.
Create a Tally Category only when the existing choices do not represent the policy or classification you need. Near-duplicate setup values split reporting and make later selection harder.
1. Select the business context first.
2. Enter the required identifying and operational values: **Name**.
3. Review **Sort Order** against the source document or approved setup decision.
4. Save the Tally Category, then confirm **Name** on its detail page before continuing.
After saving: Open **Tally Definitions** and confirm the Tally Category appears with the intended label and availability. Keep the old value for historical records when changing it would split or relabel prior reporting.
Delete a Tally Category
Delete this Tally Category only if it is an unused duplicate or setup mistake. Once other records refer to it, preserve that history and make the value inactive when the screen provides that option.
Before confirming, check for related **Tally Definitions**. Brisk may refuse deletion when another record depends on this one; resolve the duplicate or use the supported correction workflow instead of breaking the trail.
On the confirmation page, verify **Name**. After confirmation, return to the Tally Categories list and make sure only the intended Tally Category was removed.
Review Tally Category details
Use the detail page as the shared record of what this Tally Category currently means. Verify **Name**, and **Sort Order** before relying on it for a decision.
Compare the Tally Category with its source document or approved setup request before deciding that it needs correction.
Next check: Open **Tally Definitions** and confirm the Tally Category appears with the intended label and availability. Keep the old value for historical records when changing it would split or relabel prior reporting.
Edit an existing Tally Category
Edit this Tally Category when the underlying policy or classification changed. First determine whether historical transactions should retain the old value; if so, deactivate the old choice and create a new one.
1. Open the detail page. Compare **Name** with the supporting document or approved request.
2. Recheck the identifying information shown on the screen. These values are most likely to change case history, custody, dispatch, official reporting, or audit review.
3. Save the change, return to the list, and confirm that the Tally Category now appears under the expected **Name**.
After the change: Open **Tally Definitions** and confirm the Tally Category appears with the intended label and availability. Keep the old value for historical records when changing it would split or relabel prior reporting.
## Fields and business rules
Brisk stores 2 user-relevant fields for this Tally Category, including 0 linked-record selections and 0 controlled-choice fields. Create and edit screens may hide calculated or workflow-managed values from this full reference.
| Field | Required | What it controls |
|---|---:|---|
| **Name** | Yes | Sets the name of the category. |
| **Sort Order** | No | Sets the order that this category appears on daily logs and reports. |
## What happens next
Open **Tally Definitions** and confirm the Tally Category appears with the intended label and availability. Keep the old value for historical records when changing it would split or relabel prior reporting.
## Common mistakes and troubleshooting
- **The record will not save:** Recheck **Name** and any message beside the field. A required related record may also be inactive or unavailable to your role.
- **The values look right but the result is wrong:** Compare this Tally Category with the source document or approved setup decision, then check the downstream screen where it is used.
# Tally Definitions
# Tally Definitions
Purpose and when to use this record
Define a recurring countable agency activity used in logs and performance reporting.
## At a glance
- **Identify it by:** **Name**.
- **Check its business context:** **Category**.
- **Why care:** Use the agency’s approved terminology and access policy. Preserve dates, responsible personnel, case links, and audit history because these records may support official reporting or custody review.
- **Why care:** Availability and publication flags affect future use without erasing history. Prefer disabling an obsolete setup record when existing transactions still refer to it.
## Before you begin
You need the Brisk permission for the action you are taking on tally definitions. If a Create, Edit, or Delete control is absent, do not work around it with another user’s account; ask an administrator to review your role.
Have valid **Category** records ready first. Those selections determine where this Tally Definition belongs and which later screens can find it.
Create a Tally Definition
The Tally Definitions create screen in the Brisk documentation demo.
Create a Tally Definition only when the existing choices do not represent the policy or classification you need. Near-duplicate setup values split reporting and make later selection harder.
1. Select the business context first: **Category**.
2. Enter the required identifying and operational values: **Category**, and **Name**.
3. Review **Currency**, and **Active** deliberately; these choices control availability or workflow rather than merely describing the record.
4. Save the Tally Definition, then confirm **Name** on its detail page before continuing.
After saving: Open **Tallies** and confirm the Tally Definition appears with the intended label and availability. Keep the old value for historical records when changing it would split or relabel prior reporting.
Delete a Tally Definition
Delete this Tally Definition only if it is an unused duplicate or setup mistake. Once other records refer to it, preserve that history and make the value inactive when the screen provides that option.
If the record is merely obsolete, use **Active** to remove it from future use while preserving existing references.
Before confirming, check for related **Tallies**. Brisk may refuse deletion when another record depends on this one; resolve the duplicate or use the supported correction workflow instead of breaking the trail.
On the confirmation page, verify **Name**. After confirmation, return to the Tally Definitions list and make sure only the intended Tally Definition was removed.
Review Tally Definition details
Use the detail page as the shared record of what this Tally Definition currently means. Verify **Active** before relying on it for a decision.
Follow **Category** to determine whether the issue is on this Tally Definition or on one of those linked records.
Next check: Open **Tallies** and confirm the Tally Definition appears with the intended label and availability. Keep the old value for historical records when changing it would split or relabel prior reporting.
Edit an existing Tally Definition
Edit this Tally Definition when the underlying policy or classification changed. First determine whether historical transactions should retain the old value; if so, deactivate the old choice and create a new one.
1. Open the detail page. Compare **Category** with the supporting document or approved request.
2. Recheck **Active**. These values are most likely to change case history, custody, dispatch, official reporting, or audit review.
3. Save the change, return to the list, and confirm that the Tally Definition now appears under the expected **Active**.
After the change: Open **Tallies** and confirm the Tally Definition appears with the intended label and availability. Keep the old value for historical records when changing it would split or relabel prior reporting.
Find and review tally definitions
The Tally Definitions list screen in the Brisk documentation demo.
Use the Tally Definitions list to find the correct record before opening or changing it. Compare **Name**. Records with similar names or numbers can still belong to different **Category**.
Open the Tally Definition whose **Name** match the task. If it is missing, clear the list filters and recheck **Active** rather than creating a replacement immediately.
## Fields and business rules
Brisk stores 5 user-relevant fields for this Tally Definition, including 1 linked-record selection and 0 controlled-choice fields. Create and edit screens may hide calculated or workflow-managed values from this full reference.
| Field | Required | What it controls |
|---|---:|---|
| **Category** | Yes | The category associated with this tally definition. |
| **Name** | Yes | Sets the name of this tally. |
| **Sort Order** | No | Sets the order that this tally appears within its category. |
| **Currency** | No | If enabled, this field will report a dollar amount on reports. |
| **Active** | No | If this field is unchecked, this definition will no longer appear in reports. |
## What happens next
Open **Tallies** and confirm the Tally Definition appears with the intended label and availability. Keep the old value for historical records when changing it would split or relabel prior reporting.
## Common mistakes and troubleshooting
- **The record will not save:** Recheck **Category**, and **Name** and any message beside the field. A required related record may also be inactive or unavailable to your role.
- **The record saved but is not available where expected:** Recheck **Active**, then clear the filters on the destination list. A saved record can still be inactive, unpublished, locked, unapproved, or in the wrong workflow state.
- **The values look right but the result is wrong:** Open **Category** from the detail page. Correct the specific relationship that is wrong instead of forcing a total or status to compensate for it.
# Time Tracking Categories
# Time Tracking Categories
Purpose and when to use this record
Maintain the categories used to classify officer or staff time.
## At a glance
- **Identify it by:** **Name**.
- **Why care:** Use the agency’s approved terminology and access policy. Preserve dates, responsible personnel, case links, and audit history because these records may support official reporting or custody review.
## Before you begin
You need the Brisk permission for the action you are taking on time tracking categories. If a Create, Edit, or Delete control is absent, do not work around it with another user’s account; ask an administrator to review your role.
Find and review time tracking categories
The Time Tracking Categories list screen in the Brisk documentation demo.
Use the Time Tracking Categories list to find the correct record before opening or changing it. Compare **Name**. Compare the full identifier rather than relying on a similar name.
Open the Time Tracking Category whose **Name** match the task. If it is missing, clear the list filters and recheck the identifying information shown on the screen rather than creating a replacement immediately.
Create a Time Tracking Category
The Time Tracking Categories create screen in the Brisk documentation demo.
Create a Time Tracking Category only when the existing choices do not represent the policy or classification you need. Near-duplicate setup values split reporting and make later selection harder.
1. Select the business context first.
2. Enter the required identifying and operational values: **Name**.
3. Review the identifying information shown on the screen against the source document or approved setup decision.
4. Save the Time Tracking Category, then confirm **Name** on its detail page before continuing.
After saving: Open **Time Tracking Incidents** and confirm the Time Tracking Category appears with the intended label and availability. Keep the old value for historical records when changing it would split or relabel prior reporting.
Delete a Time Tracking Category
Delete this Time Tracking Category only if it is an unused duplicate or setup mistake. Once other records refer to it, preserve that history and make the value inactive when the screen provides that option.
Before confirming, check for related **Time Tracking Incidents**. Brisk may refuse deletion when another record depends on this one; resolve the duplicate or use the supported correction workflow instead of breaking the trail.
On the confirmation page, verify **Name**. After confirmation, return to the Time Tracking Categories list and make sure only the intended Time Tracking Category was removed.
Review Time Tracking Category details
Use the detail page as the shared record of what this Time Tracking Category currently means. Verify **Name** before relying on it for a decision.
Compare the Time Tracking Category with its source document or approved setup request before deciding that it needs correction.
Next check: Open **Time Tracking Incidents** and confirm the Time Tracking Category appears with the intended label and availability. Keep the old value for historical records when changing it would split or relabel prior reporting.
Edit an existing Time Tracking Category
Edit this Time Tracking Category when the underlying policy or classification changed. First determine whether historical transactions should retain the old value; if so, deactivate the old choice and create a new one.
1. Open the detail page. Compare **Name** with the supporting document or approved request.
2. Recheck the identifying information shown on the screen. These values are most likely to change case history, custody, dispatch, official reporting, or audit review.
3. Save the change, return to the list, and confirm that the Time Tracking Category now appears under the expected **Name**.
After the change: Open **Time Tracking Incidents** and confirm the Time Tracking Category appears with the intended label and availability. Keep the old value for historical records when changing it would split or relabel prior reporting.
## Fields and business rules
Brisk stores 1 user-relevant fields for this Time Tracking Category, including 0 linked-record selections and 0 controlled-choice fields. Create and edit screens may hide calculated or workflow-managed values from this full reference.
| Field | Required | What it controls |
|---|---:|---|
| **Name** | Yes | Sets the name of this time tracking category. |
## What happens next
Open **Time Tracking Incidents** and confirm the Time Tracking Category appears with the intended label and availability. Keep the old value for historical records when changing it would split or relabel prior reporting.
## Common mistakes and troubleshooting
- **The record will not save:** Recheck **Name** and any message beside the field. A required related record may also be inactive or unavailable to your role.
- **The values look right but the result is wrong:** Compare this Time Tracking Category with the source document or approved setup decision, then check the downstream screen where it is used.
# Time Tracking Incidents
# Time Tracking Incidents
Purpose and when to use this record
Record a block of categorized time associated with an officer, incident, case, or other agency work.
## At a glance
- **Identify it by:** **Incident Number**, and **Date**.
- **Check its business context:** **Category**, and **Officer**.
- **Why care:** Use the agency’s approved terminology and access policy. Preserve dates, responsible personnel, case links, and audit history because these records may support official reporting or custody review.
## Before you begin
You need the Brisk permission for the action you are taking on time tracking incidents. If a Create, Edit, or Delete control is absent, do not work around it with another user’s account; ask an administrator to review your role.
Have valid **Category**, and **Officer** records ready first. Those selections determine where this Time Tracking Incident belongs and which later screens can find it.
Create a Time Tracking Incident
The Time Tracking Incidents create screen in the Brisk documentation demo.
Create a Time Tracking Incident only after confirming that the source document or operational event has not already been entered.
1. Select the business context first: **Category**, and **Officer**.
2. Enter the required identifying and operational values: **Date**, **Location**, **Category**, and **Officer**.
3. Review **Incident Number**, and **Call Type** against the source document or approved setup decision.
4. Save the Time Tracking Incident, then confirm **Incident Number**, and **Date** on its detail page before continuing.
After saving: Verify **Category**, and **Officer** on the detail page, then continue the law enforcement workflow only when those values agree with the source document and actual work performed.
Delete a Time Tracking Incident
Delete this Time Tracking Incident only when it was entered by mistake and no downstream history depends on it. Use a reversal, void, credit, counter-adjustment, or status correction for a real event that later changed.
Before confirming, check for related **Time Tracking Entries**. Brisk may refuse deletion when another record depends on this one; resolve the duplicate or use the supported correction workflow instead of breaking the trail.
On the confirmation page, verify **Incident Number**, and **Date**. After confirmation, return to the Time Tracking Incidents list and make sure only the intended Time Tracking Incident was removed.
Review Time Tracking Incident details
Use the detail page as the shared record of what this Time Tracking Incident currently means. Verify **Date** before relying on it for a decision.
Follow **Category**, and **Officer** to determine whether the issue is on this Time Tracking Incident or on one of those linked records.
Next check: Verify **Category**, and **Officer** on the detail page, then continue the law enforcement workflow only when those values agree with the source document and actual work performed.
Edit an existing Time Tracking Incident
Edit this Time Tracking Incident to correct or complete the same source document or operational event; use the supported reversal or follow-up workflow when the business event itself changed.
1. Open the detail page. Compare **Category**, and **Officer** with the supporting document or approved request.
2. Recheck **Date**. These values are most likely to change case history, custody, dispatch, official reporting, or audit review.
3. Save the change, return to the list, and confirm that the Time Tracking Incident now appears under the expected **Incident Number**, and **Date**.
After the change: Verify **Category**, and **Officer** on the detail page, then continue the law enforcement workflow only when those values agree with the source document and actual work performed.
Find and review time tracking incidents
The Time Tracking Incidents list screen in the Brisk documentation demo.
Use the Time Tracking Incidents list to find the correct record before opening or changing it. Compare **Incident Number**, and **Date**. Records with similar names or numbers can still belong to different **Category**, and **Officer**.
Open the Time Tracking Incident whose **Incident Number**, and **Date** match the task. If it is missing, clear the list filters and recheck the identifying information shown on the screen rather than creating a replacement immediately.
## Fields and business rules
Brisk stores 6 user-relevant fields for this Time Tracking Incident, including 2 linked-record selections and 0 controlled-choice fields. Create and edit screens may hide calculated or workflow-managed values from this full reference.
| Field | Required | What it controls |
|---|---:|---|
| **Incident Number** | No | Optionally use this field to record the case number, incident numberm, or other identifying number associated with this activity entry. |
| **Date** | Yes | The calendar date of this incident. |
| **Location** | Yes | Records the location of this incident. |
| **Call Type** | No | Records the call type of this incident. |
| **Category** | Yes | Sets the category of this incident. |
| **Officer** | Yes | Sets the primary officer for this log entry. |
## What happens next
Verify **Category**, and **Officer** on the detail page, then continue the law enforcement workflow only when those values agree with the source document and actual work performed.
## Common mistakes and troubleshooting
- **The record will not save:** Recheck **Date**, **Location**, **Category**, and **Officer** and any message beside the field. A required related record may also be inactive or unavailable to your role.
- **The values look right but the result is wrong:** Open **Category**, and **Officer** from the detail page. Correct the specific relationship that is wrong instead of forcing a total or status to compensate for it.
# Transportation Checkpoints
# Transportation Checkpoints
Purpose and when to use this record
Define a scheduled or required checkpoint along a transportation route.
## At a glance
- **Identify it by:** **Checkpoint Date/Time**.
- **Check its business context:** **Transportation Entry**, and **Officer**.
- **Why care:** Use the agency’s approved terminology and access policy. Preserve dates, responsible personnel, case links, and audit history because these records may support official reporting or custody review.
## Before you begin
You need the Brisk permission for the action you are taking on transportation checkpoints. If a Create, Edit, or Delete control is absent, do not work around it with another user’s account; ask an administrator to review your role.
Have valid **Transportation Entry** records ready first. Those selections determine where this Transportation Checkpoint belongs and which later screens can find it.
Create a Transportation Checkpoint
The Transportation Checkpoints create screen in the Brisk documentation demo.
Create a Transportation Checkpoint only after confirming that the source document or operational event has not already been entered.
1. Select the business context first: **Transportation Entry**, and **Officer**.
2. Enter the required identifying and operational values: **Transportation Entry**.
3. Review **Checkpoint Type** deliberately; these choices control availability or workflow rather than merely describing the record.
4. Save the Transportation Checkpoint, then confirm **Checkpoint Date/Time** on its detail page before continuing.
After saving: Verify **Checkpoint Type**, **Transportation Entry**, and **Officer** on the detail page, then continue the law enforcement workflow only when those values agree with the source document and actual work performed.
Delete a Transportation Checkpoint
Delete this Transportation Checkpoint only when it was entered by mistake and no downstream history depends on it. Use a reversal, void, credit, counter-adjustment, or status correction for a real event that later changed.
On the confirmation page, verify **Checkpoint Date/Time**. After confirmation, return to the Transportation Checkpoints list and make sure only the intended Transportation Checkpoint was removed.
Review Transportation Checkpoint details
Use the detail page as the shared record of what this Transportation Checkpoint currently means. Verify **Checkpoint Type**, and **Checkpoint Date/Time** before relying on it for a decision.
Follow **Transportation Entry**, and **Officer** to determine whether the issue is on this Transportation Checkpoint or on one of those linked records.
Next check: Verify **Checkpoint Type**, **Transportation Entry**, and **Officer** on the detail page, then continue the law enforcement workflow only when those values agree with the source document and actual work performed.
Edit an existing Transportation Checkpoint
Edit this Transportation Checkpoint to correct or complete the same source document or operational event; use the supported reversal or follow-up workflow when the business event itself changed.
1. Open the detail page. Compare **Transportation Entry**, and **Officer** with the supporting document or approved request.
2. Recheck **Checkpoint Type**, and **Checkpoint Date/Time**. These values are most likely to change case history, custody, dispatch, official reporting, or audit review.
3. Save the change, return to the list, and confirm that the Transportation Checkpoint now appears under the expected **Checkpoint Type**.
After the change: Verify **Checkpoint Type**, **Transportation Entry**, and **Officer** on the detail page, then continue the law enforcement workflow only when those values agree with the source document and actual work performed.
Find and review transportation checkpoints
The Transportation Checkpoints list screen in the Brisk documentation demo.
Use the Transportation Checkpoints list to find the correct record before opening or changing it. Compare **Checkpoint Date/Time**. Records with similar names or numbers can still belong to different **Transportation Entry**, and **Officer**.
- The initial order emphasizes **Checkpoint Date/Time**, and **Id**. Select a column heading when you need a different comparison.
Open the Transportation Checkpoint whose **Checkpoint Date/Time** match the task. If it is missing, clear the list filters and recheck **Checkpoint Type** rather than creating a replacement immediately.
## Fields and business rules
Brisk stores 6 user-relevant fields for this Transportation Checkpoint, including 2 linked-record selections and 1 controlled-choice field. Create and edit screens may hide calculated or workflow-managed values from this full reference.
| Field | Required | What it controls |
|---|---:|---|
| **Transportation Entry** | Yes | The transportation entry associated with this transportation checkpoint. |
| **Checkpoint Type** | No | The checkpoint type recorded for this transportation checkpoint. Available values: Intake, Departure, Arrival, Release, Transfer, Other. |
| **Checkpoint Date/Time** | No | Date and time recorded for checkpoint date/time on this transportation checkpoint. |
| **Officer** | No | The officer associated with this transportation checkpoint. |
| **Location** | No | The location recorded for this transportation checkpoint. |
| **Notes** | No | Additional internal notes about this transportation checkpoint. |
## What happens next
Verify **Checkpoint Type**, **Transportation Entry**, and **Officer** on the detail page, then continue the law enforcement workflow only when those values agree with the source document and actual work performed.
## Common mistakes and troubleshooting
- **The record will not save:** Recheck **Transportation Entry** and any message beside the field. A required related record may also be inactive or unavailable to your role.
- **The values look right but the result is wrong:** Open **Transportation Entry**, and **Officer** from the detail page. Correct the specific relationship that is wrong instead of forcing a total or status to compensate for it.
# Transportation Classes
# Transportation Classes
Purpose and when to use this record
Classify transportation work for assignment, rate, compliance, or reporting purposes.
## At a glance
- **Identify it by:** **Name**.
- **Why care:** Use the agency’s approved terminology and access policy. Preserve dates, responsible personnel, case links, and audit history because these records may support official reporting or custody review.
## Before you begin
You need the Brisk permission for the action you are taking on transportation classes. If a Create, Edit, or Delete control is absent, do not work around it with another user’s account; ask an administrator to review your role.
Create a Transportation Class
The Transportation Classes create screen in the Brisk documentation demo.
Create a Transportation Class only when the existing choices do not represent the policy or classification you need. Near-duplicate setup values split reporting and make later selection harder.
1. Select the business context first.
2. Enter the required identifying and operational values: **Name**.
3. Review the identifying information shown on the screen against the source document or approved setup decision.
4. Save the Transportation Class, then confirm **Name** on its detail page before continuing.
After saving: Open **Transportation Entries** and confirm the Transportation Class appears with the intended label and availability. Keep the old value for historical records when changing it would split or relabel prior reporting.
Delete a Transportation Class
Delete this Transportation Class only if it is an unused duplicate or setup mistake. Once other records refer to it, preserve that history and make the value inactive when the screen provides that option.
Before confirming, check for related **Transportation Entries**. Brisk may refuse deletion when another record depends on this one; resolve the duplicate or use the supported correction workflow instead of breaking the trail.
On the confirmation page, verify **Name**. After confirmation, return to the Transportation Classes list and make sure only the intended Transportation Class was removed.
Review Transportation Class details
Use the detail page as the shared record of what this Transportation Class currently means. Verify **Name** before relying on it for a decision.
Compare the Transportation Class with its source document or approved setup request before deciding that it needs correction.
Next check: Open **Transportation Entries** and confirm the Transportation Class appears with the intended label and availability. Keep the old value for historical records when changing it would split or relabel prior reporting.
Edit an existing Transportation Class
Edit this Transportation Class when the underlying policy or classification changed. First determine whether historical transactions should retain the old value; if so, deactivate the old choice and create a new one.
1. Open the detail page. Compare **Name** with the supporting document or approved request.
2. Recheck the identifying information shown on the screen. These values are most likely to change case history, custody, dispatch, official reporting, or audit review.
3. Save the change, return to the list, and confirm that the Transportation Class now appears under the expected **Name**.
After the change: Open **Transportation Entries** and confirm the Transportation Class appears with the intended label and availability. Keep the old value for historical records when changing it would split or relabel prior reporting.
Find and review transportation classes
The Transportation Classes list screen in the Brisk documentation demo.
Use the Transportation Classes list to find the correct record before opening or changing it. Compare **Name**. Compare the full identifier rather than relying on a similar name.
Open the Transportation Class whose **Name** match the task. If it is missing, clear the list filters and recheck the identifying information shown on the screen rather than creating a replacement immediately.
## Fields and business rules
Brisk stores 1 user-relevant fields for this Transportation Class, including 0 linked-record selections and 0 controlled-choice fields. Create and edit screens may hide calculated or workflow-managed values from this full reference.
| Field | Required | What it controls |
|---|---:|---|
| **Name** | Yes | Use this field to give the category a name (e.g. Felony, Misdemeanor, Federal, etc.). |
## What happens next
Open **Transportation Entries** and confirm the Transportation Class appears with the intended label and availability. Keep the old value for historical records when changing it would split or relabel prior reporting.
## Common mistakes and troubleshooting
- **The record will not save:** Recheck **Name** and any message beside the field. A required related record may also be inactive or unavailable to your role.
- **The values look right but the result is wrong:** Compare this Transportation Class with the source document or approved setup decision, then check the downstream screen where it is used.
# Transportation Entries
# Transportation Entries
Purpose and when to use this record
Record an actual transport movement, its route, vehicle, personnel, timing, mileage, and completion state.
## At a glance
- **Identify it by:** **Date**, and **Label**.
- **Check its business context:** **Transporter**, **Vehicle**, **Destination**, and **Class**.
- **Why care:** Use the agency’s approved terminology and access policy. Preserve dates, responsible personnel, case links, and audit history because these records may support official reporting or custody review.
## Before you begin
You need the Brisk permission for the action you are taking on transportation entries. If a Create, Edit, or Delete control is absent, do not work around it with another user’s account; ask an administrator to review your role.
Have valid **Transporter** records ready first. Those selections determine where this Transporation Entry belongs and which later screens can find it.
Find and review transportation entries
Use the Transportation Entries list to find the correct record before opening or changing it. Compare **Date**. Records with similar names or numbers can still belong to different **Transporter**, **Vehicle**, **Destination**, and **Class**.
Open the Transporation Entry whose **Date** match the task. If it is missing, clear the list filters and recheck the identifying information shown on the screen rather than creating a replacement immediately.
Create a Transporation Entry
The Transportation Entries create screen in the Brisk documentation demo.
Create a Transporation Entry only after confirming that the source document or operational event has not already been entered.
1. Select the business context first: **Transporter**, **Vehicle**, **Destination**, and **Class**.
2. Enter the required identifying and operational values: **Transporter**, and **Date**.
3. Review **Beginning Time**, **End Time**, **Beginning Miles**, **Ending Miles**, **Total Miles**, and **Comments**, plus the remaining screen fields against the source document or approved setup decision.
4. Save the Transporation Entry, then confirm **Date**, and **Label** on its detail page before continuing.
After saving: Verify **Transporter**, **Vehicle**, **Destination**, and **Class** on the detail page, then continue the law enforcement workflow only when those values agree with the source document and actual work performed.
Delete a Transporation Entry
Delete this Transporation Entry only when it was entered by mistake and no downstream history depends on it. Use a reversal, void, credit, counter-adjustment, or status correction for a real event that later changed.
Before confirming, check for related **Transportation Checkpoints**, and **Transportation Route Audits**. Brisk may refuse deletion when another record depends on this one; resolve the duplicate or use the supported correction workflow instead of breaking the trail.
On the confirmation page, verify **Date**, and **Label**. After confirmation, return to the Transportation Entries list and make sure only the intended Transporation Entry was removed.
Review Transporation Entry details
Use the detail page as the shared record of what this Transporation Entry currently means. Verify **Date**, and **Total Miles** before relying on it for a decision.
Follow **Transporter**, **Vehicle**, **Destination**, and **Class** to determine whether the issue is on this Transporation Entry or on one of those linked records.
Next check: Verify **Transporter**, **Vehicle**, **Destination**, and **Class** on the detail page, then continue the law enforcement workflow only when those values agree with the source document and actual work performed.
Edit an existing Transporation Entry
Edit this Transporation Entry to correct or complete the same source document or operational event; use the supported reversal or follow-up workflow when the business event itself changed.
1. Open the detail page. Compare **Transporter**, **Vehicle**, **Destination**, and **Class** with the supporting document or approved request.
2. Recheck **Date**, and **Total Miles**. These values are most likely to change case history, custody, dispatch, official reporting, or audit review.
3. Save the change, return to the list, and confirm that the Transporation Entry now appears under the expected **Date**, and **Label**.
After the change: Verify **Transporter**, **Vehicle**, **Destination**, and **Class** on the detail page, then continue the law enforcement workflow only when those values agree with the source document and actual work performed.
## Fields and business rules
Brisk stores 12 user-relevant fields for this Transporation Entry, including 4 linked-record selections and 0 controlled-choice fields. Create and edit screens may hide calculated or workflow-managed values from this full reference.
| Field | Required | What it controls |
|---|---:|---|
| **Transporter** | Yes | Sets the transporter for this transportation entry. |
| **Date** | Yes | The calendar date of this transportation record. |
| **Beginning Time** | No | The beginning time recorded for this transportation entry. |
| **End Time** | No | The end time recorded for this transportation entry. |
| **Vehicle** | No | Records the vehicle that the transporter used. |
| **Beginning Miles** | No | Records the mileage of the vehicle at the beginning of the trip. |
| **Ending Miles** | No | Records the mileage of the vehicle at the end of the trip. |
| **Total Miles** | No | Records the difference between the beginning and ending mileage. |
| **Destination** | No | Use this field to record the starting point and destination. |
| **Comments** | No | Use this field to store any additional information about the transportation record. |
| **Label** | No | Optionally set a label for this transportation entry. |
| **Class** | No | Optionally classify this transportation entry. |
## What happens next
Verify **Transporter**, **Vehicle**, **Destination**, and **Class** on the detail page, then continue the law enforcement workflow only when those values agree with the source document and actual work performed.
## Common mistakes and troubleshooting
- **The record will not save:** Recheck **Transporter**, and **Date** and any message beside the field. A required related record may also be inactive or unavailable to your role.
- **The values look right but the result is wrong:** Open **Transporter**, **Vehicle**, **Destination**, and **Class** from the detail page. Correct the specific relationship that is wrong instead of forcing a total or status to compensate for it.
# Transportation Route Audits
# Transportation Route Audits
Purpose and when to use this record
Review recorded changes or compliance checks associated with a transportation route.
## At a glance
- **Identify it by:** **Review Status**.
- **Check its business context:** **Transportation Entry**, and **Route**.
- **Why care:** Use the agency’s approved terminology and access policy. Preserve dates, responsible personnel, case links, and audit history because these records may support official reporting or custody review.
## Before you begin
You need the Brisk permission for the action you are taking on transportation route audits. If a Create, Edit, or Delete control is absent, do not work around it with another user’s account; ask an administrator to review your role.
Have valid **Transportation Entry** records ready first. Those selections determine where this Transportation Route Audit belongs and which later screens can find it.
Create a Transportation Route Audit
The Transportation Route Audits create screen in the Brisk documentation demo.
Create a Transportation Route Audit only after confirming that the source document or operational event has not already been entered.
1. Select the business context first: **Transportation Entry**, and **Route**.
2. Enter the required identifying and operational values: **Transportation Entry**.
3. Review **Review Status** deliberately; these choices control availability or workflow rather than merely describing the record.
4. Save the Transportation Route Audit, then confirm **Review Status** on its detail page before continuing.
After saving: Use **Transportation Entry**, and **Route** to interpret this Transportation Route Audit. If it records a failure or exception, correct the source process and create a new successful event rather than rewriting the audit trail.
Delete a Transportation Route Audit
Delete this Transportation Route Audit only when it was entered by mistake and no downstream history depends on it. Use a reversal, void, credit, counter-adjustment, or status correction for a real event that later changed.
On the confirmation page, verify **Review Status**. After confirmation, return to the Transportation Route Audits list and make sure only the intended Transportation Route Audit was removed.
Review Transportation Route Audit details
Use the detail page as the shared record of what this Transportation Route Audit currently means. Verify **Review Status** before relying on it for a decision.
Follow **Transportation Entry**, and **Route** to determine whether the issue is on this Transportation Route Audit or on one of those linked records.
Next check: Use **Transportation Entry**, and **Route** to interpret this Transportation Route Audit. If it records a failure or exception, correct the source process and create a new successful event rather than rewriting the audit trail.
Edit an existing Transportation Route Audit
Edit this Transportation Route Audit to correct or complete the same source document or operational event; use the supported reversal or follow-up workflow when the business event itself changed.
1. Open the detail page. Compare **Transportation Entry**, and **Route** with the supporting document or approved request.
2. Recheck **Review Status**. These values are most likely to change case history, custody, dispatch, official reporting, or audit review.
3. Save the change, return to the list, and confirm that the Transportation Route Audit now appears under the expected **Review Status**.
After the change: Use **Transportation Entry**, and **Route** to interpret this Transportation Route Audit. If it records a failure or exception, correct the source process and create a new successful event rather than rewriting the audit trail.
Find and review transportation route audits
The Transportation Route Audits list screen in the Brisk documentation demo.
Use the Transportation Route Audits list to find the correct record before opening or changing it. Compare **Review Status**. Records with similar names or numbers can still belong to different **Transportation Entry**, and **Route**.
- The initial order emphasizes **Recorded At**, and **Id**. Select a column heading when you need a different comparison.
Open the Transportation Route Audit whose **Review Status** match the task. If it is missing, clear the list filters and recheck **Review Status** rather than creating a replacement immediately.
## Fields and business rules
Brisk stores 9 user-relevant fields for this Transportation Route Audit, including 2 linked-record selections and 1 controlled-choice field. Create and edit screens may hide calculated or workflow-managed values from this full reference.
| Field | Required | What it controls |
|---|---:|---|
| **Transportation Entry** | Yes | The transportation entry associated with this transportation route audit. |
| **Route** | No | The route associated with this transportation route audit. |
| **Recorded At** | No | Date and time recorded for recorded at on this transportation route audit. |
| **Starting Miles** | No | The starting miles value recorded for this transportation route audit. |
| **Ending Miles** | No | The ending miles value recorded for this transportation route audit. |
| **Expected Miles** | No | The expected miles value recorded for this transportation route audit. |
| **Variance Miles** | No | The variance miles value recorded for this transportation route audit. |
| **Review Status** | No | The review status recorded for this transportation route audit. Available values: Clear, Review. |
| **Notes** | No | Additional internal notes about this transportation route audit. |
## What happens next
Use **Transportation Entry**, and **Route** to interpret this Transportation Route Audit. If it records a failure or exception, correct the source process and create a new successful event rather than rewriting the audit trail.
## Common mistakes and troubleshooting
- **The record will not save:** Recheck **Transportation Entry** and any message beside the field. A required related record may also be inactive or unavailable to your role.
- **The values look right but the result is wrong:** Open **Transportation Entry**, and **Route** from the detail page. Correct the specific relationship that is wrong instead of forcing a total or status to compensate for it.
# Transportation Routes
# Transportation Routes
Purpose and when to use this record
Define a repeatable origin, destination, checkpoint, distance, and operating pattern for transports.
## At a glance
- **Identify it by:** **Name**.
- **Why care:** Use the agency’s approved terminology and access policy. Preserve dates, responsible personnel, case links, and audit history because these records may support official reporting or custody review.
## Before you begin
You need the Brisk permission for the action you are taking on transportation routes. If a Create, Edit, or Delete control is absent, do not work around it with another user’s account; ask an administrator to review your role.
Create a Transportation Route
The Transportation Routes create screen in the Brisk documentation demo.
Create a Transportation Route only after confirming that the source document or operational event has not already been entered.
1. Select the business context first.
2. Enter the required identifying and operational values: **Name**.
3. Review the identifying information shown on the screen against the source document or approved setup decision.
4. Save the Transportation Route, then confirm **Name** on its detail page before continuing.
After saving: Verify the identifying information shown on the screen on the detail page, then continue the law enforcement workflow only when those values agree with the source document and actual work performed.
Delete a Transportation Route
Delete this Transportation Route only when it was entered by mistake and no downstream history depends on it. Use a reversal, void, credit, counter-adjustment, or status correction for a real event that later changed.
Before confirming, check for related **Transportation Entries**, and **Transportation Route Audits**. Brisk may refuse deletion when another record depends on this one; resolve the duplicate or use the supported correction workflow instead of breaking the trail.
On the confirmation page, verify **Name**. After confirmation, return to the Transportation Routes list and make sure only the intended Transportation Route was removed.
Review Transportation Route details
Use the detail page as the shared record of what this Transportation Route currently means. Verify **Name** before relying on it for a decision.
Compare the Transportation Route with its source document or approved setup request before deciding that it needs correction.
Next check: Verify the identifying information shown on the screen on the detail page, then continue the law enforcement workflow only when those values agree with the source document and actual work performed.
Edit an existing Transportation Route
Edit this Transportation Route to correct or complete the same source document or operational event; use the supported reversal or follow-up workflow when the business event itself changed.
1. Open the detail page. Compare **Name** with the supporting document or approved request.
2. Recheck the identifying information shown on the screen. These values are most likely to change case history, custody, dispatch, official reporting, or audit review.
3. Save the change, return to the list, and confirm that the Transportation Route now appears under the expected **Name**.
After the change: Verify the identifying information shown on the screen on the detail page, then continue the law enforcement workflow only when those values agree with the source document and actual work performed.
Find and review transportation routes
The Transportation Routes list screen in the Brisk documentation demo.
Use the Transportation Routes list to find the correct record before opening or changing it. Compare **Name**. Compare the full identifier rather than relying on a similar name.
Open the Transportation Route whose **Name** match the task. If it is missing, clear the list filters and recheck the identifying information shown on the screen rather than creating a replacement immediately.
## Fields and business rules
Brisk stores 1 user-relevant fields for this Transportation Route, including 0 linked-record selections and 0 controlled-choice fields. Create and edit screens may hide calculated or workflow-managed values from this full reference.
| Field | Required | What it controls |
|---|---:|---|
| **Name** | Yes | Should include the beginning and ending location of a transportation record. |
## What happens next
Verify the identifying information shown on the screen on the detail page, then continue the law enforcement workflow only when those values agree with the source document and actual work performed.
## Common mistakes and troubleshooting
- **The record will not save:** Recheck **Name** and any message beside the field. A required related record may also be inactive or unavailable to your role.
- **The values look right but the result is wrong:** Compare this Transportation Route with the source document or approved setup decision, then check the downstream screen where it is used.
# Vehicles
# Vehicles
Purpose and when to use this record
Maintain agency vehicles used for dispatch, mileage, and transportation records.
## At a glance
- **Identify it by:** **Car Number**, and **Description**.
- **Why care:** Use the agency’s approved terminology and access policy. Preserve dates, responsible personnel, case links, and audit history because these records may support official reporting or custody review.
- **Why care:** Availability and publication flags affect future use without erasing history. Prefer disabling an obsolete setup record when existing transactions still refer to it.
## Before you begin
You need the Brisk permission for the action you are taking on vehicles. If a Create, Edit, or Delete control is absent, do not work around it with another user’s account; ask an administrator to review your role.
Create a vehicle
The Vehicles create screen in the Brisk documentation demo.
Create a vehicle only after confirming that the source document or operational event has not already been entered.
1. Select the business context first.
2. Enter the required identifying and operational values: **Car Number**, and **Description**.
3. Review **Active** deliberately; these choices control availability or workflow rather than merely describing the record.
4. Save the vehicle, then confirm **Car Number**, and **Description** on its detail page before continuing.
After saving: Verify **Active** on the detail page, then continue the law enforcement workflow only when those values agree with the source document and actual work performed.
Delete a vehicle
Delete this vehicle only when it was entered by mistake and no downstream history depends on it. Use a reversal, void, credit, counter-adjustment, or status correction for a real event that later changed.
If the record is merely obsolete, use **Active** to remove it from future use while preserving existing references.
Before confirming, check for related **Logs**, and **Transportation Entries**. Brisk may refuse deletion when another record depends on this one; resolve the duplicate or use the supported correction workflow instead of breaking the trail.
On the confirmation page, verify **Car Number**, and **Description**. After confirmation, return to the Vehicles list and make sure only the intended vehicle was removed.
Review vehicle details
Use the detail page as the shared record of what this vehicle currently means. Verify **Active** before relying on it for a decision.
Compare the vehicle with its source document or approved setup request before deciding that it needs correction.
Next check: Verify **Active** on the detail page, then continue the law enforcement workflow only when those values agree with the source document and actual work performed.
Edit an existing vehicle
Edit this vehicle to correct or complete the same source document or operational event; use the supported reversal or follow-up workflow when the business event itself changed.
1. Open the detail page. Compare **Car Number**, and **Description** with the supporting document or approved request.
2. Recheck **Active**. These values are most likely to change case history, custody, dispatch, official reporting, or audit review.
3. Save the change, return to the list, and confirm that the vehicle now appears under the expected **Active**.
After the change: Verify **Active** on the detail page, then continue the law enforcement workflow only when those values agree with the source document and actual work performed.
Find and review vehicles
The Vehicles list screen in the Brisk documentation demo.
Use the Vehicles list to find the correct record before opening or changing it. Compare **Car Number**, and **Description**. Compare the full identifier rather than relying on a similar name.
Open the vehicle whose **Car Number**, and **Description** match the task. If it is missing, clear the list filters and recheck **Active** rather than creating a replacement immediately.
## Fields and business rules
Brisk stores 3 user-relevant fields for this vehicle, including 0 linked-record selections and 0 controlled-choice fields. Create and edit screens may hide calculated or workflow-managed values from this full reference.
| Field | Required | What it controls |
|---|---:|---|
| **Car Number** | Yes | The designated number of the vehicle. |
| **Description** | Yes | Provides a description of the vehicle. |
| **Active** | No | If this field is unchecked, this vehicle will no longer appear in reports. |
## What happens next
Verify **Active** on the detail page, then continue the law enforcement workflow only when those values agree with the source document and actual work performed.
## Common mistakes and troubleshooting
- **The record will not save:** Recheck **Car Number**, and **Description** and any message beside the field. A required related record may also be inactive or unavailable to your role.
- **The record saved but is not available where expected:** Recheck **Active**, then clear the filters on the destination list. A saved record can still be inactive, unpublished, locked, unapproved, or in the wrong workflow state.
- **The values look right but the result is wrong:** Compare this vehicle with the source document or approved setup decision, then check the downstream screen where it is used.
# Start Here
# Law Enforcement
# Law Enforcement
Law Enforcement overview
The Law Enforcement workspace related to this reference article.
Law Enforcement keeps operational and administrative records for cases, people and agencies, evidence, dispatch, activity logs, time, transportation, certifications, and sheriff collections. Use controlled types, statuses, and categories consistently so staff can retrieve the record later and statutory or management reports compare like activity.
Cases and evidence
Use [Cases](https://help.brisksystems.us/link/2651#bkmrk-overview) as the central incident or investigation record, supported by case type, status, jurisdiction, additional information definitions, and case tallies. Catalog each physical or digital item as an [Evidence Item](https://help.brisksystems.us/link/2655#bkmrk-overview). Append an [Evidence Chain Entry](https://help.brisksystems.us/link/2654#bkmrk-overview) for every transfer, receipt, storage, test, release, or disposition; never rewrite earlier custody history to describe a later event.
Daily operations and personnel
[Dispatch Entries](https://help.brisksystems.us/link/2653#bkmrk-overview) record calls, units, location, disposition, and narrative. [Logs](https://help.brisksystems.us/link/2659#bkmrk-overview) preserve chronological agency activity. Maintain [Officers](https://help.brisksystems.us/link/2662#bkmrk-overview), agencies, vehicles, certifications, time categories, and time incidents as shared operational context. Transportation routes, checkpoints, entries, mileage, and audits preserve the planned and actual movement trail.
Sheriff receipts and deposits
Use [Sheriff Receipts](https://help.brisksystems.us/link/2666#bkmrk-overview) to record payer/source, amount, tender, and deposit state. Group collected receipts into [Sheriff Bank Deposits](https://help.brisksystems.us/link/2664#bkmrk-overview) so the receipt register can be reconciled to the bank. Void, refund, or correct records through the authorized workflow rather than deleting financial history.
Record integrity
Confirm case number, agency, jurisdiction, officer, event time, location, status, and record identity before saving. Separate observed facts from interpretation in narratives. Restrict sensitive case and evidence information to authorized users, and use ReadyLog staging records to review source rows and errors before accepting imported activity into Brisk.