# Core Records
# Customer Classes
# Customer Classes
Purpose and when to use this record
Group customers so pricing, terms, reporting, or operating policies can be applied consistently.
## At a glance
- **Identify it by:** **Name**.
- **Why care:** These master records supply defaults and choices to later transactions. Correct duplicates and inactive records before staff build more activity on the wrong record.
## Before you begin
You need the Brisk permission for the action you are taking on customer classes. If a Create, Edit, or Delete control is absent, do not work around it with another user’s account; ask an administrator to review your role.
Create a customer class
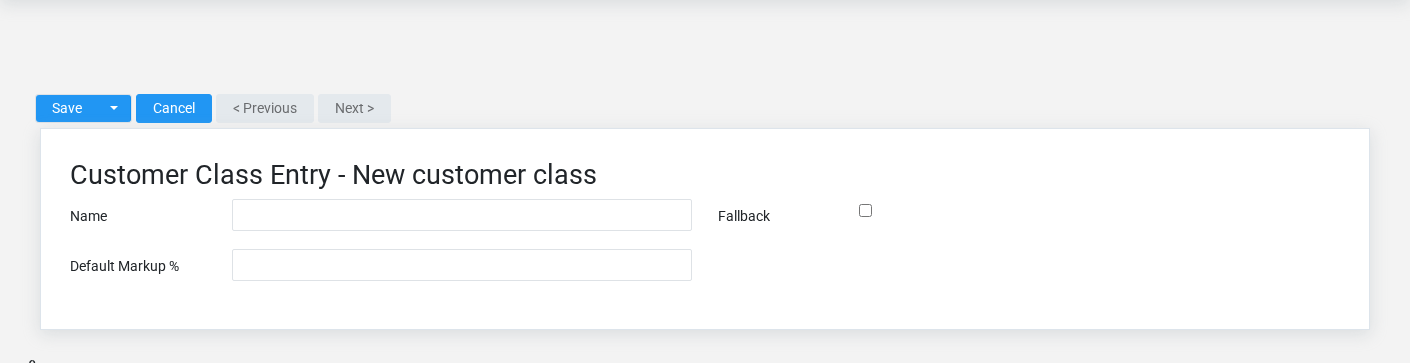
The Customer Classes create screen in the Brisk documentation demo.
Create a customer class only when the existing choices do not represent the policy or classification you need. Near-duplicate setup values split reporting and make later selection harder.
1. Select the business context first.
2. Enter the required identifying and operational values: **Name**.
3. Review **Fallback** deliberately; these choices control availability or workflow rather than merely describing the record.
4. Save the customer class, then confirm **Name** on its detail page before continuing.
After saving: Open **Customers**, **Price Rules**, **Price Schedule Items**, and **Price Schedules**, plus the remaining screen fields and confirm the customer class appears with the intended label and availability. Keep the old value for historical records when changing it would split or relabel prior reporting.
Delete a customer class
Delete this customer class only if it is an unused duplicate or setup mistake. Once other records refer to it, preserve that history and make the value inactive when the screen provides that option.
Before confirming, check for related **Customers**, **Price Rules**, **Price Schedule Items**, **Price Schedules**, and **Stores**. Brisk may refuse deletion when another record depends on this one; resolve the duplicate or use the supported correction workflow instead of breaking the trail.
On the confirmation page, verify **Name**. After confirmation, return to the Customer Classes list and make sure only the intended customer class was removed.
Review customer class details
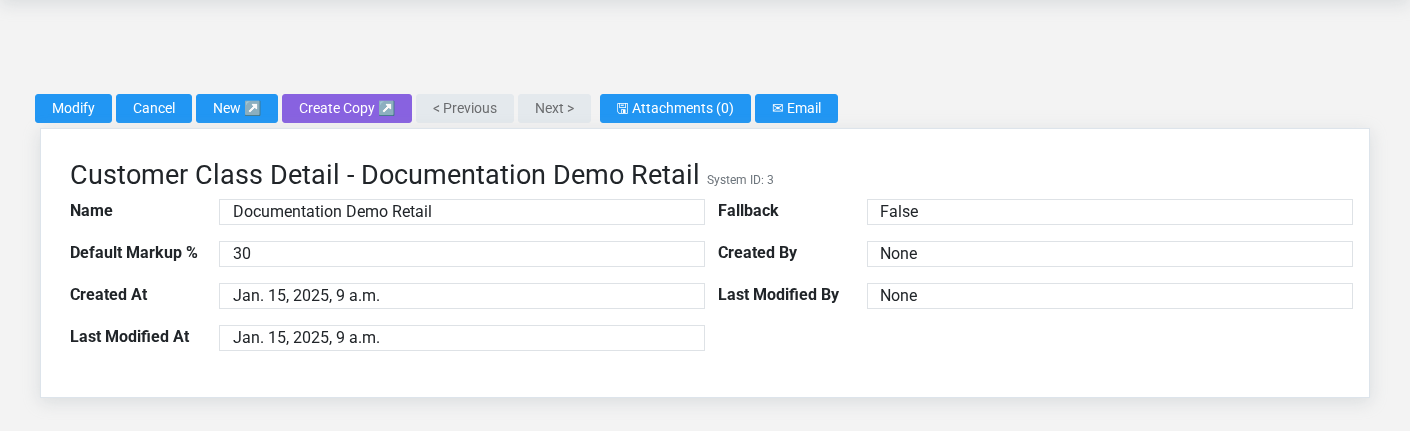
The Customer Classes detail screen in the Brisk documentation demo.
Use the detail page as the shared record of what this customer class currently means. Verify **Name**, **Fallback**, and **Default Markup %** before relying on it for a decision.
Compare the customer class with its source document or approved setup request before deciding that it needs correction.
Next check: Open **Customers**, **Price Rules**, **Price Schedule Items**, and **Price Schedules**, plus the remaining screen fields and confirm the customer class appears with the intended label and availability. Keep the old value for historical records when changing it would split or relabel prior reporting.
Edit an existing customer class
Edit this customer class when the underlying policy or classification changed. First determine whether historical transactions should retain the old value; if so, deactivate the old choice and create a new one.
1. Open the detail page. Compare **Name** with the supporting document or approved request.
2. Recheck **Fallback**. These values are most likely to change future transactions, defaults, assignment, pricing, and reporting.
3. Save the change, return to the list, and confirm that the customer class now appears under the expected **Name**.
After the change: Open **Customers**, **Price Rules**, **Price Schedule Items**, and **Price Schedules**, plus the remaining screen fields and confirm the customer class appears with the intended label and availability. Keep the old value for historical records when changing it would split or relabel prior reporting.
Find and review customer classes
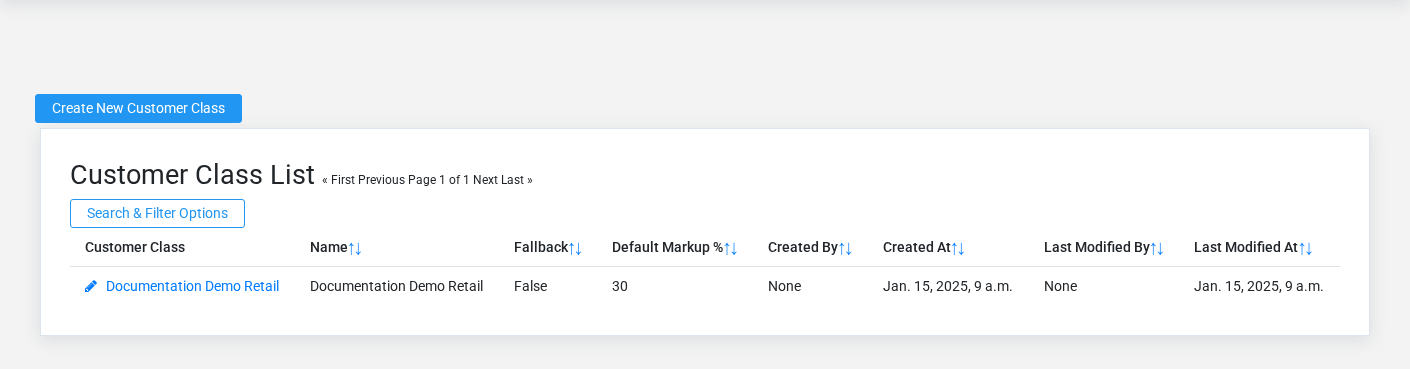
The Customer Classes list screen in the Brisk documentation demo.
Use the Customer Classes list to find the correct record before opening or changing it. Compare **Name**. Compare the full identifier rather than relying on a similar name.
- The initial order emphasizes **Name**. Select a column heading when you need a different comparison.
Open the customer class whose **Name** match the task. If it is missing, clear the list filters and recheck the identifying information shown on the screen rather than creating a replacement immediately.
## Fields and business rules
Brisk stores 3 user-relevant fields for this customer class, including 0 linked-record selections and 0 controlled-choice fields. Create and edit screens may hide calculated or workflow-managed values from this full reference.
| Field | Required | What it controls |
|---|---:|---|
| **Name** | Yes | Human-readable name for this customer class. |
| **Fallback** | No | If this option is selected, item prices will automatically be overwritten by price rules associated with this customer class. This should be enabled for your primary customer class to avoid potential pricing issues. Only one class may be configured as the pricing fallback. |
| **Default Markup %** | No | If the system is enabled to use price rules and allows automatic creation of them, this setting determines how much the markup will be for this customer class. |
## What happens next
Open **Customers**, **Price Rules**, **Price Schedule Items**, and **Price Schedules**, plus the remaining screen fields and confirm the customer class appears with the intended label and availability. Keep the old value for historical records when changing it would split or relabel prior reporting.
## Common mistakes and troubleshooting
- **The record will not save:** Recheck **Name** and any message beside the field. A required related record may also be inactive or unavailable to your role.
- **The values look right but the result is wrong:** Compare this customer class with the source document or approved setup decision, then check the downstream screen where it is used.
# Customer Tax Codes
# Customer Tax Codes
Purpose and when to use this record
Classify how a customer is taxed and which tax rules apply during sales.
## At a glance
- **Identify it by:** **Name**.
- **Why care:** These master records supply defaults and choices to later transactions. Correct duplicates and inactive records before staff build more activity on the wrong record.
## Before you begin
You need the Brisk permission for the action you are taking on customer tax codes. If a Create, Edit, or Delete control is absent, do not work around it with another user’s account; ask an administrator to review your role.
Create a customer tax code
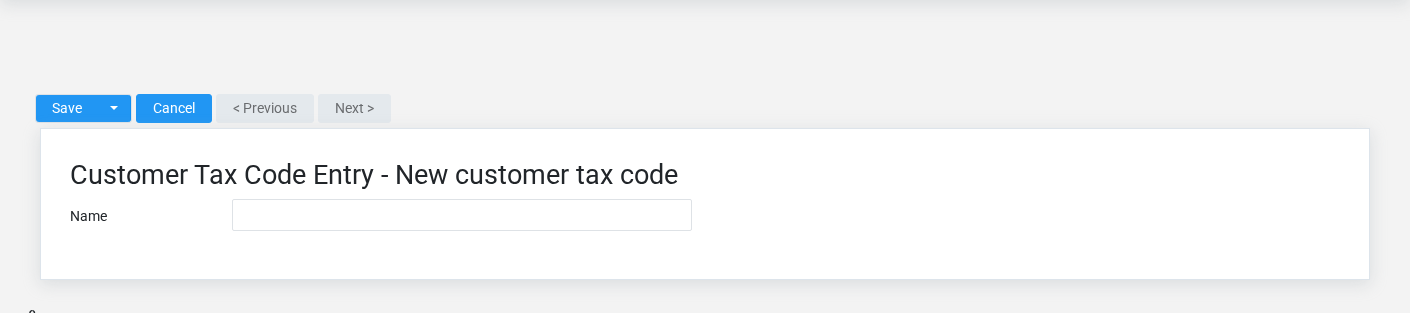
The Customer Tax Codes create screen in the Brisk documentation demo.
Create a customer tax code only when the existing choices do not represent the policy or classification you need. Near-duplicate setup values split reporting and make later selection harder.
1. Select the business context first.
2. Enter the required identifying and operational values: **Name**.
3. Review the identifying information shown on the screen against the source document or approved setup decision.
4. Save the customer tax code, then confirm **Name** on its detail page before continuing.
After saving: Open **Customers**, **Stores**, and **Tax Rules** and confirm the customer tax code appears with the intended label and availability. Keep the old value for historical records when changing it would split or relabel prior reporting.
Delete a customer tax code
Delete this customer tax code only if it is an unused duplicate or setup mistake. Once other records refer to it, preserve that history and make the value inactive when the screen provides that option.
Before confirming, check for related **Customers**, **Stores**, and **Tax Rules**. Brisk may refuse deletion when another record depends on this one; resolve the duplicate or use the supported correction workflow instead of breaking the trail.
On the confirmation page, verify **Name**. After confirmation, return to the Customer Tax Codes list and make sure only the intended customer tax code was removed.
Review customer tax code details
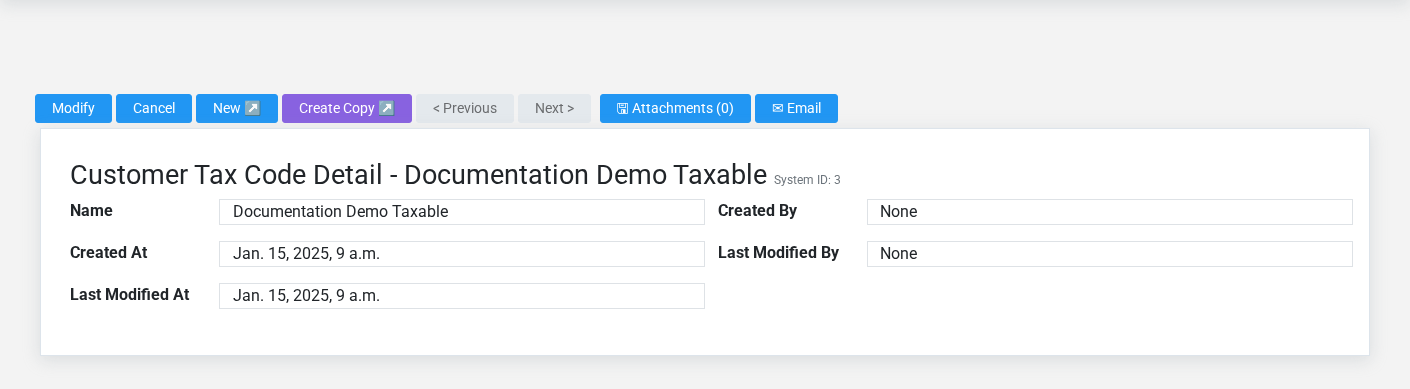
The Customer Tax Codes detail screen in the Brisk documentation demo.
Use the detail page as the shared record of what this customer tax code currently means. Verify **Name** before relying on it for a decision.
Compare the customer tax code with its source document or approved setup request before deciding that it needs correction.
Next check: Open **Customers**, **Stores**, and **Tax Rules** and confirm the customer tax code appears with the intended label and availability. Keep the old value for historical records when changing it would split or relabel prior reporting.
Edit an existing customer tax code
Edit this customer tax code when the underlying policy or classification changed. First determine whether historical transactions should retain the old value; if so, deactivate the old choice and create a new one.
1. Open the detail page. Compare **Name** with the supporting document or approved request.
2. Recheck the identifying information shown on the screen. These values are most likely to change future transactions, defaults, assignment, pricing, and reporting.
3. Save the change, return to the list, and confirm that the customer tax code now appears under the expected **Name**.
After the change: Open **Customers**, **Stores**, and **Tax Rules** and confirm the customer tax code appears with the intended label and availability. Keep the old value for historical records when changing it would split or relabel prior reporting.
Find and review customer tax codes
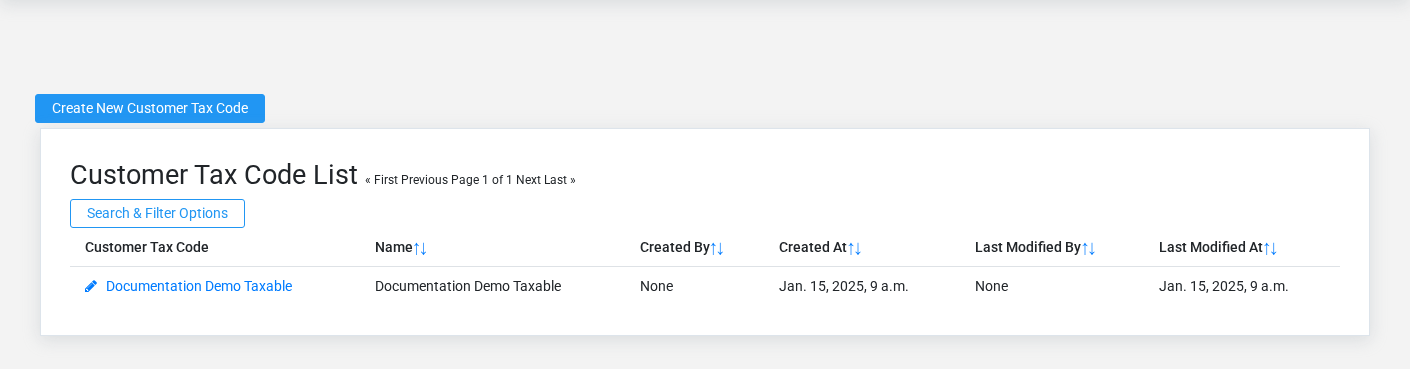
The Customer Tax Codes list screen in the Brisk documentation demo.
Use the Customer Tax Codes list to find the correct record before opening or changing it. Compare **Name**. Compare the full identifier rather than relying on a similar name.
- The initial order emphasizes **Name**. Select a column heading when you need a different comparison.
Open the customer tax code whose **Name** match the task. If it is missing, clear the list filters and recheck the identifying information shown on the screen rather than creating a replacement immediately.
## Fields and business rules
Brisk stores 1 user-relevant fields for this customer tax code, including 0 linked-record selections and 0 controlled-choice fields. Create and edit screens may hide calculated or workflow-managed values from this full reference.
| Field | Required | What it controls |
|---|---:|---|
| **Name** | Yes | Human-readable name for this customer tax code. |
## What happens next
Open **Customers**, **Stores**, and **Tax Rules** and confirm the customer tax code appears with the intended label and availability. Keep the old value for historical records when changing it would split or relabel prior reporting.
## Common mistakes and troubleshooting
- **The record will not save:** Recheck **Name** and any message beside the field. A required related record may also be inactive or unavailable to your role.
- **The values look right but the result is wrong:** Compare this customer tax code with the source document or approved setup decision, then check the downstream screen where it is used.
# Customers
# Customers
Purpose and when to use this record
Maintain the people and organizations that buy from the business, including billing, tax, pricing, credit, and contact defaults.
## At a glance
- **Identify it by:** **Customer #**, **First Name**, **Last Name**, **Tax Code**, and **Last A/R Payment Date**.
- **Check its business context:** **Division**, **Salesperson**, **Class**, **Freight Zone**, and **Discount Schedule**.
- **Why care:** These master records supply defaults and choices to later transactions. Correct duplicates and inactive records before staff build more activity on the wrong record.
## Before you begin
You need the Brisk permission for the action you are taking on customers. If a Create, Edit, or Delete control is absent, do not work around it with another user’s account; ask an administrator to review your role.
Have valid **Class**, **Tax Code**, **Receivable Account**, and **Payment Terms** records ready first. Those selections determine where this Customer belongs and which later screens can find it.
Create a Customer
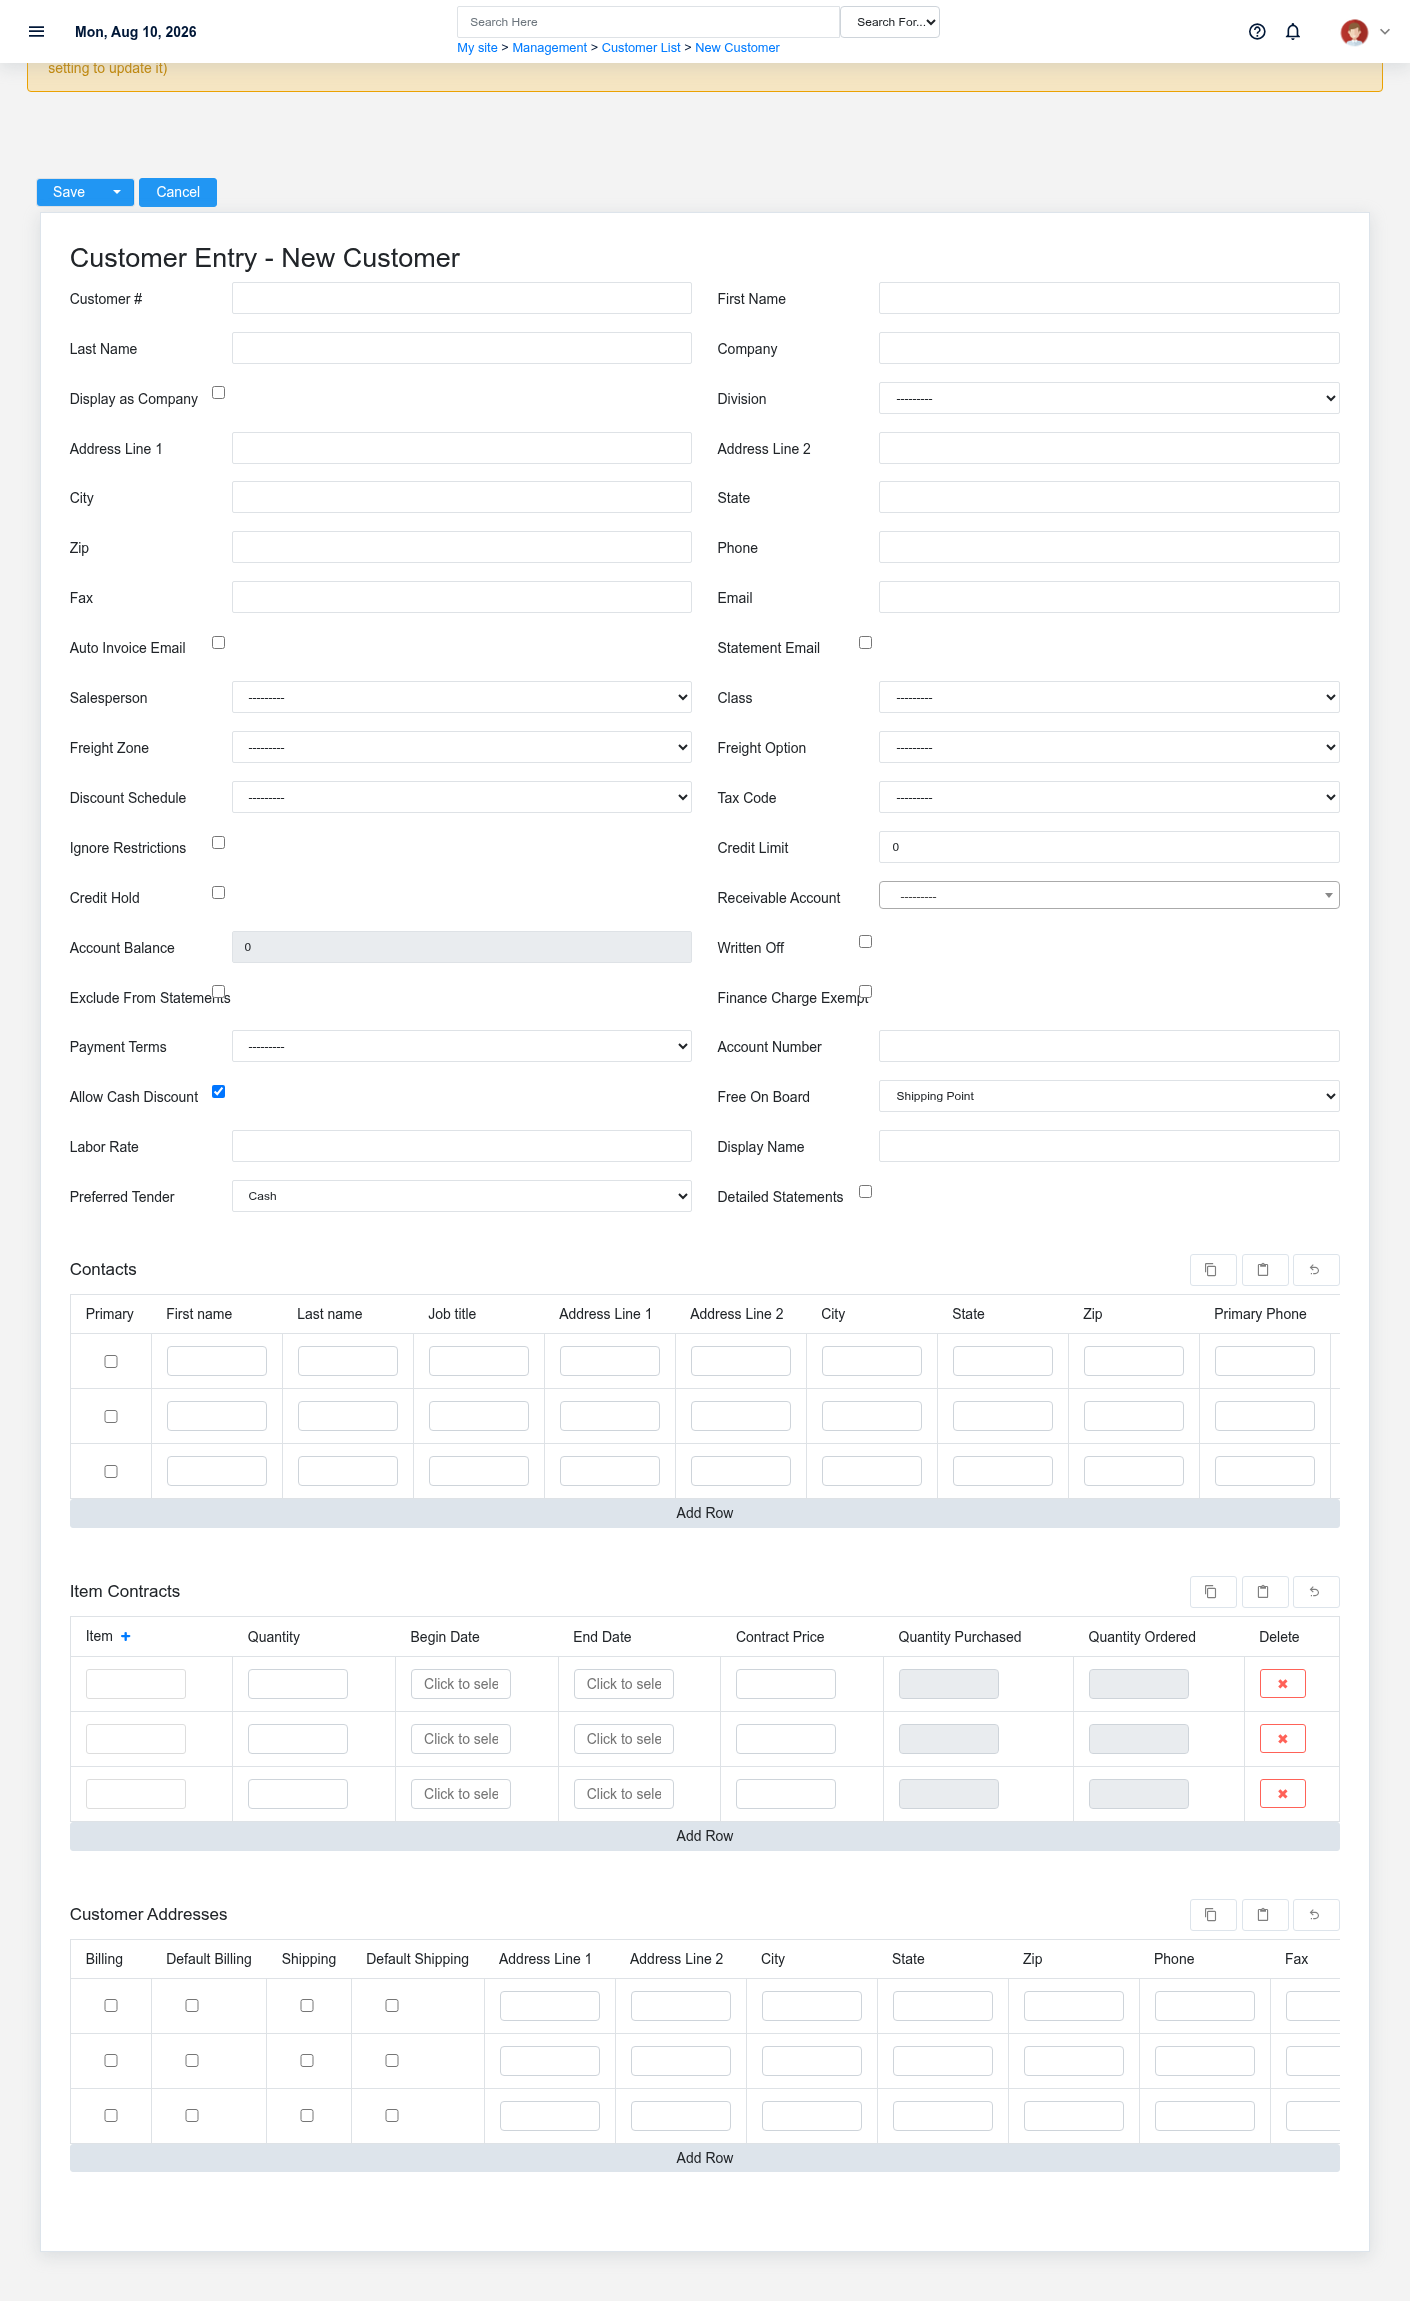
The Customers create screen in the Brisk documentation demo.
Create a Customer after searching for the person, organization, item, location, or resource under alternate names and identifiers. Merge or correct an existing master record instead of creating a duplicate.
1. Select the business context first: **Division**, **Salesperson**, **Class**, **Freight Zone**, **Discount Schedule**, and **Tax Code**, plus the remaining screen fields.
2. Enter the required identifying and operational values: **First Name**, **Last Name**, **Class**, **Tax Code**, **Receivable Account**, and **Payment Terms**.
3. Review **Display As Company**, **Auto Invoice Email**, **Statement Email**, **Freight Option**, **Ignore Restrictions**, and **Active Prescription**, plus the remaining screen fields deliberately; these choices control availability or workflow rather than merely describing the record.
4. Save the Customer, then confirm **Customer #**, **First Name**, **Last Name**, **Tax Code**, and **Last A/R Payment Date** on its detail page before continuing.
After saving: Verify this Customer in **Bookings**, **Contacts**, **Customer Addresses**, and **Customer Aging Snapshots**, plus the remaining screen fields before staff build new activity on it; correct ownership, classification, and active state now rather than after transactions accumulate.
Delete a Customer
Delete this Customer only if it is an unused duplicate or setup mistake. Once other records refer to it, preserve that history and make the value inactive when the screen provides that option.
Before confirming, check for related **Bookings**, **Contacts**, **Customer Addresses**, **Customer Aging Snapshots**, and **Customer Balance Import Lines**, plus the remaining screen fields. Brisk may refuse deletion when another record depends on this one; resolve the duplicate or use the supported correction workflow instead of breaking the trail.
On the confirmation page, verify **Customer #**, **First Name**, **Last Name**, **Tax Code**, and **Last A/R Payment Date**. After confirmation, return to the Customers list and make sure only the intended Customer was removed.
Review Customer details
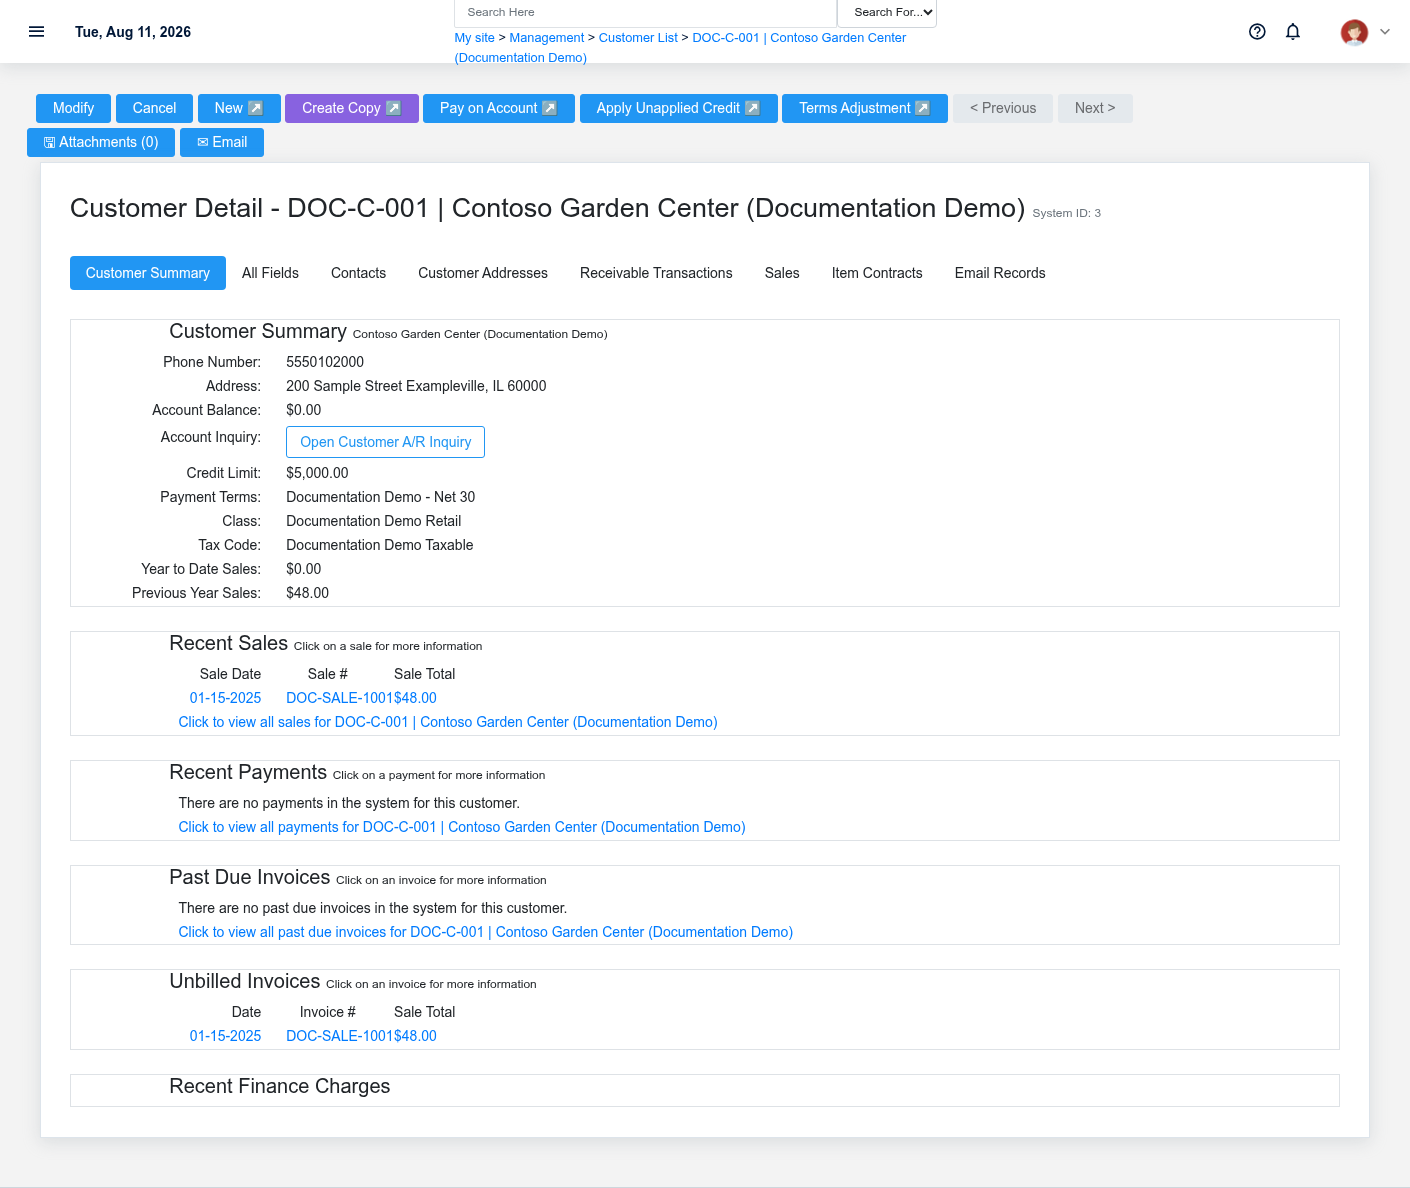
The Customers detail screen in the Brisk documentation demo.
Use the detail page as the shared record of what this Customer currently means. Verify **Freight Option**, **Active Prescription**, **Account Balance**, **Last A/R Payment Date**, **Last A/R Payment Amount**, and **Free On Board**, plus the remaining screen fields before relying on it for a decision.
Follow **Division**, **Salesperson**, **Class**, **Freight Zone**, **Discount Schedule**, and **Tax Code**, plus the remaining screen fields to determine whether the issue is on this Customer or on one of those linked records.
Next check: Verify this Customer in **Bookings**, **Contacts**, **Customer Addresses**, and **Customer Aging Snapshots**, plus the remaining screen fields before staff build new activity on it; correct ownership, classification, and active state now rather than after transactions accumulate.
Edit an existing Customer
Edit this Customer to keep the same real-world party, item, location, or resource accurate. Do not repurpose it for a different entity after activity is attached.
1. Open the detail page. Compare **Division**, **Salesperson**, **Class**, **Freight Zone**, **Discount Schedule**, and **Tax Code**, plus the remaining screen fields with the supporting document or approved request.
2. Recheck **Customer #**, **Class**, **Freight Option**, **Active Prescription**, **Receivable Account**, and **Account Balance**, plus the remaining screen fields. These values are most likely to change future transactions, defaults, assignment, pricing, and reporting.
3. Save the change, return to the list, and confirm that the Customer now appears under the expected **Freight Option**, **Active Prescription**, **Free On Board**, and **Preferred Tender**.
After the change: Verify this Customer in **Bookings**, **Contacts**, **Customer Addresses**, and **Customer Aging Snapshots**, plus the remaining screen fields before staff build new activity on it; correct ownership, classification, and active state now rather than after transactions accumulate.
Find and review customers
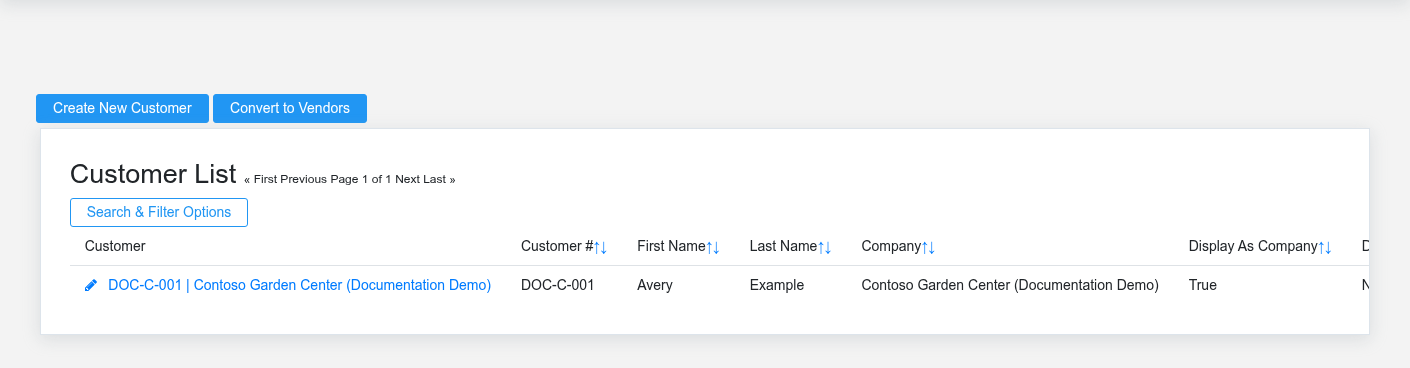
The Customers list screen in the Brisk documentation demo.
Use the Customers list to find the correct record before opening or changing it. Compare **Customer #**, **First Name**, **Last Name**, **Tax Code**, **Last A/R Payment Date**, and **Account Number**, plus the remaining screen fields. Records with similar names or numbers can still belong to different **Division**, **Salesperson**, **Class**, **Freight Zone**, **Discount Schedule**, and **Tax Code**, plus the remaining screen fields.
- Keyword search checks **Display Name**, **First Name**, **Last Name**, **Address Line 1**, **Address Line 2**, and **City**, plus the remaining screen fields.
Open the Customer whose **Customer #**, **First Name**, **Last Name**, **Tax Code**, **Last A/R Payment Date**, and **Account Number**, plus the remaining screen fields match the task. If it is missing, clear the list filters and recheck **Freight Option**, **Active Prescription**, **Free On Board**, and **Preferred Tender** rather than creating a replacement immediately.
## Fields and business rules
Brisk stores 42 user-relevant fields for this Customer, including 8 linked-record selections and 3 controlled-choice fields. Create and edit screens may hide calculated or workflow-managed values from this full reference.
| Field | Required | What it controls |
|---|---:|---|
| **Customer #** | No | A customer's unique ID number. Leave this field blank for the system to generate one automatically. |
| **First Name** | Yes | The first name recorded for this customer. |
| **Last Name** | Yes | The last name recorded for this customer. |
| **Company** | No | The company recorded for this customer. |
| **Display As Company** | No | Whether the display as company option applies to this customer. |
| **Division** | No | The division associated with this customer. |
| **Address Line 1** | No | The address line 1 recorded for this customer. |
| **Address Line 2** | No | The address line 2 recorded for this customer. |
| **City** | No | The city recorded for this customer. |
| **State** | No | The state recorded for this customer. |
| **Zip** | No | The zip recorded for this customer. |
| **Phone** | No | The phone recorded for this customer. |
| **Fax** | No | The fax recorded for this customer. |
| **Email** | No | The email recorded for this customer. |
| **Auto Invoice Email** | No | If enabled, the system will attempt to automatically email receipts to this customer at their specified email address. |
| **Statement Email** | No | If enabled, the system will attempt to email statements to this customer at their specified email address. |
| **Salesperson** | No | The salesperson associated with this customer. |
| **Class** | Yes | The class associated with this customer. |
| **Freight Zone** | No | The freight zone associated with this customer. |
| **Freight Option** | No | The freight option recorded for this customer. Available values: Line Item, Distributed, Other. |
| **Discount Schedule** | No | The discount schedule associated with this customer. |
| **Tax Code** | Yes | The tax code associated with this customer. |
| **Ignore Restrictions** | No | If this field is enabled, the selected customer will not be subject to restrictions placed on contract-restriced items. This would be appropriate for customers who are dealers or otherwise responsible for dealing with purchase restriction regulations. |
| **Active Prescription** | No | If enabled, this customer can be selected on sales invoices when prescription restriction is active. |
| **Credit Limit** | No | The credit limit value recorded for this customer. |
| **Credit Hold** | No | If this field is enabled, the selected customer will not be allowed to charge or purchase items by check regardless of balance and credit limit. They will still be allowed to make cash and credit/debit card purchases. |
| **Receivable Account** | Yes | The receivable account associated with this customer. |
| **Account Balance** | No | The account balance value recorded for this customer. |
| **Last A/R Payment Date** | No | Date and time recorded for last a/r payment date on this customer. |
| **Last A/R Payment Amount** | No | The last a/r payment amount value recorded for this customer. |
| **Written Off** | No | If this field is enabled, the selected customer will be treated as a bad debt. They will no longer accrue finance charges or be included in batch statement printing. |
| **Exclude From Statements** | No | If enabled, this customer will be skipped during batch customer statement creation and statement emailing for manual statement handling. |
| **Finance Charge Exempt** | No | If enabled, this customer will not accrue finance charges regardless of payment terms. |
| **Payment Terms** | Yes | The payment terms associated with this customer. |
| **Account Number** | No | An optional field that allows storage of a legacy customer account number or other identifying account information. |
| **Allow Cash Discount** | No | If this field is disabled, this customer will not be allowed to receive cash discounts or early payment discounts. |
| **Free On Board** | No | The free on board recorded for this customer. Available values: Shipping Point, Destination Point. |
| **Labor Rate** | No | Sets the default labor rate for the service customer in the service module. |
| **Display Name** | No | The display name recorded for this customer. |
| **Customer Pays Tonnage Tax** | No | Enable for customers that use the product for manufacturing, resale, or other non-end-user purposes and therefore pay their own tonnage tax. |
| **Preferred Tender** | No | The customer will have this payment method selected by default when making a sale. Available values: Cash, Check, Debit Card, Credit Card, Customer Account. |
| **Detailed Statements** | No | If this field is enabled and an appropriate statement template is being used, the selected customer will receive line item detail on their monthly statements. |
## What happens next
Verify this Customer in **Bookings**, **Contacts**, **Customer Addresses**, and **Customer Aging Snapshots**, plus the remaining screen fields before staff build new activity on it; correct ownership, classification, and active state now rather than after transactions accumulate.
## Common mistakes and troubleshooting
- **The record will not save:** Recheck **First Name**, **Last Name**, **Class**, **Tax Code**, **Receivable Account**, and **Payment Terms** and any message beside the field. A required related record may also be inactive or unavailable to your role.
- **The values look right but the result is wrong:** Open **Division**, **Salesperson**, **Class**, **Freight Zone**, **Discount Schedule**, and **Tax Code**, plus the remaining screen fields from the detail page. Correct the specific relationship that is wrong instead of forcing a total or status to compensate for it.
# Departments
# Departments
Purpose and when to use this record
Group employees and activity into an operating department for responsibility and reporting.
## At a glance
- **Identify it by:** **Name**, and **Code**.
- **Why care:** These master records supply defaults and choices to later transactions. Correct duplicates and inactive records before staff build more activity on the wrong record.
## Before you begin
You need the Brisk permission for the action you are taking on departments. If a Create, Edit, or Delete control is absent, do not work around it with another user’s account; ask an administrator to review your role.
Create a department
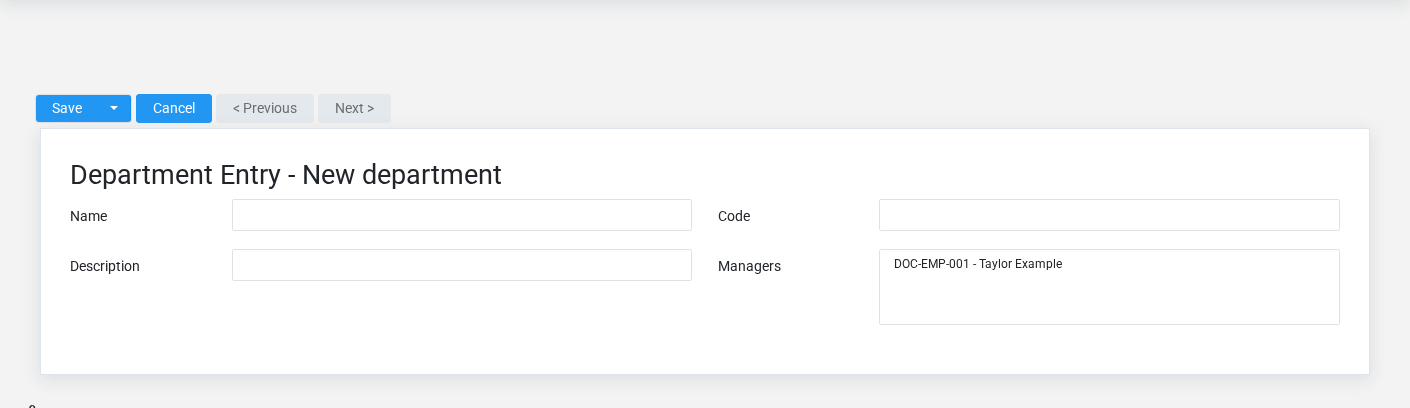
The Departments create screen in the Brisk documentation demo.
Create a department after searching for the person, organization, item, location, or resource under alternate names and identifiers. Merge or correct an existing master record instead of creating a duplicate.
1. Select the business context first.
2. Enter the required identifying and operational values: **Name**.
3. Review **Code**, and **Description** against the source document or approved setup decision.
4. Save the department, then confirm **Name**, and **Code** on its detail page before continuing.
After saving: Verify this department in **Employees** before staff build new activity on it; correct ownership, classification, and active state now rather than after transactions accumulate.
Delete a department
Delete this department only if it is an unused duplicate or setup mistake. Once other records refer to it, preserve that history and make the value inactive when the screen provides that option.
Before confirming, check for related **Employees**. Brisk may refuse deletion when another record depends on this one; resolve the duplicate or use the supported correction workflow instead of breaking the trail.
On the confirmation page, verify **Name**, and **Code**. After confirmation, return to the Departments list and make sure only the intended department was removed.
Review department details
Use the detail page as the shared record of what this department currently means. Verify **Name**, **Code**, and **Description** before relying on it for a decision.
Compare the department with its source document or approved setup request before deciding that it needs correction.
Next check: Verify this department in **Employees** before staff build new activity on it; correct ownership, classification, and active state now rather than after transactions accumulate.
Edit an existing department
Edit this department to keep the same real-world party, item, location, or resource accurate. Do not repurpose it for a different entity after activity is attached.
1. Open the detail page. Compare **Name**, and **Code** with the supporting document or approved request.
2. Recheck the identifying information shown on the screen. These values are most likely to change future transactions, defaults, assignment, pricing, and reporting.
3. Save the change, return to the list, and confirm that the department now appears under the expected **Name**, and **Code**.
After the change: Verify this department in **Employees** before staff build new activity on it; correct ownership, classification, and active state now rather than after transactions accumulate.
Find and review departments
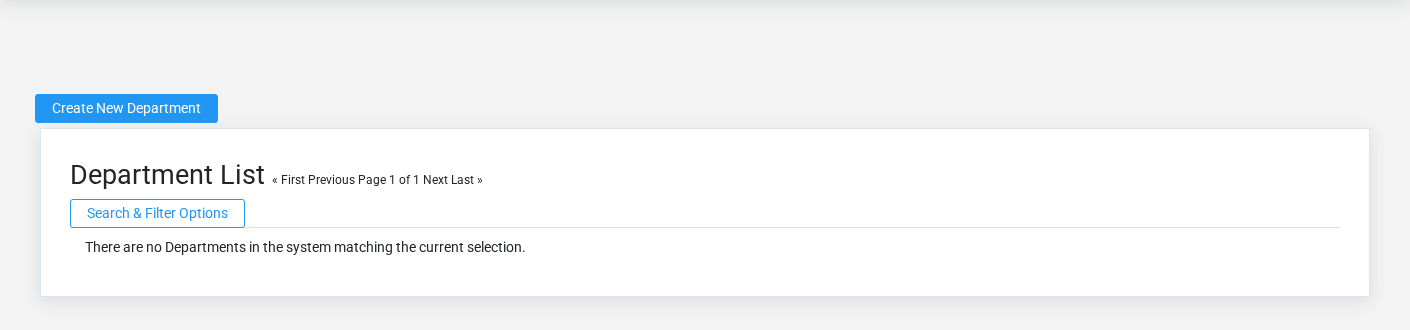
The Departments list screen in the Brisk documentation demo.
Use the Departments list to find the correct record before opening or changing it. Compare **Name**, and **Code**. Compare the full identifier rather than relying on a similar name.
- The initial order emphasizes **Name**. Select a column heading when you need a different comparison.
Open the department whose **Name**, and **Code** match the task. If it is missing, clear the list filters and recheck the identifying information shown on the screen rather than creating a replacement immediately.
## Fields and business rules
Brisk stores 3 user-relevant fields for this department, including 0 linked-record selections and 0 controlled-choice fields. Create and edit screens may hide calculated or workflow-managed values from this full reference.
| Field | Required | What it controls |
|---|---:|---|
| **Name** | Yes | Human-readable name for this department. |
| **Code** | No | Short code used to identify this department. |
| **Description** | No | Description of this department. |
## What happens next
Verify this department in **Employees** before staff build new activity on it; correct ownership, classification, and active state now rather than after transactions accumulate.
## Common mistakes and troubleshooting
- **The record will not save:** Recheck **Name** and any message beside the field. A required related record may also be inactive or unavailable to your role.
- **The values look right but the result is wrong:** Compare this department with the source document or approved setup decision, then check the downstream screen where it is used.
# Discount Schedules
# Discount Schedules
Purpose and when to use this record
Define a reusable customer or sales discount arrangement and the rules that determine when it applies.
## At a glance
- **Identify it by:** **Name**.
- **Check its business context:** **Unit Of Measure**.
- **Why care:** These master records supply defaults and choices to later transactions. Correct duplicates and inactive records before staff build more activity on the wrong record.
## Before you begin
You need the Brisk permission for the action you are taking on discount schedules. If a Create, Edit, or Delete control is absent, do not work around it with another user’s account; ask an administrator to review your role.
Create a discount schedule
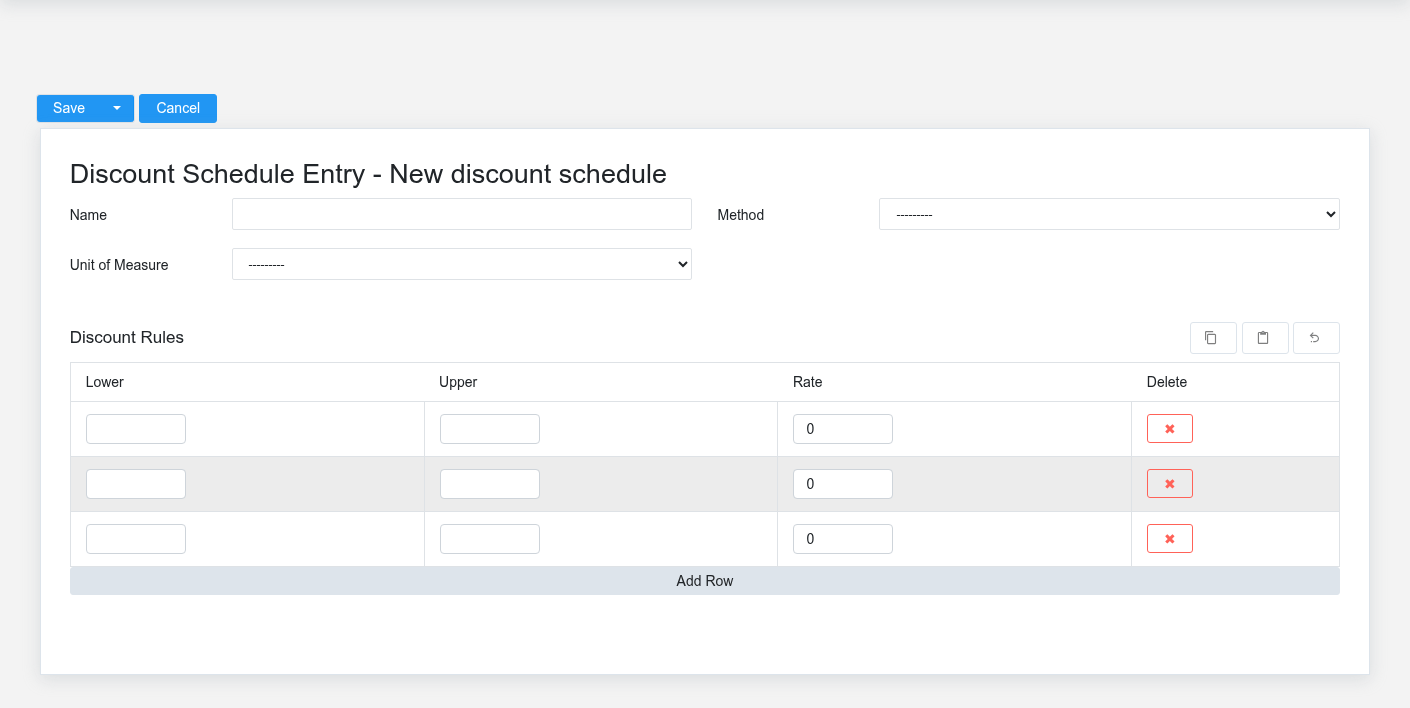
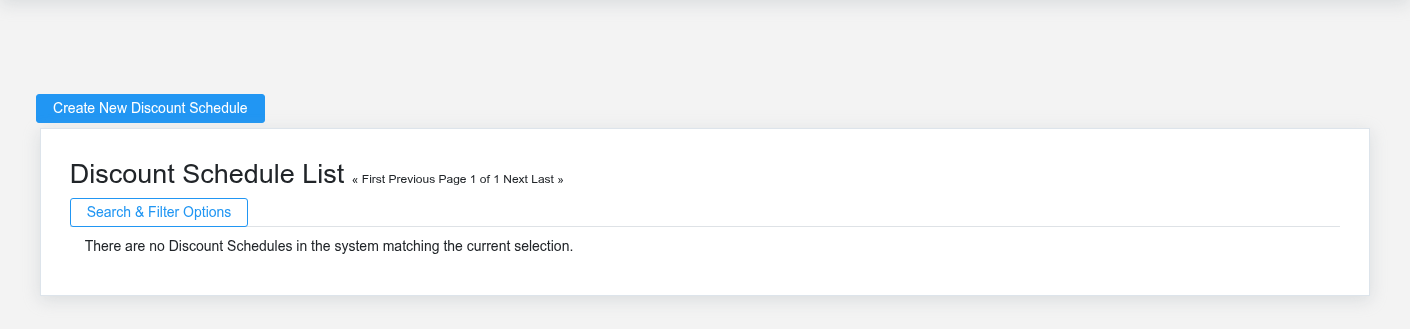
The Discount Schedules create screen in the Brisk documentation demo.
Create a discount schedule only when the existing choices do not represent the policy or classification you need. Near-duplicate setup values split reporting and make later selection harder.
1. Select the business context first: **Unit Of Measure**.
2. Enter the required identifying and operational values: **Name**.
3. Review **Method** deliberately; these choices control availability or workflow rather than merely describing the record.
4. Save the discount schedule, then confirm **Name** on its detail page before continuing.
After saving: Open **Customers**, and **Discount Rules** and confirm the discount schedule appears with the intended label and availability. Keep the old value for historical records when changing it would split or relabel prior reporting.
Delete a discount schedule
Delete this discount schedule only if it is an unused duplicate or setup mistake. Once other records refer to it, preserve that history and make the value inactive when the screen provides that option.
Before confirming, check for related **Customers**, and **Discount Rules**. Brisk may refuse deletion when another record depends on this one; resolve the duplicate or use the supported correction workflow instead of breaking the trail.
On the confirmation page, verify **Name**. After confirmation, return to the Discount Schedules list and make sure only the intended discount schedule was removed.
Review discount schedule details
Use the detail page as the shared record of what this discount schedule currently means. Verify **Method** before relying on it for a decision.
Follow **Unit Of Measure** to determine whether the issue is on this discount schedule or on one of those linked records.
Next check: Open **Customers**, and **Discount Rules** and confirm the discount schedule appears with the intended label and availability. Keep the old value for historical records when changing it would split or relabel prior reporting.
Edit an existing discount schedule
Edit this discount schedule when the underlying policy or classification changed. First determine whether historical transactions should retain the old value; if so, deactivate the old choice and create a new one.
1. Open the detail page. Compare **Unit Of Measure** with the supporting document or approved request.
2. Recheck **Method**. These values are most likely to change future transactions, defaults, assignment, pricing, and reporting.
3. Save the change, return to the list, and confirm that the discount schedule now appears under the expected **Method**.
After the change: Open **Customers**, and **Discount Rules** and confirm the discount schedule appears with the intended label and availability. Keep the old value for historical records when changing it would split or relabel prior reporting.
Find and review discount schedules
The Discount Schedules list screen in the Brisk documentation demo.
Use the Discount Schedules list to find the correct record before opening or changing it. Compare **Name**. Records with similar names or numbers can still belong to different **Unit Of Measure**.
Open the discount schedule whose **Name** match the task. If it is missing, clear the list filters and recheck **Method** rather than creating a replacement immediately.
## Fields and business rules
Brisk stores 3 user-relevant fields for this discount schedule, including 1 linked-record selection and 1 controlled-choice field. Create and edit screens may hide calculated or workflow-managed values from this full reference.
| Field | Required | What it controls |
|---|---:|---|
| **Name** | Yes | Human-readable name for this discount schedule. |
| **Method** | No | The method recorded for this discount schedule. Available values: Volume, Weight. |
| **Unit Of Measure** | No | If the method is set to weight, sets the unit of measure on the discount rules. |
## What happens next
Open **Customers**, and **Discount Rules** and confirm the discount schedule appears with the intended label and availability. Keep the old value for historical records when changing it would split or relabel prior reporting.
## Common mistakes and troubleshooting
- **The record will not save:** Recheck **Name** and any message beside the field. A required related record may also be inactive or unavailable to your role.
- **The values look right but the result is wrong:** Open **Unit Of Measure** from the detail page. Correct the specific relationship that is wrong instead of forcing a total or status to compensate for it.
# Divisions
# Divisions
Purpose and when to use this record
Separate business activity into reporting or operational divisions used by employees, customers, inventory, and transactions.
## At a glance
- **Identify it by:** **Name**, and **Code**.
- **Why care:** These master records supply defaults and choices to later transactions. Correct duplicates and inactive records before staff build more activity on the wrong record.
## Before you begin
You need the Brisk permission for the action you are taking on divisions. If a Create, Edit, or Delete control is absent, do not work around it with another user’s account; ask an administrator to review your role.
Create a division
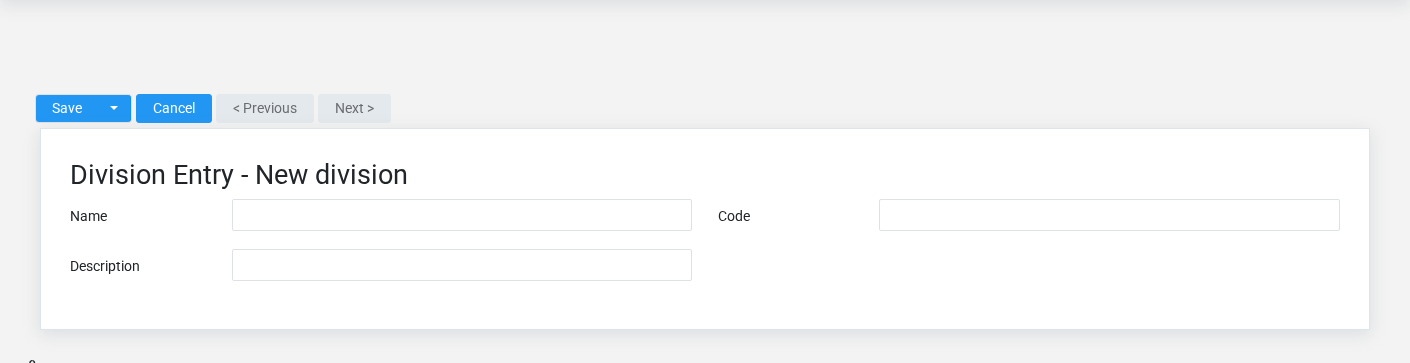
The Divisions create screen in the Brisk documentation demo.
Create a division after searching for the person, organization, item, location, or resource under alternate names and identifiers. Merge or correct an existing master record instead of creating a duplicate.
1. Select the business context first.
2. Enter the required identifying and operational values: **Name**.
3. Review **Code**, and **Description** against the source document or approved setup decision.
4. Save the division, then confirm **Name**, and **Code** on its detail page before continuing.
After saving: Verify this division in **Customers**, **Price Schedule Items**, **Price Schedules**, and **Warehouses** before staff build new activity on it; correct ownership, classification, and active state now rather than after transactions accumulate.
Delete a division
Delete this division only if it is an unused duplicate or setup mistake. Once other records refer to it, preserve that history and make the value inactive when the screen provides that option.
Before confirming, check for related **Customers**, **Price Schedule Items**, **Price Schedules**, and **Warehouses**. Brisk may refuse deletion when another record depends on this one; resolve the duplicate or use the supported correction workflow instead of breaking the trail.
On the confirmation page, verify **Name**, and **Code**. After confirmation, return to the Divisions list and make sure only the intended division was removed.
Review division details
Use the detail page as the shared record of what this division currently means. Verify **Name**, **Code**, and **Description** before relying on it for a decision.
Compare the division with its source document or approved setup request before deciding that it needs correction.
Next check: Verify this division in **Customers**, **Price Schedule Items**, **Price Schedules**, and **Warehouses** before staff build new activity on it; correct ownership, classification, and active state now rather than after transactions accumulate.
Edit an existing division
Edit this division to keep the same real-world party, item, location, or resource accurate. Do not repurpose it for a different entity after activity is attached.
1. Open the detail page. Compare **Name**, and **Code** with the supporting document or approved request.
2. Recheck the identifying information shown on the screen. These values are most likely to change future transactions, defaults, assignment, pricing, and reporting.
3. Save the change, return to the list, and confirm that the division now appears under the expected **Name**, and **Code**.
After the change: Verify this division in **Customers**, **Price Schedule Items**, **Price Schedules**, and **Warehouses** before staff build new activity on it; correct ownership, classification, and active state now rather than after transactions accumulate.
Find and review divisions
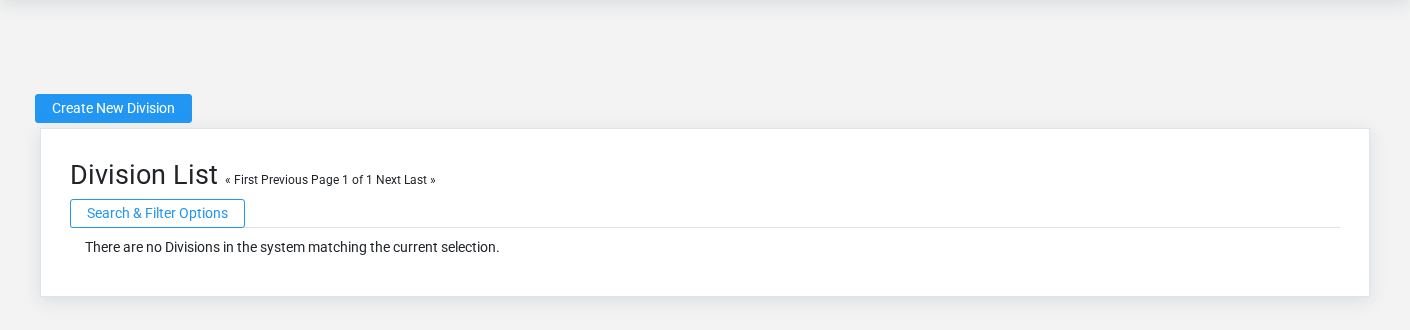
The Divisions list screen in the Brisk documentation demo.
Use the Divisions list to find the correct record before opening or changing it. Compare **Name**, and **Code**. Compare the full identifier rather than relying on a similar name.
- The initial order emphasizes **Name**. Select a column heading when you need a different comparison.
Open the division whose **Name**, and **Code** match the task. If it is missing, clear the list filters and recheck the identifying information shown on the screen rather than creating a replacement immediately.
## Fields and business rules
Brisk stores 3 user-relevant fields for this division, including 0 linked-record selections and 0 controlled-choice fields. Create and edit screens may hide calculated or workflow-managed values from this full reference.
| Field | Required | What it controls |
|---|---:|---|
| **Name** | Yes | Human-readable name for this division. |
| **Code** | No | Short code used to identify this division. |
| **Description** | No | Description of this division. |
## What happens next
Verify this division in **Customers**, **Price Schedule Items**, **Price Schedules**, and **Warehouses** before staff build new activity on it; correct ownership, classification, and active state now rather than after transactions accumulate.
## Common mistakes and troubleshooting
- **The record will not save:** Recheck **Name** and any message beside the field. A required related record may also be inactive or unavailable to your role.
- **The values look right but the result is wrong:** Compare this division with the source document or approved setup decision, then check the downstream screen where it is used.
# Employees
# Employees
Purpose and when to use this record
Maintain the worker record used for sales, time, payroll, service, approvals, and accountability.
## At a glance
- **Identify it by:** **Employee Code**, **First Name**, and **Last Name**.
- **Check its business context:** **User**, and **Department**.
- **Why care:** These master records supply defaults and choices to later transactions. Correct duplicates and inactive records before staff build more activity on the wrong record.
## Before you begin
You need the Brisk permission for the action you are taking on employees. If a Create, Edit, or Delete control is absent, do not work around it with another user’s account; ask an administrator to review your role.
Create an employee
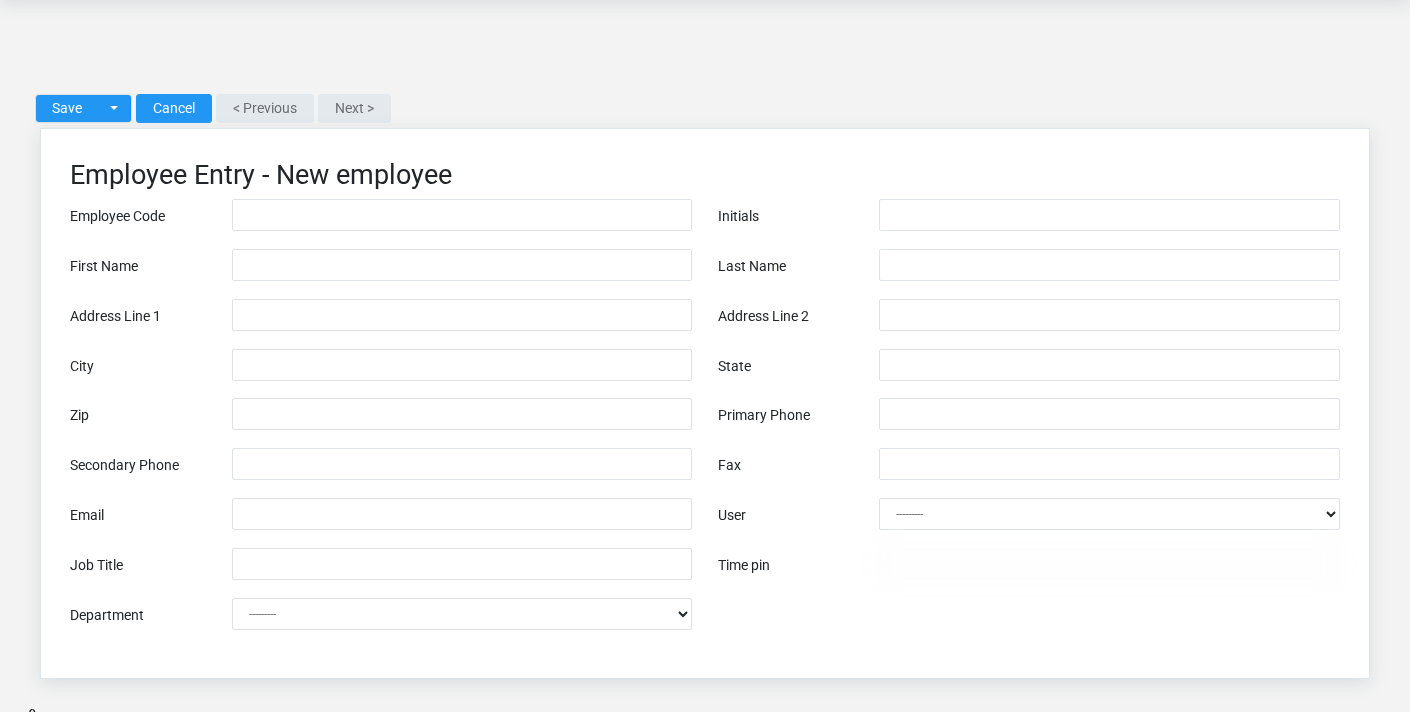
The Employees create screen in the Brisk documentation demo.
Create an employee after searching for the person, organization, item, location, or resource under alternate names and identifiers. Merge or correct an existing master record instead of creating a duplicate.
1. Select the business context first: **User**, and **Department**.
2. Enter the required identifying and operational values: **First Name**, **Last Name**, **Address Line 1**, **City**, **State**, and **Zip**, plus the remaining screen fields.
3. Review **Employee Code**, **Initials**, **Address Line 2**, **Secondary Phone**, **Fax**, and **Email**, plus the remaining screen fields against the source document or approved setup decision.
4. Save the employee, then confirm **Employee Code**, **First Name**, and **Last Name** on its detail page before continuing.
After saving: Verify this employee in **Departments**, **Payouts**, **Payroll Profiles**, and **Payroll Run Employees**, plus the remaining screen fields before staff build new activity on it; correct ownership, classification, and active state now rather than after transactions accumulate.
Delete an employee
Delete this employee only if it is an unused duplicate or setup mistake. Once other records refer to it, preserve that history and make the value inactive when the screen provides that option.
Before confirming, check for related **Departments**, **Payouts**, **Payroll Profiles**, **Payroll Run Employees**, and **Sales**, plus the remaining screen fields. Brisk may refuse deletion when another record depends on this one; resolve the duplicate or use the supported correction workflow instead of breaking the trail.
On the confirmation page, verify **Employee Code**, **First Name**, and **Last Name**. After confirmation, return to the Employees list and make sure only the intended employee was removed.
Review employee details
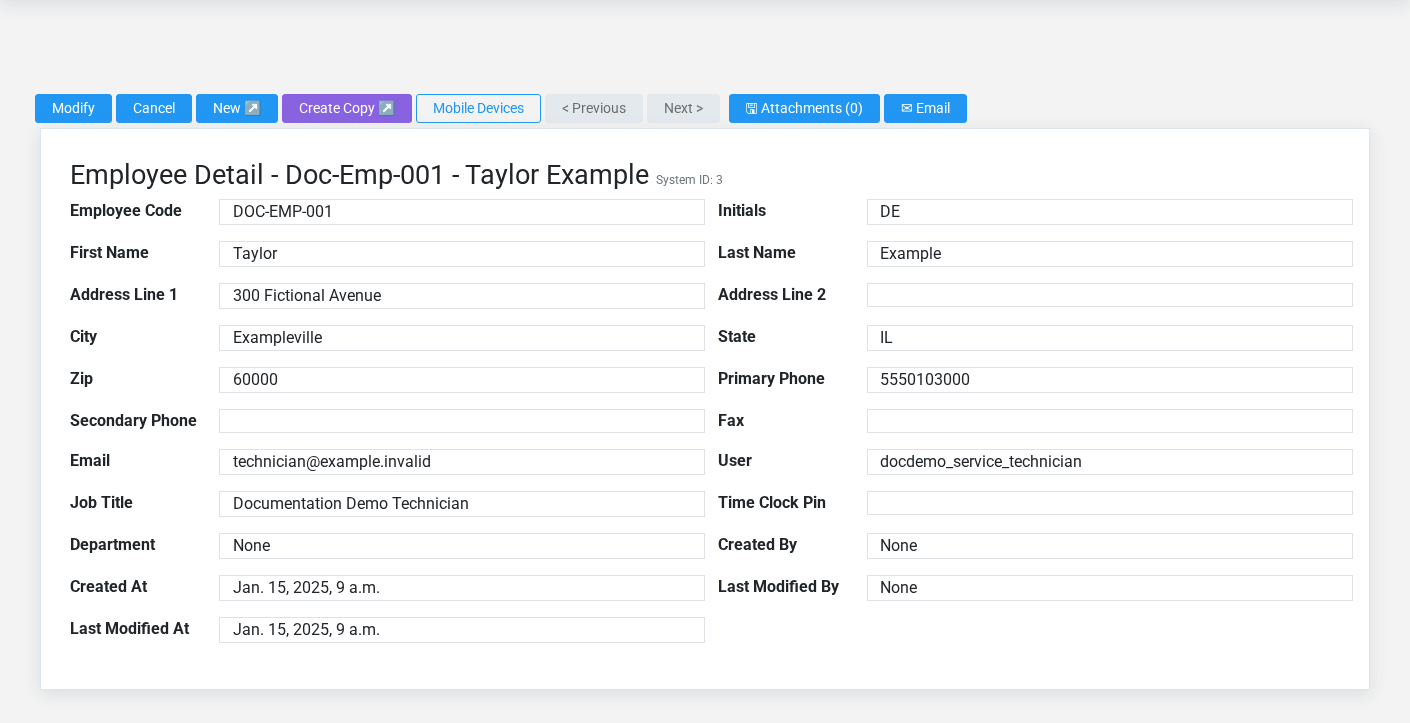
The Employees detail screen in the Brisk documentation demo.
Use the detail page as the shared record of what this employee currently means. Verify **Employee Code**, **Initials**, **First Name**, and **Last Name** before relying on it for a decision.
Follow **User**, and **Department** to determine whether the issue is on this employee or on one of those linked records.
Next check: Verify this employee in **Departments**, **Payouts**, **Payroll Profiles**, and **Payroll Run Employees**, plus the remaining screen fields before staff build new activity on it; correct ownership, classification, and active state now rather than after transactions accumulate.
Edit an existing employee
Edit this employee to keep the same real-world party, item, location, or resource accurate. Do not repurpose it for a different entity after activity is attached.
1. Open the detail page. Compare **User**, and **Department** with the supporting document or approved request.
2. Recheck the identifying information shown on the screen. These values are most likely to change future transactions, defaults, assignment, pricing, and reporting.
3. Save the change, return to the list, and confirm that the employee now appears under the expected **Employee Code**, **First Name**, and **Last Name**.
After the change: Verify this employee in **Departments**, **Payouts**, **Payroll Profiles**, and **Payroll Run Employees**, plus the remaining screen fields before staff build new activity on it; correct ownership, classification, and active state now rather than after transactions accumulate.
Find and review employees
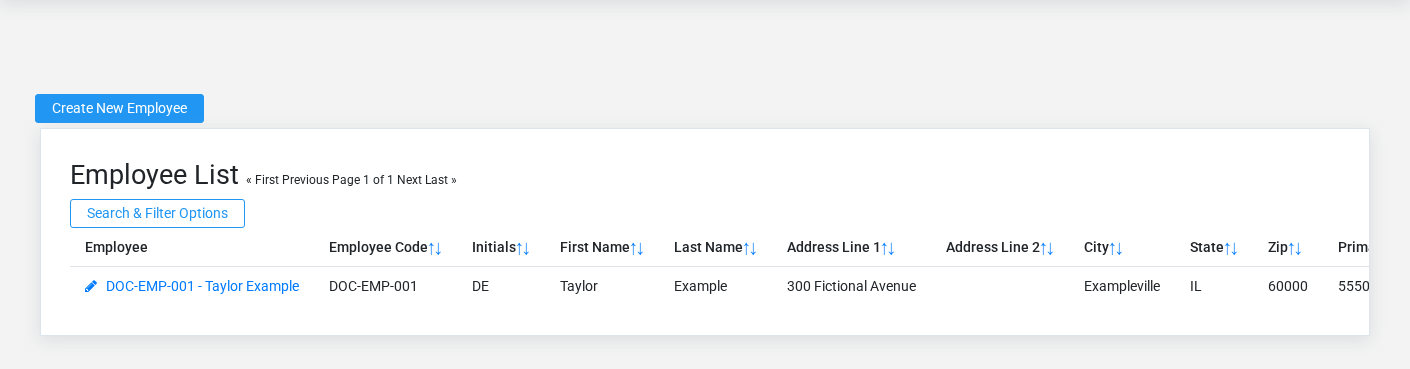
The Employees list screen in the Brisk documentation demo.
Use the Employees list to find the correct record before opening or changing it. Compare **Employee Code**, **First Name**, and **Last Name**. Records with similar names or numbers can still belong to different **User**, and **Department**.
- The initial order emphasizes **First Name**, and **Last Name**. Select a column heading when you need a different comparison.
Open the employee whose **Employee Code**, **First Name**, and **Last Name** match the task. If it is missing, clear the list filters and recheck the identifying information shown on the screen rather than creating a replacement immediately.
## Fields and business rules
Brisk stores 17 user-relevant fields for this employee, including 2 linked-record selections and 0 controlled-choice fields. Create and edit screens may hide calculated or workflow-managed values from this full reference.
| Field | Required | What it controls |
|---|---:|---|
| **Employee Code** | No | Short code used to identify this employee. |
| **Initials** | No | Unique initials used to identify the employee at transaction entry. |
| **First Name** | Yes | The first name recorded for this employee. |
| **Last Name** | Yes | The last name recorded for this employee. |
| **Address Line 1** | Yes | The address line 1 recorded for this employee. |
| **Address Line 2** | No | The address line 2 recorded for this employee. |
| **City** | Yes | The city recorded for this employee. |
| **State** | Yes | The state recorded for this employee. |
| **Zip** | Yes | The zip recorded for this employee. |
| **Primary Phone** | Yes | The primary phone recorded for this employee. |
| **Secondary Phone** | No | The secondary phone recorded for this employee. |
| **Fax** | No | The fax recorded for this employee. |
| **Email** | No | The email recorded for this employee. |
| **User** | No | The user associated with this employee. |
| **Job Title** | No | The job title recorded for this employee. |
| **Time Clock Pin** | No | Optional PIN for kiosk clock-in/out. |
| **Department** | No | The department associated with this employee. |
## What happens next
Verify this employee in **Departments**, **Payouts**, **Payroll Profiles**, and **Payroll Run Employees**, plus the remaining screen fields before staff build new activity on it; correct ownership, classification, and active state now rather than after transactions accumulate.
## Common mistakes and troubleshooting
- **The record will not save:** Recheck **First Name**, **Last Name**, **Address Line 1**, **City**, **State**, and **Zip**, plus the remaining screen fields and any message beside the field. A required related record may also be inactive or unavailable to your role.
- **The values look right but the result is wrong:** Open **User**, and **Department** from the detail page. Correct the specific relationship that is wrong instead of forcing a total or status to compensate for it.
# Freight Zones
# Freight Zones
Purpose and when to use this record
Define a delivery area and its freight treatment so shipping charges can be applied consistently.
## At a glance
- **Identify it by:** **Name**.
- **Why care:** These master records supply defaults and choices to later transactions. Correct duplicates and inactive records before staff build more activity on the wrong record.
## Before you begin
You need the Brisk permission for the action you are taking on freight zones. If a Create, Edit, or Delete control is absent, do not work around it with another user’s account; ask an administrator to review your role.
Create a freight zone
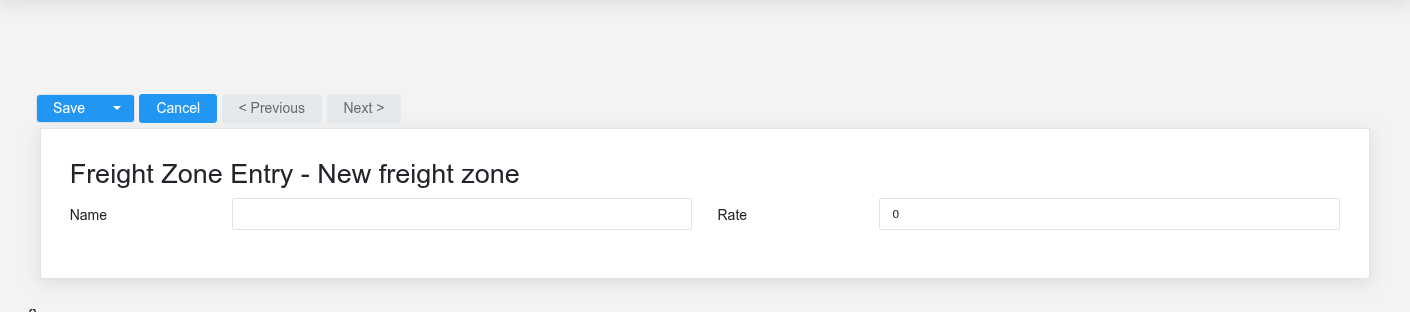
The Freight Zones create screen in the Brisk documentation demo.
Create a freight zone only when the existing choices do not represent the policy or classification you need. Near-duplicate setup values split reporting and make later selection harder.
1. Select the business context first.
2. Enter the required identifying and operational values: **Name**.
3. Review **Rate** against the source document or approved setup decision.
4. Save the freight zone, then confirm **Name** on its detail page before continuing.
After saving: Open **Customers** and confirm the freight zone appears with the intended label and availability. Keep the old value for historical records when changing it would split or relabel prior reporting.
Delete a freight zone
Delete this freight zone only if it is an unused duplicate or setup mistake. Once other records refer to it, preserve that history and make the value inactive when the screen provides that option.
Before confirming, check for related **Customers**. Brisk may refuse deletion when another record depends on this one; resolve the duplicate or use the supported correction workflow instead of breaking the trail.
On the confirmation page, verify **Name**. After confirmation, return to the Freight Zones list and make sure only the intended freight zone was removed.
Review freight zone details
Use the detail page as the shared record of what this freight zone currently means. Verify **Name**, and **Rate** before relying on it for a decision.
Compare the freight zone with its source document or approved setup request before deciding that it needs correction.
Next check: Open **Customers** and confirm the freight zone appears with the intended label and availability. Keep the old value for historical records when changing it would split or relabel prior reporting.
Edit an existing freight zone
Edit this freight zone when the underlying policy or classification changed. First determine whether historical transactions should retain the old value; if so, deactivate the old choice and create a new one.
1. Open the detail page. Compare **Name** with the supporting document or approved request.
2. Recheck the identifying information shown on the screen. These values are most likely to change future transactions, defaults, assignment, pricing, and reporting.
3. Save the change, return to the list, and confirm that the freight zone now appears under the expected **Name**.
After the change: Open **Customers** and confirm the freight zone appears with the intended label and availability. Keep the old value for historical records when changing it would split or relabel prior reporting.
Find and review freight zones
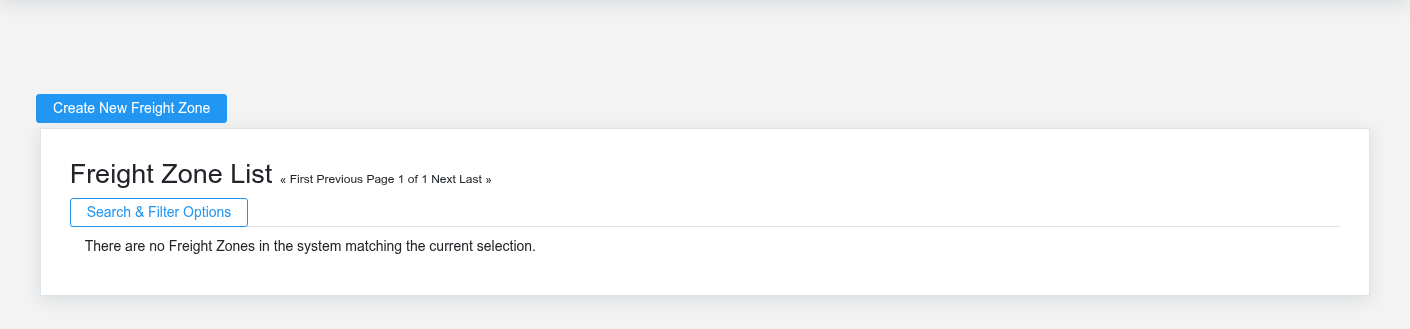
The Freight Zones list screen in the Brisk documentation demo.
Use the Freight Zones list to find the correct record before opening or changing it. Compare **Name**. Compare the full identifier rather than relying on a similar name.
Open the freight zone whose **Name** match the task. If it is missing, clear the list filters and recheck the identifying information shown on the screen rather than creating a replacement immediately.
## Fields and business rules
Brisk stores 2 user-relevant fields for this freight zone, including 0 linked-record selections and 0 controlled-choice fields. Create and edit screens may hide calculated or workflow-managed values from this full reference.
| Field | Required | What it controls |
|---|---:|---|
| **Name** | Yes | Human-readable name for this freight zone. |
| **Rate** | No | Determines the dollar amount charged per weight unit on an order. Weight unit can be selected in the system settings. |
## What happens next
Open **Customers** and confirm the freight zone appears with the intended label and availability. Keep the old value for historical records when changing it would split or relabel prior reporting.
## Common mistakes and troubleshooting
- **The record will not save:** Recheck **Name** and any message beside the field. A required related record may also be inactive or unavailable to your role.
- **The values look right but the result is wrong:** Compare this freight zone with the source document or approved setup decision, then check the downstream screen where it is used.
# Fulfillment Methods
# Fulfillment Methods
Purpose and when to use this record
Define the pickup, delivery, shipment, or other handoff choices available to sales and ecommerce orders.
## At a glance
- **Identify it by:** **Name**.
- **Why care:** These master records supply defaults and choices to later transactions. Correct duplicates and inactive records before staff build more activity on the wrong record.
## Before you begin
You need the Brisk permission for the action you are taking on fulfillment methods. If a Create, Edit, or Delete control is absent, do not work around it with another user’s account; ask an administrator to review your role.
Create a fulfillment method
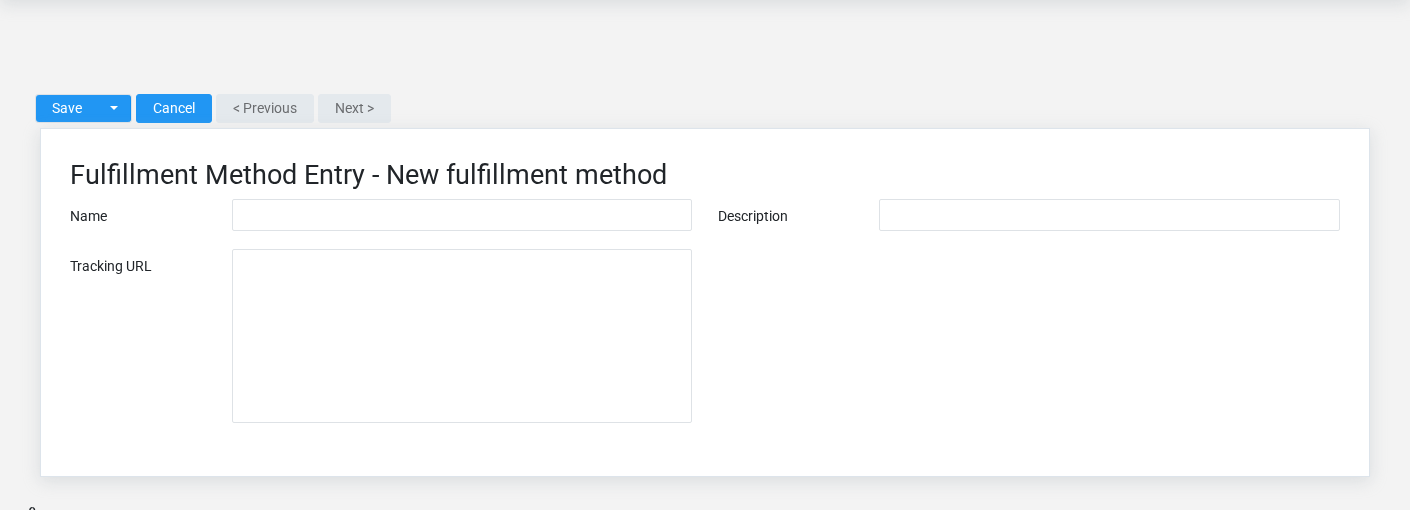
The Fulfillment Methods create screen in the Brisk documentation demo.
Create a fulfillment method only when the existing choices do not represent the policy or classification you need. Near-duplicate setup values split reporting and make later selection harder.
1. Select the business context first.
2. Enter the required identifying and operational values: **Name**, and **Description**.
3. Review **Tracking Url** against the source document or approved setup decision.
4. Save the fulfillment method, then confirm **Name** on its detail page before continuing.
After saving: Open **Orders**, **Sale Fulfillments**, and **Stores** and confirm the fulfillment method appears with the intended label and availability. Keep the old value for historical records when changing it would split or relabel prior reporting.
Delete a fulfillment method
Delete this fulfillment method only if it is an unused duplicate or setup mistake. Once other records refer to it, preserve that history and make the value inactive when the screen provides that option.
Before confirming, check for related **Orders**, **Sale Fulfillments**, and **Stores**. Brisk may refuse deletion when another record depends on this one; resolve the duplicate or use the supported correction workflow instead of breaking the trail.
On the confirmation page, verify **Name**. After confirmation, return to the Fulfillment Methods list and make sure only the intended fulfillment method was removed.
Review fulfillment method details
Use the detail page as the shared record of what this fulfillment method currently means. Verify **Name**, **Description**, and **Tracking Url** before relying on it for a decision.
Compare the fulfillment method with its source document or approved setup request before deciding that it needs correction.
Next check: Open **Orders**, **Sale Fulfillments**, and **Stores** and confirm the fulfillment method appears with the intended label and availability. Keep the old value for historical records when changing it would split or relabel prior reporting.
Edit an existing fulfillment method
Edit this fulfillment method when the underlying policy or classification changed. First determine whether historical transactions should retain the old value; if so, deactivate the old choice and create a new one.
1. Open the detail page. Compare **Name** with the supporting document or approved request.
2. Recheck the identifying information shown on the screen. These values are most likely to change future transactions, defaults, assignment, pricing, and reporting.
3. Save the change, return to the list, and confirm that the fulfillment method now appears under the expected **Name**.
After the change: Open **Orders**, **Sale Fulfillments**, and **Stores** and confirm the fulfillment method appears with the intended label and availability. Keep the old value for historical records when changing it would split or relabel prior reporting.
Find and review fulfillment methods
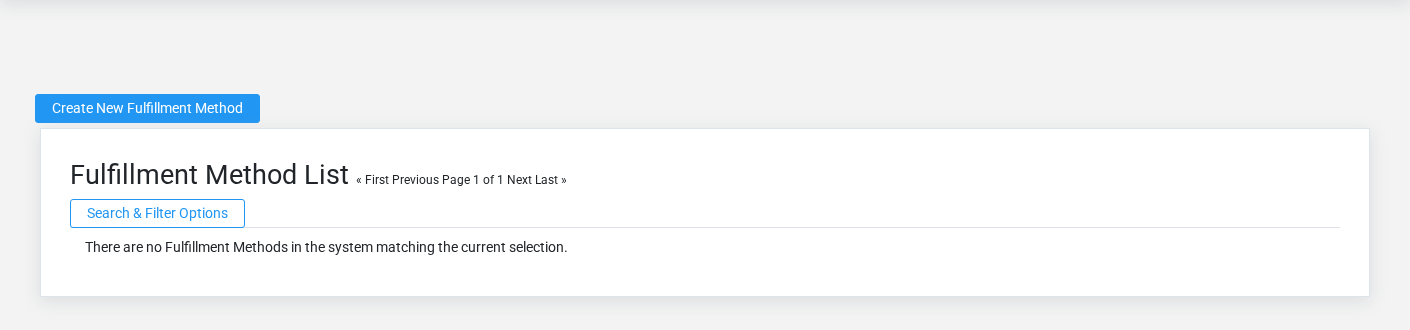
The Fulfillment Methods list screen in the Brisk documentation demo.
Use the Fulfillment Methods list to find the correct record before opening or changing it. Compare **Name**. Compare the full identifier rather than relying on a similar name.
- The initial order emphasizes **Name**. Select a column heading when you need a different comparison.
Open the fulfillment method whose **Name** match the task. If it is missing, clear the list filters and recheck the identifying information shown on the screen rather than creating a replacement immediately.
## Fields and business rules
Brisk stores 3 user-relevant fields for this fulfillment method, including 0 linked-record selections and 0 controlled-choice fields. Create and edit screens may hide calculated or workflow-managed values from this full reference.
| Field | Required | What it controls |
|---|---:|---|
| **Name** | Yes | Human-readable name for this fulfillment method. |
| **Description** | Yes | Description of this fulfillment method. |
| **Tracking Url** | No | The tracking url recorded for this fulfillment method. |
## What happens next
Open **Orders**, **Sale Fulfillments**, and **Stores** and confirm the fulfillment method appears with the intended label and availability. Keep the old value for historical records when changing it would split or relabel prior reporting.
## Common mistakes and troubleshooting
- **The record will not save:** Recheck **Name**, and **Description** and any message beside the field. A required related record may also be inactive or unavailable to your role.
- **The values look right but the result is wrong:** Compare this fulfillment method with the source document or approved setup decision, then check the downstream screen where it is used.
# Nav Cards
# Nav Cards
Purpose and when to use this record
Group related navigation links into a dashboard card and control its label, icon, order, and availability.
## At a glance
- **Identify it by:** **Title**.
- **Why care:** These master records supply defaults and choices to later transactions. Correct duplicates and inactive records before staff build more activity on the wrong record.
## Before you begin
You need the Brisk permission for the action you are taking on nav cards. If a Create, Edit, or Delete control is absent, do not work around it with another user’s account; ask an administrator to review your role.
Create a nav card
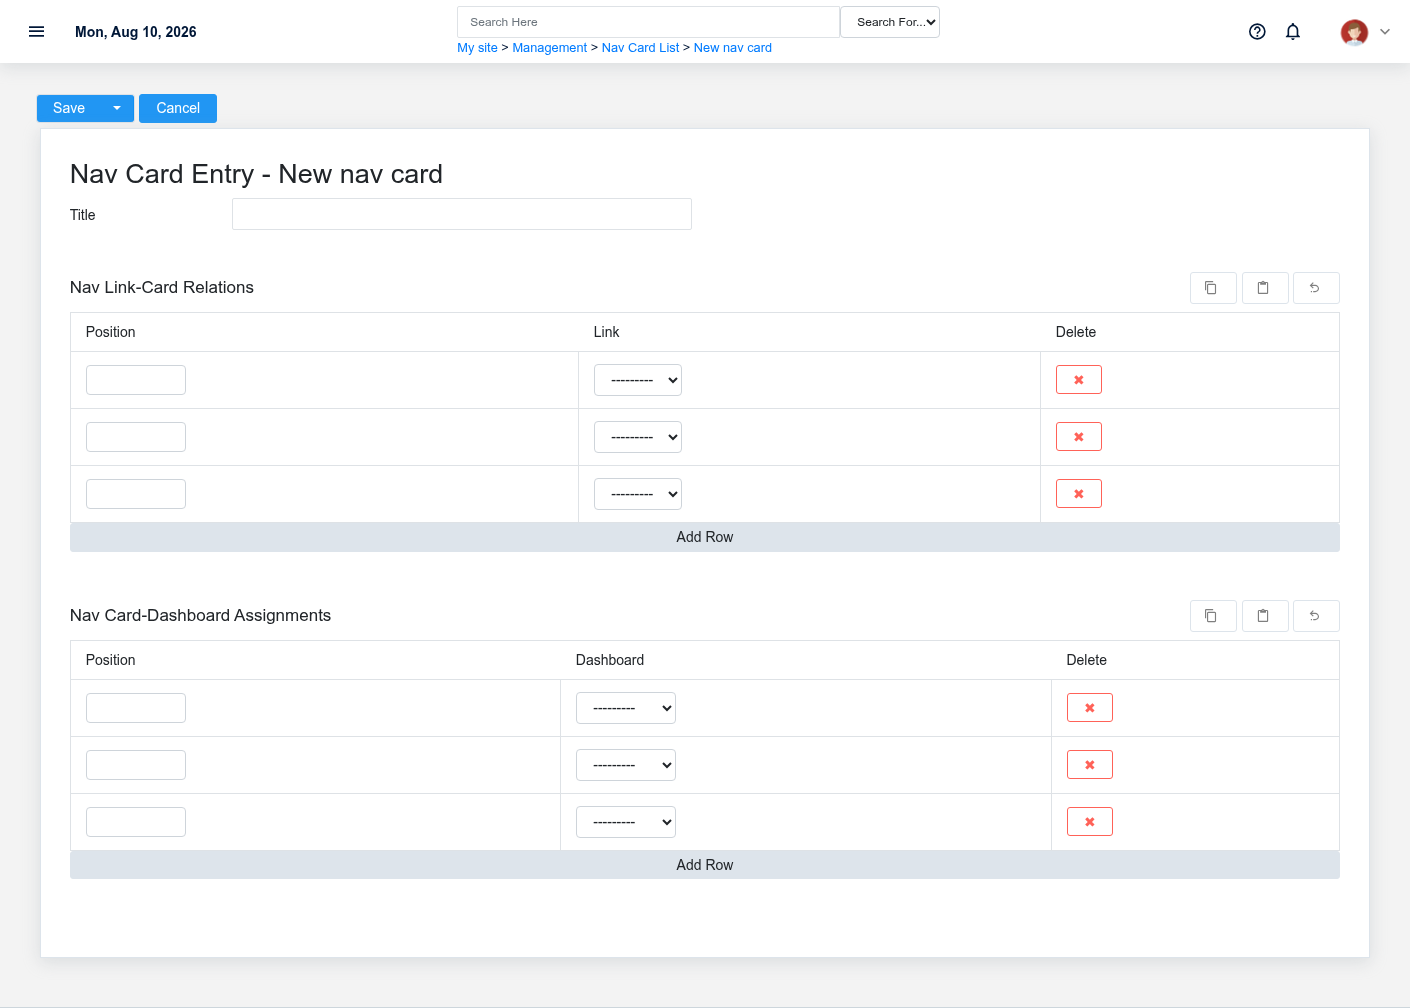
The Nav Cards create screen in the Brisk documentation demo.
Create a nav card only when the existing choices do not represent the policy or classification you need. Near-duplicate setup values split reporting and make later selection harder.
1. Select the business context first.
2. Enter the required identifying and operational values: **Title**.
3. Review the identifying information shown on the screen against the source document or approved setup decision.
4. Save the nav card, then confirm **Title** on its detail page before continuing.
After saving: Open **Nav Card-Dashboard Assignments**, and **Nav Link-Card Relations** and confirm the nav card appears with the intended label and availability. Keep the old value for historical records when changing it would split or relabel prior reporting.
Delete a nav card
Delete this nav card only if it is an unused duplicate or setup mistake. Once other records refer to it, preserve that history and make the value inactive when the screen provides that option.
Before confirming, check for related **Nav Card-Dashboard Assignments**, and **Nav Link-Card Relations**. Brisk may refuse deletion when another record depends on this one; resolve the duplicate or use the supported correction workflow instead of breaking the trail.
On the confirmation page, verify **Title**. After confirmation, return to the Nav Cards list and make sure only the intended nav card was removed.
Review nav card details
Use the detail page as the shared record of what this nav card currently means. Verify **Title** before relying on it for a decision.
Compare the nav card with its source document or approved setup request before deciding that it needs correction.
Next check: Open **Nav Card-Dashboard Assignments**, and **Nav Link-Card Relations** and confirm the nav card appears with the intended label and availability. Keep the old value for historical records when changing it would split or relabel prior reporting.
Edit an existing nav card
Edit this nav card when the underlying policy or classification changed. First determine whether historical transactions should retain the old value; if so, deactivate the old choice and create a new one.
1. Open the detail page. Compare the identifying information shown on the screen with the supporting document or approved request.
2. Recheck the identifying information shown on the screen. These values are most likely to change future transactions, defaults, assignment, pricing, and reporting.
3. Save the change, return to the list, and confirm that the nav card now appears under the expected the identifying information shown on the screen.
After the change: Open **Nav Card-Dashboard Assignments**, and **Nav Link-Card Relations** and confirm the nav card appears with the intended label and availability. Keep the old value for historical records when changing it would split or relabel prior reporting.
Find and review nav cards
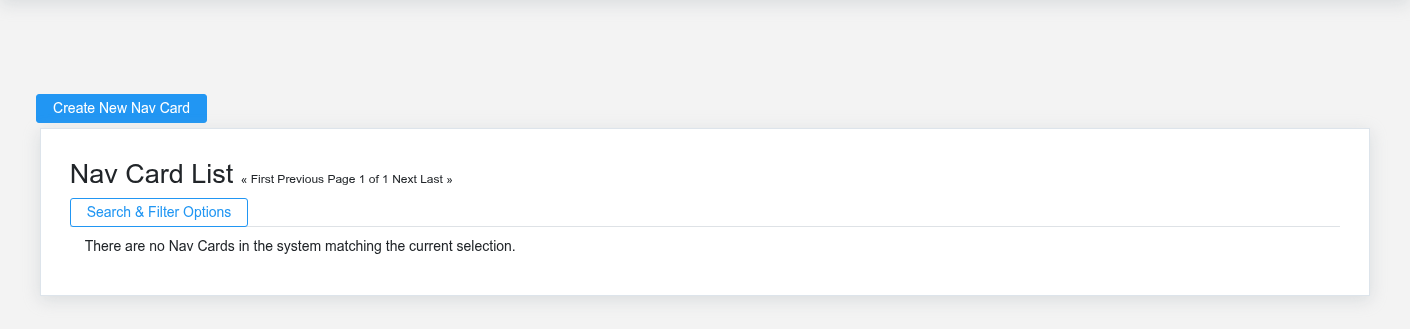
The Nav Cards list screen in the Brisk documentation demo.
Use the Nav Cards list to find the correct record before opening or changing it. Compare **Title**. Compare the full identifier rather than relying on a similar name.
Open the nav card whose **Title** match the task. If it is missing, clear the list filters and recheck the identifying information shown on the screen rather than creating a replacement immediately.
## Fields and business rules
Brisk stores 1 user-relevant fields for this nav card, including 0 linked-record selections and 0 controlled-choice fields. Create and edit screens may hide calculated or workflow-managed values from this full reference.
| Field | Required | What it controls |
|---|---:|---|
| **Title** | Yes | The title used for the card. |
## What happens next
Open **Nav Card-Dashboard Assignments**, and **Nav Link-Card Relations** and confirm the nav card appears with the intended label and availability. Keep the old value for historical records when changing it would split or relabel prior reporting.
## Common mistakes and troubleshooting
- **The record will not save:** Recheck **Title** and any message beside the field. A required related record may also be inactive or unavailable to your role.
- **The values look right but the result is wrong:** Compare this nav card with the source document or approved setup decision, then check the downstream screen where it is used.
# Nav Links
# Nav Links
Purpose and when to use this record
Define a destination within a navigation card, including its visible label, target, order, and access conditions.
## At a glance
- **Identify it by:** **Url**, **Title**, **Description**, and **App**.
- **Why care:** These master records supply defaults and choices to later transactions. Correct duplicates and inactive records before staff build more activity on the wrong record.
## Before you begin
You need the Brisk permission for the action you are taking on nav links. If a Create, Edit, or Delete control is absent, do not work around it with another user’s account; ask an administrator to review your role.
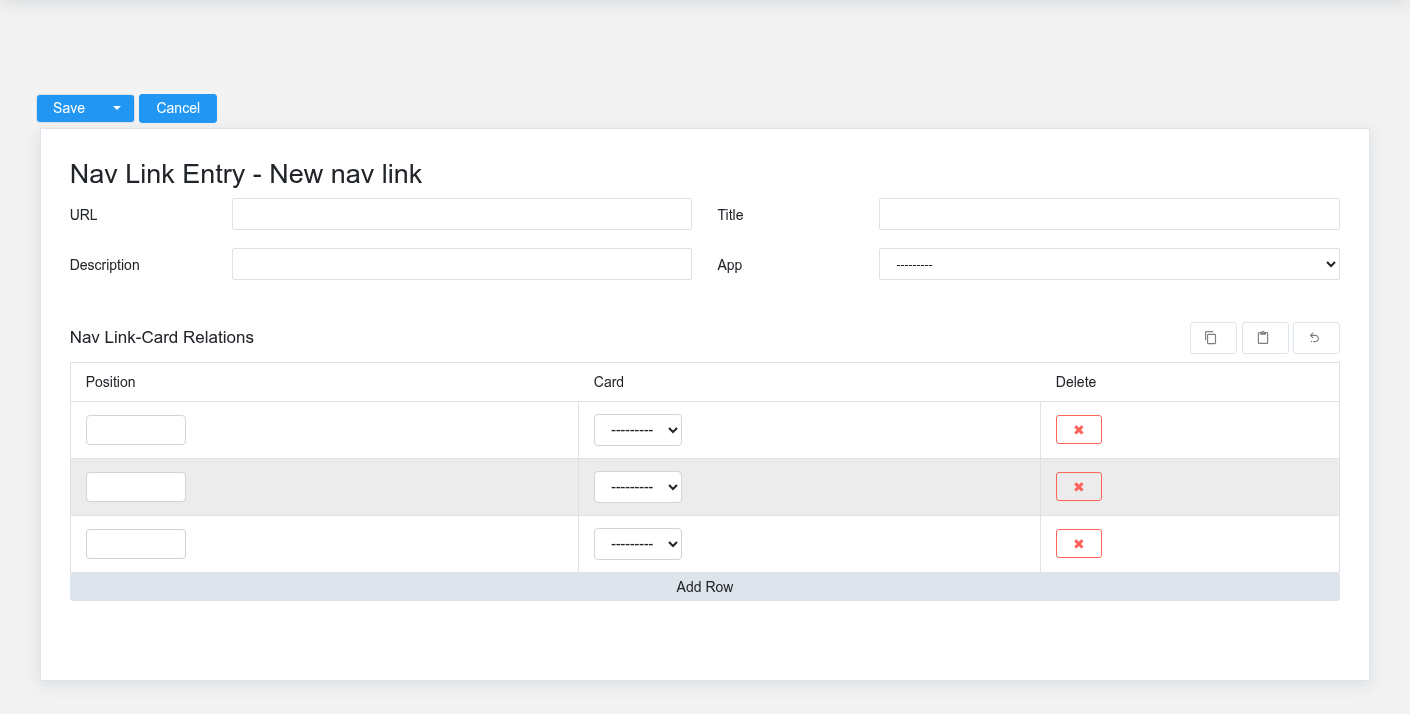
Create a nav link
The Nav Links create screen in the Brisk documentation demo.
Create a nav link only when the existing choices do not represent the policy or classification you need. Near-duplicate setup values split reporting and make later selection harder.
1. Select the business context first.
2. Enter the required identifying and operational values: **Url**, **Title**, and **Description**.
3. Review **App** deliberately; these choices control availability or workflow rather than merely describing the record.
4. Save the nav link, then confirm **Url**, **Title**, **Description**, and **App** on its detail page before continuing.
After saving: Open **Nav Link-Card Relations** and confirm the nav link appears with the intended label and availability. Keep the old value for historical records when changing it would split or relabel prior reporting.
Delete a nav link
Delete this nav link only if it is an unused duplicate or setup mistake. Once other records refer to it, preserve that history and make the value inactive when the screen provides that option.
Before confirming, check for related **Nav Link-Card Relations**. Brisk may refuse deletion when another record depends on this one; resolve the duplicate or use the supported correction workflow instead of breaking the trail.
On the confirmation page, verify **Url**, **Title**, **Description**, and **App**. After confirmation, return to the Nav Links list and make sure only the intended nav link was removed.
Review nav link details
Use the detail page as the shared record of what this nav link currently means. Verify **App** before relying on it for a decision.
Compare the nav link with its source document or approved setup request before deciding that it needs correction.
Next check: Open **Nav Link-Card Relations** and confirm the nav link appears with the intended label and availability. Keep the old value for historical records when changing it would split or relabel prior reporting.
Edit an existing nav link
Edit this nav link when the underlying policy or classification changed. First determine whether historical transactions should retain the old value; if so, deactivate the old choice and create a new one.
1. Open the detail page. Compare the identifying information shown on the screen with the supporting document or approved request.
2. Recheck **App**. These values are most likely to change future transactions, defaults, assignment, pricing, and reporting.
3. Save the change, return to the list, and confirm that the nav link now appears under the expected **App**.
After the change: Open **Nav Link-Card Relations** and confirm the nav link appears with the intended label and availability. Keep the old value for historical records when changing it would split or relabel prior reporting.
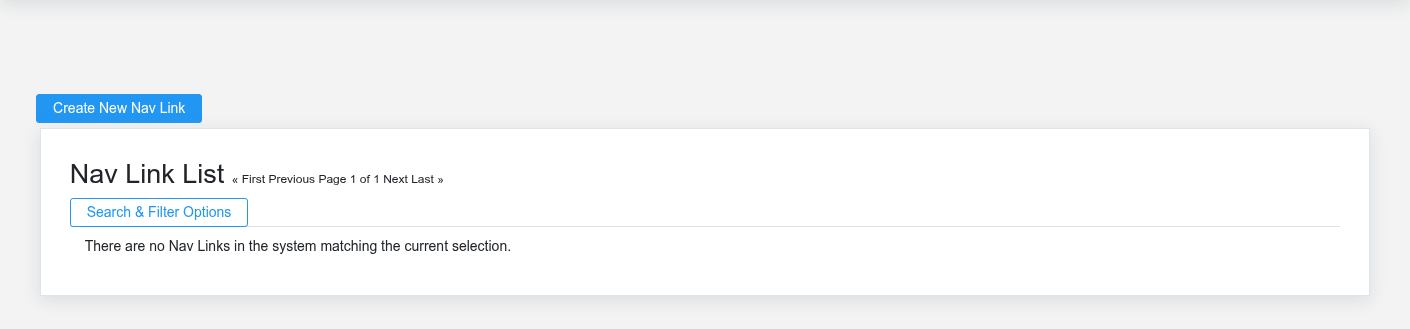
Find and review nav links
The Nav Links list screen in the Brisk documentation demo.
Use the Nav Links list to find the correct record before opening or changing it. Compare **Url**, **Title**, **Description**, and **App**. Compare the full identifier rather than relying on a similar name.
Open the nav link whose **Url**, **Title**, **Description**, and **App** match the task. If it is missing, clear the list filters and recheck **App** rather than creating a replacement immediately.
## Fields and business rules
Brisk stores 4 user-relevant fields for this nav link, including 0 linked-record selections and 1 controlled-choice field. Create and edit screens may hide calculated or workflow-managed values from this full reference.
| Field | Required | What it controls |
|---|---:|---|
| **Url** | Yes | The last section of the URL. |
| **Title** | Yes | The title used for the hyperlink. |
| **Description** | Yes | The text displayed next to the link. |
| **App** | No | The app recorded for this nav link. Available values: Accounting, Inventory, Management, Manufacturing, Payroll, Reports, Sales, Service, Time. |
## What happens next
Open **Nav Link-Card Relations** and confirm the nav link appears with the intended label and availability. Keep the old value for historical records when changing it would split or relabel prior reporting.
## Common mistakes and troubleshooting
- **The record will not save:** Recheck **Url**, **Title**, and **Description** and any message beside the field. A required related record may also be inactive or unavailable to your role.
- **The values look right but the result is wrong:** Compare this nav link with the source document or approved setup decision, then check the downstream screen where it is used.
# Salespeople
# Salespeople
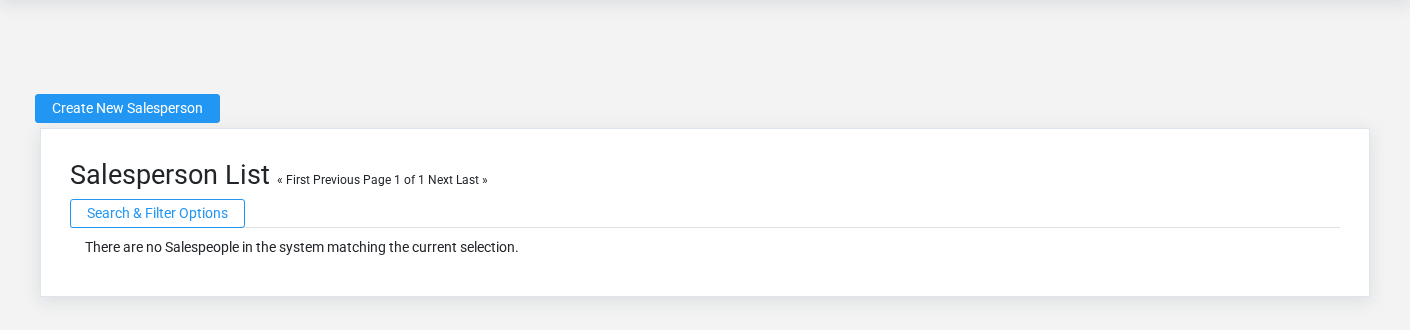
Purpose and when to use this record
The Salespeople overview screen in the Brisk documentation demo.
Connect sales activity to the responsible salesperson for assignment, customer service, and commission reporting.
## At a glance
- **Identify it by:** **First Name**, and **Last Name**.
- **Check its business context:** **Employee**, **Payable Account**, and **Expense Account**.
- **Why care:** These master records supply defaults and choices to later transactions. Correct duplicates and inactive records before staff build more activity on the wrong record.
## Before you begin
You need the Brisk permission for the action you are taking on salespeople. If a Create, Edit, or Delete control is absent, do not work around it with another user’s account; ask an administrator to review your role.
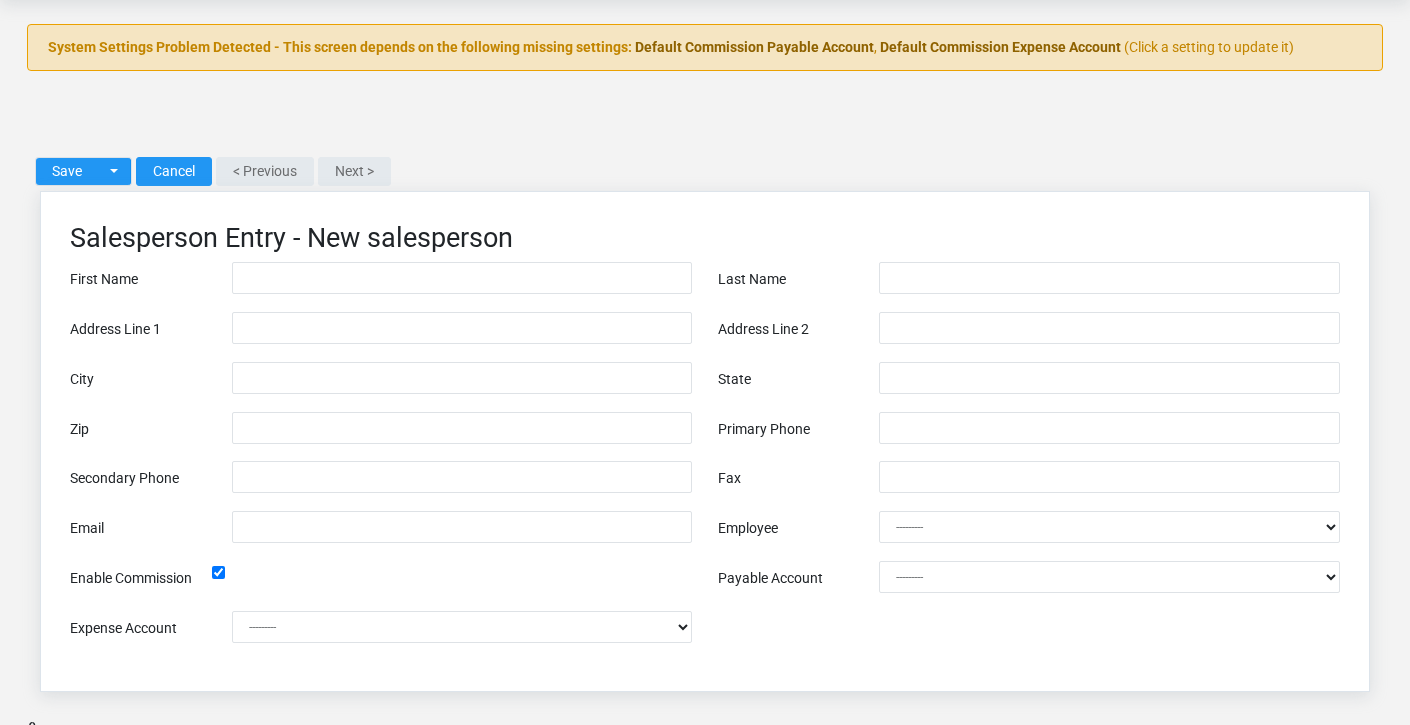
Create a salesperson
The Salespeople create screen in the Brisk documentation demo.
Create a salesperson only after confirming that the source document or operational event has not already been entered.
1. Select the business context first: **Employee**, **Payable Account**, and **Expense Account**.
2. Enter the required identifying and operational values: **First Name**, **Last Name**, **Address Line 1**, **City**, **State**, and **Zip**, plus the remaining screen fields.
3. Review **Enable Commission** deliberately; these choices control availability or workflow rather than merely describing the record.
4. Save the salesperson, then confirm **First Name**, and **Last Name** on its detail page before continuing.
After saving: Verify **Employee**, **Payable Account**, and **Expense Account** on the detail page, then continue the management workflow only when those values agree with the source document and actual work performed.
Delete a salesperson
Delete this salesperson only when it was entered by mistake and no downstream history depends on it. Use a reversal, void, credit, counter-adjustment, or status correction for a real event that later changed.
Before confirming, check for related **Commission Payments**, **Customers**, **Foodservice Tables**, **Quotes**, and **Sales**, plus the remaining screen fields. Brisk may refuse deletion when another record depends on this one; resolve the duplicate or use the supported correction workflow instead of breaking the trail.
On the confirmation page, verify **First Name**, and **Last Name**. After confirmation, return to the Salespeople list and make sure only the intended salesperson was removed.
Review salesperson details
Use the detail page as the shared record of what this salesperson currently means. Verify **First Name**, **Last Name**, **Address Line 1**, and **Address Line 2** before relying on it for a decision.
Follow **Employee**, **Payable Account**, and **Expense Account** to determine whether the issue is on this salesperson or on one of those linked records.
Next check: Verify **Employee**, **Payable Account**, and **Expense Account** on the detail page, then continue the management workflow only when those values agree with the source document and actual work performed.
Edit an existing salesperson
Edit this salesperson to correct or complete the same source document or operational event; use the supported reversal or follow-up workflow when the business event itself changed.
1. Open the detail page. Compare **Employee**, **Payable Account**, and **Expense Account** with the supporting document or approved request.
2. Recheck **Payable Account**, and **Expense Account**. These values are most likely to change future transactions, defaults, assignment, pricing, and reporting.
3. Save the change, return to the list, and confirm that the salesperson now appears under the expected **First Name**, and **Last Name**.
After the change: Verify **Employee**, **Payable Account**, and **Expense Account** on the detail page, then continue the management workflow only when those values agree with the source document and actual work performed.
## Fields and business rules
Brisk stores 15 user-relevant fields for this salesperson, including 3 linked-record selections and 0 controlled-choice fields. Create and edit screens may hide calculated or workflow-managed values from this full reference.
| Field | Required | What it controls |
|---|---:|---|
| **First Name** | Yes | The first name recorded for this salesperson. |
| **Last Name** | Yes | The last name recorded for this salesperson. |
| **Address Line 1** | Yes | The address line 1 recorded for this salesperson. |
| **Address Line 2** | No | The address line 2 recorded for this salesperson. |
| **City** | Yes | The city recorded for this salesperson. |
| **State** | Yes | The state recorded for this salesperson. |
| **Zip** | Yes | The zip recorded for this salesperson. |
| **Primary Phone** | Yes | The primary phone recorded for this salesperson. |
| **Secondary Phone** | No | The secondary phone recorded for this salesperson. |
| **Fax** | No | The fax recorded for this salesperson. |
| **Email** | No | The email recorded for this salesperson. |
| **Employee** | No | Link this salesperson to an employee record. |
| **Enable Commission** | No | Disabling this option will stop this salesperson from earning any commission. |
| **Payable Account** | No | Sets the GL account to which this commission payable transactions post for this salesperson. |
| **Expense Account** | No | Sets the GL account to which this commission expense transactions post for this salesperson. |
## What happens next
Verify **Employee**, **Payable Account**, and **Expense Account** on the detail page, then continue the management workflow only when those values agree with the source document and actual work performed.
## Common mistakes and troubleshooting
- **The record will not save:** Recheck **First Name**, **Last Name**, **Address Line 1**, **City**, **State**, and **Zip**, plus the remaining screen fields and any message beside the field. A required related record may also be inactive or unavailable to your role.
- **The values look right but the result is wrong:** Open **Employee**, **Payable Account**, and **Expense Account** from the detail page. Correct the specific relationship that is wrong instead of forcing a total or status to compensate for it.
# Vendors
# Vendors
Purpose and when to use this record
Maintain suppliers and payees used for purchasing, receiving, vendor invoices, credits, payments, and 1099 reporting.
## At a glance
- **Identify it by:** **Vendor #**, **Vendor Name**, **Account Number**, and **Coi Expiration Date**.
- **Check its business context:** **Payment Terms**, **Payable Account**, and **Charges/Fees Account**.
- **Why care:** These master records supply defaults and choices to later transactions. Correct duplicates and inactive records before staff build more activity on the wrong record.
## Before you begin
You need the Brisk permission for the action you are taking on vendors. If a Create, Edit, or Delete control is absent, do not work around it with another user’s account; ask an administrator to review your role.
Have valid **Payable Account**, and **Charges/Fees Account** records ready first. Those selections determine where this vendor belongs and which later screens can find it.
Create a vendor
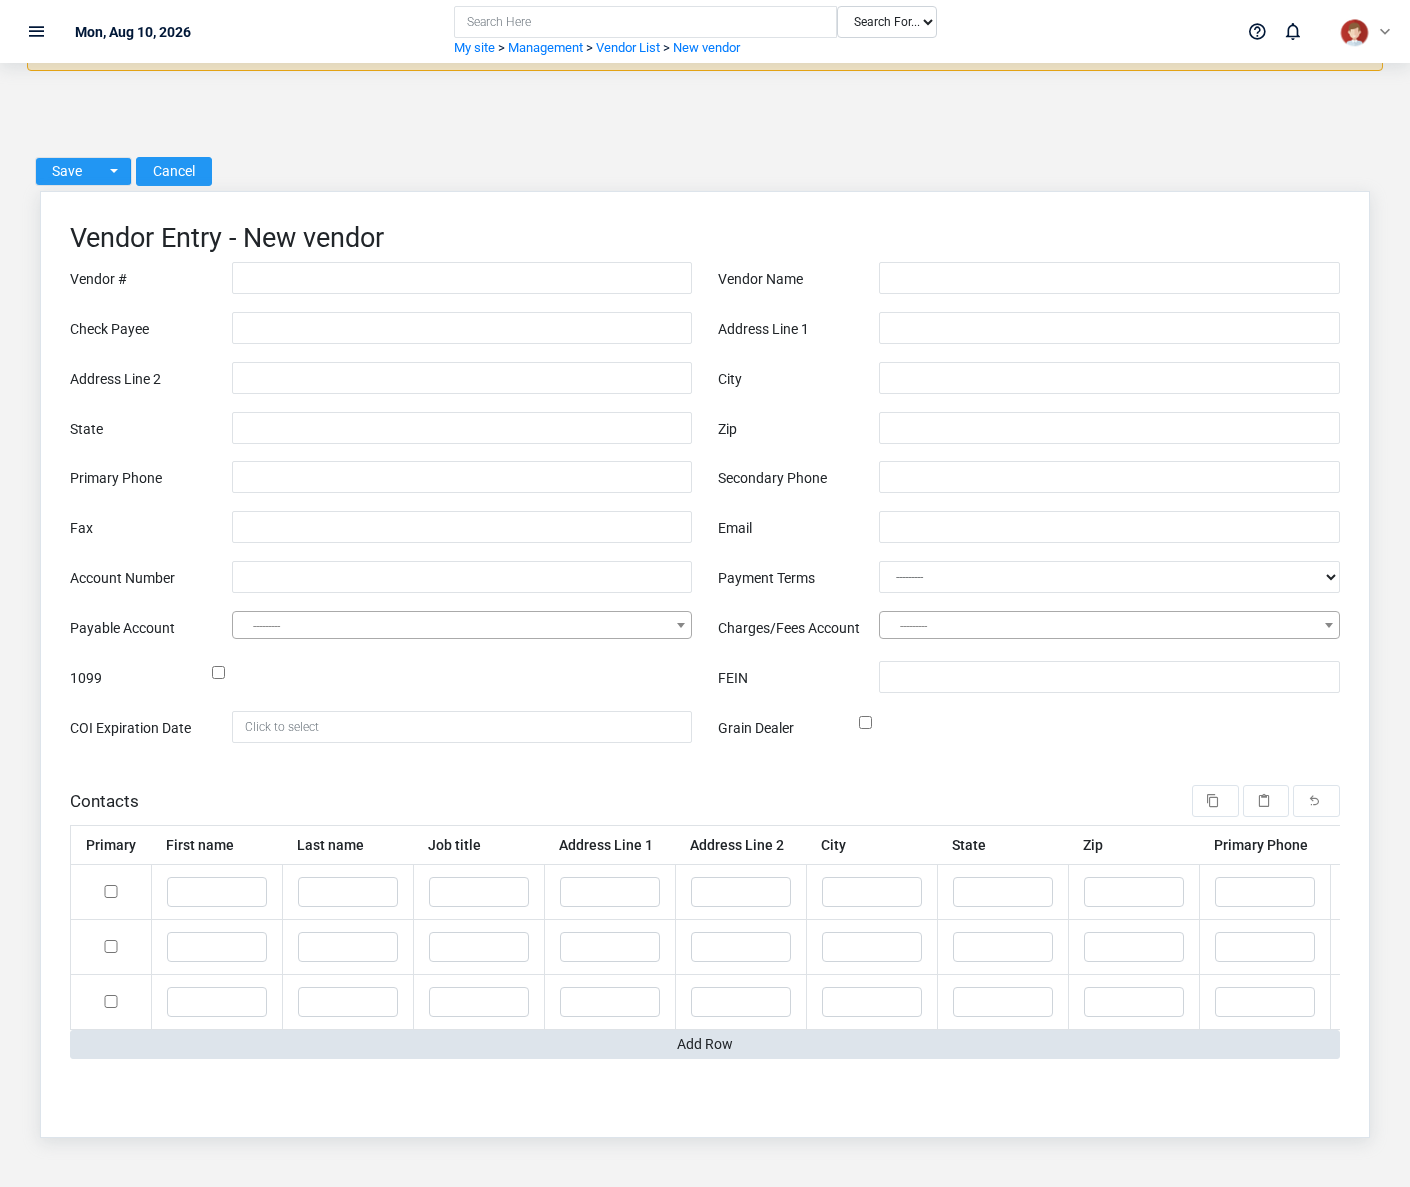
The Vendors create screen in the Brisk documentation demo.
Create a vendor after searching for the person, organization, item, location, or resource under alternate names and identifiers. Merge or correct an existing master record instead of creating a duplicate.
1. Select the business context first: **Payment Terms**, **Payable Account**, and **Charges/Fees Account**.
2. Enter the required identifying and operational values: **Vendor Name**, **Address Line 1**, **City**, **State**, **Zip**, and **Primary Phone**, plus the remaining screen fields.
3. Review **1099**, and **Grain Dealer** deliberately; these choices control availability or workflow rather than merely describing the record.
4. Save the vendor, then confirm **Vendor #**, **Vendor Name**, **Account Number**, and **Coi Expiration Date** on its detail page before continuing.
After saving: Verify this vendor in **Commodity Sales**, **Contacts**, **Credit Card Accounts**, and **Credit Card Charges**, plus the remaining screen fields before staff build new activity on it; correct ownership, classification, and active state now rather than after transactions accumulate.
Delete a vendor
Delete this vendor only if it is an unused duplicate or setup mistake. Once other records refer to it, preserve that history and make the value inactive when the screen provides that option.
Before confirming, check for related **Commodity Sales**, **Contacts**, **Credit Card Accounts**, **Credit Card Charges**, and **Inventory Receipts**, plus the remaining screen fields. Brisk may refuse deletion when another record depends on this one; resolve the duplicate or use the supported correction workflow instead of breaking the trail.
On the confirmation page, verify **Vendor #**, **Vendor Name**, **Account Number**, and **Coi Expiration Date**. After confirmation, return to the Vendors list and make sure only the intended vendor was removed.
Review vendor details
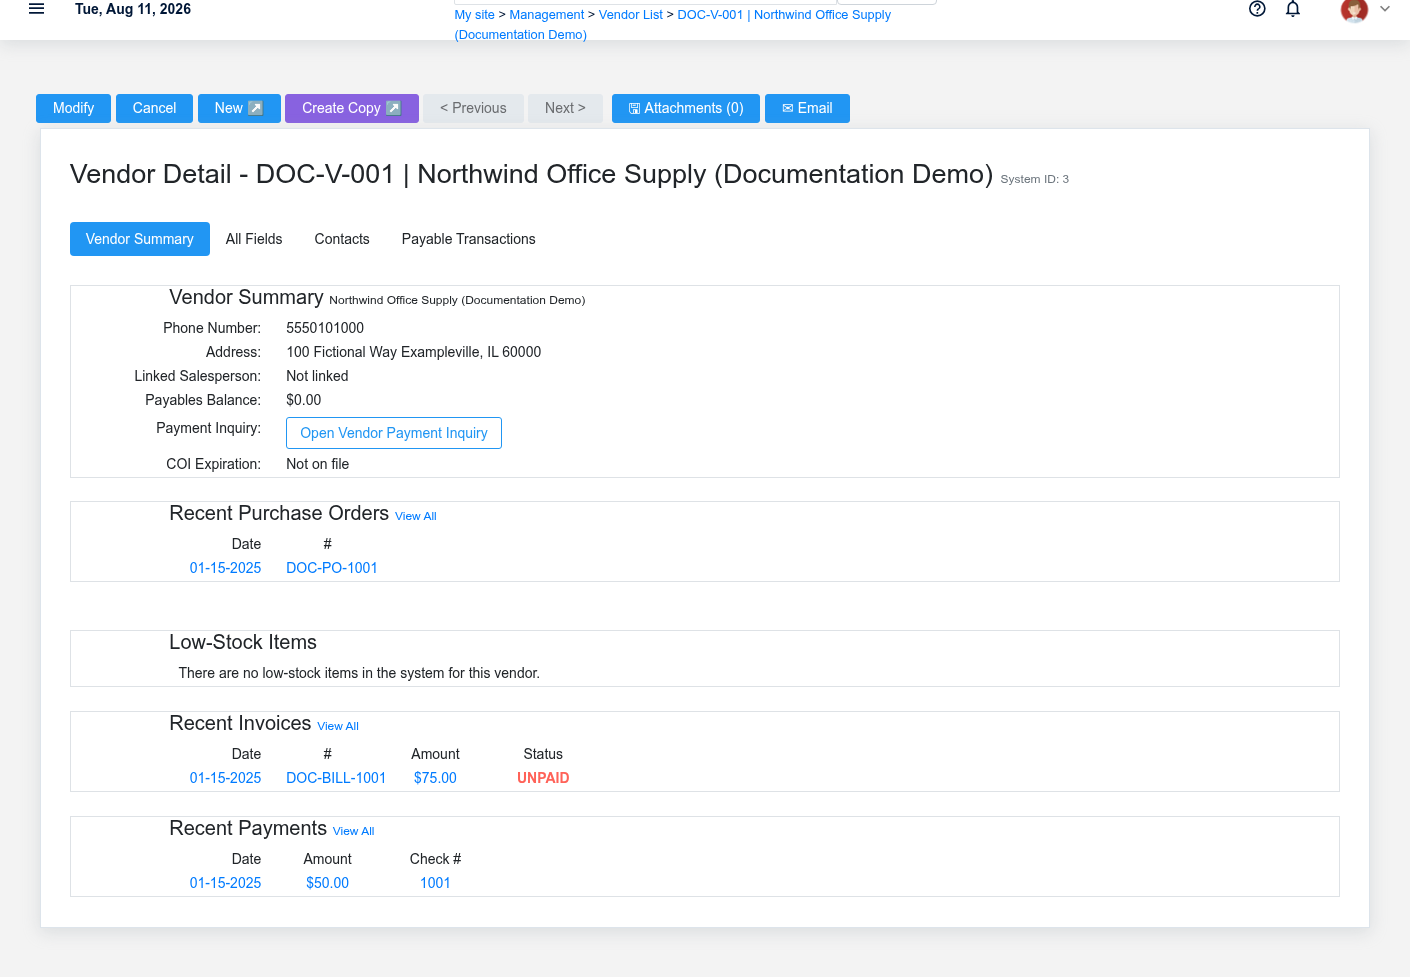
The Vendors detail screen in the Brisk documentation demo.
Use the detail page as the shared record of what this vendor currently means. Verify **Coi Expiration Date** before relying on it for a decision.
Follow **Payment Terms**, **Payable Account**, and **Charges/Fees Account** to determine whether the issue is on this vendor or on one of those linked records.
Next check: Verify this vendor in **Commodity Sales**, **Contacts**, **Credit Card Accounts**, and **Credit Card Charges**, plus the remaining screen fields before staff build new activity on it; correct ownership, classification, and active state now rather than after transactions accumulate.
Edit an existing vendor
Edit this vendor to keep the same real-world party, item, location, or resource accurate. Do not repurpose it for a different entity after activity is attached.
1. Open the detail page. Compare **Payment Terms**, **Payable Account**, and **Charges/Fees Account** with the supporting document or approved request.
2. Recheck **Vendor #**, **Account Number**, **Payable Account**, **Charges/Fees Account**, and **Coi Expiration Date**. These values are most likely to change future transactions, defaults, assignment, pricing, and reporting.
3. Save the change, return to the list, and confirm that the vendor now appears under the expected **Vendor #**, **Vendor Name**, **Account Number**, and **Coi Expiration Date**.
After the change: Verify this vendor in **Commodity Sales**, **Contacts**, **Credit Card Accounts**, and **Credit Card Charges**, plus the remaining screen fields before staff build new activity on it; correct ownership, classification, and active state now rather than after transactions accumulate.
Find and review vendors
The Vendors list screen in the Brisk documentation demo.
Use the Vendors list to find the correct record before opening or changing it. Compare **Vendor #**, **Vendor Name**, **Account Number**, and **Coi Expiration Date**. Records with similar names or numbers can still belong to different **Payment Terms**, **Payable Account**, and **Charges/Fees Account**.
- Keyword search checks **Vendor Name**, **Vendor #**, **Address Line 1**, **Address Line 2**, **City**, and **State**, plus the remaining screen fields.
- The initial order emphasizes **Vendor Name**. Select a column heading when you need a different comparison.
Open the vendor whose **Vendor #**, **Vendor Name**, **Account Number**, and **Coi Expiration Date** match the task. If it is missing, clear the list filters and recheck the identifying information shown on the screen rather than creating a replacement immediately.
## Fields and business rules
Brisk stores 20 user-relevant fields for this vendor, including 3 linked-record selections and 0 controlled-choice fields. Create and edit screens may hide calculated or workflow-managed values from this full reference.
| Field | Required | What it controls |
|---|---:|---|
| **Vendor #** | No | A vendor's unique ID number. Leave this field blank for the system to generate one automatically. |
| **Vendor Name** | Yes | Enter the name of the company or individual that will identify this vendor. |
| **Check Payee** | No | If different from the Vendor Name, enter the name as it appears on checks here. |
| **Address Line 1** | Yes | The address line 1 recorded for this vendor. |
| **Address Line 2** | No | The address line 2 recorded for this vendor. |
| **City** | Yes | The city recorded for this vendor. |
| **State** | Yes | The state recorded for this vendor. |
| **Zip** | Yes | The zip recorded for this vendor. |
| **Primary Phone** | Yes | The primary phone recorded for this vendor. |
| **Secondary Phone** | No | The secondary phone recorded for this vendor. |
| **Fax** | No | The fax recorded for this vendor. |
| **Email** | No | The email recorded for this vendor. |
| **Account Number** | No | List your business account number with this vendor. |
| **Payment Terms** | No | The payment terms associated with this vendor. |
| **Payable Account** | Yes | Designates the account that will track any accounts payable transactions for this vendor. |
| **Charges/Fees Account** | Yes | Designates the expense account that will be used if finance charges or restocking fees are included in a credit memo. |
| **1099** | No | Determines whether to issue 1099s to this vendor or not. |
| **Fein** | No | Store the Federal Employer Identification Number here. |
| **Coi Expiration Date** | No | Date that the vendor certificate of insurance expires. |
| **Grain Dealer** | No | Determines whether or not this vendor is a grain dealer for the purposes of federal corn checkoff regulations. Grain dealers are expected to handle paying corn checkoff, so it will not be deducted from their payments. |
## What happens next
Verify this vendor in **Commodity Sales**, **Contacts**, **Credit Card Accounts**, and **Credit Card Charges**, plus the remaining screen fields before staff build new activity on it; correct ownership, classification, and active state now rather than after transactions accumulate.
## Common mistakes and troubleshooting
- **The record will not save:** Recheck **Vendor Name**, **Address Line 1**, **City**, **State**, **Zip**, and **Primary Phone**, plus the remaining screen fields and any message beside the field. A required related record may also be inactive or unavailable to your role.
- **The values look right but the result is wrong:** Open **Payment Terms**, **Payable Account**, and **Charges/Fees Account** from the detail page. Correct the specific relationship that is wrong instead of forcing a total or status to compensate for it.