
EMV Terminals
Emv Terminals
Purpose and when to use this record
Configure the processor terminal identity used for card-present payments and assign it to the correct user or workstation.
At a glance
-
Identify it by: Name, and Pairing Code.
-
Why care: Customer, source document, amount, authorization, processor status, and settlement are separate controls. Verify all of them before retrying or treating a payment as complete.
Before you begin
You need the Brisk permission for the action you are taking on emv terminals. If a Create, Edit, or Delete control is absent, do not work around it with another user’s account; ask an administrator to review your role.
Create an EMV Terminal
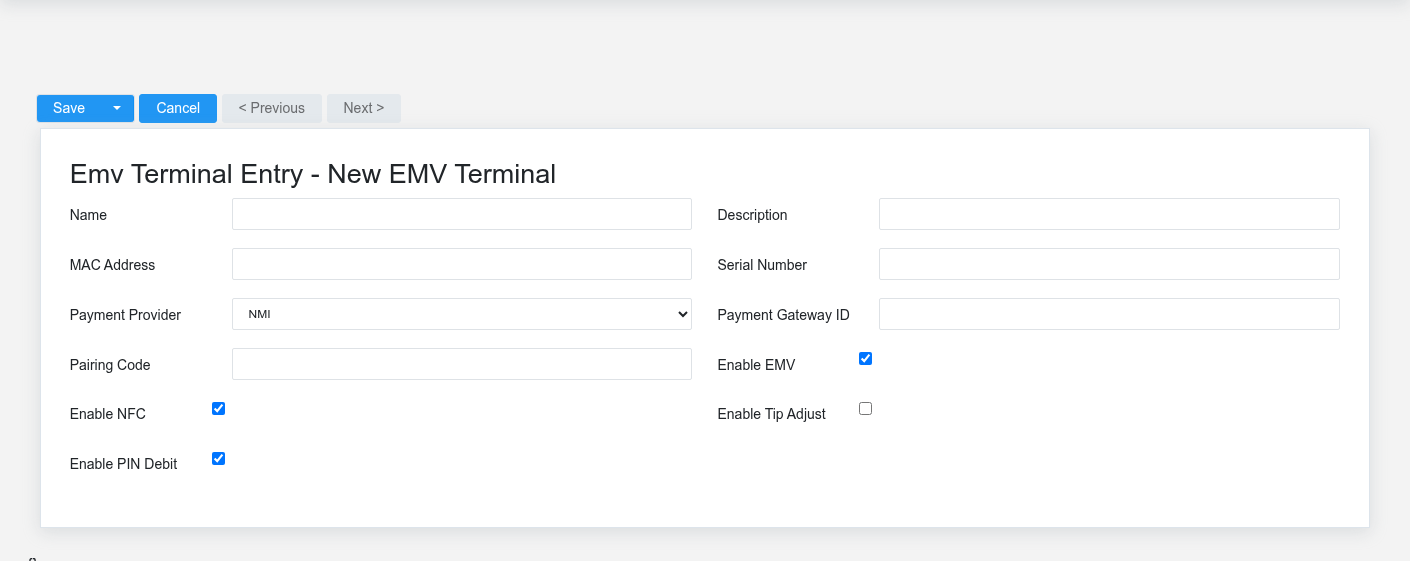
Creating a terminal is an external action: the first save asks the configured provider to register the hardware. Have the physical device, serial number, processor account, and pairing information ready before you begin.
- Use a Name that identifies the business location and register, such as “Front Counter 1,” not only the hardware model.
- Record the serial number and, where used, MAC address so staff can match Brisk to the device in hand.
- Select the correct Payment Provider and enter only the gateway hardware ID or pairing code supplied for this device.
- Enable EMV, NFC, tip adjustment, and PIN debit only when both the hardware and business workflow support them.
- Save once and verify the provider registration before assigning the terminal to a user or workstation.
If registration times out, check the processor portal before recreating the record; the first request may have registered successfully.
Delete an EMV Terminal
Delete this EMV Terminal only if it is an unused duplicate or setup mistake. Once other records refer to it, preserve that history and make the value inactive when the screen provides that option.
On the confirmation page, verify Name, and Pairing Code. After confirmation, return to the EMV Terminals list and make sure only the intended EMV Terminal was removed.
Review EMV Terminal details
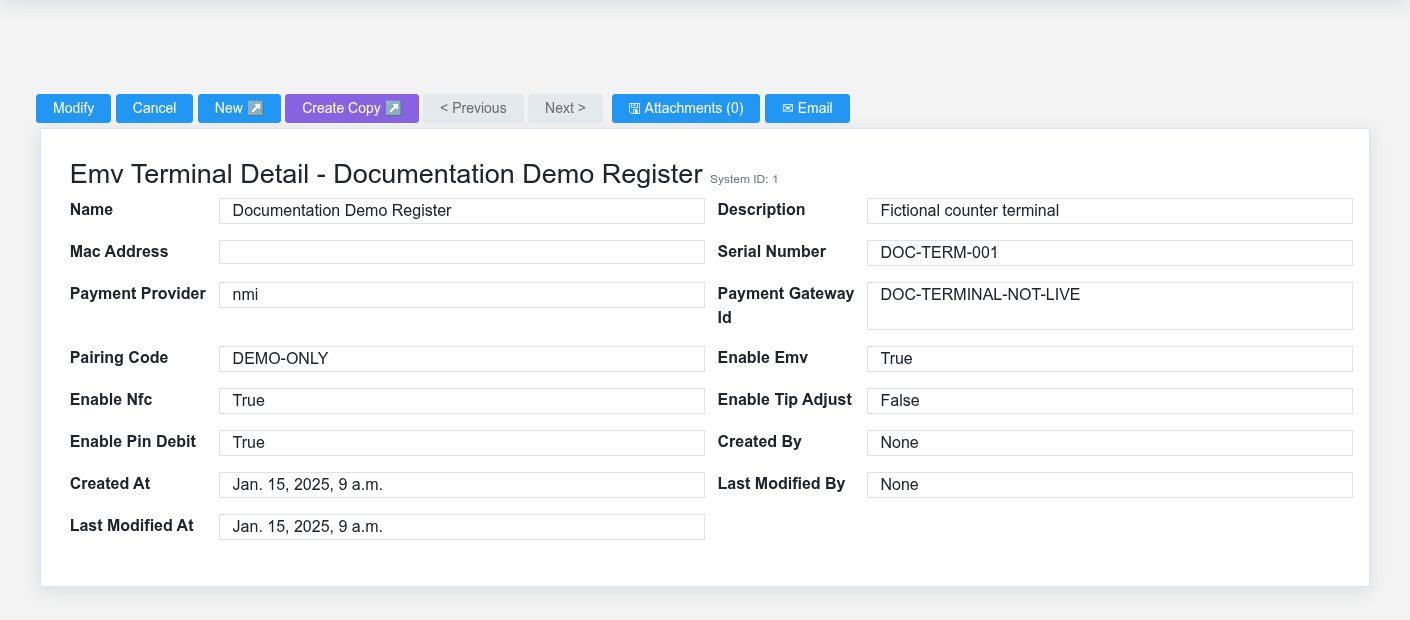
Use the detail page as the shared record of what this EMV Terminal currently means. Verify Payment Provider before relying on it for a decision.
Compare the EMV Terminal with its source document or approved setup request before deciding that it needs correction.
Next check: Assign the terminal to the intended user or workstation, run a controlled test transaction, and reconcile its processor identity before live use.
Edit an existing EMV Terminal
Saving an existing terminal sends its EMV, NFC, tip-adjust, and PIN-debit configuration to the registered gateway device. Compare the Brisk gateway ID and physical serial number first; do not repurpose a historical terminal record for different hardware. After changing capabilities, run a controlled low-risk test and confirm both the Brisk result and processor transaction before taking customer payments.
Find and review emv terminals
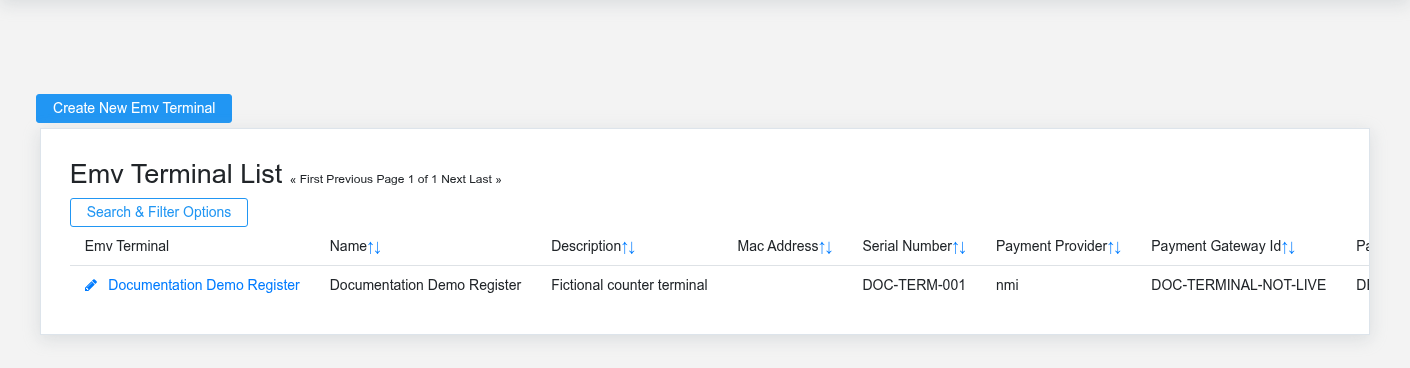
Use the Emv Terminals list to find the correct record before opening or changing it. Compare Name, and Pairing Code. Compare the full identifier rather than relying on a similar name.
Open the EMV Terminal whose Name, and Pairing Code match the task. If it is missing, clear the list filters and recheck Payment Provider rather than creating a replacement immediately.
Fields and business rules
Brisk stores 11 user-relevant fields for this EMV Terminal, including 0 linked-record selections and 1 controlled-choice field. Create and edit screens may hide calculated or workflow-managed values from this full reference.
| Field | Required | What it controls |
|---|---|---|
| Name | Yes | Friendly name to help identify the terminal, e.g. "Register 1". |
| Description | No | Additional information about the terminal, possibly include the brand, model, location, etc. |
| Mac Address | No | Optionally identify the MAC address of the terminal. |
| Serial Number | No | Optionally identify the serial number of the terminal. |
| Payment Provider | No | Payment provider that owns this terminal registration. Available values: NMI, eBizCharge. |
| Payment Gateway Id | No | Stores the unique hardware ID from the payment gateway. |
| Pairing Code | No | Stores the pairing code from the payment gateway used to activate the device. |
| Enable Emv | No | Enable or disable chip reader (EMV) features on this device, if supported. |
| Enable Nfc | No | Enable or disable tap-to-pay features on this device, if supported. |
| Enable Tip Adjust | No | Enable or disable tip adjustment features on this device, if supported. |
| Enable Pin Debit | No | Enable or disable PIN debit card transactions on this device, if supported. |
What happens next
Assign the terminal to the intended user or workstation, run a controlled test transaction, and reconcile its processor identity before live use.
Common mistakes and troubleshooting
-
The record will not save: Recheck Name and any message beside the field. A required related record may also be inactive or unavailable to your role.
-
The values look right but the result is wrong: Compare this EMV Terminal with the source document or approved setup decision, then check the downstream screen where it is used.
No comments to display
No comments to display