
Advanced Reports
Advanced Reports
Purpose and when to use this record
Build a reusable report from selected data, filters, columns, grouping, sorting, totals, and access settings.
At a glance
-
Identify it by: Report Title, Allow Date Filters, Date Field, Date Behavior, and Beginning Date.
-
Why care: A report is only trustworthy when its data source, date field, filters, grouping, and totals answer the intended business question.
Before you begin
You need the Brisk storespermission for the action you are taking on advanced reportsreports. asIf parta ofCreate, theEdit, reportsor module.Delete This generated referencecontrol is awaitingabsent, workflowdo review.not work around it with another user’s account; ask an administrator to review your role.
Create aan recordAdvanced Report
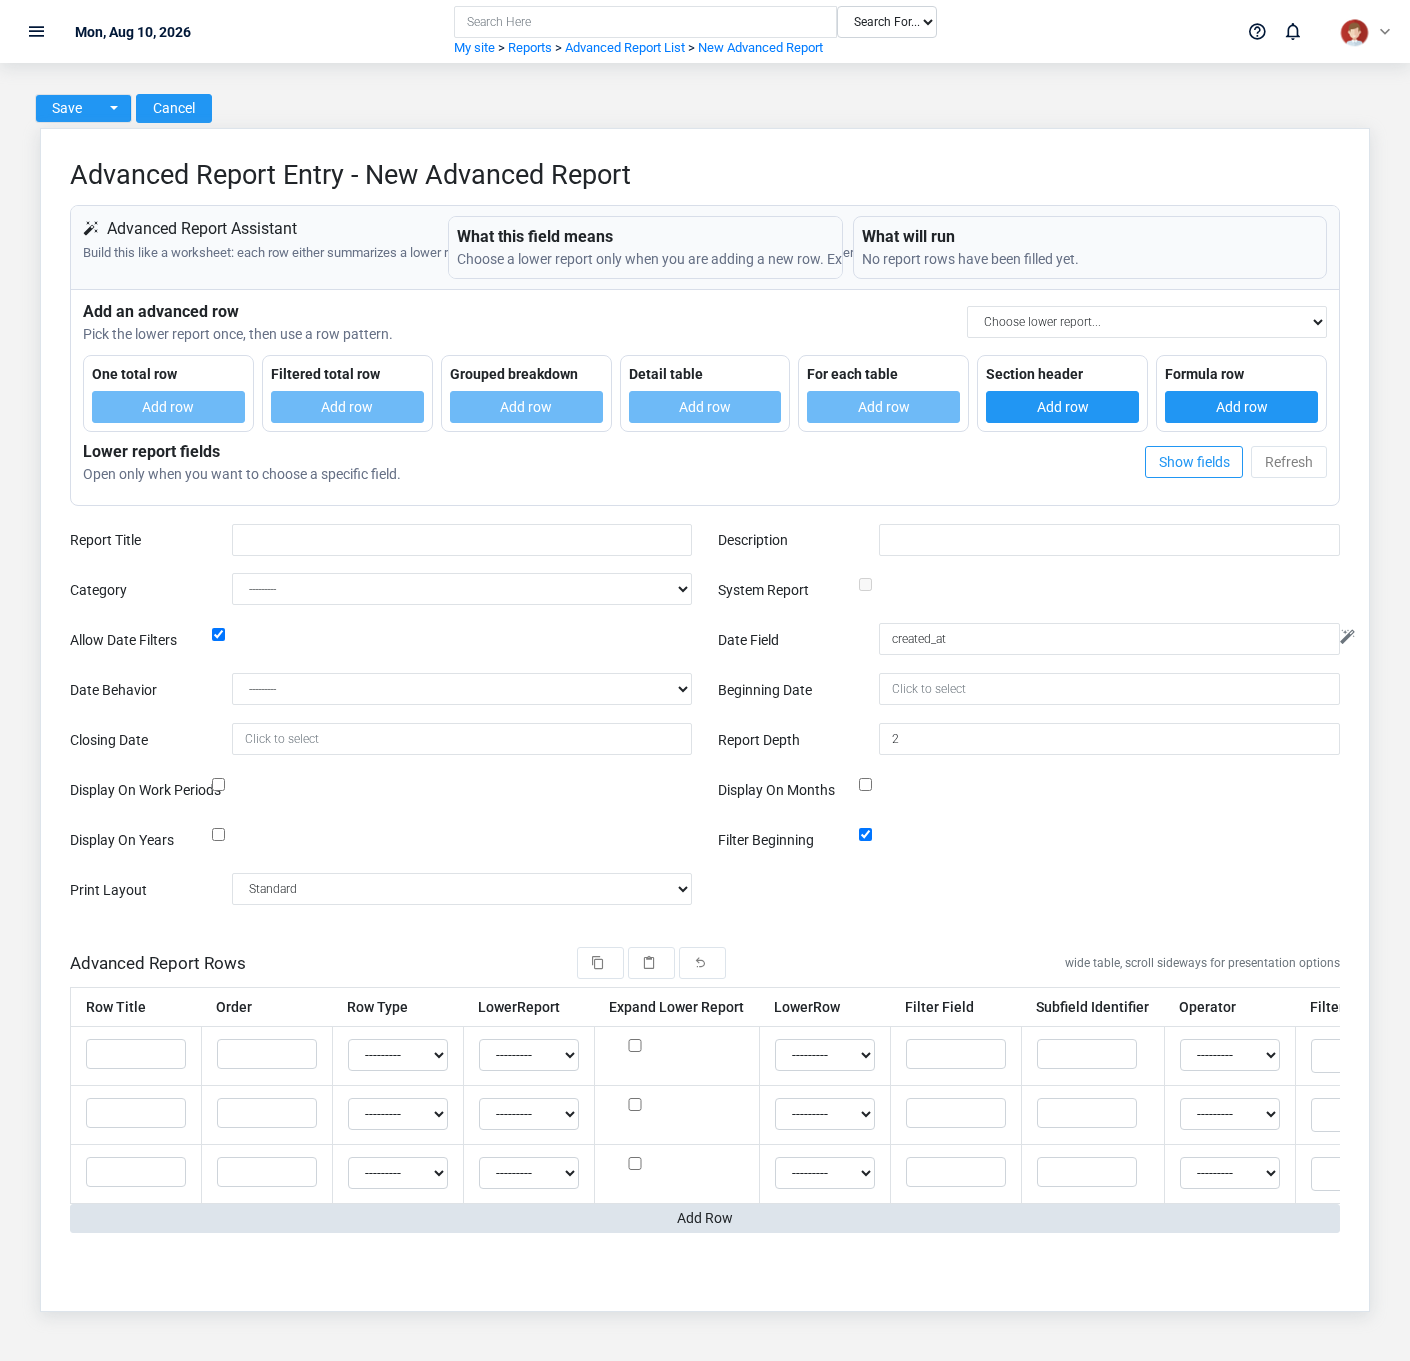
TheCreate evidencean packetAdvanced identifiesReport after searching for the viewperson, organization, item, location, or resource under alternate names and sourceidentifiers. locationMerge or correct an existing master record instead of creating a duplicate.
-
Select the business context first.
-
Enter the required identifying and operational values: Report Title.
-
Review Category, System Report, Allow Date Filters, Date Behavior, Display On Work Periods, and Display On Months, plus the remaining screen fields deliberately; these choices control availability or workflow rather than merely describing the record.
-
Save the Advanced Report, then confirm Report Title, Allow Date Filters, Date Field, Date Behavior, and Beginning Date on its detail page before continuing.
After saving: Verify this Advanced Report in Advanced Report Rows, and Report Charts before staff build new activity on it; correct ownership, classification, and active state now rather than after transactions accumulate.
Delete an Advanced Report
Delete this Advanced Report only if it is an unused duplicate or setup mistake. Once other records refer to it, preserve that history and make the value inactive when the screen provides that option.
Before confirming, check for thisrelated action.Report ConfirmCharts, user-facingand stepsAdvanced beforeReport approvingRows. Brisk may refuse deletion when another record depends on this page.one; resolve the duplicate or use the supported correction workflow instead of breaking the trail.
On the confirmation page, verify Report Title, Allow Date Filters, Date Field, Date Behavior, and Beginning Date. After confirmation, return to the Advanced Reports list and make sure only the intended Advanced Report was removed.
ViewReview recordAdvanced Report details
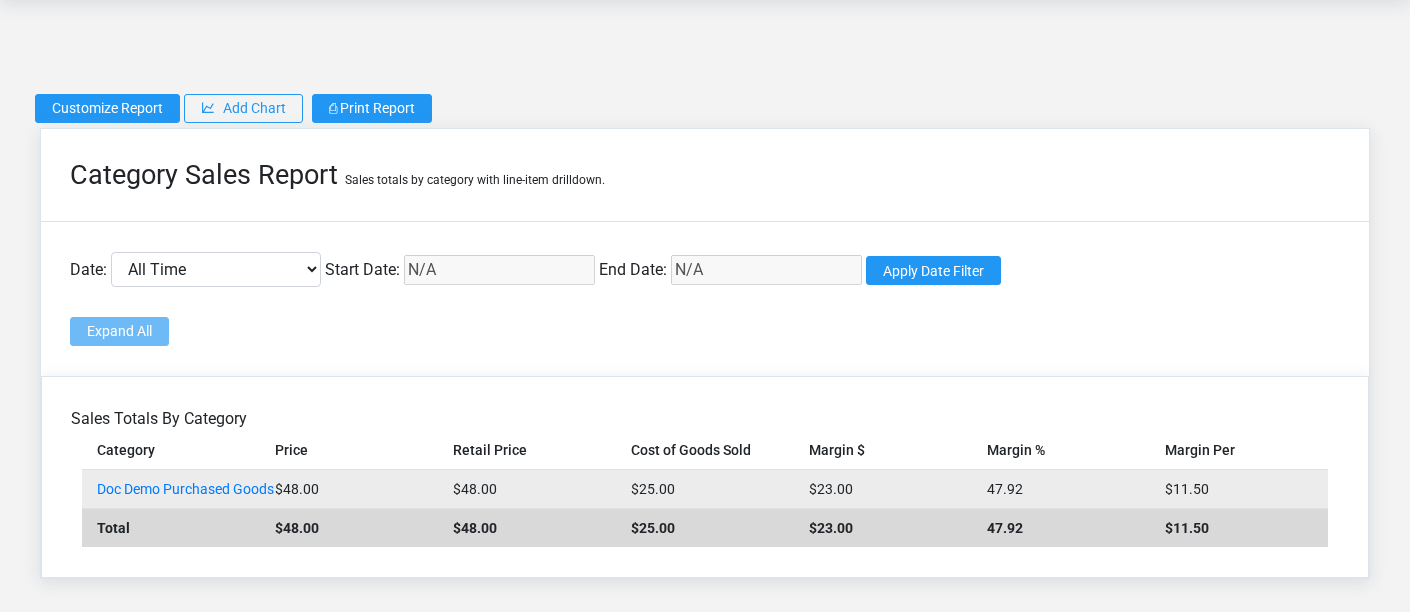
The evidence packet identifiesUse the viewdetail page as the shared record of what this Advanced Report currently means. Verify Category, Allow Date Filters, Date Field, Date Behavior, Beginning Date, and sourceClosing locationDate, plus the remaining screen fields before relying on it for thisa action.decision.
Compare user-facingthe stepsAdvanced Report with its source document or approved setup request before approvingdeciding that it needs correction.
Next check: Verify this Advanced Report in Advanced Report Rows, and Report Charts before staff build new activity on it; correct ownership, classification, and active state now rather than after transactions accumulate.
Edit an existing Advanced Report
Edit this Advanced Report to keep the same real-world party, item, location, or resource accurate. Do not repurpose it for a different entity after activity is attached.
-
Open the detail page. Compare Report Title, Allow Date Filters, Date Field, Date Behavior, and Beginning Date with the supporting document or approved request.
-
Recheck Category, Allow Date Filters, Date Field, Date Behavior, Beginning Date, and Closing Date, plus the remaining screen fields. These values are most likely to change the population, date range, grouping, and totals users see.
-
Save the change, return to the list, and confirm that the Advanced Report now appears under the expected Category, Date Behavior, and Print Layout.
After the change: Verify this Advanced Report in Advanced Report Rows, and Report Charts before staff build new activity on it; correct ownership, classification, and active state now rather than after transactions accumulate.
Find and review recordsadvanced reports
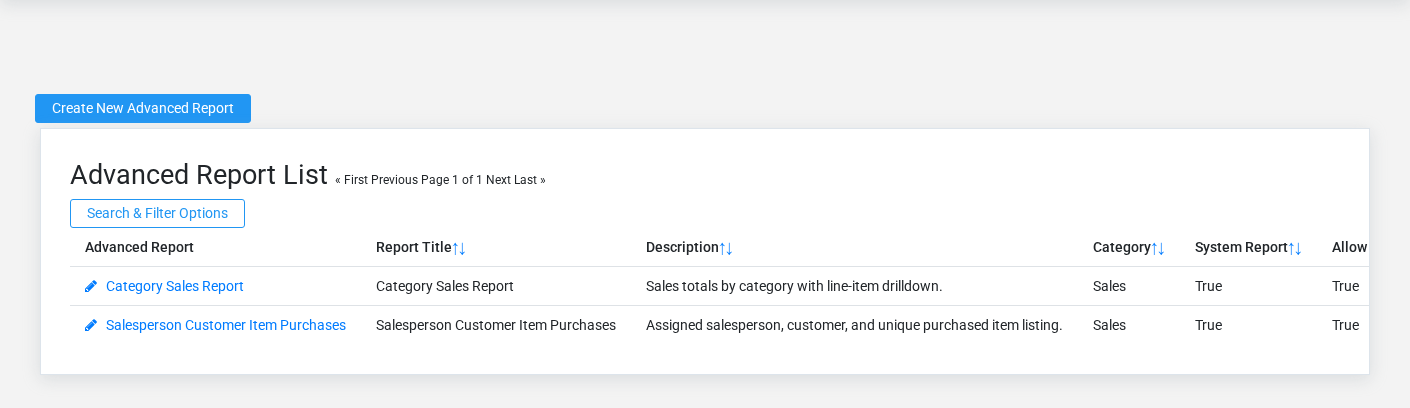
The evidence packet identifiesUse the viewAdvanced Reports list to find the correct record before opening or changing it. Compare Report Title, Allow Date Filters, Date Field, Date Behavior, Beginning Date, and sourceClosing locationDate. Compare the full identifier rather than relying on a similar name.
- The initial order emphasizes Report Title. Select a column heading when you need a different comparison.
Open the Advanced Report whose Report Title, Allow Date Filters, Date Field, Date Behavior, Beginning Date, and Closing Date match the task. If it is missing, clear the list filters and recheck Category, Date Behavior, and Print Layout rather than creating a replacement immediately.
Fields and business rules
Brisk stores 15 user-relevant fields for this action.Advanced ConfirmReport, user-facingincluding steps0 beforelinked-record approvingselections and 3 controlled-choice fields. Create and edit screens may hide calculated or workflow-managed values from this page.full reference.
Edit
| Field | Required | What it controls |
|---|---|---|
| Report Title | Yes | The |
| Description | No | Description of this advanced report. |
| Category | No | The category recorded for this |
| System Report | No | Reports provided by Brisk are considered system reports; they can be copied but not deleted or modified. |
| Allow Date Filters | No | If this
live |
| Date Field | No | By default, the system will attempt to filter by date using the created_at field. If this field is populated, the system will attempt to filter by the provided field instead. This field is ignored if Allow Date Filters is not enabled. |
| Date Behavior | No | Select the initial state of the date filters on this report. Available values: All Time, Today, Yesterday, Last 7 Days, Week-to-date, Last 30 Days, Month-to-date, Last 365 Days, Year-to-date, Previous Week, Previous Week-to-day, Previous Month, Previous Month-to-date, Previous Year, Previous Year-to-date, Custom Date Range. |
| Beginning Date | No | Sets the start date for this report if using a custom date range. |
| Closing Date | No | Sets the end date for this report if using a custom date range. |
| Report Depth | No | This field is used to control nested report groups. Valid values are 2, 3, and 4. If a non-nested report is needed, it will need to be created separately. This value should be equal to the highest child report +1. |
| Display On Work Periods | No | Enable this setting to run this report directly from closed work periods. |
| Display On Months | No | Enable this setting to run this report directly from closed months. |
| Display On Years | No | Enable this setting to run this report directly from closed years. |
| Filter Beginning | No | If set to false, when filtering this report by date, it will only filter by the ending date, not the beginning date. |
| Print Layout | No | Controls optional print formatting for advanced reports. Available values: Standard, Wide Detail Table. |
What happens next
Verify this Advanced Report in Advanced Report Rows, and Report Charts before approvingstaff build new activity on it; correct ownership, classification, and active state now rather than after transactions accumulate.
Common mistakes and troubleshooting
-
The record will not save: Recheck Report Title and any message beside the field. A required related record may also be inactive or unavailable to your role.
-
The values look right but the result is wrong: Compare this
page.Advanced Report with the source document or approved setup decision, then check the downstream screen where it is used.