
Reports
Reports
Purpose and when to use this record
Define a reusable business report, its data source, date behavior, category, filters, and system/custom status.
At a glance
-
Identify it by: Report Title, Allow Date Filters, Date Field, Date Behavior, and Beginning Date.
-
Check its business context: Content Type.
-
Why care: A report is only trustworthy when its data source, date field, filters, grouping, and totals answer the intended business question.
Before you begin
You need the Brisk permission for the action you are taking on reports. If a Create, Edit, or Delete control is absent, do not work around it with another user’s account; ask an administrator to review your role.
Have valid Content Type records ready first. Those selections determine where this Report belongs and which later screens can find it.
Create a Report
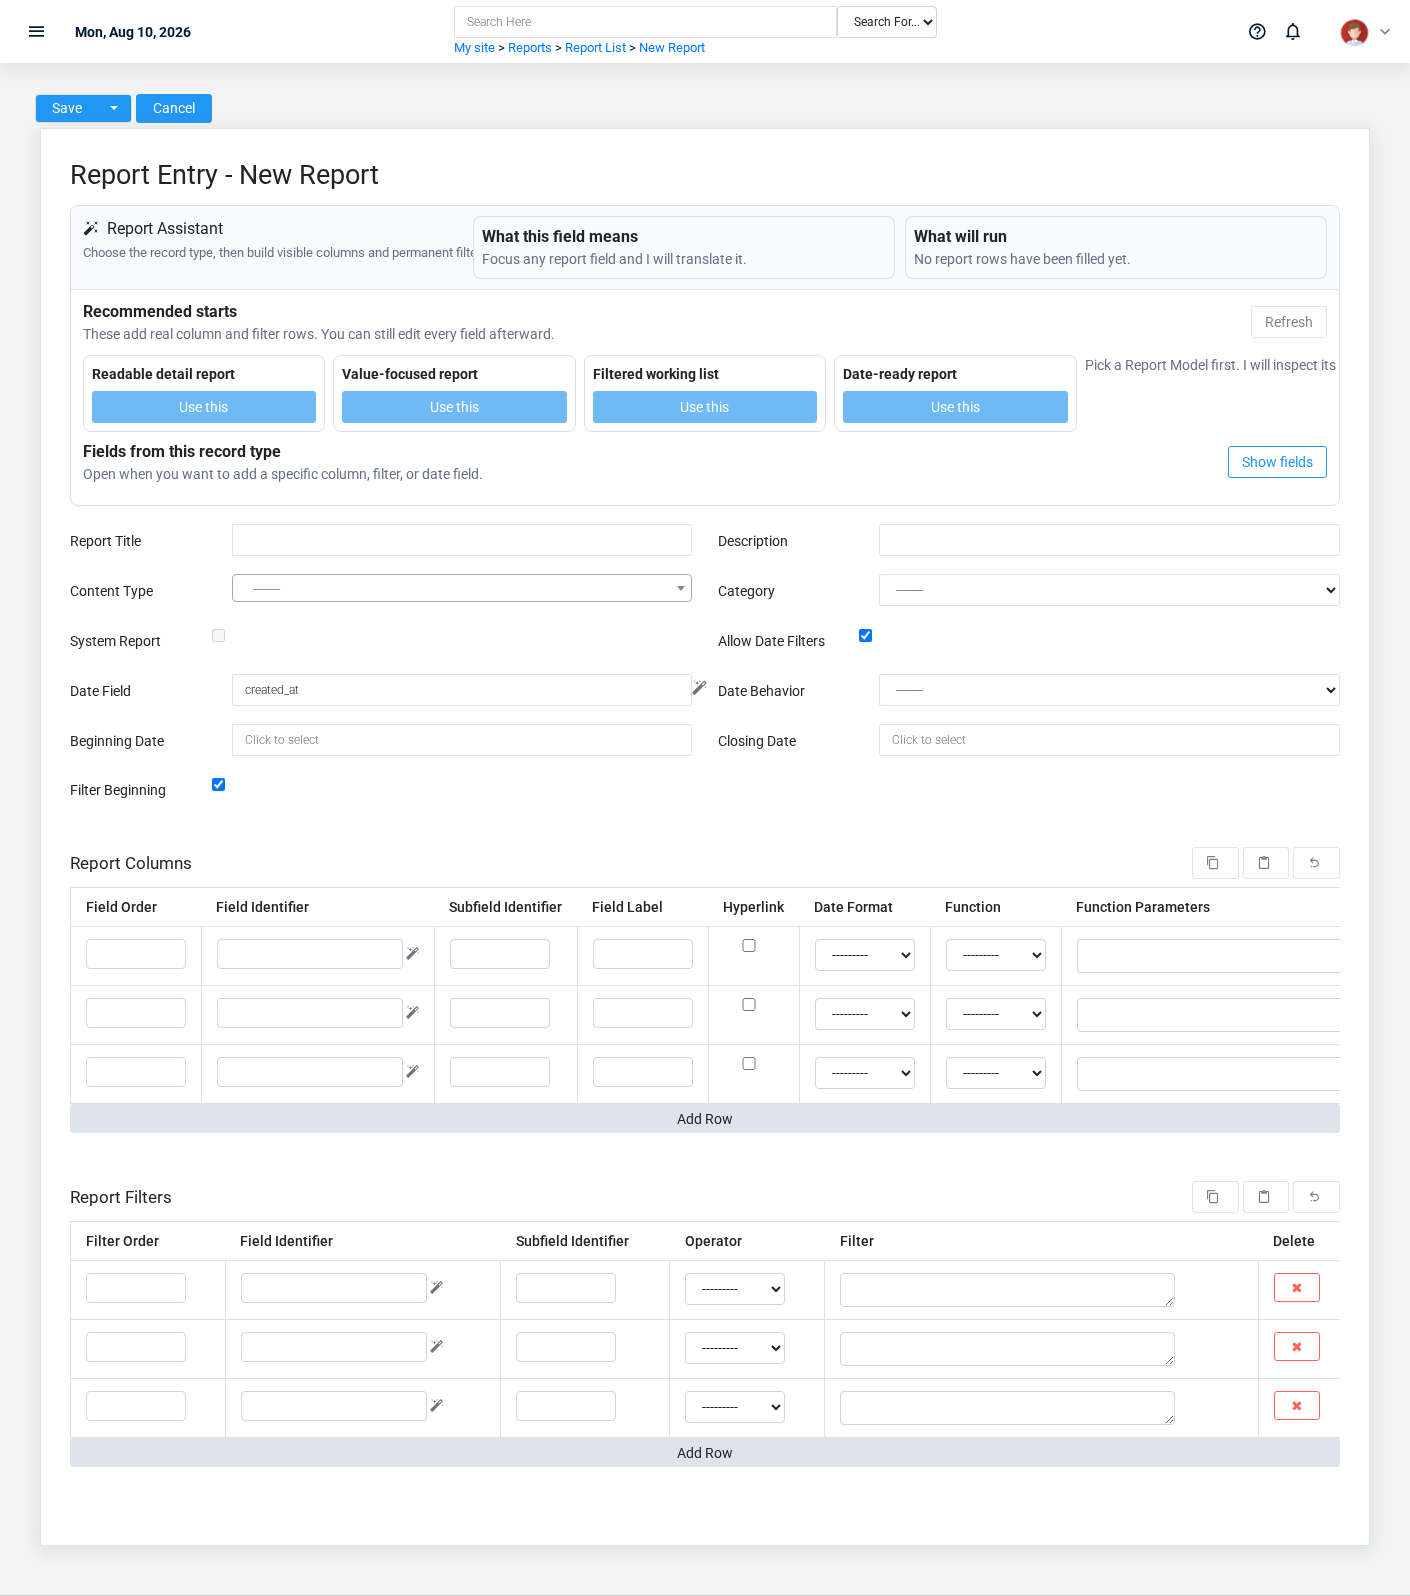
Create a Report only when the existing choices do not represent the policy or classification you need. Near-duplicate setup values split reporting and make later selection harder.
-
Select the business context first: Content Type.
-
Enter the required identifying and operational values: Report Title, and Content Type.
-
Review Category, System Report, Allow Date Filters, Date Behavior, and Filter Beginning deliberately; these choices control availability or workflow rather than merely describing the record.
-
Save the Report, then confirm Report Title, Allow Date Filters, Date Field, Date Behavior, and Beginning Date on its detail page before continuing.
After saving: Open Advanced Report Rows, Report Charts, Report Columns, and Report Filters and confirm the Report appears with the intended label and availability. Keep the old value for historical records when changing it would split or relabel prior reporting.
Delete a Report
Delete this Report only if it is an unused duplicate or setup mistake. Once other records refer to it, preserve that history and make the value inactive when the screen provides that option.
Before confirming, check for related Report Charts, Report Columns, Report Filters, and Advanced Report Rows. Brisk may refuse deletion when another record depends on this one; resolve the duplicate or use the supported correction workflow instead of breaking the trail.
On the confirmation page, verify Report Title, Allow Date Filters, Date Field, Date Behavior, and Beginning Date. After confirmation, return to the Reports list and make sure only the intended Report was removed.
Review Report details
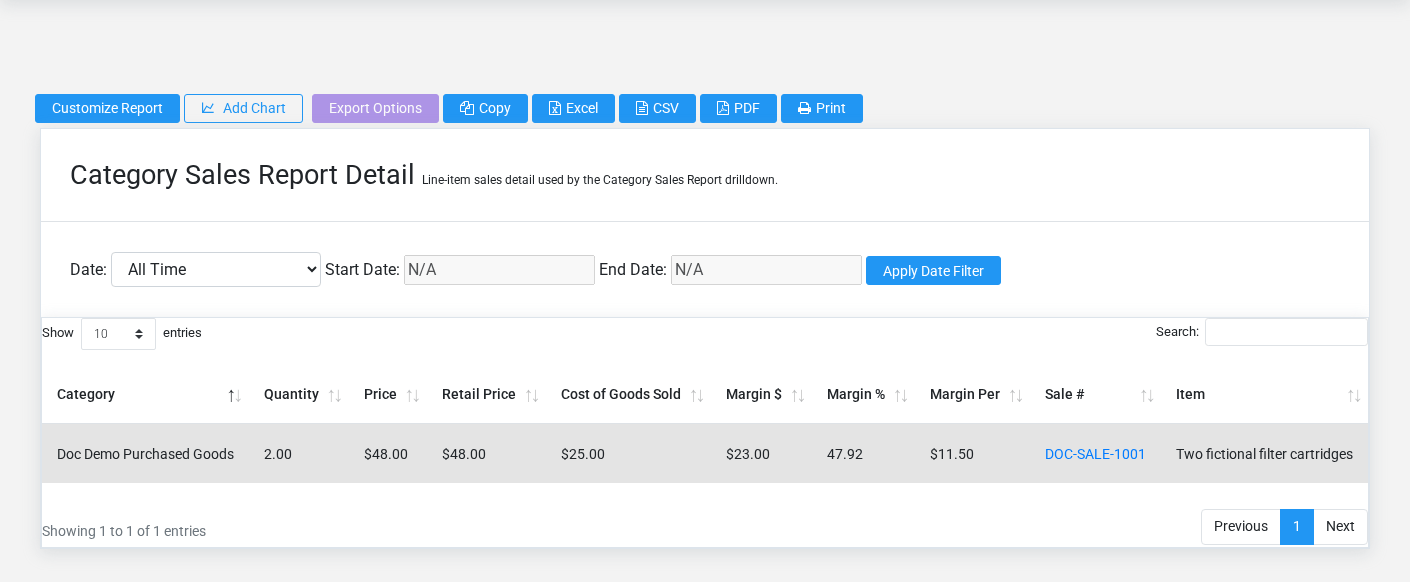
Use the detail page as the shared record of what this Report currently means. Verify Category, Allow Date Filters, Date Field, Date Behavior, Beginning Date, and Closing Date before relying on it for a decision.
Follow Content Type to determine whether the issue is on this Report or on one of those linked records.
Next check: Open Advanced Report Rows, Report Charts, Report Columns, and Report Filters and confirm the Report appears with the intended label and availability. Keep the old value for historical records when changing it would split or relabel prior reporting.
Edit an existing Report
Edit this Report when the underlying policy or classification changed. First determine whether historical transactions should retain the old value; if so, deactivate the old choice and create a new one.
-
Open the detail page. Compare Content Type with the supporting document or approved request.
-
Recheck Category, Allow Date Filters, Date Field, Date Behavior, Beginning Date, and Closing Date. These values are most likely to change the population, date range, grouping, and totals users see.
-
Save the change, return to the list, and confirm that the Report now appears under the expected Category, and Date Behavior.
After the change: Open Advanced Report Rows, Report Charts, Report Columns, and Report Filters and confirm the Report appears with the intended label and availability. Keep the old value for historical records when changing it would split or relabel prior reporting.
Find and review reports
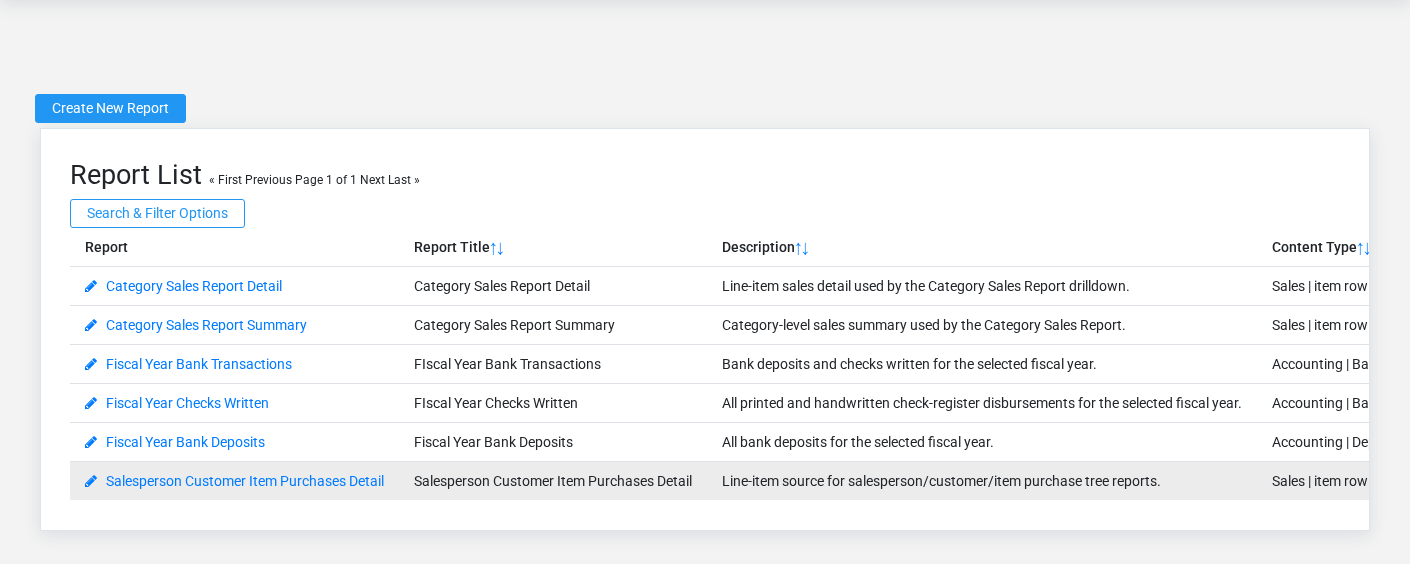
Use the Reports list to find the correct record before opening or changing it. Compare Report Title, Allow Date Filters, Date Field, Date Behavior, Beginning Date, and Closing Date. Records with similar names or numbers can still belong to different Content Type.
- The initial order emphasizes Report Title. Select a column heading when you need a different comparison.
Open the Report whose Report Title, Allow Date Filters, Date Field, Date Behavior, Beginning Date, and Closing Date match the task. If it is missing, clear the list filters and recheck Category, and Date Behavior rather than creating a replacement immediately.
Fields and business rules
Brisk stores 11 user-relevant fields for this Report, including 1 linked-record selection and 2 controlled-choice fields. Create and edit screens may hide calculated or workflow-managed values from this full reference.
| Field | Required | What it controls |
|---|---|---|
| Report Title | Yes | The name or title of this report. |
| Description | No | Description of this report definition. |
| Content Type | Yes | The content type associated with this report definition. |
| Category | No | The category recorded for this report definition. Available values: Accounting, Inventory, Management, Manufacturing, Sales, Financial, Favorites. |
| System Report | No | Reports provided by Brisk are considered system reports; they can be copied but not deleted or modified. |
| Allow Date Filters | No | If this field is disabled, live date filters will not be available for this report. |
| Date Field | No | By default, the system will attempt to filter by date using the created_at field. If this field is populated, the system will attempt to filter by the provided field instead. This field is ignored if Allow Date Filters is not enabled. |
| Date Behavior | No | Select the initial state of the date filters on this report. Available values: All Time, Today, Yesterday, Last 7 Days, Week-to-date, Last 30 Days, Month-to-date, Last 365 Days, Year-to-date, Previous Week, Previous Week-to-day, Previous Month, Previous Month-to-date, Previous Year, Previous Year-to-date, Custom Date Range. |
| Beginning Date | No | Sets the start date for this report if using a custom date range. |
| Closing Date | No | Sets the end date for this report if using a custom date range. |
| Filter Beginning | No | If set to false, when filtering this report by date, it will only filter by the ending date, not the beginning date. |
What happens next
Open Advanced Report Rows, Report Charts, Report Columns, and Report Filters and confirm the Report appears with the intended label and availability. Keep the old value for historical records when changing it would split or relabel prior reporting.
Common mistakes and troubleshooting
-
The record will not save: Recheck Report Title, and Content Type and any message beside the field. A required related record may also be inactive or unavailable to your role.
-
The values look right but the result is wrong: Open Content Type from the detail page. Correct the specific relationship that is wrong instead of forcing a total or status to compensate for it.